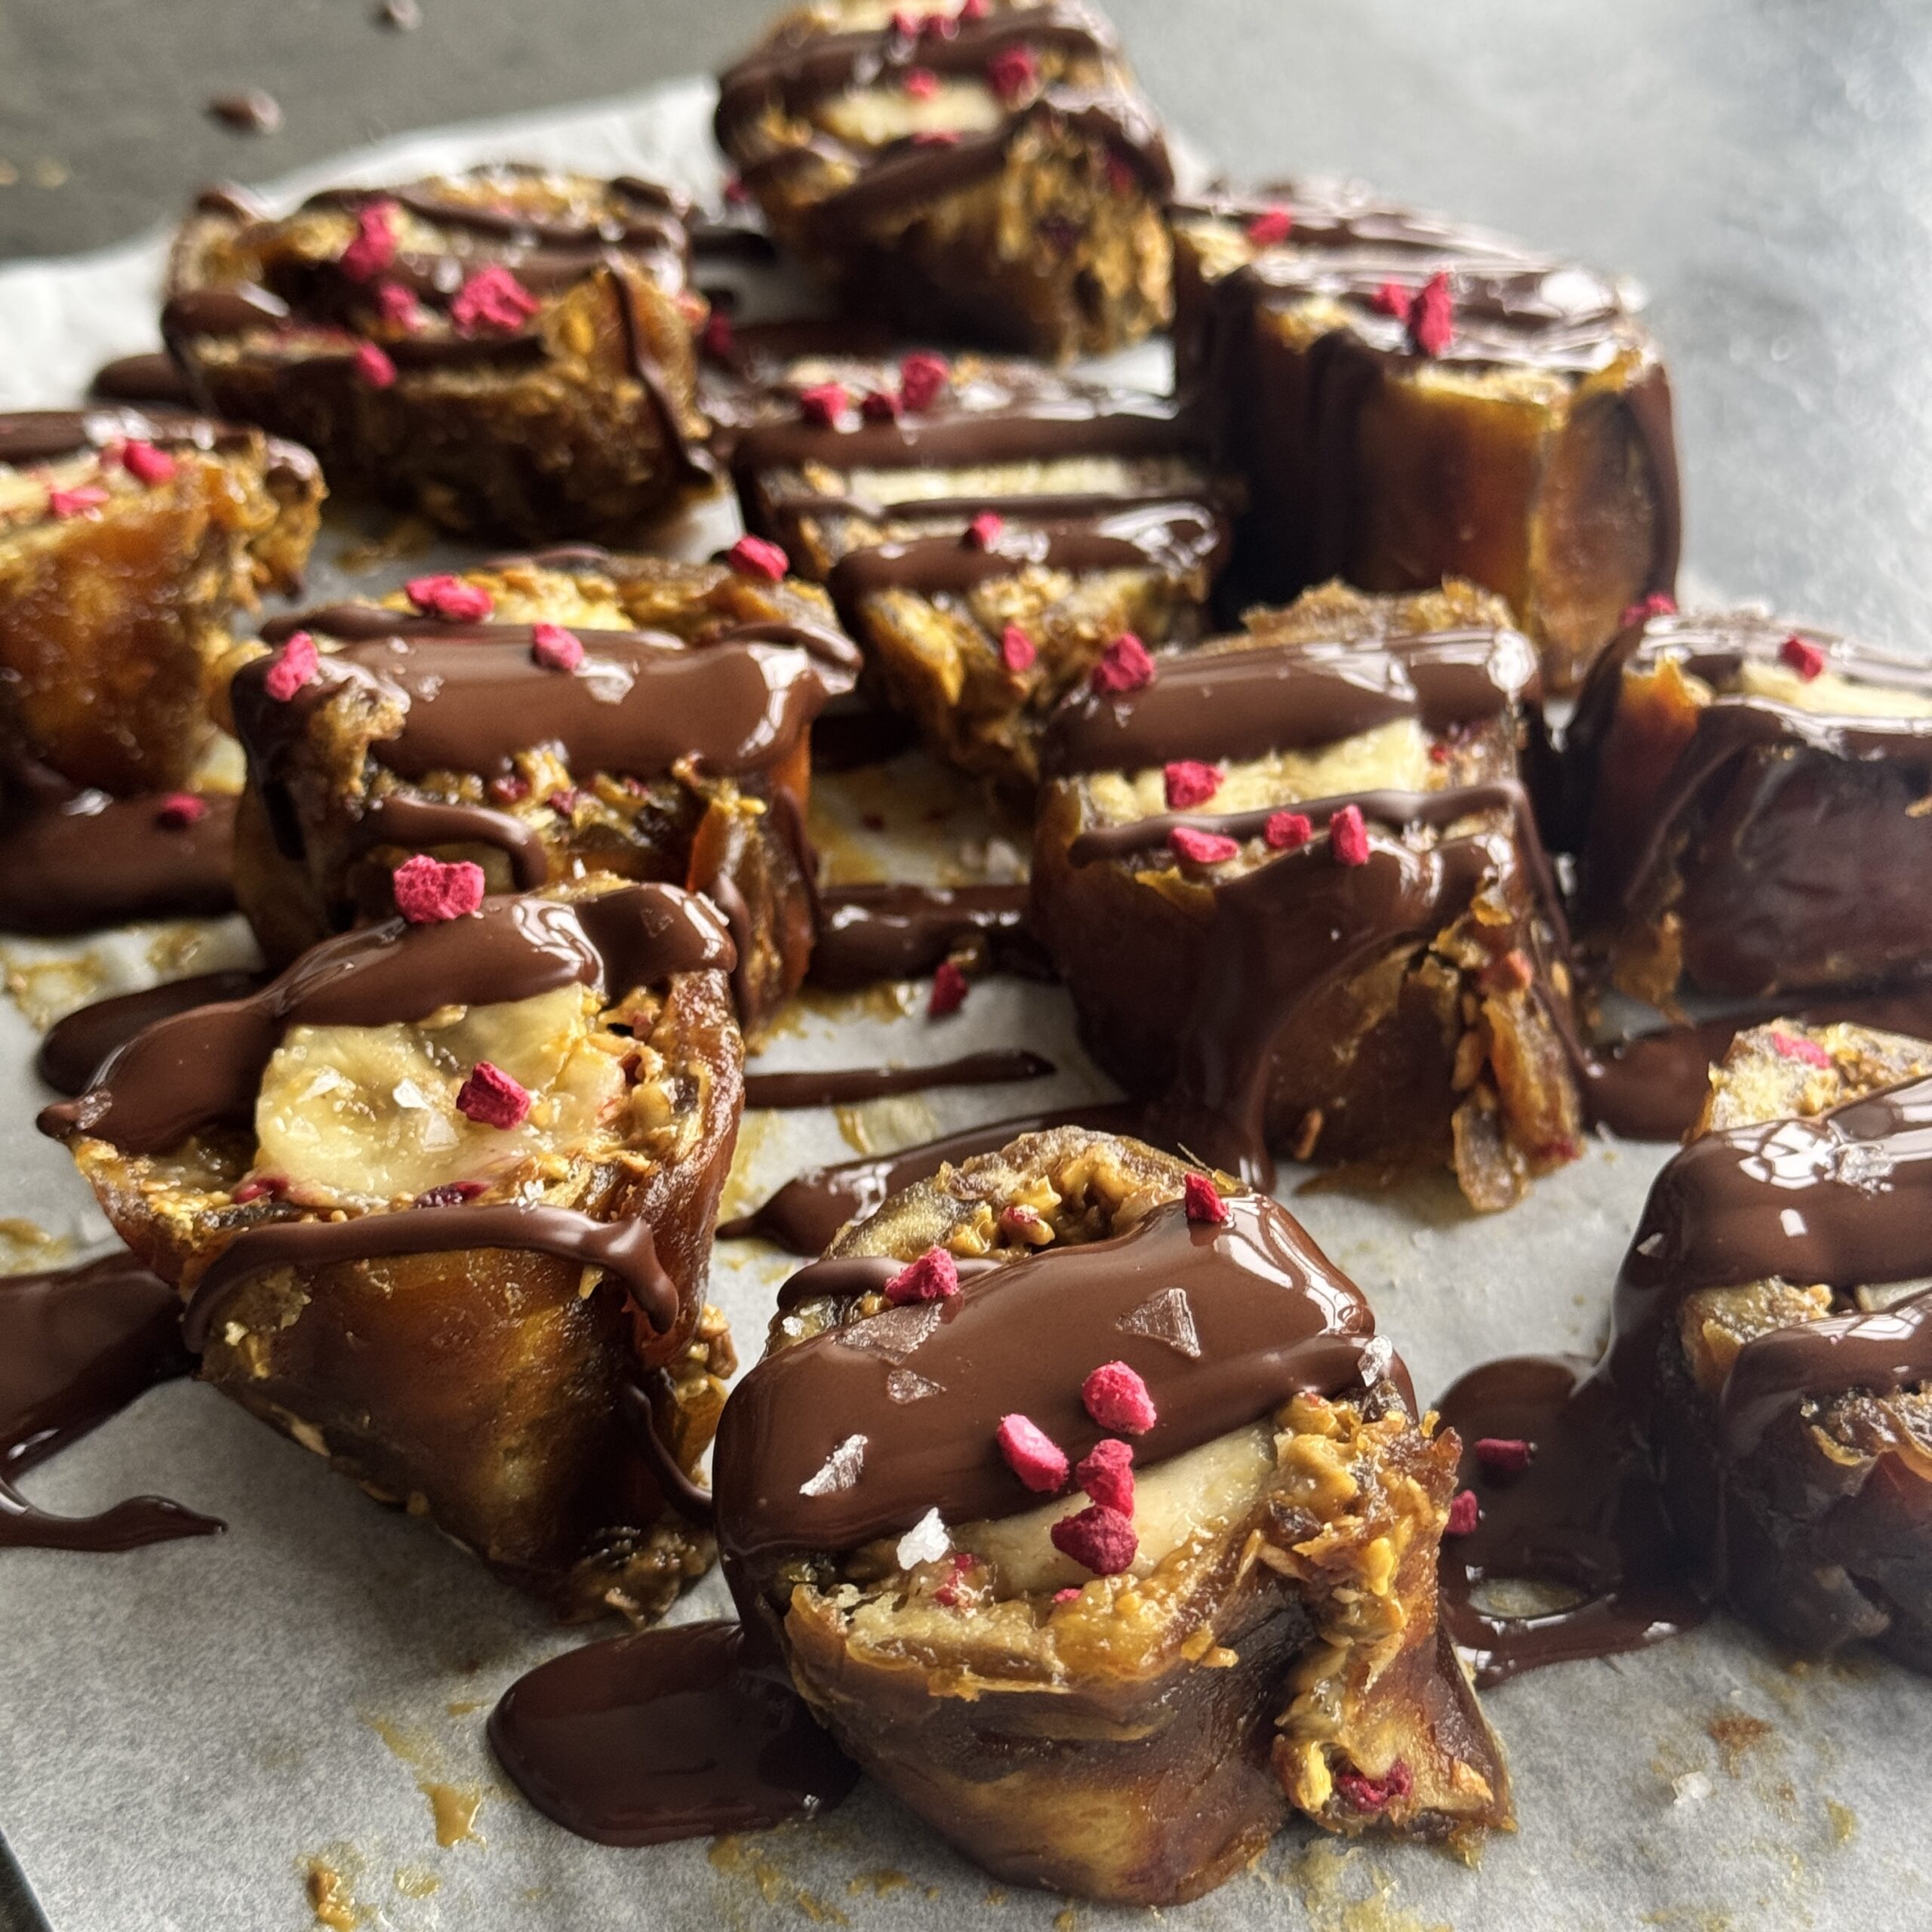
Banana Date Sushi
A creative, nutrient-dense snack that looks as good as it tastes! As we’re using fresh bananas, these are best kept in the freezer to keep the fruit firm and prevent browning.
Takes 10 minutes
Serves 12
Ingredients
- 200 g Medjool dates
- 100 g peanut butter or pistachio butter approx. ⅓ cup
- 2 bananas
- 50 g desiccated coconut approx. ½ cup
- 5 g freeze-dried raspberries approx. ¼ cup, lightly crushed
- 100 g dark chocolate approx. ⅔ cup chopped or chips
Instructions
Toast the coconut
- Add the desiccated coconut to a dry frying pan over a medium heat. Toast for 5–6 minutes, stirring regularly, until it turns a beautiful golden brown. Remove immediately from the heat to prevent burning and set aside.
Create the date “nori” sheet
- Remove the stones from the dates. Flatten and arrange them on a sheet of baking parchment in a rectangular shape, slightly overlapping so there are no gaps.
- Place a second sheet of parchment on top and use a rolling pin (or a clean glass bottle) to roll the dates into one thin, even sheet.
Layer the flavours
- Peel away the top layer of parchment.
- Spread an even layer of nut butter over the date sheet, leaving a small 1cm gap at the top edge.
- Sprinkle over the toasted coconut and crushed freeze-dried raspberries.
The “sushi” roll
- Peel the bananas. If they’re very curved, gently straighten them or cut into shorter, straighter halves.
- Place the bananas along the bottom edge of the date sheet.
- Using the parchment to help you, roll the date sheet up tightly over the bananas, like a sushi roll. Press firmly so it holds together.
Chill and slice
- Place the rolls in the freezer for 10–15 minutes. This helps firm everything up and makes slicing much easier.
- Once chilled, use a sharp knife to cut into 2cm thick “sushi” rounds.
The chocolate finish
- Melt the dark chocolate using a bain-marie or in the microwave in 30-second bursts.
- Drizzle over the rounds or dip one half of each piece into the chocolate for a more striking finish.
- Allow to set on parchment in the fridge or freezer.
Storage tip
- Store in an airtight container in the freezer. They taste like a gourmet frozen chocolate bar and can be enjoyed straight from frozen!