
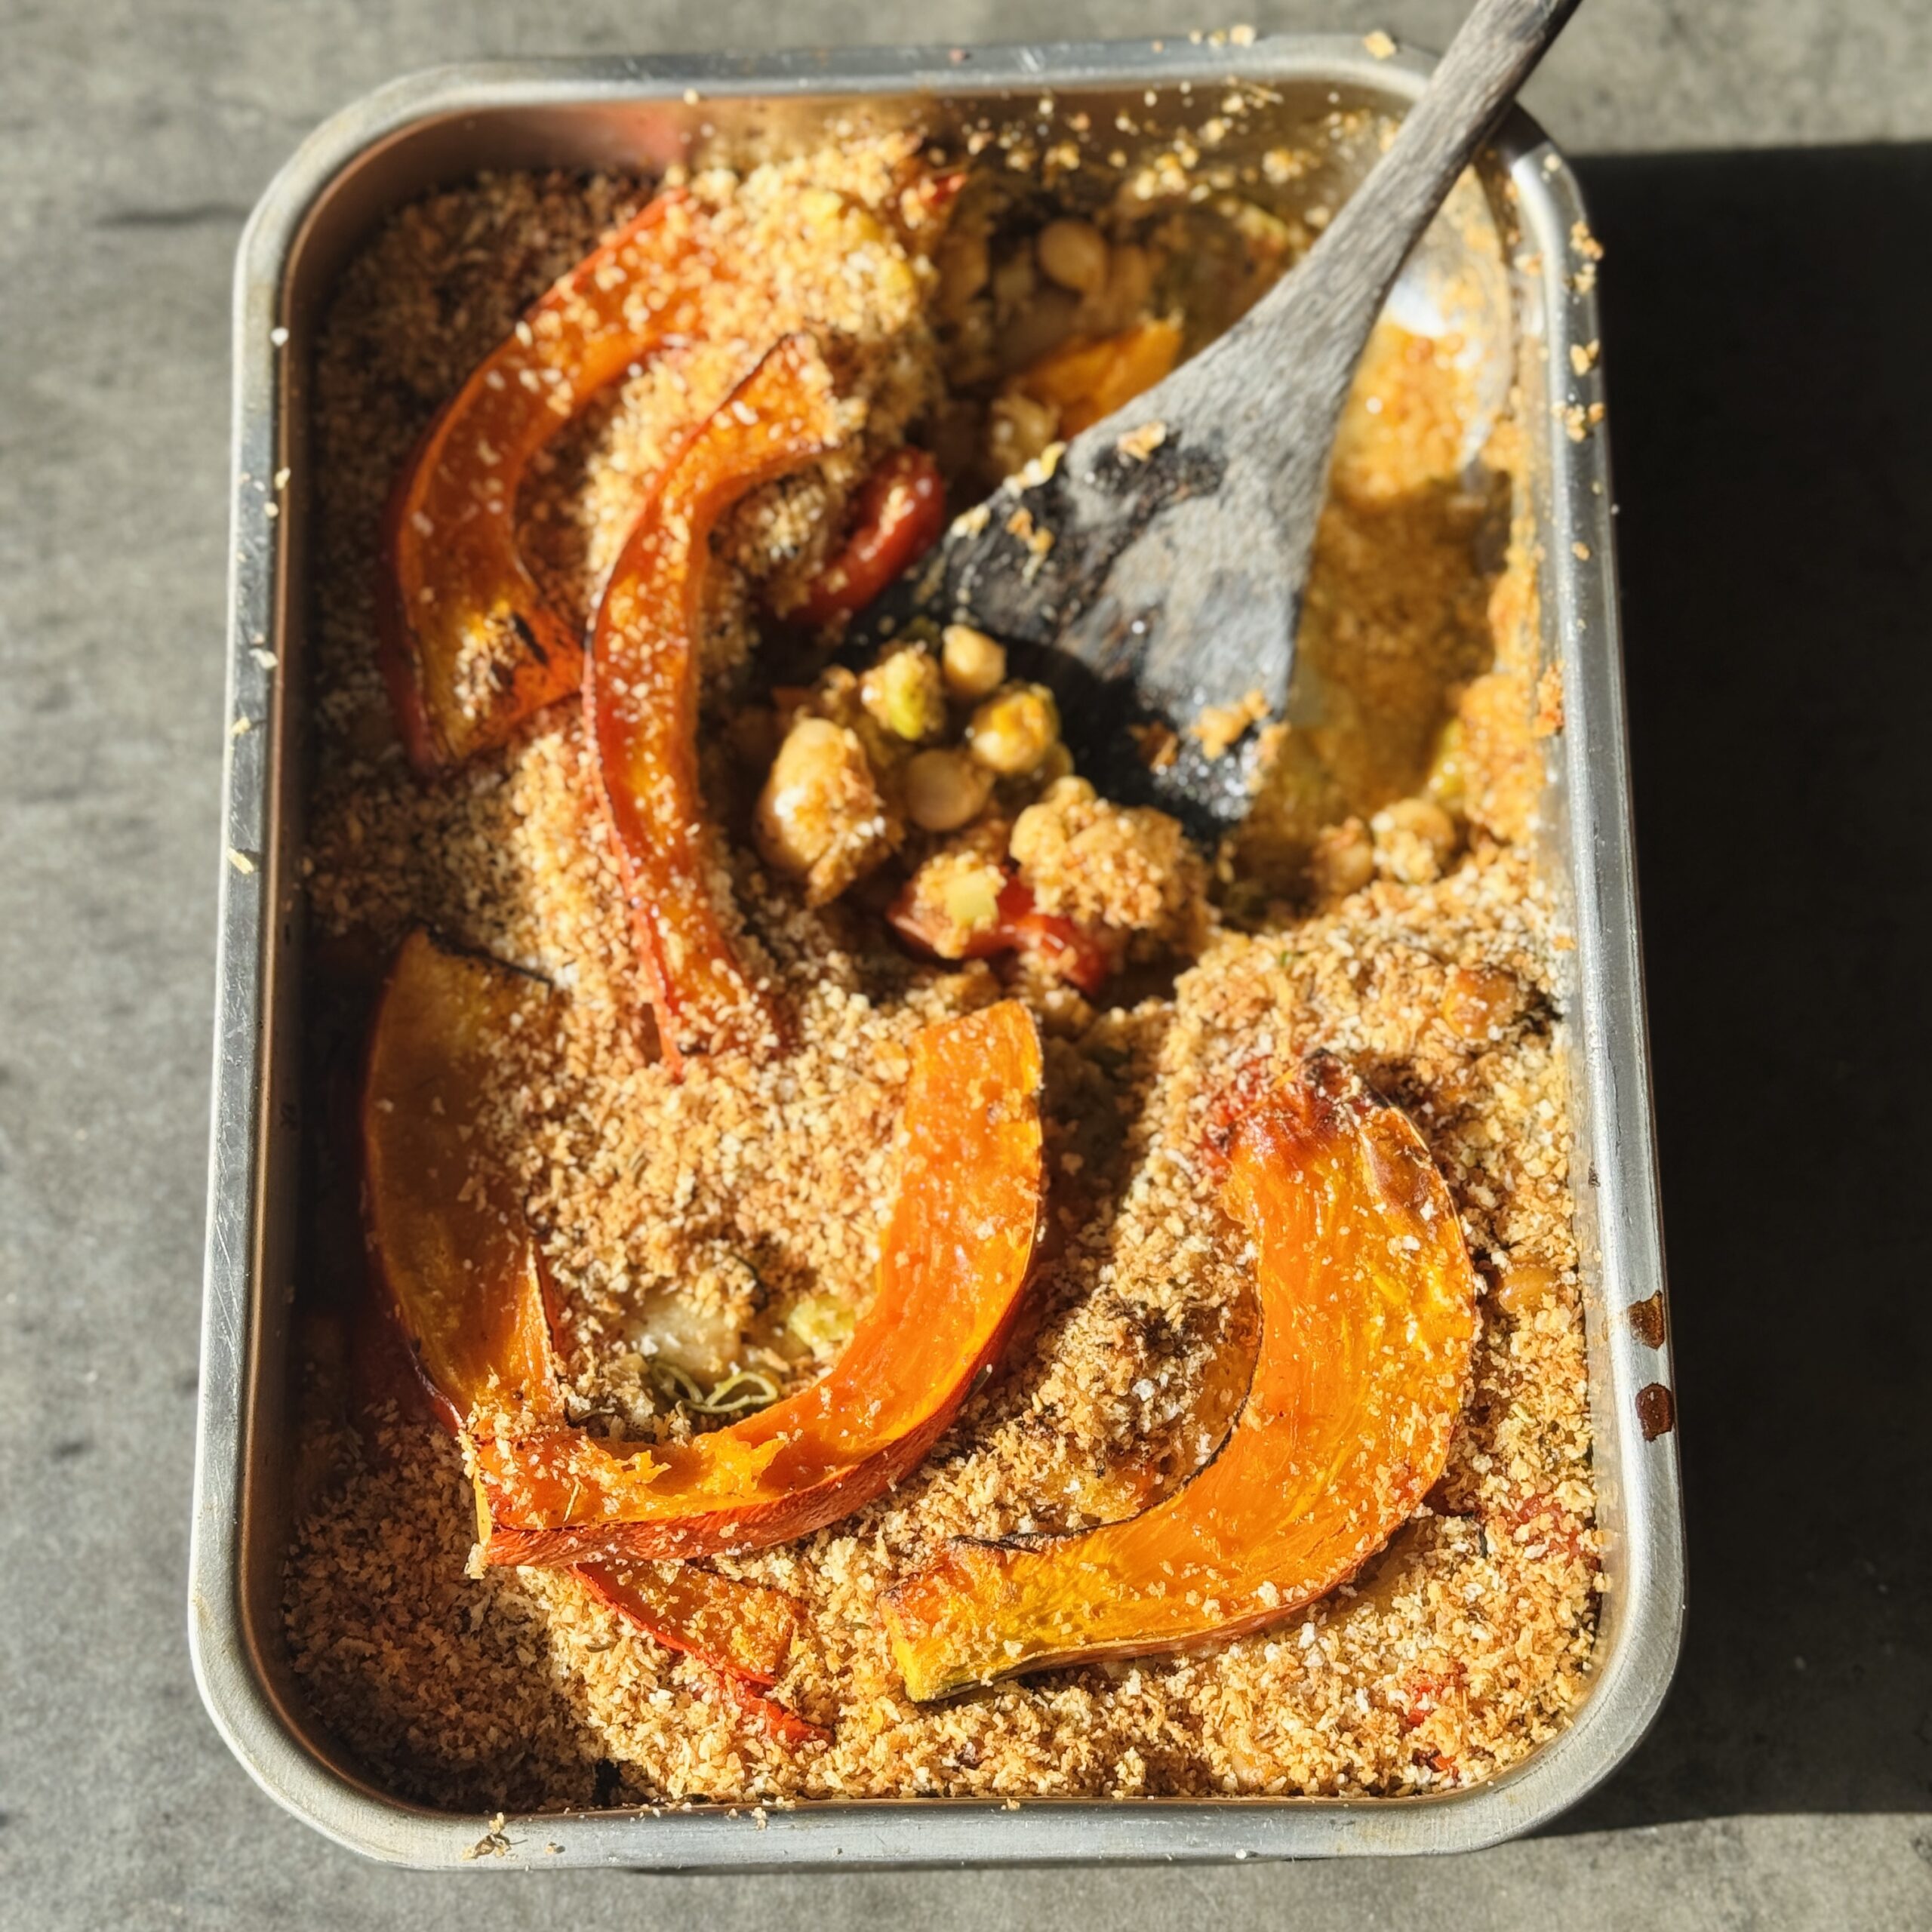
Easy Pumpkin & Butter Bean Casserole with Sundried Tomato Pesto
Takes 30 minutes
Serves 2
Ingredients
- 1 x 400g tin butter beans about 2 ½ cups cooked
- 1 x 400g tin cannellini beans or chickpeas about 2 ½ cups cooked
- 400 g pumpkin about 1 ½ cups
- 200 g cherry tomatoes about 1 ¼ cups
- 1 bunch scallions/green onions 6–8, ~1 cup chopped
- 135 g The Happy Pear Sundried Tomato Pesto about ½ cup
- 200 ml oat milk or similar about ¾ cup + 1 tbsp
- 5 tbsp breadcrumbs about 30 g / ¼ cup
- ½ tsp mixed herbs
- Drizzle olive oil ~1 tbsp / 15 ml
- ½ tsp salt
Instructions
- Preheat the oven to 200°C.
- Drain and rinse the beans.
- Carefully chop ½ the pumpkin into thin wedges that are approx ½ cm thick and the other half slice into small 1cm cubes.
- Quarter the cherry tomatoes and finely slice the scallions.
- In a casserole dish, combine the beans, pumpkin, tomatoes, scallions, sundried tomato pesto, and oat milk along with a generous pinch of salt. Mix until creamy and well combined. Taste and season.
- Top with breadcrumbs ,mixed herbs, the slices pumpkin wedges, a pinch of salt, and a drizzle of olive oil.
- Bake for 25 minutes until golden on top and the pumpkin is cooked all the way through.
- Remove from the oven and enjoy warm, straight from the dish!
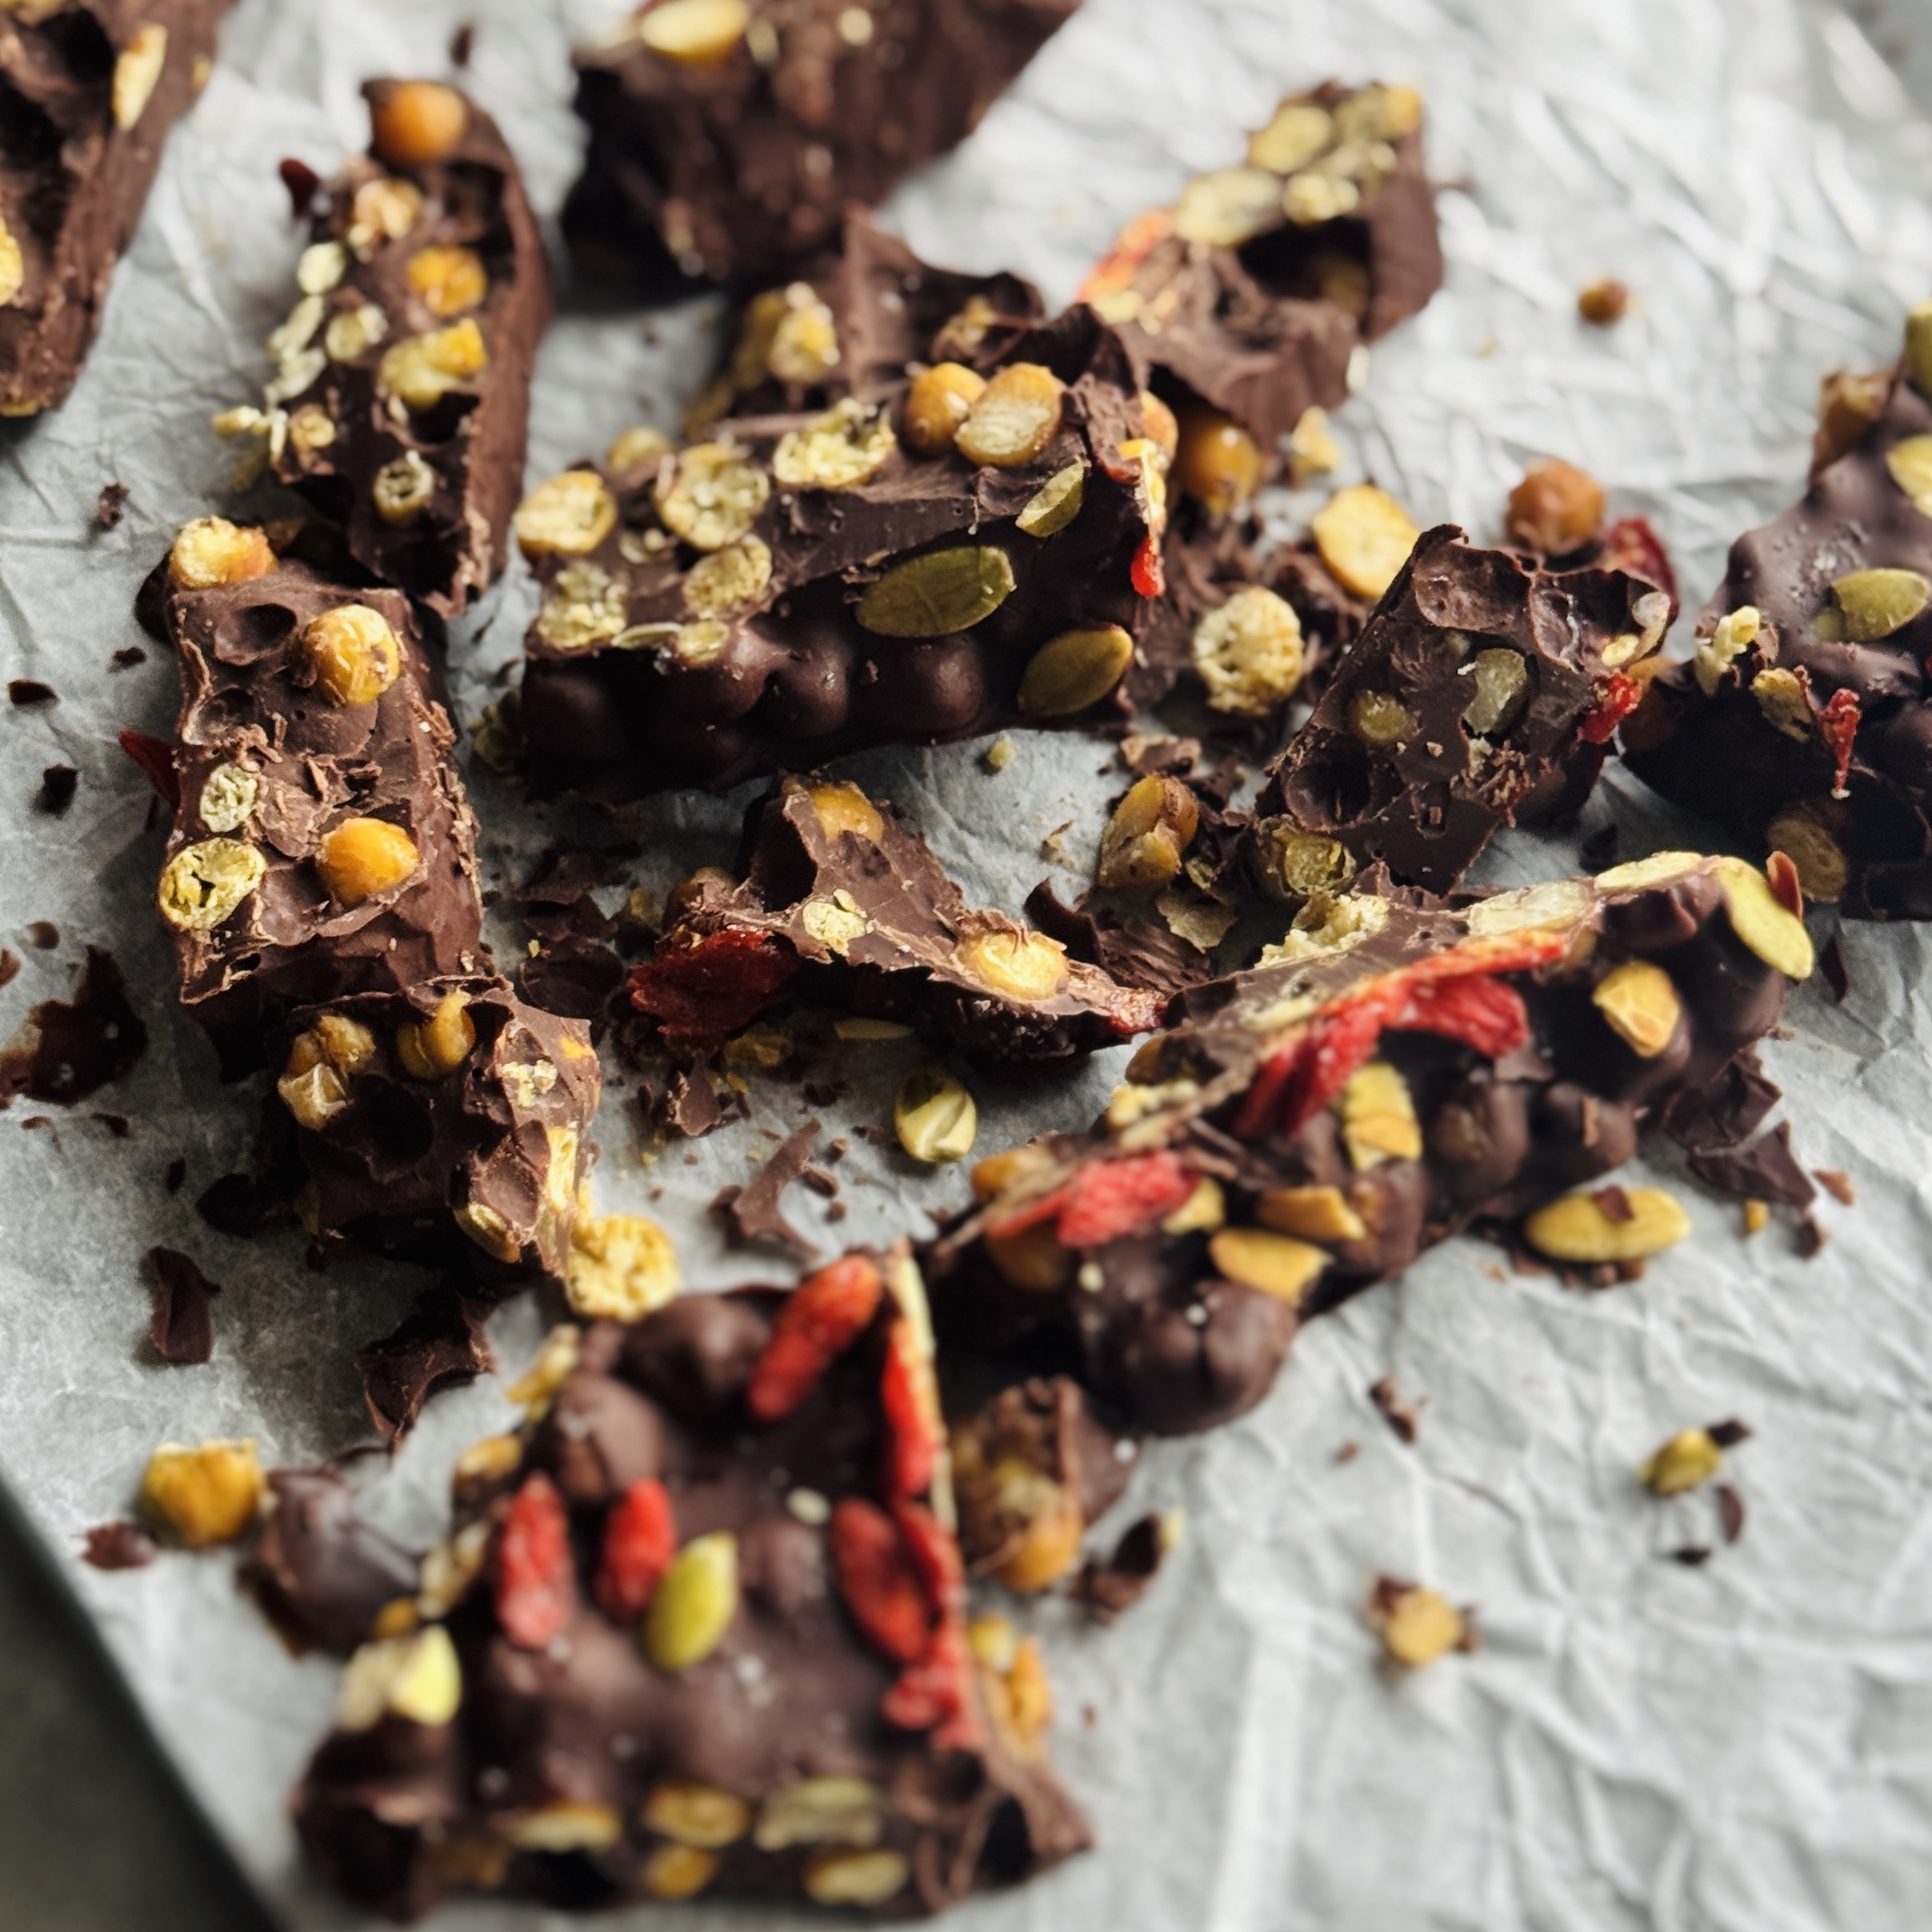
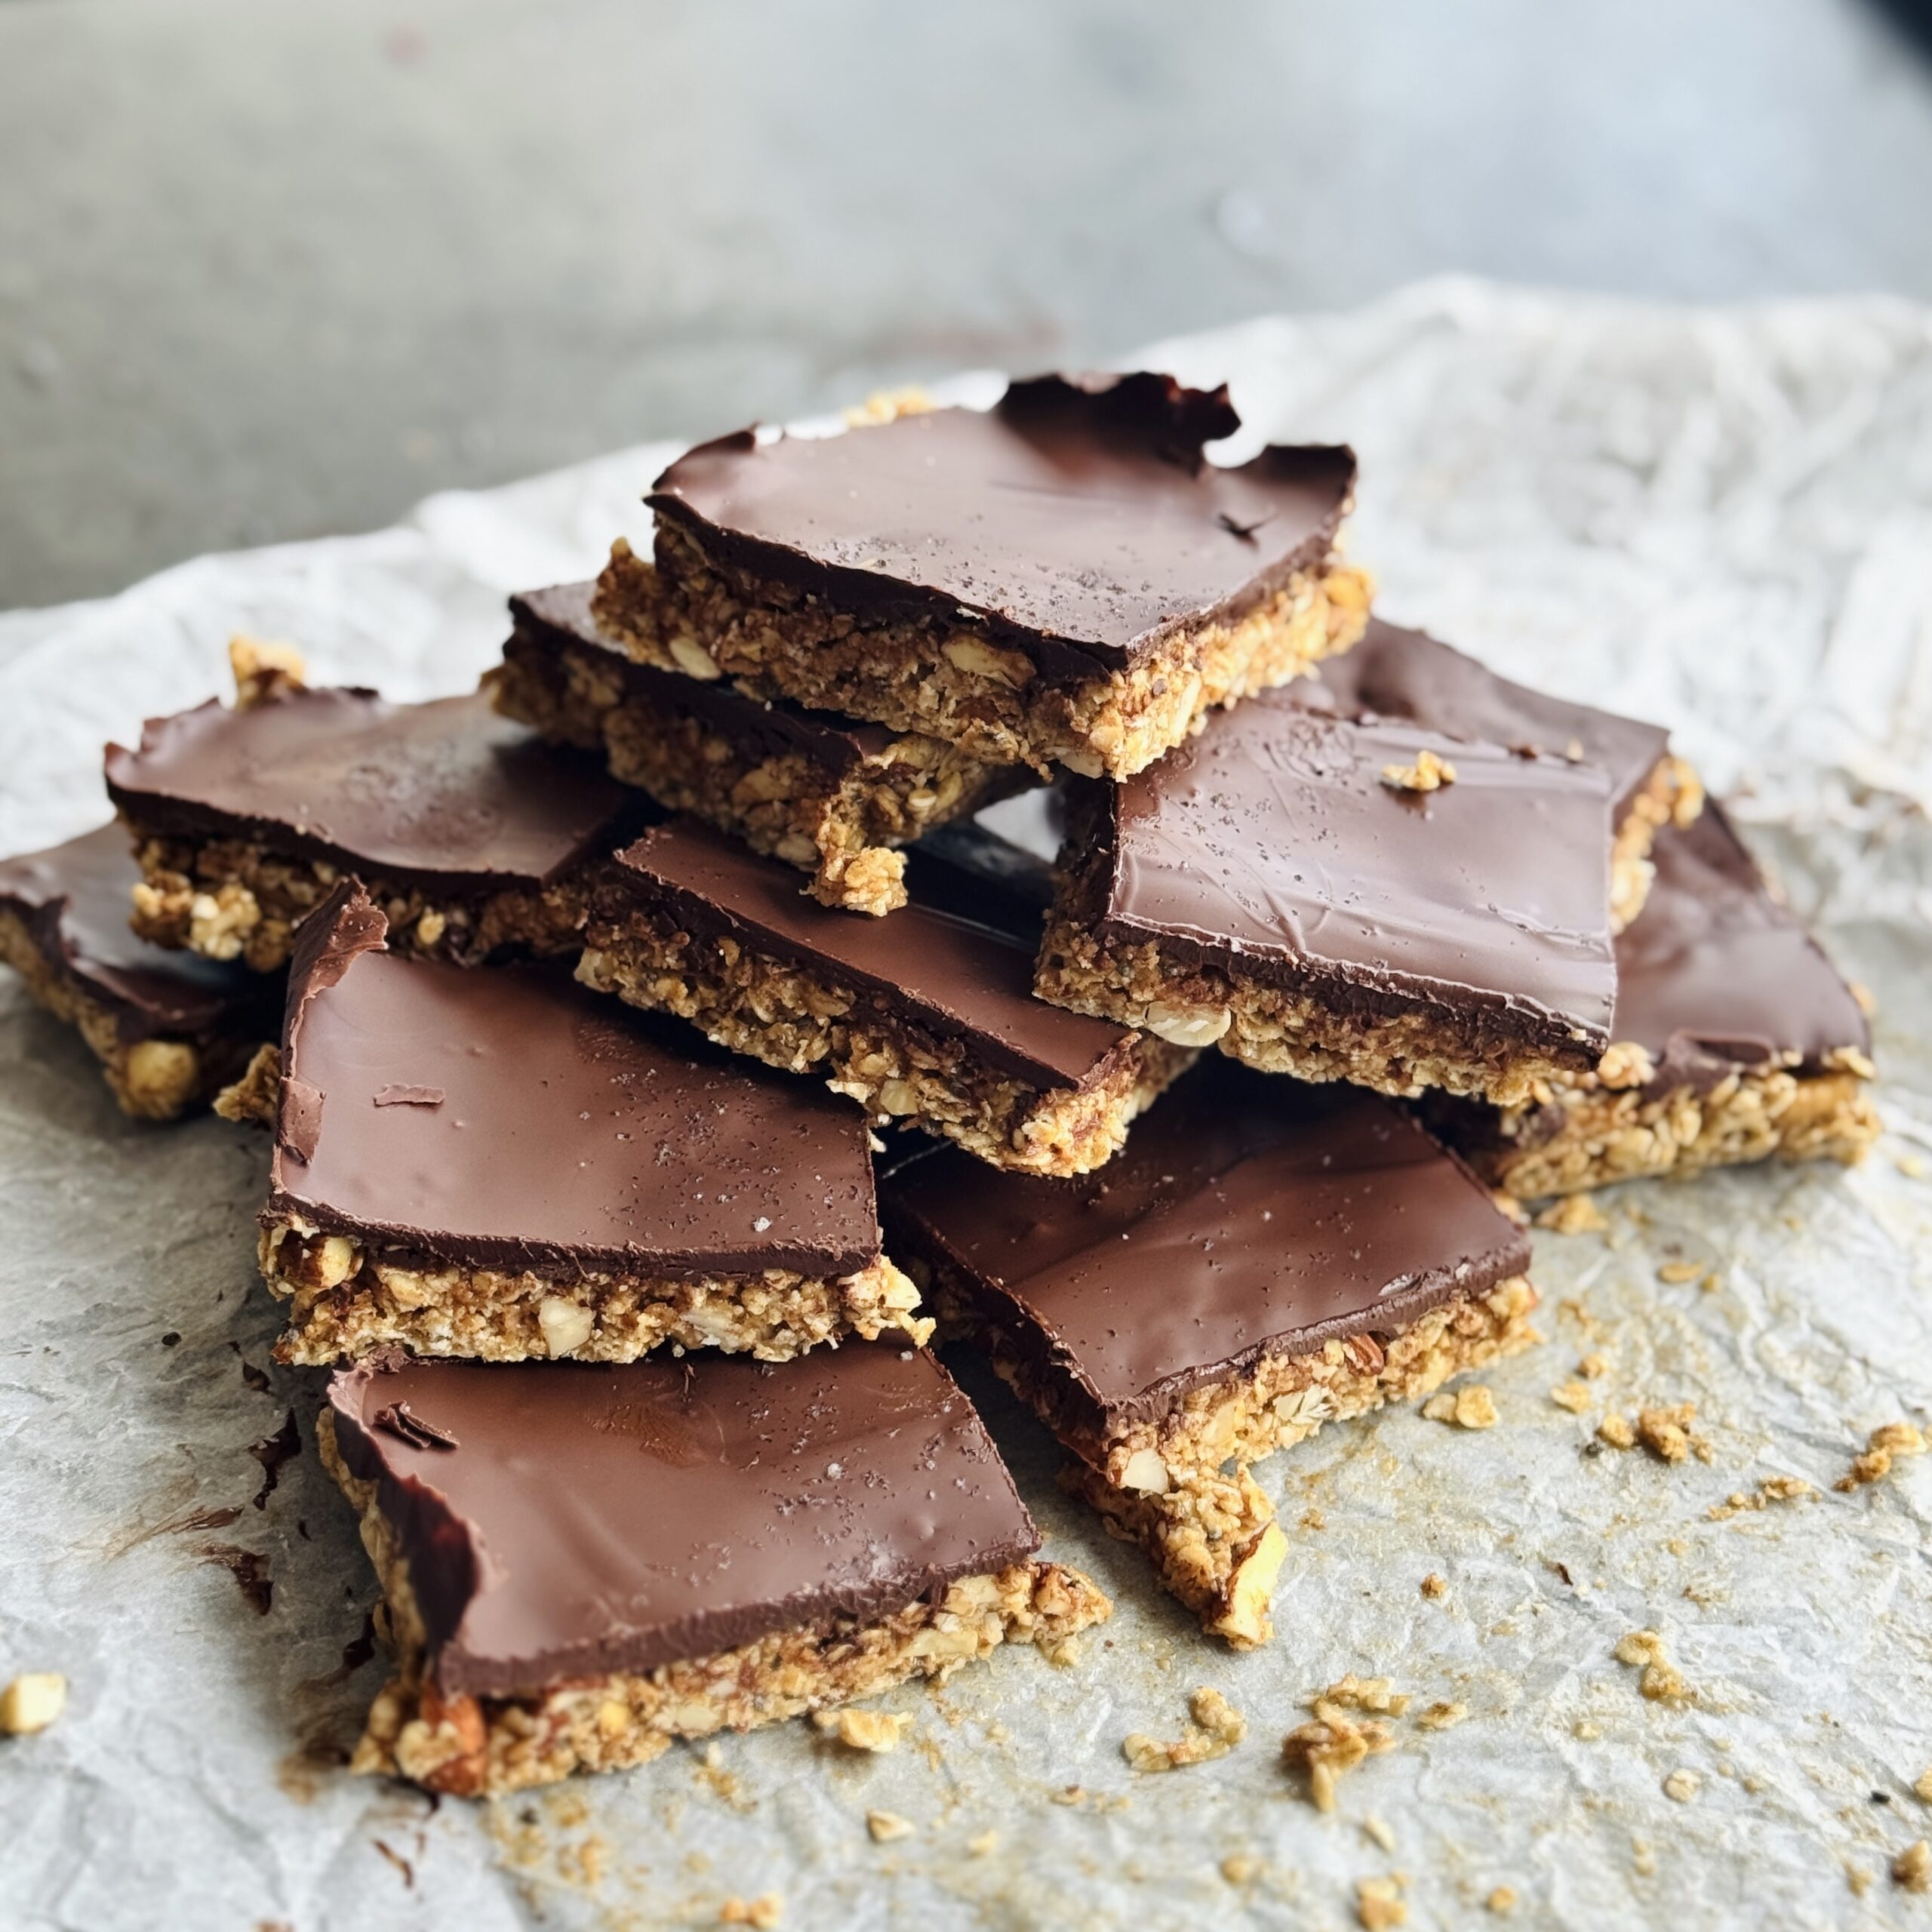
Chocolate Chickpea Bark
Takes 35 minutes
Serves 8
Ingredients
- 1 x 400g tin of cooked chickpeas drained and rinsed
- 150 g dark chocolate about 1 cup chips or chopped
- 20 g dried goji berries about 2 tbsp
- 20 g pumpkin seeds about 2 tbsp
- Pinch of sea salt
Instructions
- Preheat the oven to 180°C (160°C fan) or prepare your airfryer.
- Spread the chickpeas on a baking tray or in the airfryer basket and roast for 15–20 minutes until golden and crispy, shaking halfway. Allow to cool.
- Melt the dark chocolate gently in a heatproof bowl over simmering water or in short bursts in the microwave.
- Spread the melted chocolate evenly onto a tray lined with parchment paper.
- Scatter the goji berries, pumpkin seeds, and a pinch of sea salt over the chocolate chickpea bark.
- Leave to set in the fridge for 20 minutes, or until firm.
- Break into pieces and serve.
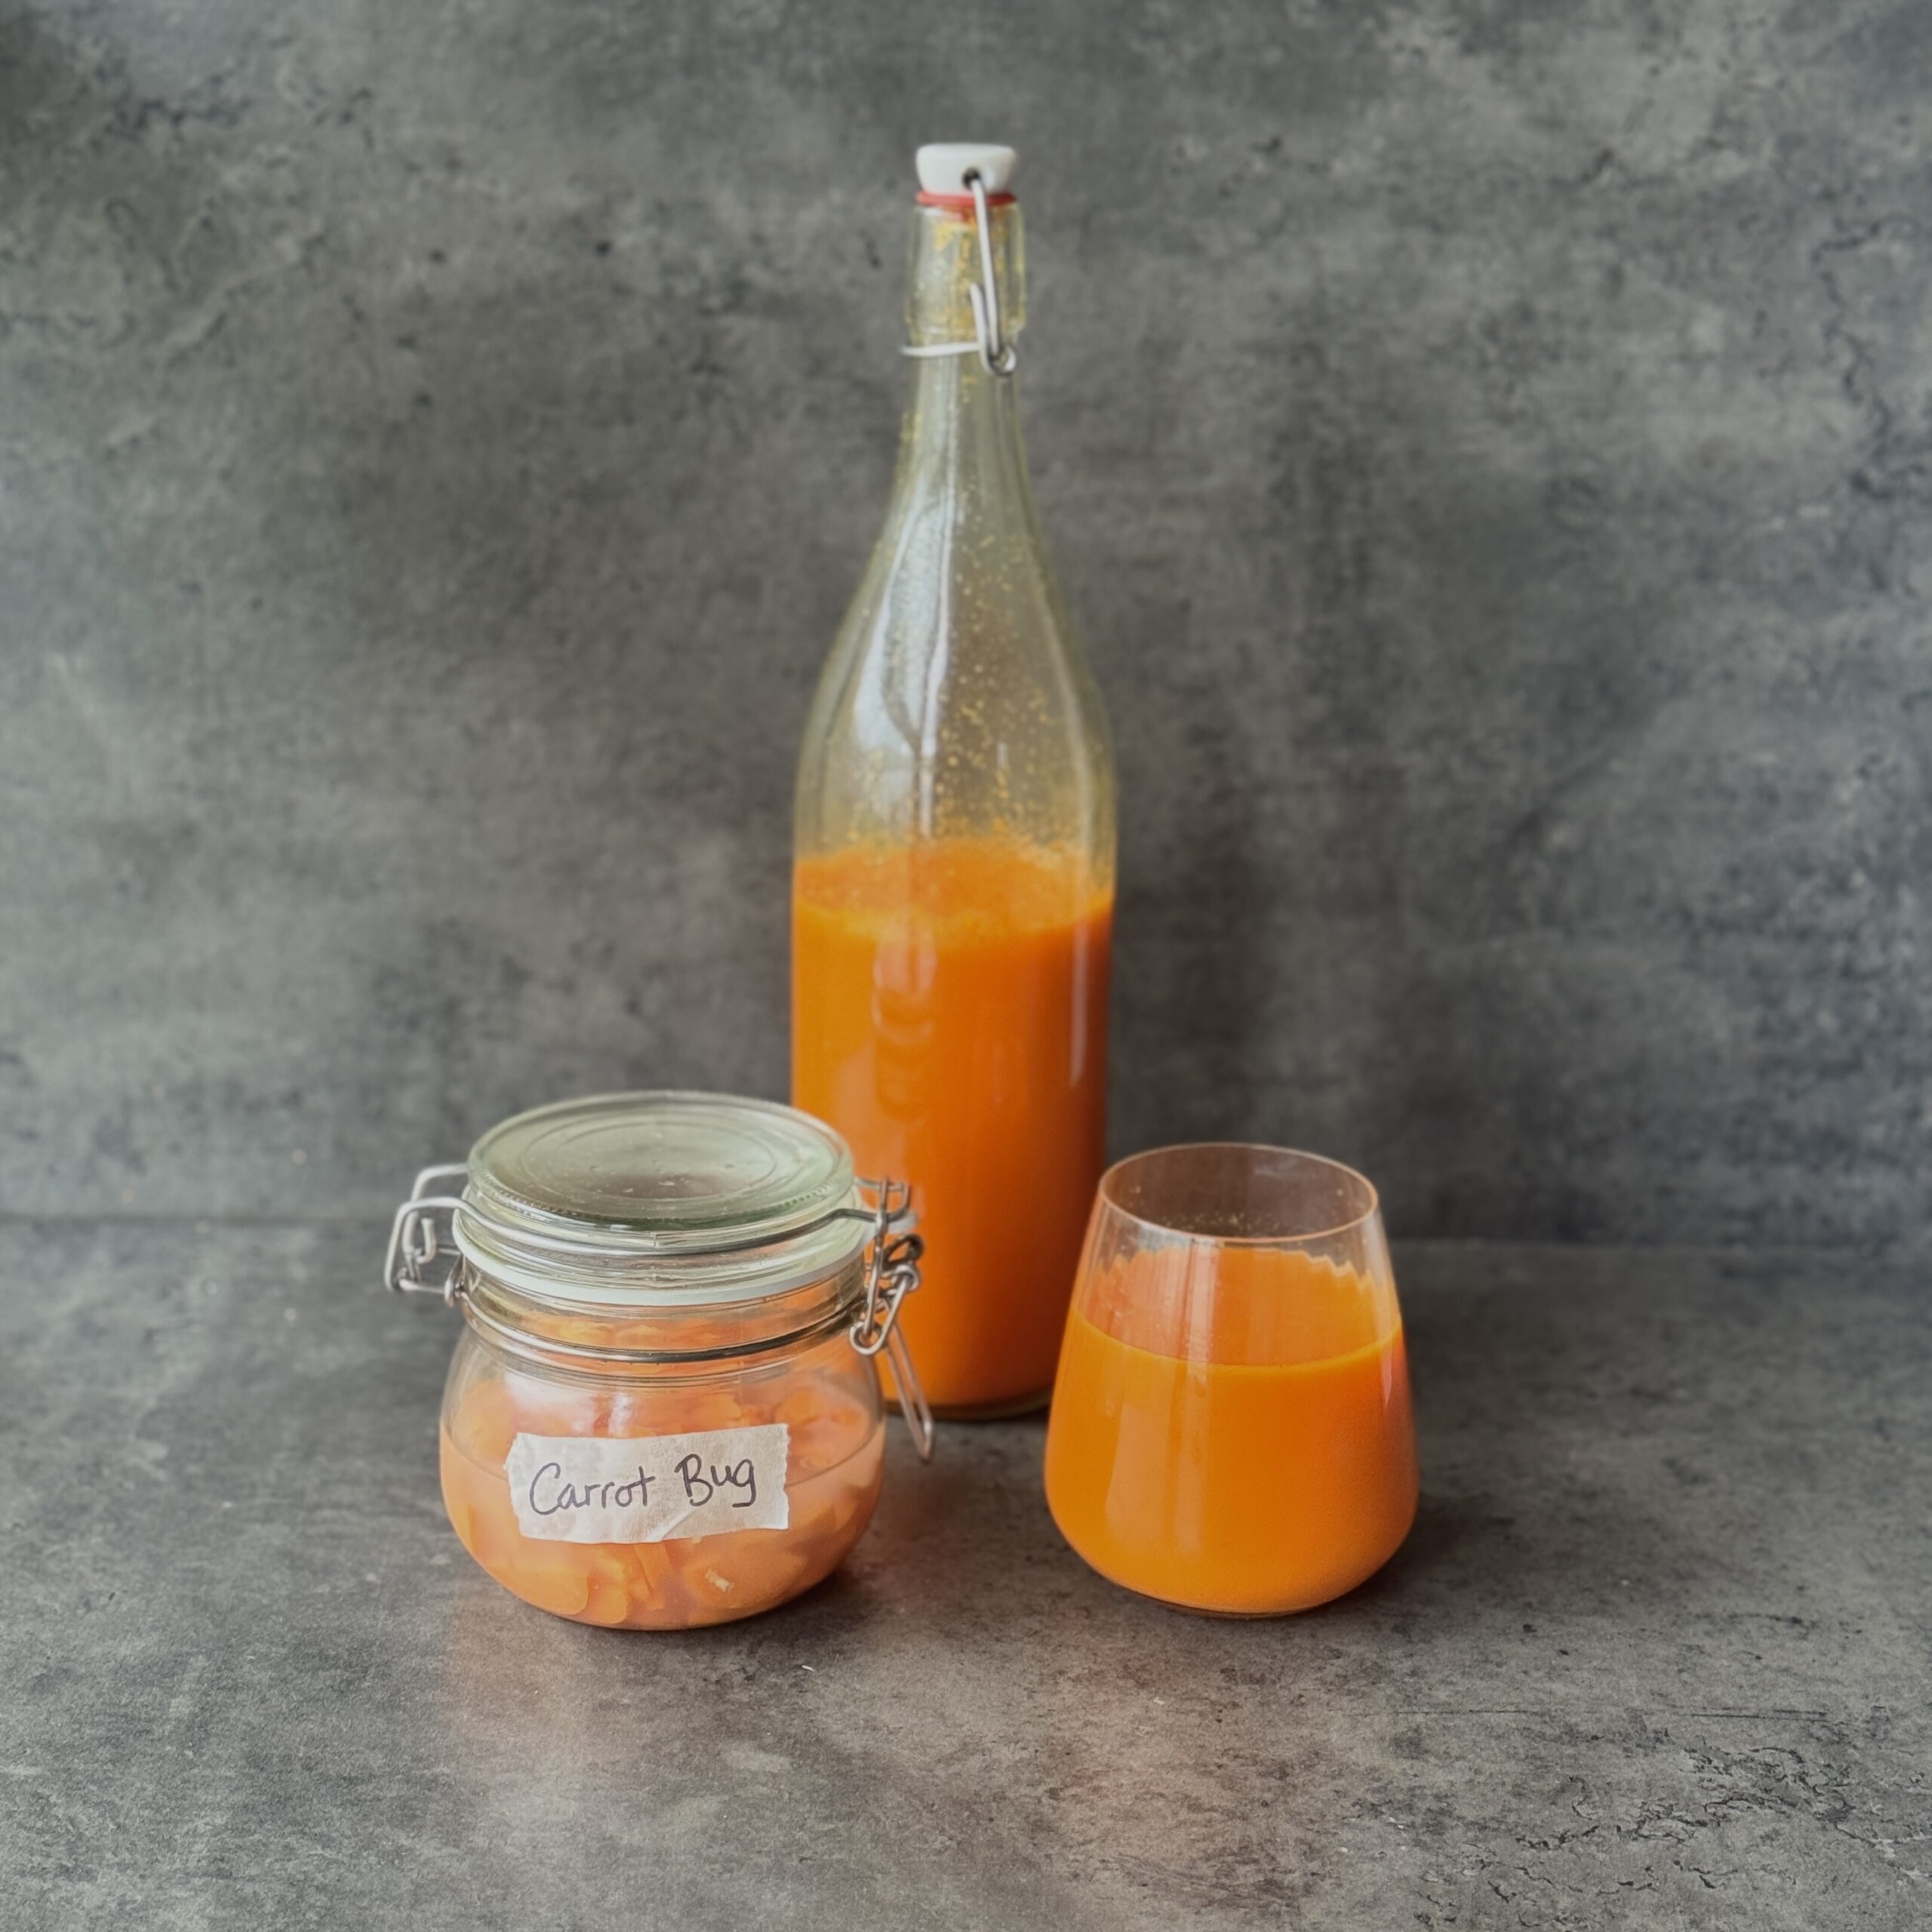
Carrot Bug Immunity Soda
Takes 7 days 20 minutes
Serves 8
Ingredients
Carrot Bug Base:
- 100 g ½ cup fresh carrot or beetroot, finely chopped or grated
- 10 –15g 1 tbsp fresh ginger, finely chopped
- 2 tsp brown sugar
- 200 ml ¾ cup filtered water
Daily feeding (for 5 days):
- 10 –15g 1 tbsp finely chopped ginger
- 1 tsp brown sugar
For the Immunity Soda (makes about 1 litre):
- 50 ml 3 tbsp + 1 tsp active carrot or beetroot bug
- 300 ml 1¼ cups fresh carrot juice
- 150 ml ⅔ cup fresh ginger tea or ginger juice
- 500 ml 2 cups filtered still or sparkling water
- Juice of 1 lemon
- 1½ tbsp maple syrup or to taste
Instructions
- To start the bug, place 100g finely chopped carrot or beetroot, 10–15g chopped ginger, 2 tsp brown sugar, and 200ml filtered water into a sterilised 1-litre jar. Stir until the sugar dissolves, cover loosely with a clean cloth or lid, and label with the start date.
- Feed the bug daily for the next five days by adding 10–15g finely chopped ginger and 1 tsp brown sugar each day, stirring thoroughly after each addition. This daily feeding keeps the beneficial bacteria and wild yeasts alive and encourages fermentation. You should begin to notice gentle bubbling and a sweet, slightly yeasty aroma after a few days — a good sign that it’s becoming active.
- Open the jar once a day to release gas and prevent pressure building up. After five days, the bug should smell pleasantly yeasty and slightly sweet, with visible bubbles rising to the surface. At this stage, it’s ready to use in homemade sodas.
- Once active, store your bug in the fridge with a loose-fitting lid. Feed it once a week with 10g chopped carrot or beetroot and 1 tsp sugar to keep it healthy. To reactivate the bug before using it again, leave it at room temperature and feed daily for one to two days until bubbly.
- To make the Immunity Soda, combine 300ml fresh carrot juice, 150ml ginger tea or juice, the juice of one lemon, and 1½ tbsp maple syrup in a large jug. Stir well to mix. Add 50ml of your active carrot or beetroot bug, then top up with 500ml filtered still or sparkling water, stirring gently to combine.
- Pour the mixture into swing-top bottles or jars with tight-fitting lids, leaving about 3cm of headspace at the top. Leave the bottles at room temperature for 24–48 hours to naturally carbonate, “burping” them daily to release excess pressure.
- Once the soda is bubbly and lightly fizzy, transfer it to the fridge to slow the fermentation. Serve chilled over ice for a refreshing, probiotic-rich Immunity Soda that’s full of life and flavour.

Autumnal Pumpkin & Carrot Soup
Takes 45 minutes
Serves 6
Ingredients
- 1 medium pumpkin approx. 1–1.2kg
- 2 leeks
- 4 carrots
- 1 bulb garlic
- 10 g fresh ginger
- 1 red chilli optional, for heat
- 1 x 400g tin coconut milk approx. 1.75 cups
- 1 litre vegetable stock approx. 4 cups
- 1 tsp ground cumin
- Olive oil
- Salt
To serve:
- Coconut yoghurt
- Roasted pumpkin seeds
- Fresh sourdough optional
Instructions
Roast the veg
- Preheat the oven to 200°C (390°F). Roughly chop the pumpkin (skin on, seeds removed), carrots, and leeks. Slice the ginger. Place everything on a baking tray along with the whole bulb of garlic. Drizzle with olive oil, sprinkle with a pinch of salt, and roast for 30–35 minutes, until soft and caramelised.
Prepare the garlic
- Once roasted, allow the garlic to cool slightly, then squeeze the soft, sweet cloves from their skins.
Make the soup
- Transfer the roasted veg and garlic into a large saucepan. Add the vegetable stock, coconut milk, and cumin. Bring to a simmer for 5 minutes to let the flavours meld.
Blend until smooth
- Using an immersion blender, blend until silky smooth. Taste and adjust seasoning with salt, lemon or lime juice (and a little extra chilli if you like heat).
Serve
- Ladle into bowls and finish with a drizzle of coconut yoghurt and a sprinkle of roasted pumpkin seeds.
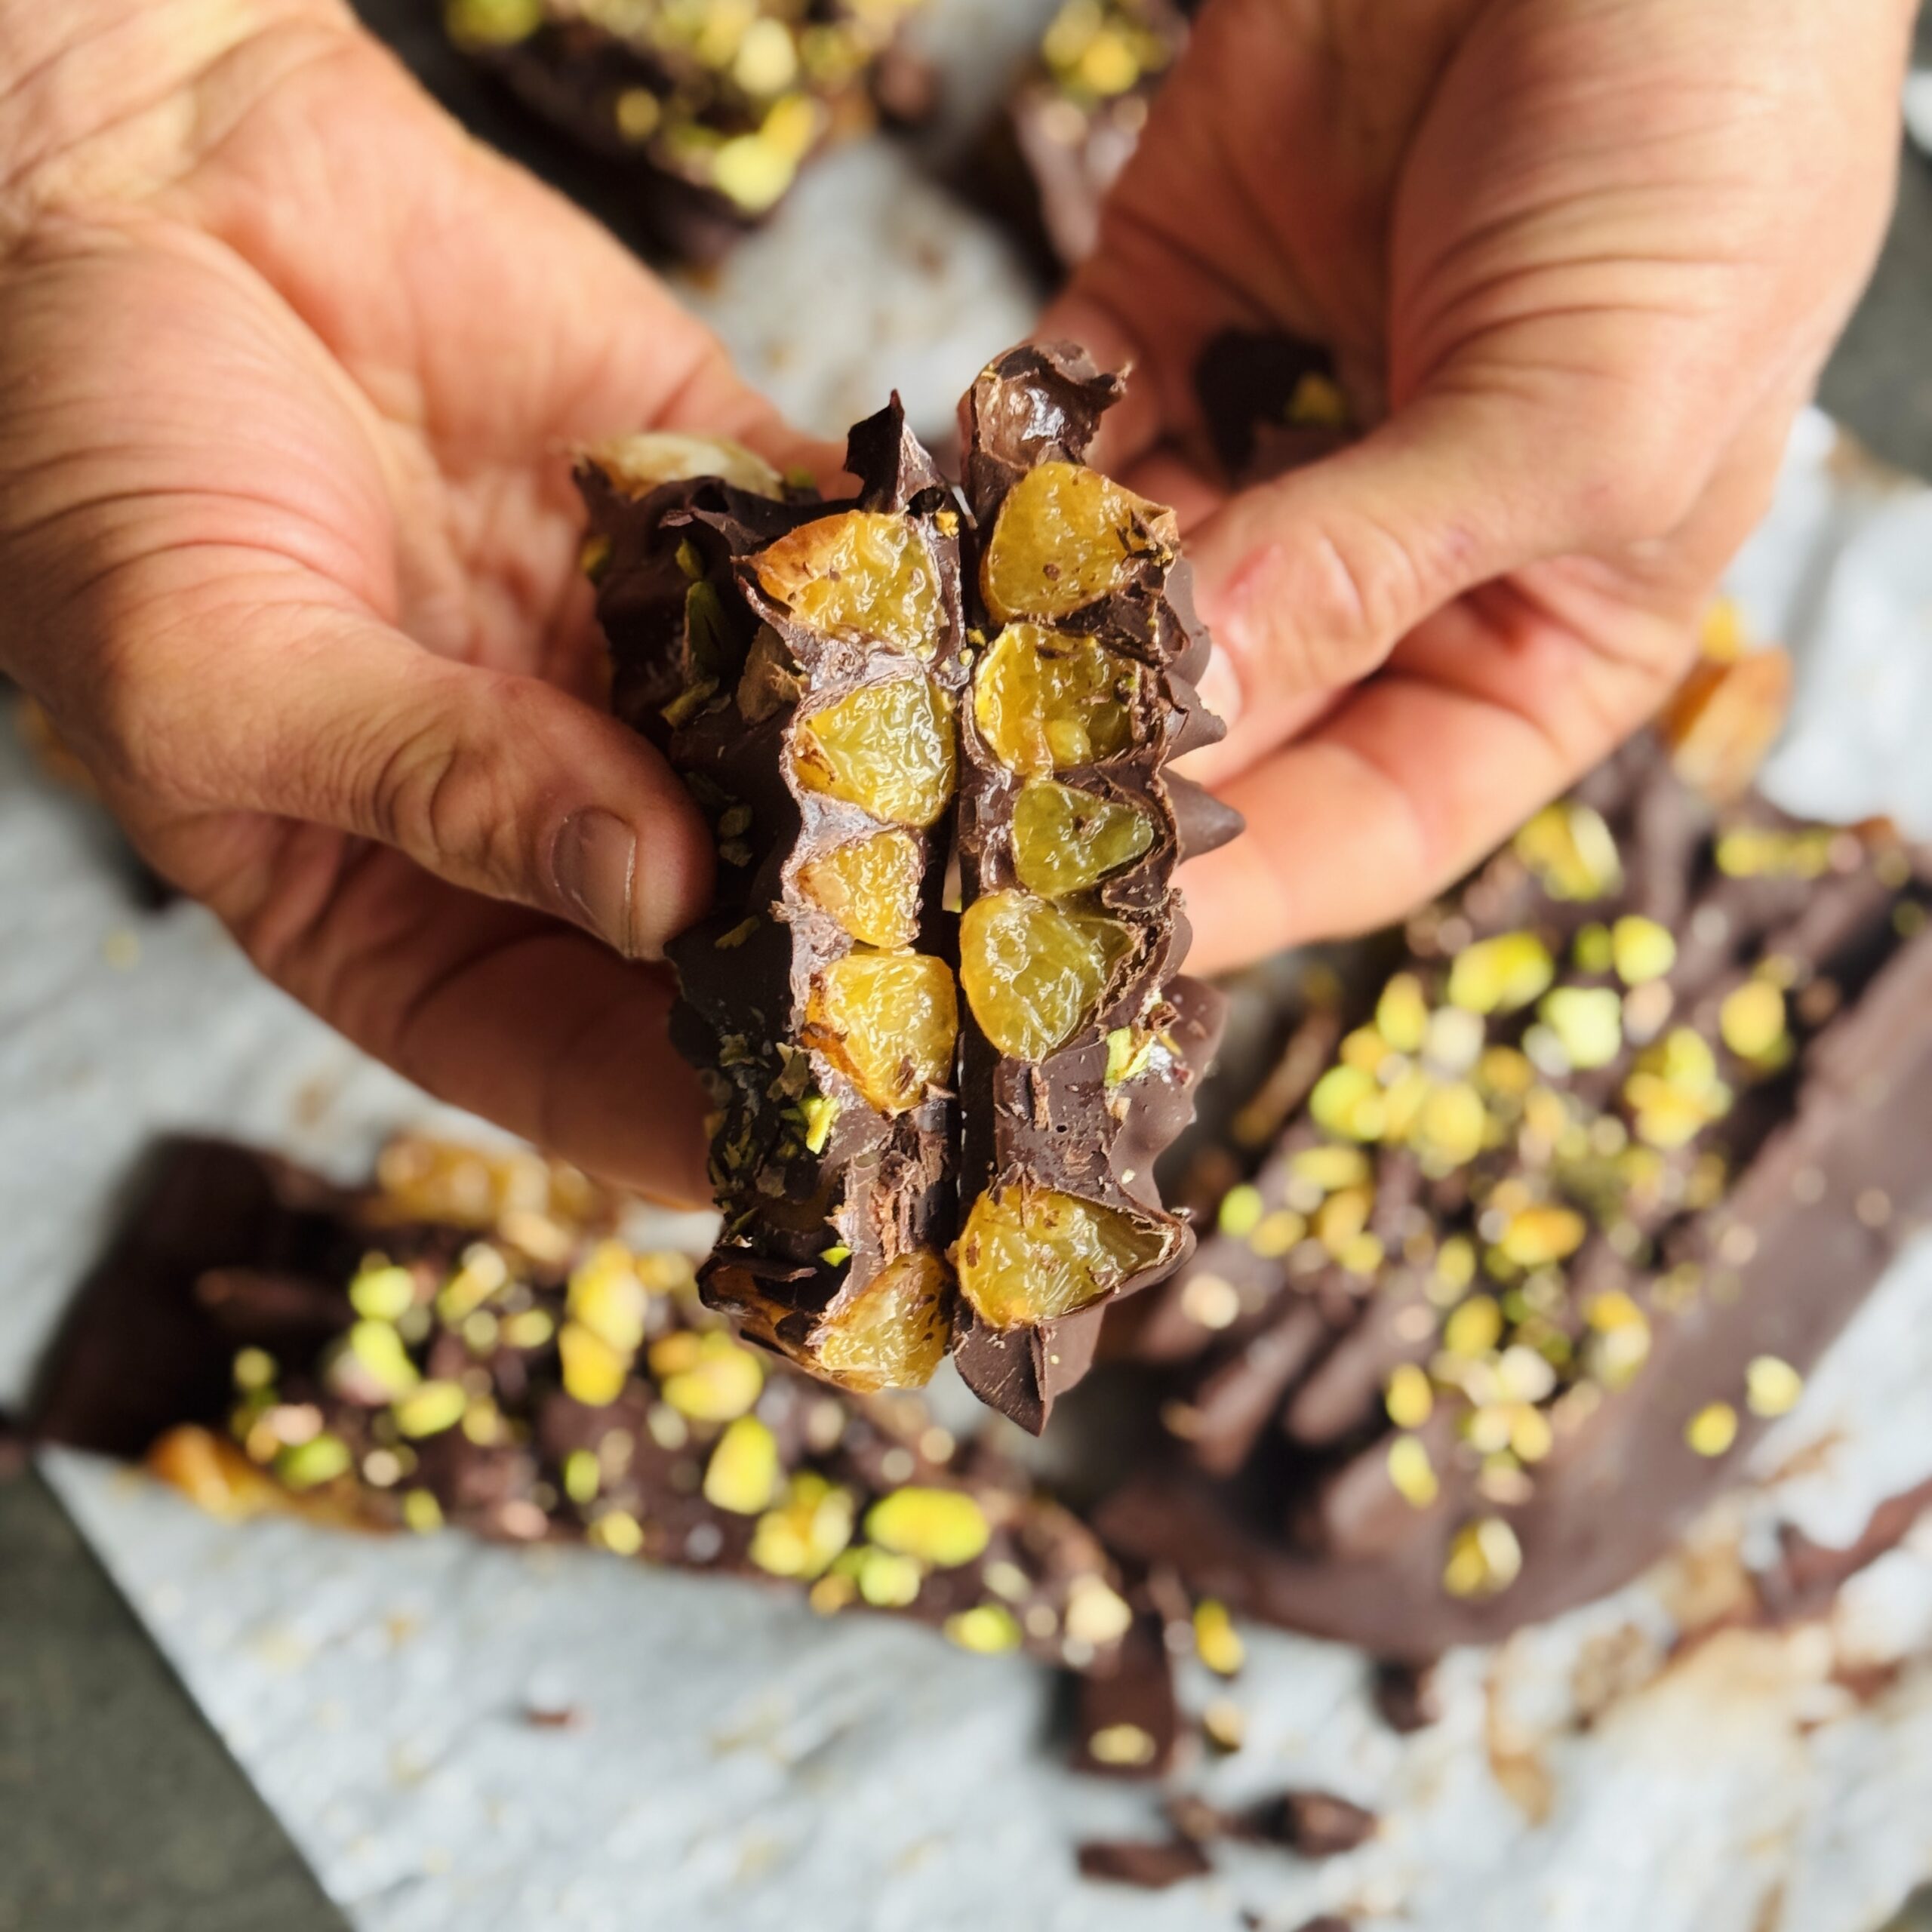
Chocolate Orange Bark
Takes 45 minutes
Serves 10
Ingredients
- 10 clementines peeled
- 250 g dark chocolate about 1 ½ cups chips or chopped
- 50 g shelled pistachios roughly chopped (about ⅓ cup)
- 2 tbsp dried goji berries
- Pinch of sea salt
Instructions
- Line a baking tray with parchment paper.
- Peel the clementines and separate into segments.
- Melt the dark chocolate gently in a heatproof bowl over a pan of simmering water, or in short bursts in the microwave.
- Spread the melted chocolate evenly onto the lined tray.
- Arrange the clementine segments on top of the chocolate.
- Scatter over the chopped pistachios, goji berries, and a pinch of sea salt.
- Leave to set in the fridge for 30 minutes, or until firm.
- Break into shards and serve.
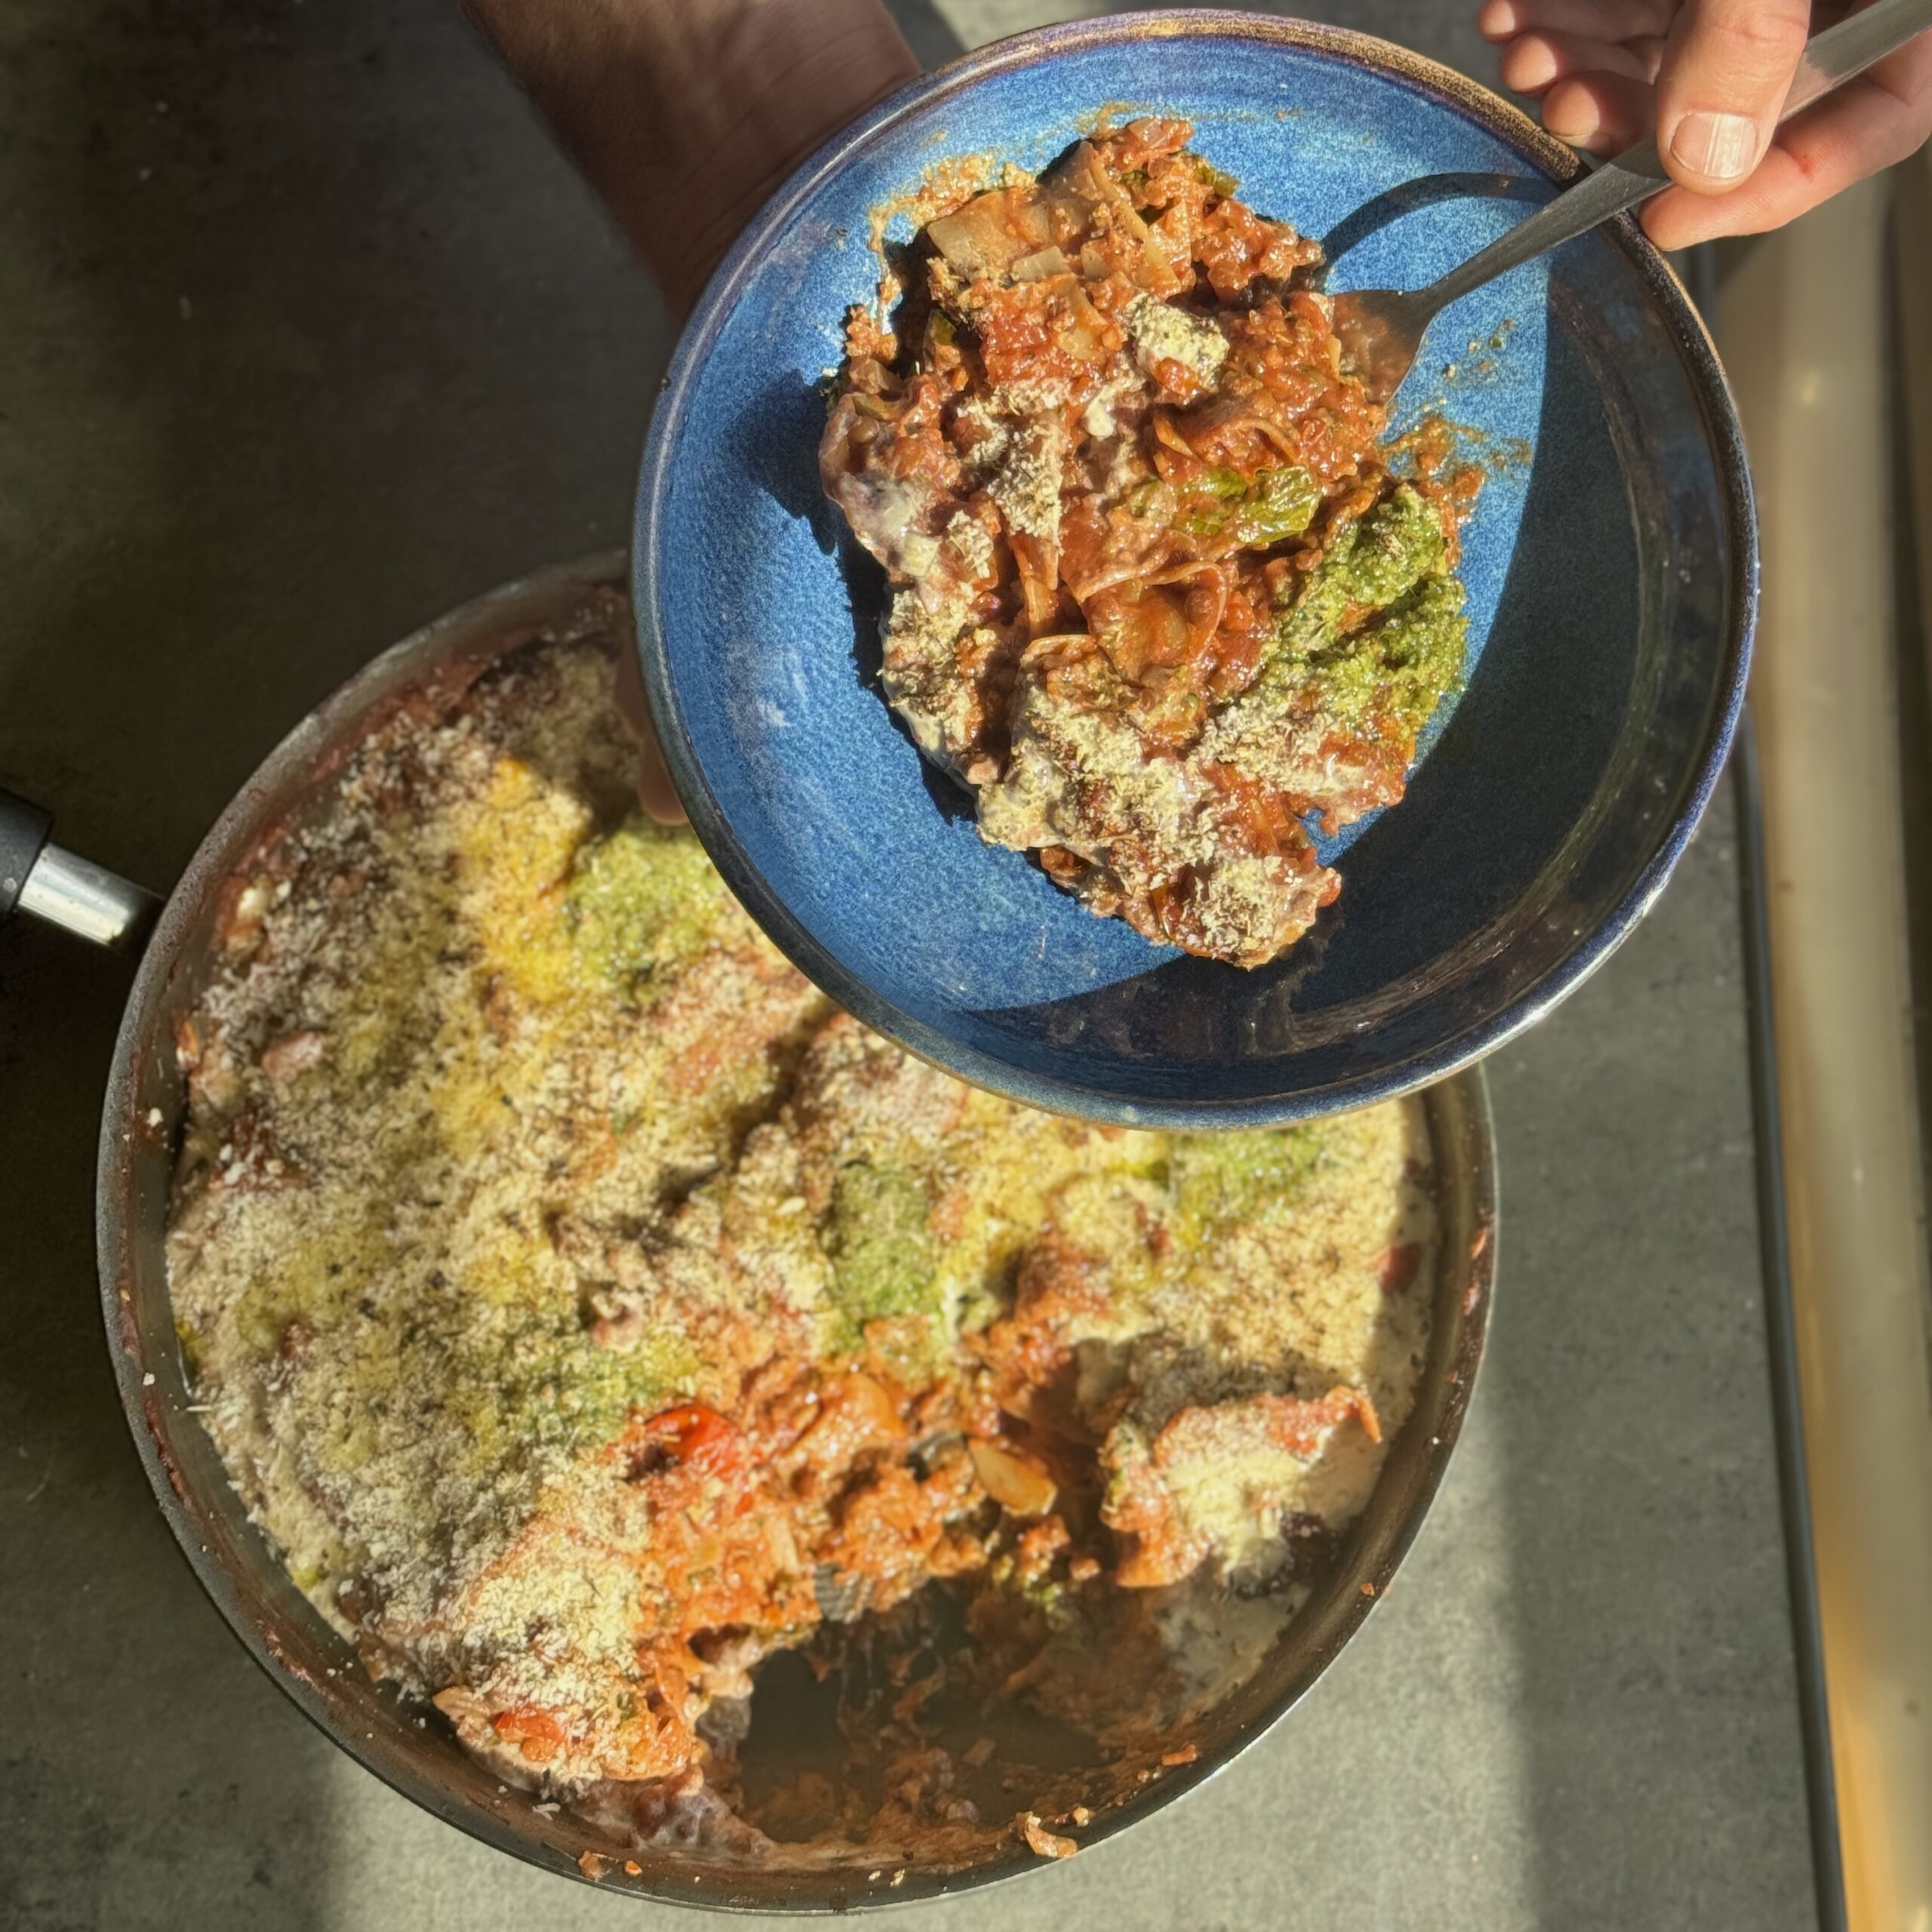
20 Minute High Protein Lasagne
Takes
Serves 4
Ingredients
For the ragù
- 30 g olive oil 2 tbsp
- 150 g onion 1 medium, 1 cup finely chopped
- 2 cloves garlic
- 100 g carrot 1 medium, ⅔ cup finely diced
- 150 g courgette 1 medium, 1 cup finely diced
- 100 g walnuts 1 cup, roughly chopped
- 400 g cooked lentils 1 tin, drained, 2¼ cups
- 680 g passata 3 cups
- 200 g tomato purée ¾ cup
- 30 ml tamari 2 tbsp
- 15 ml maple syrup 1 tbsp
- 12 g sea salt 2 tsp
- 10 g fresh basil or flat-leaf parsley small bunch, ½ cup chopped
- 200 g lasagne sheets preferably red lentil or chickpea-based, broken into pieces, about 8 sheets
- 200 ml vegetable stock ¾ cup
For the cashew cream
- 100 g raw cashews ¾ cup
- 210 ml oat milk ¾ cup + 2 tbsp
- 30 ml olive oil 2 tbsp
- Juice of ¼ lime 1 tsp
- 2 g sea salt generous pinch
- Pinch of black pepper
To serve
- 50 g breadcrumbs ½ cup
- 100 ml basil pesto ⅓ cup
- Olive oil for drizzling
Instructions
Prep the vegetables:
- Peel and finely chop the onion and garlic. Finely dice the carrot and courgette. Roughly chop the walnuts and finely chop the basil or parsley. Drain and rinse the lentils.
Sauté the base vegetables:
- Heat the olive oil in a large, deep non-stick pan over high heat. Add the onion and cook for 2 minutes, stirring regularly. Add the garlic, carrot and courgette and cook for another 2 minutes.
Build the ragù:
- Add the walnuts, lentils, passata, tomato purée, tamari, maple syrup and sea salt. Stir well to combine.
Add the pasta and cook:
- Break the lasagne sheets into bite-sized pieces and stir them through the sauce so they are evenly spread and not stuck together. Add the vegetable stock, cover with a lid, and simmer over medium heat for 7 minutes, stirring occasionally.
Make the cashew cream:
- Blend the cashews, oat milk, olive oil, lime juice, sea salt and black pepper until silky smooth. Add a little extra oat milk to loosen if needed.
Assemble and garnish:
- When the pasta is tender and the sauce has thickened, drizzle over the cashew cream, add spoonfuls of basil pesto and sprinkle with breadcrumbs. Drizzle lightly with olive oil.
Crisp the top:
- Lightly char the surface with a blowtorch or place the pan under a hot grill for 3–5 minutes until crisp and bubbling.
Serve:
- Scatter over the chopped fresh basil or parsley and serve hot, straight from the pan.

Fermented Fries (Crispy, Tangy, Plant-Based)
Takes 3 days 40 minutes
Serves 4
Ingredients
- 1 kg floury potatoes Maris Piper or Rooster work brilliantly
- 1 L 4¼ cups filtered water
- 15 g 1 tbsp sea salt
- Neutral oil for cooking rapeseed, sunflower, or avocado oil
To finish (optional but excellent):
- Flaky sea salt
- Fresh thyme or rosemary
- Cracked black pepper
- Plant-based aioli or fermented hot sauce for dipping
Instructions
Prep the potatoes
- Cut the potatoes (leave the skins on if you can, as this boosts fibre) into chip or French fry shapes, about 1cm thick.
- Rinse well under cold water to remove surface starch.
Ferment the chips (2–3 days)
- In a large jar or fermentation-safe container, dissolve 15g salt into 1L filtered water to make your brine.
- Submerge the raw chips fully in the brine. Weigh them down with a fermentation weight or a clean glass to keep them under the liquid.
- Cover loosely with a lid or cloth and leave to ferment at room temperature for 2–3 days. You should see small bubbles and notice a lightly sour aroma by day 2 or 3. Fermentation begins breaking down the starches, improving digestibility and enhancing flavour, while adding a gentle acidity for extra depth.
Rinse and dry
- After fermentation, drain and rinse the chips well.
- Pat them completely dry with a clean tea towel—this step is crucial for crispness.
Cook the chips
Option 1: Air fry (healthier)
- Toss the chips lightly in 15–30g (1–2 tbsp) neutral oil.
- Air fry at 200°C (392°F) for 12–15 minutes, shaking halfway, until golden and crisp.
Option 2: Oven-bake
- Preheat the oven to 220°C (428°F).
- Spread chips on a parchment-lined tray, drizzle with 30–45g (2–3 tbsp) oil, and toss to coat.
- Bake for 30–35 minutes, turning halfway, until crisp.
Option 3: Shallow fry (for maximum crunch)
- Heat oil in a deep pan to 180°C (356°F).
- Fry the fermented chips in batches for 3–5 minutes until golden.
- Drain on kitchen paper and season straight away.
To finish
- While still hot, toss the chips with flaky sea salt, chopped herbs, or cracked black pepper.
- Serve with your favourite fermented ketchup, hot sauce, or plant-based aioli.
Tips
- Don’t ferment for longer than 3 days or the chips may soften too much.
- For a probiotic twist, serve with sauerkraut or kimchi on the side.
- Save the potato fermentation brine—it’s packed with flavour and can be used to kickstart other ferments!

Chia & Mixed Seed Crackers
Takes 55 minutes
Serves 4
Ingredients
- 150 g chia seeds 1 cup
- 400 ml hot water 1 & 2/3 cups
- ½ tsp sea salt or kosher salt plus extra for sprinkling
- 280 g mixed raw seeds e.g., pumpkin, sunflower, sesame, hemp (2 cups)
- 4 tbsp olive oil or avocado oil divided (2 tbsp + 2 tbsp), plus extra for greasing
Instructions
Preheat the oven:
- Preheat to 200°C (400°F) and position a rack in the centre of the oven.
Prepare the chia mixture:
- In a mixing bowl, combine 150g (1 cup) chia seeds with 400ml (1 & 3/4 cup) boiling water and ½ tsp sea salt. Stir well and leave to sit for 2-3 minutes until the mixture thickens to a gloopy, egg white-like texture.
Add the mixed seeds:
- Add 280g (2 cups) mixed raw seeds to the flax mixture and stir until evenly combined. Taste and add a pinch more salt if needed.
Grease and line your baking tray:
- Lightly oil a large baking tray (approx. 30 × 40cm or a half-sheet pan) and line with parchment paper. Brush the parchment with 2 tbsp oil to help the mixture spread evenly.
Spread the cracker mixture:
- Transfer the seed mixture onto the tray and spread it thinly and evenly across the surface using a spatula or the back of a spoon.
Brush with oil and salt:
- Brush the top of the spread-out mixture with the remaining 2 tbsp oil and sprinkle with a little more sea salt.
Bake in two stages:
- Bake at 200°C (400°F) for 25–28 minutes until the edges start to turn golden. Then open the oven door briefly to release steam, reduce the temperature to 175°C (350°F), rotate the tray, and bake for a further 12–15 minutes until golden brown all over.
Cool and break into pieces:
- Allow the cracker sheet to cool in the tray or on a wire rack. Once cool, snap into bite-sized crackers or rustic shards.
Store:
- Store in an airtight container for 2–3 weeks. Keeps best in a cool, dry place.

Healthier Peanut Butter & Jelly Bites
Takes 25 minutes
Serves 24
Ingredients
Base layer
- 200 g 1 cup tightly packed pitted dates
- 100 g ¾ cup almonds or walnuts
- 2 tbsp peanut butter or almond butter
- 20 g 4 tbsp cocoa or cacao powder
- 1 tsp vanilla extract
- Pinch of sea salt
- 1 tsp espresso powder optional
- 3 –4 tbsp water
Peanut butter filling
- 150 g ½ cup creamy peanut butter
- 3 tbsp almond flour or almond meal
- 2 tbsp 30ml maple syrup
- 1 tbsp 15ml melted coconut oil
- ½ tsp vanilla extract
Jam layer
- 200 g approx. ¾ cup berry jam of choice
Chocolate coating
- 300 g about 2 cups dark chocolate (you’ll have some leftover)
- 1 tbsp coconut oil
Instructions
Prepare the base:
- Add the dates and almonds (or walnuts) to a food processor. Blitz until a coarse crumb forms. Add the peanut butter, cocoa powder, vanilla, salt, and espresso powder if using. Blend again until sticky and the mixture holds together when pinched, adding water 1 tbsp at a time if needed.
Fill the moulds:
- Line silicone ice cube moulds (or a 20cm x 20cm tin) with a little baking parchment if needed. Divide the base mixture evenly between 24 moulds, pressing it down firmly with damp fingers or the back of a spoon. Chill while you prepare the next layer.
Make the peanut butter filling:
- In a bowl, stir together the peanut butter, almond flour, maple syrup, coconut oil, and vanilla until smooth. Spoon a little of this mixture over each base, spreading it evenly. Return to the fridge or freezer for 10 minutes to firm.
Add the jam:
- Spoon about 1 tsp jam over each bite. Smooth the tops and chill again for at least 30 minutes until fully firm.
Melt the chocolate:
- Melt the chocolate with the coconut oil in a heatproof bowl over a pan of simmering water (or in short microwave bursts), stirring until silky smooth.
Coat the bites:
- Pop the firm bites from their moulds. Using a fork, carefully dip each one into the melted chocolate until fully coated. Let the excess drip off before placing them on a parchment-lined tray. Sprinkle with a little sea salt or crushed nuts if desired.
Chill to set:
- Place in the fridge for 20–30 minutes until the chocolate is crisp and set.
Store and enjoy:
- Keep in an airtight container in the fridge for up to 1 week, or freeze for up to 1 month.

Elderberry Immunity Syrup
Takes 50 minutes
Serves 60
Ingredients
- 250 g fresh elderberries stalks removed (about 2 cups / 9 oz)
- 30 g rosehips fresh or dried (about 3 tbsp / 1 oz)
- 20 g blackberries about 2 tbsp / ¾ oz
- 3 cinnamon quills or 1 tbsp ground cinnamon
- 20 g fresh ginger finely diced (about 2 tbsp / ¾ oz)
- ½ thumb-sized piece fresh turmeric finely diced
- ½ tsp cracked black peppercorns
- ½ lemon sliced (plus juice to finish)
- 600 ml water 2½ cups
- 300 ml maple syrup 1¼ cups
Instructions
Prepare the ingredients
- Remove elderberries and rosehips from their stalks. Dice the ginger and turmeric. Slice the lemon.
Simmer the base
- Place the elderberries, rosehips, blackberries, cinnamon, ginger, turmeric, black pepper and lemon slices into a medium saucepan with the water. Bring to the boil, then reduce to a gentle simmer. Cook uncovered for 30–40 minutes, stirring occasionally, until the liquid has reduced by about half.
Strain
- Remove from the heat. Mash the mixture gently with the back of a spoon to release the juices. Strain through a fine sieve or muslin cloth into a clean bowl, pressing to extract as much liquid as possible. Discard the solids.
Sweeten and finish
- While the liquid is still warm (but not boiling hot), stir in the maple syrup and a squeeze of lemon juice. Mix until fully combined.
Bottle and store
- Pour into sterilised glass bottles or jars. Store in the fridge for up to 2 months.
Notes
How to Use
- Daily support: Take 1–2 tsp daily.
- At the first sign of a cold/flu: Take 1 tsp every 3–4 hours.
- Serving ideas: Stir into warm water or tea, or drizzle over porridge and yoghurt.

Cornflake-Crusted Tofu Tenders with Smoky Buffalo Glaze
Takes 30 minutes
Serves 4
Ingredients
For the tofu tenders
- 225 g firm smoked tofu
- 2 tbsp tamari to marinade
For the tofu tenders
- 140 g oat milk ½ cup + 2 tbsp
- 15 g apple cider vinegar 1 tbsp
- 3 g garlic powder 1 tsp
- 3 g smoked paprika 1 tsp
- 75 g plain flour ½ cup
For the cornflake coating:
- 100 g cornflakes 3 cups, crushed
- Pinch of sea salt
- Olive oil spray for baking
For the buffalo glaze
- 120 g hot sauce ½ cup – e.g. Frank’s
- 45 g vegan butter 3 tbsp
- 15 g maple syrup 1 tbsp
- 2 g garlic powder ½ tsp
Instructions
Prepare the tofu:
- Cut the tofu into strips approx. 6cm x 3cm x 1cm. Trim the corners to form diamond-shaped pieces. Cross hatch on both sides to help flavour absorption. Lay in a baking tray and drizzle over the tamari. Leave to marinade while you prep the buttermilk batter
Make the buttermilk batter:
- In a bowl, combine oat milk and apple cider vinegar. Let sit for 2 minutes. Whisk in flour, smoked paprika, garlic powder, and a pinch of salt to form a smooth batter.
Crush the coating:
- In a separate bowl, crush the cornflakes by hand or in a bag until coarse crumbs form.
Coat the tofu:
- Dip each tofu piece into the batter, then roll in the crushed cornflakes to coat evenly. Use one hand for wet batter and the other for dry crumbs to avoid clumping.
Bake or air fry:
- Preheat the oven or air fryer to 200°C (392°F). Place coated tofu pieces on a lined baking tray or air fryer basket, spaced apart. Spray lightly with olive oil.
- Bake or air fry for 15–20 minutes, until crisp and golden.
Make the buffalo glaze:
- In a small saucepan, combine hot sauce, vegan butter, maple syrup, and garlic powder. Heat gently, stirring until smooth and warm.
Glaze and serve:
- Toss the cooked tofu tenders in the buffalo glaze until well coated. Serve immediately with vegan ranch dip, celery sticks, or in a wrap.

Dubai-Style Pistachio Oat Bars
Takes 40 minutes
Serves
Ingredients
For the flapjack base
- 120 g shelled pistachios about 1 cup
- 100 g rolled oats 1 cup
- 60 g desiccated coconut ¾ cup
- 60 g chopped shelled pistachios ½ cup
- 100 ml maple syrup ⅓ cup + 1 tbsp
- 2 tbsp coconut oil
- 1 tsp vanilla extract
- 1 tbsp chia seeds
- Pinch of sea salt
For the topping
- 200 g dark chocolate about 1¼ cups chopped
- 1 tsp coconut oil
- Flaky sea salt or crushed nuts/seeds to garnish
Instructions
Toast the coconut and make the pistachio butter
- In a dry frying pan, toast 60g desiccated coconut (¾ cup) over a medium heat for 2–3 minutes until golden and fragrant, stirring frequently. Set aside to cool.
- In a high-speed blender or food processor, blend 120g pistachios (1 cup) with 2 tbsp coconut oil until smooth and creamy, scraping down the sides as needed. This will take 3–5 minutes depending on your blender.
Combine the dry ingredients
- In a large mixing bowl, add 100g oats (1 cup), the toasted coconut, 60g chopped pistachios (½ cup), 1 tbsp chia seeds, and a pinch of sea salt. Stir to combine.
Mix in the wet ingredients
- Add the pistachio butter (about 120g / ½ cup), maple syrup, and vanilla extract. Mix well until evenly combined and sticky.
Press into a tin
- Line a small tray or loaf tin (approx. 20 × 20 cm) with baking parchment. Press the mixture evenly into the tin using the back of a spoon or damp fingers to smooth the surface.
Chocolate topping
- Melt the dark chocolate with 1 tsp coconut oil using a bain-marie or in short bursts in the microwave. Pour over the flapjack base and spread evenly. Garnish with flaky sea salt or chopped pistachios if desired.
Chill and slice
- Place the tray in the fridge or freezer for about 20 minutes, until fully set. Slice into 12 bars or squares and enjoy.
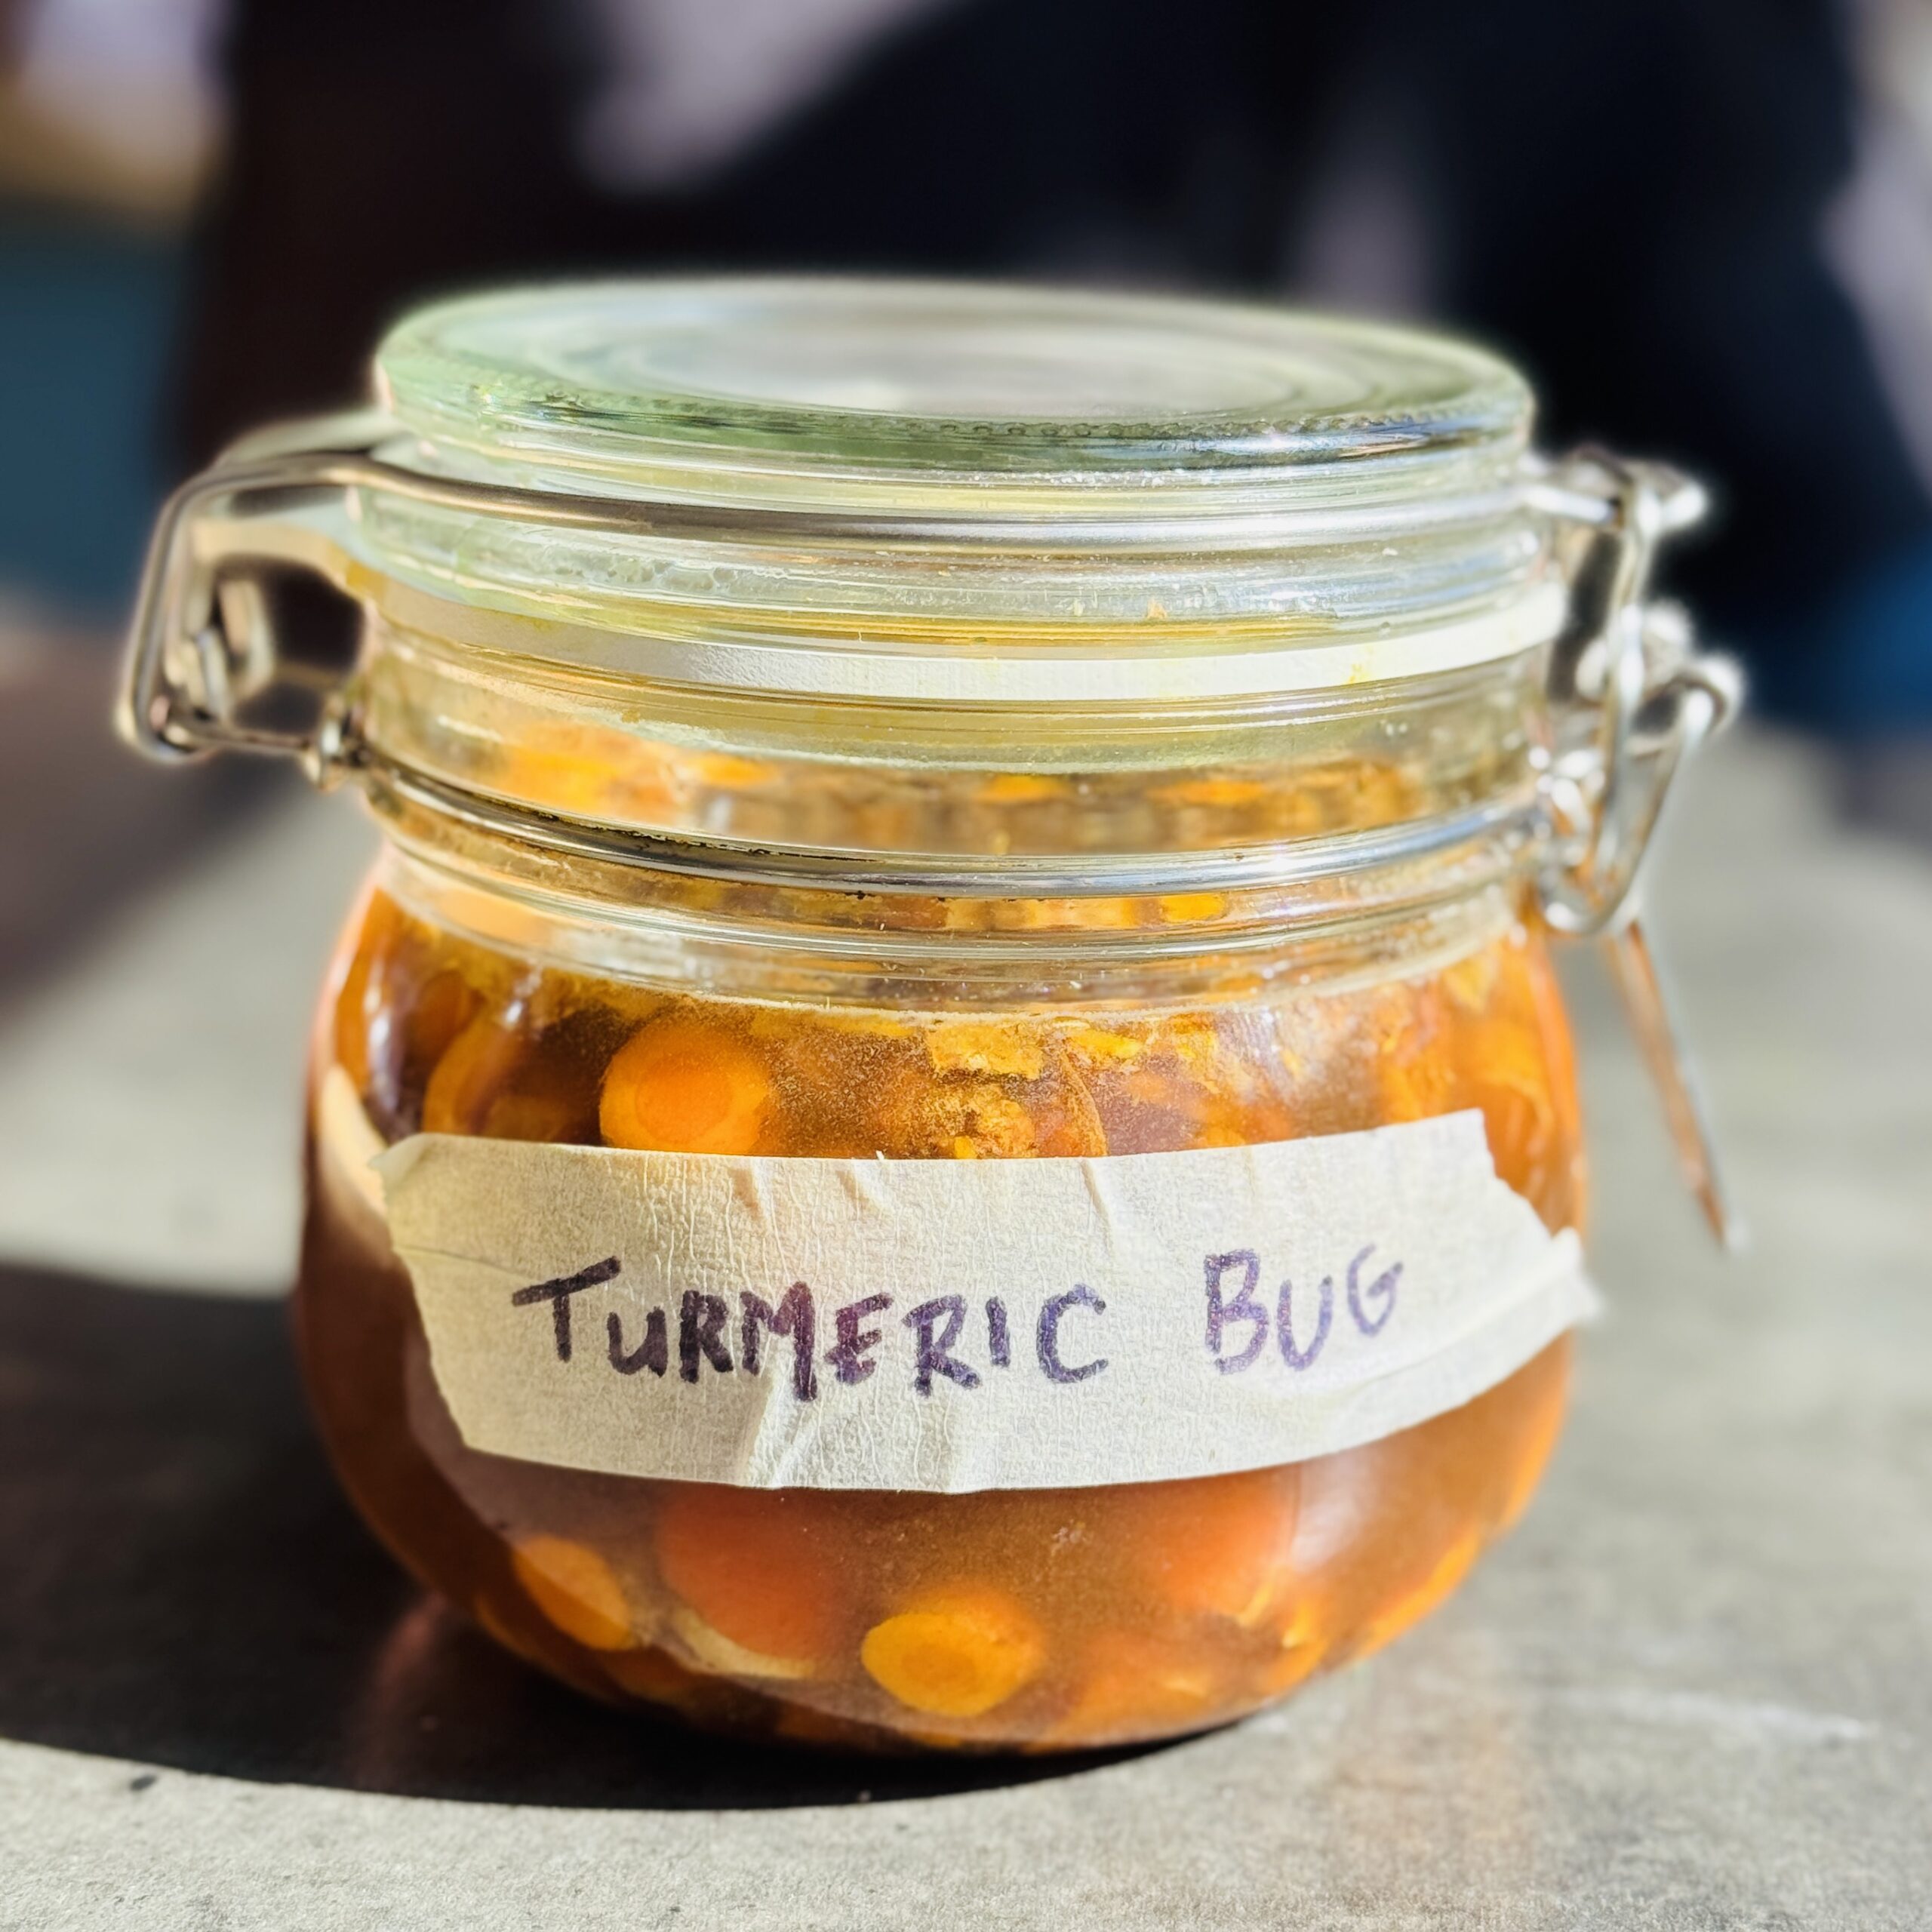
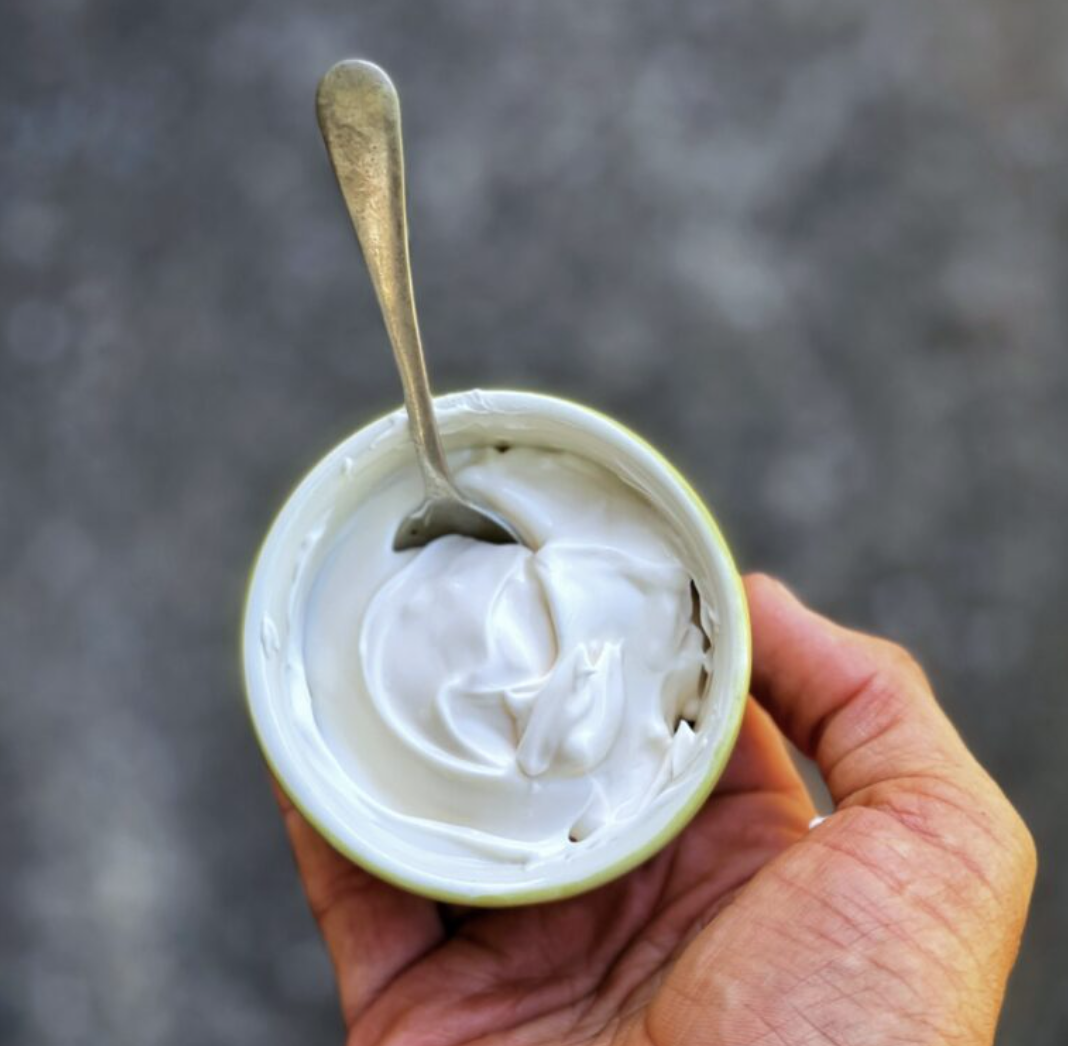
Turmeric Bug
Takes 5 days
Serves 1
Ingredients
- 100 g fresh turmeric optional, for immune-boosting version
- 2 tbsp brown sugar
- 500 ml water
Daily Feeding (for 5 days):
- 10 –15g fresh ginger or ginger + turmeric mix, finely chopped
- 1 tsp brown sugar
Probiotic Iced Tea Ingredients (for 1 litre):
- 50 ml turmeric/ ginger bug
- 1 L water still or sparkling
- 1 lemon cut into wedges
- 6 sprigs fresh mint
- 50 g frozen raspberries for chill and flavour
- 1.5 tbsp maple syrup or to taste
Instructions
Start the bug:
- In a 3-litre sterilised jar, add 100g finely chopped ginger (and/ or turmeric, if using), 2 tbsp brown sugar, and 500ml filtered water. Stir well to dissolve the sugar. Seal with a loose-fitting lid and label with the date.
Feed daily for 5 days:
- Each day, add 10–15g finely chopped ginger (or ginger-turmeric mix) and 1 tsp brown sugar. Stir well. This daily feeding keeps the yeasts and bacteria alive and active.
Burp daily:
- Open the lid once a day for a few seconds to release any built-up gas, then reseal. This prevents pressure from building and avoids jar explosions.
Ready to use:
- After 5 days, the bug should smell yeasty and slightly sweet-like beer or sourdough. It’s now ready to use in probiotic drinks.
Storage:
- Keep the finished bug in the fridge and feed it once a week to keep it alive. It will last approx. 1 week without feeding. Bring it back to room temp and resume feeding to reactivate.
Healthier No-Bake Flapjacks
Takes 10 minutes
Serves 12
Ingredients
- 180 g 2 cups rolled oats
- 60 g ½ cup chopped nuts (cashews, almonds, etc.) or roasted sunflower seeds
- 100 ml ⅓ cup + 1 tbsp maple syrup
- 120 g ½ cup almond butter, peanut butter or seed butter (e.g. tahini)
- 2 tbsp coconut oil
- 1 tsp vanilla extract
- 1 tbsp chia seeds
- Pinch of sea salt
- Optional: ½ tsp ground cinnamon or finely grated orange zest
For the topping (optional):
- 200 g dark chocolate
- 1 tsp coconut oil
- Flaky sea salt or crushed nuts/seeds to garnish
Instructions
Make the base:
- In a mixing bowl, pulse or crush the oats (180g) and nuts/seeds (60g) into a coarse crumb. Add the maple syrup (100ml), nut/seed butter (120g), coconut oil (2 tbsp), vanilla (1 tsp), chia seeds (1 tbsp) and a pinch of sea salt. If the mixture feels too dry, add a splash of plant milk.
Press into a tin:
- Line a loaf tin or small tray (approx. 20 × 20cm) with baking parchment. Press the flapjack mixture evenly into the tin using the back of a spoon or damp fingers.
Optional chocolate topping:
- Melt the dark chocolate (200g) with the coconut oil (1 tsp). Pour over the flapjack base and smooth the surface. Sprinkle with flaky sea salt or crushed nuts/seeds if desired.
Chill and slice:
- Place in the fridge for 1 hour (or freezer for 20 minutes) until firm. Slice into bars or squares.
Variations
- Nut-free: Use sunflower butter or tahini.
- Protein boost: Add a scoop of plant protein powder or a handful of crushed pumpkin seeds.
- Festive twist: Mix in chopped dried figs, cranberries, or orange zest.
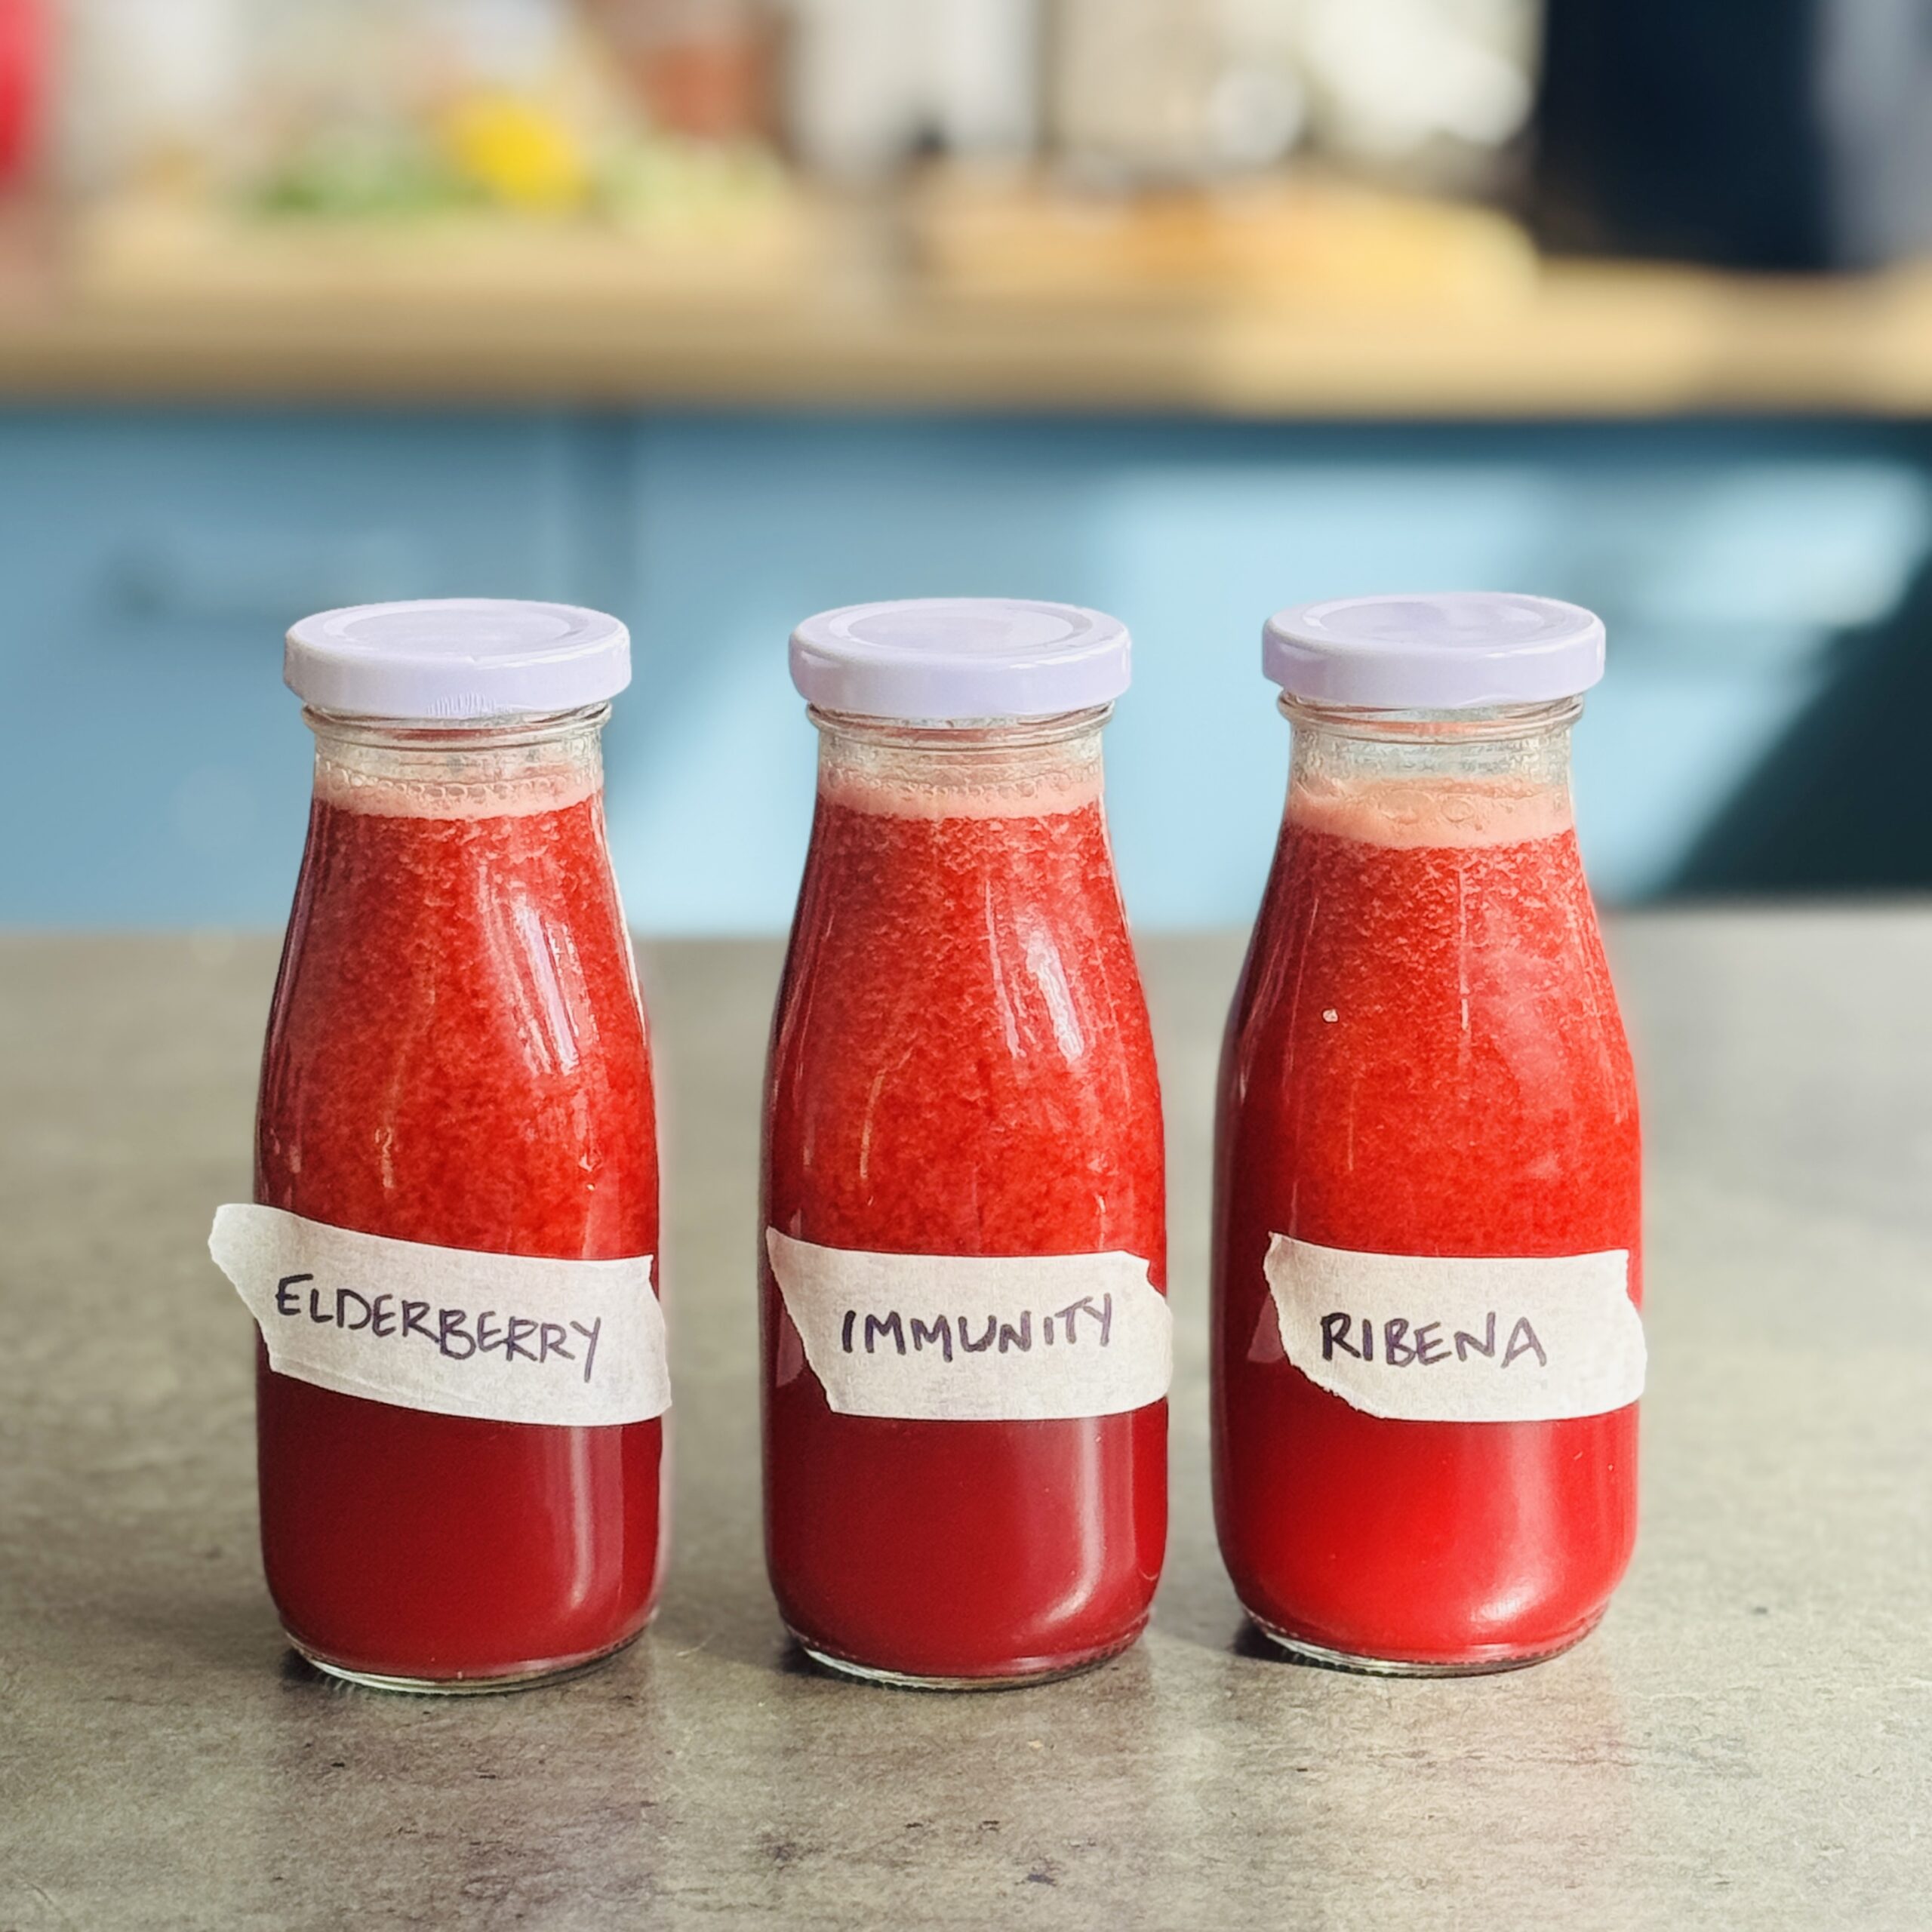
Immunity Support Ribena (with elderberries)
Takes 45 minutes
Serves 12
Ingredients
- 200 g elderberries about 1½ cups
- 400 ml water 1¾ cups
- 3 medium oranges peeled
- 1 lemon
- 3 medium apples
- 25 g fresh ginger 1 thumb-sized piece / about 1 tbsp grated
- 12 g fresh turmeric ½ thumb-sized piece / or 1 tbsp ground turmeric
- Generous pinch of black pepper
Instructions
Make the elderberry base:
- Place the elderberries and water into a large saucepan. Bring to the boil, then reduce the heat and simmer gently for 30 minutes. Remove from the heat and allow to cool slightly. Strain the mixture through a fine sieve or muslin cloth, pressing the berries to extract as much liquid as possible.
Juice the fresh ingredients:
- Run the oranges, lemon, apples, ginger, and turmeric (or ground turmeric) through your juicer.
Combine:
- Mix the strained elderberry liquid with the fresh juice. Stir in a generous pinch of black pepper while still slightly warm so the flavours meld and the turmeric is activated.
Store and serve:
- Pour the immunity juice into airtight glass bottles or jars. Keep in the fridge for up to 4 days. Shake well before serving. Enjoy chilled, or gently warmed for a soothing tonic.
Notes
Recipe Notes
- Elderberries should always be cooked before use, as raw berries may cause stomach upset. The simmering step in this recipe ensures they are safe to enjoy.
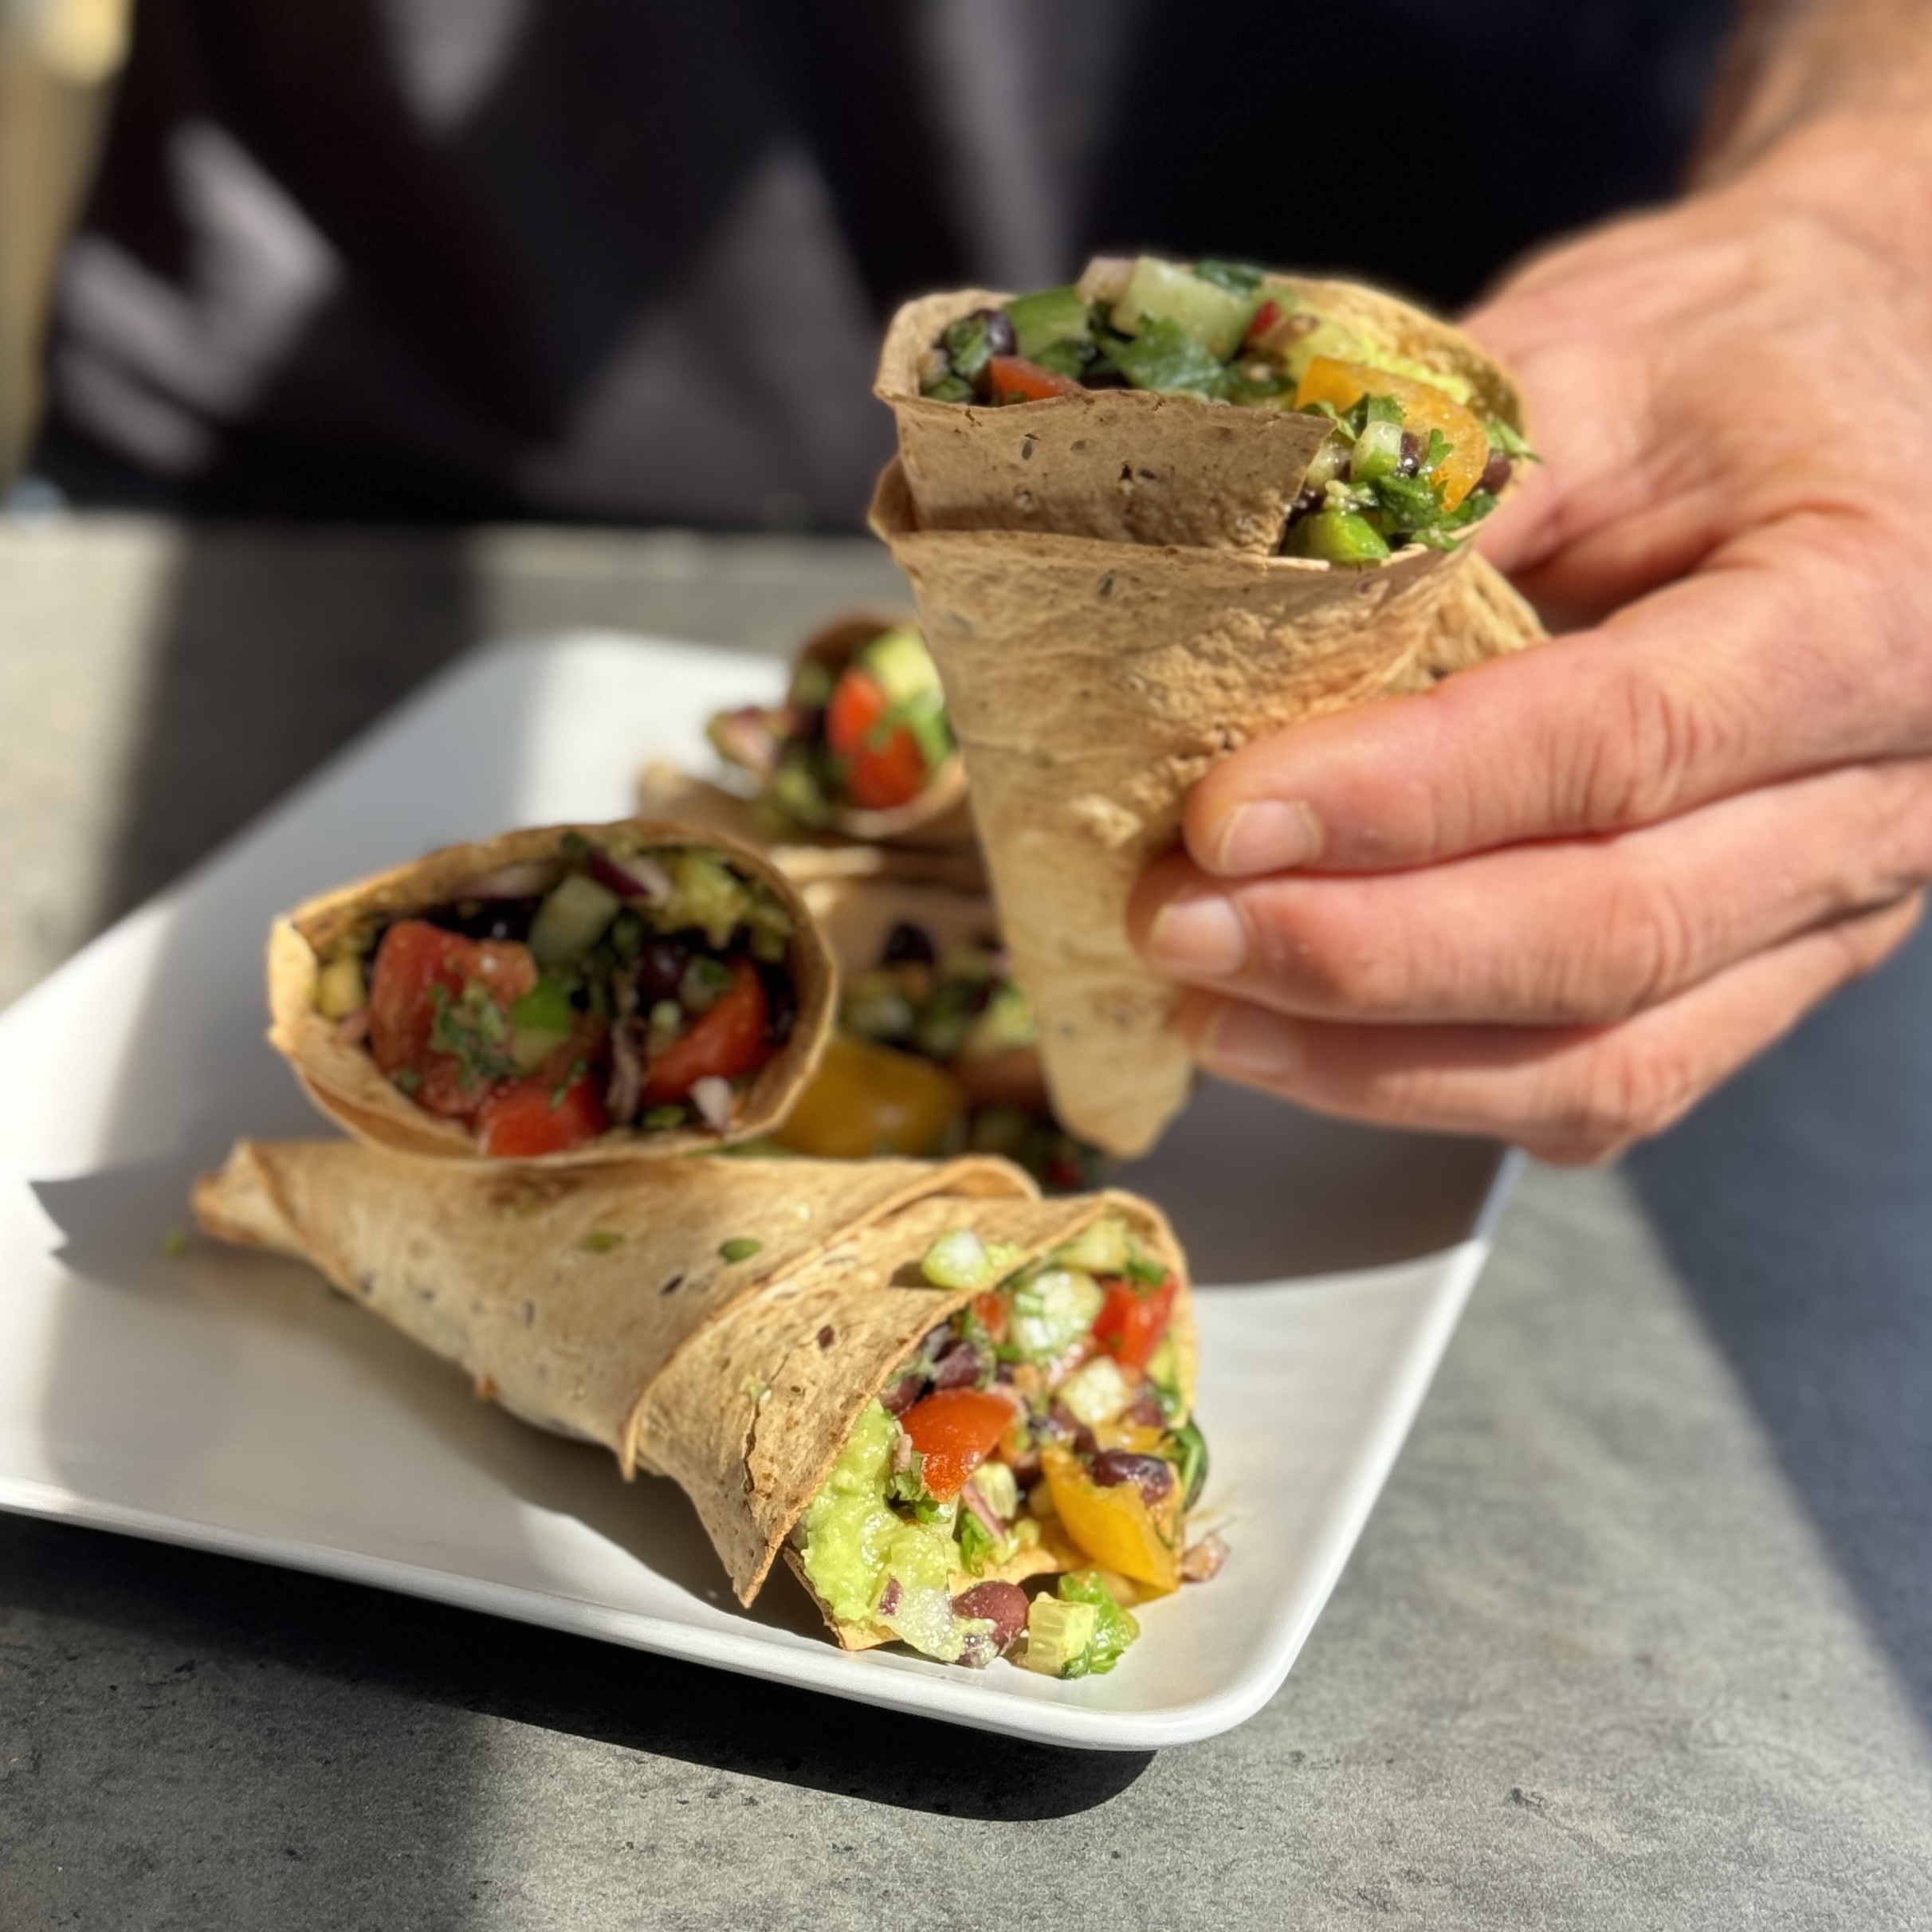
Burrito Cones
Takes 30 minutes
Serves 4
Ingredients
For the tortilla cones:
- 4 wholewheat burrito wraps or large tortillas
- Spray oil or a little olive oil
- Wooden toothpicks
For the guacamole:
- 2 ripe avocados
- 1 large tomato finely diced
- ½ red onion finely chopped
- ½ tsp garlic powder or 1 small clove garlic minced
- Juice of 1 lime
- ½ tsp sea salt
For the refried beans:
- 1 x 400g tin kidney beans drained and rinsed
- 1 tbsp tamari or soy sauce
- ½ tsp sea salt
- 1 tsp ground cumin
- 1 tbsp ground coriander
For the fresh salsa:
- 1 large tomato finely diced
- ½ red onion finely chopped
- 50 g fresh coriander chopped
- Juice of ½ lime
- Pinch of salt
Instructions
Make the tortilla cones:
- Preheat the oven to 200°C (392°F).
- Cut each tortilla in half to make 8 semi-circles.
- Roll each half into a cone shape with a pointed bottom and open top. Overlap the edges slightly and secure the seam with a wooden toothpick.
- Place seam-side down on a baking tray and lightly brush or spray with oil.
- Bake for 10–12 minutes, or until golden and crisp. Let cool slightly and remove toothpicks.
Prepare the guacamole:
- In a bowl, mash 2 avocados.
- Mix in the diced tomato, chopped red onion, garlic (powder or fresh), lime juice, and salt.
- Stir until creamy with some texture remaining.
Make the refried beans:
- In a pan over medium heat, combine kidney beans, tamari, salt, cumin, and ground coriander.
- Mash with a fork or potato masher while heating until thick and spreadable.
- Cook for 3–4 minutes, stirring occasionally, then remove from heat.
Mix the salsa:
- Combine diced tomato, chopped red onion, chopped coriander, lime juice, and a pinch of salt in a bowl. Mix well.
Assemble the cones:
- Spoon refried beans into the bottom of each tortilla cone.
- Add a layer of guacamole.
- Top with a spoonful of salsa.
- Serve immediately while the cones are still crisp!
Tips
- If making ahead, keep the cones and fillings separate and assemble just before serving.
- Add pickled jalapeños, shredded lettuce, or hot sauce for extra flair.
- These also work great with a smoky black bean filling or rice for a more filling cone.
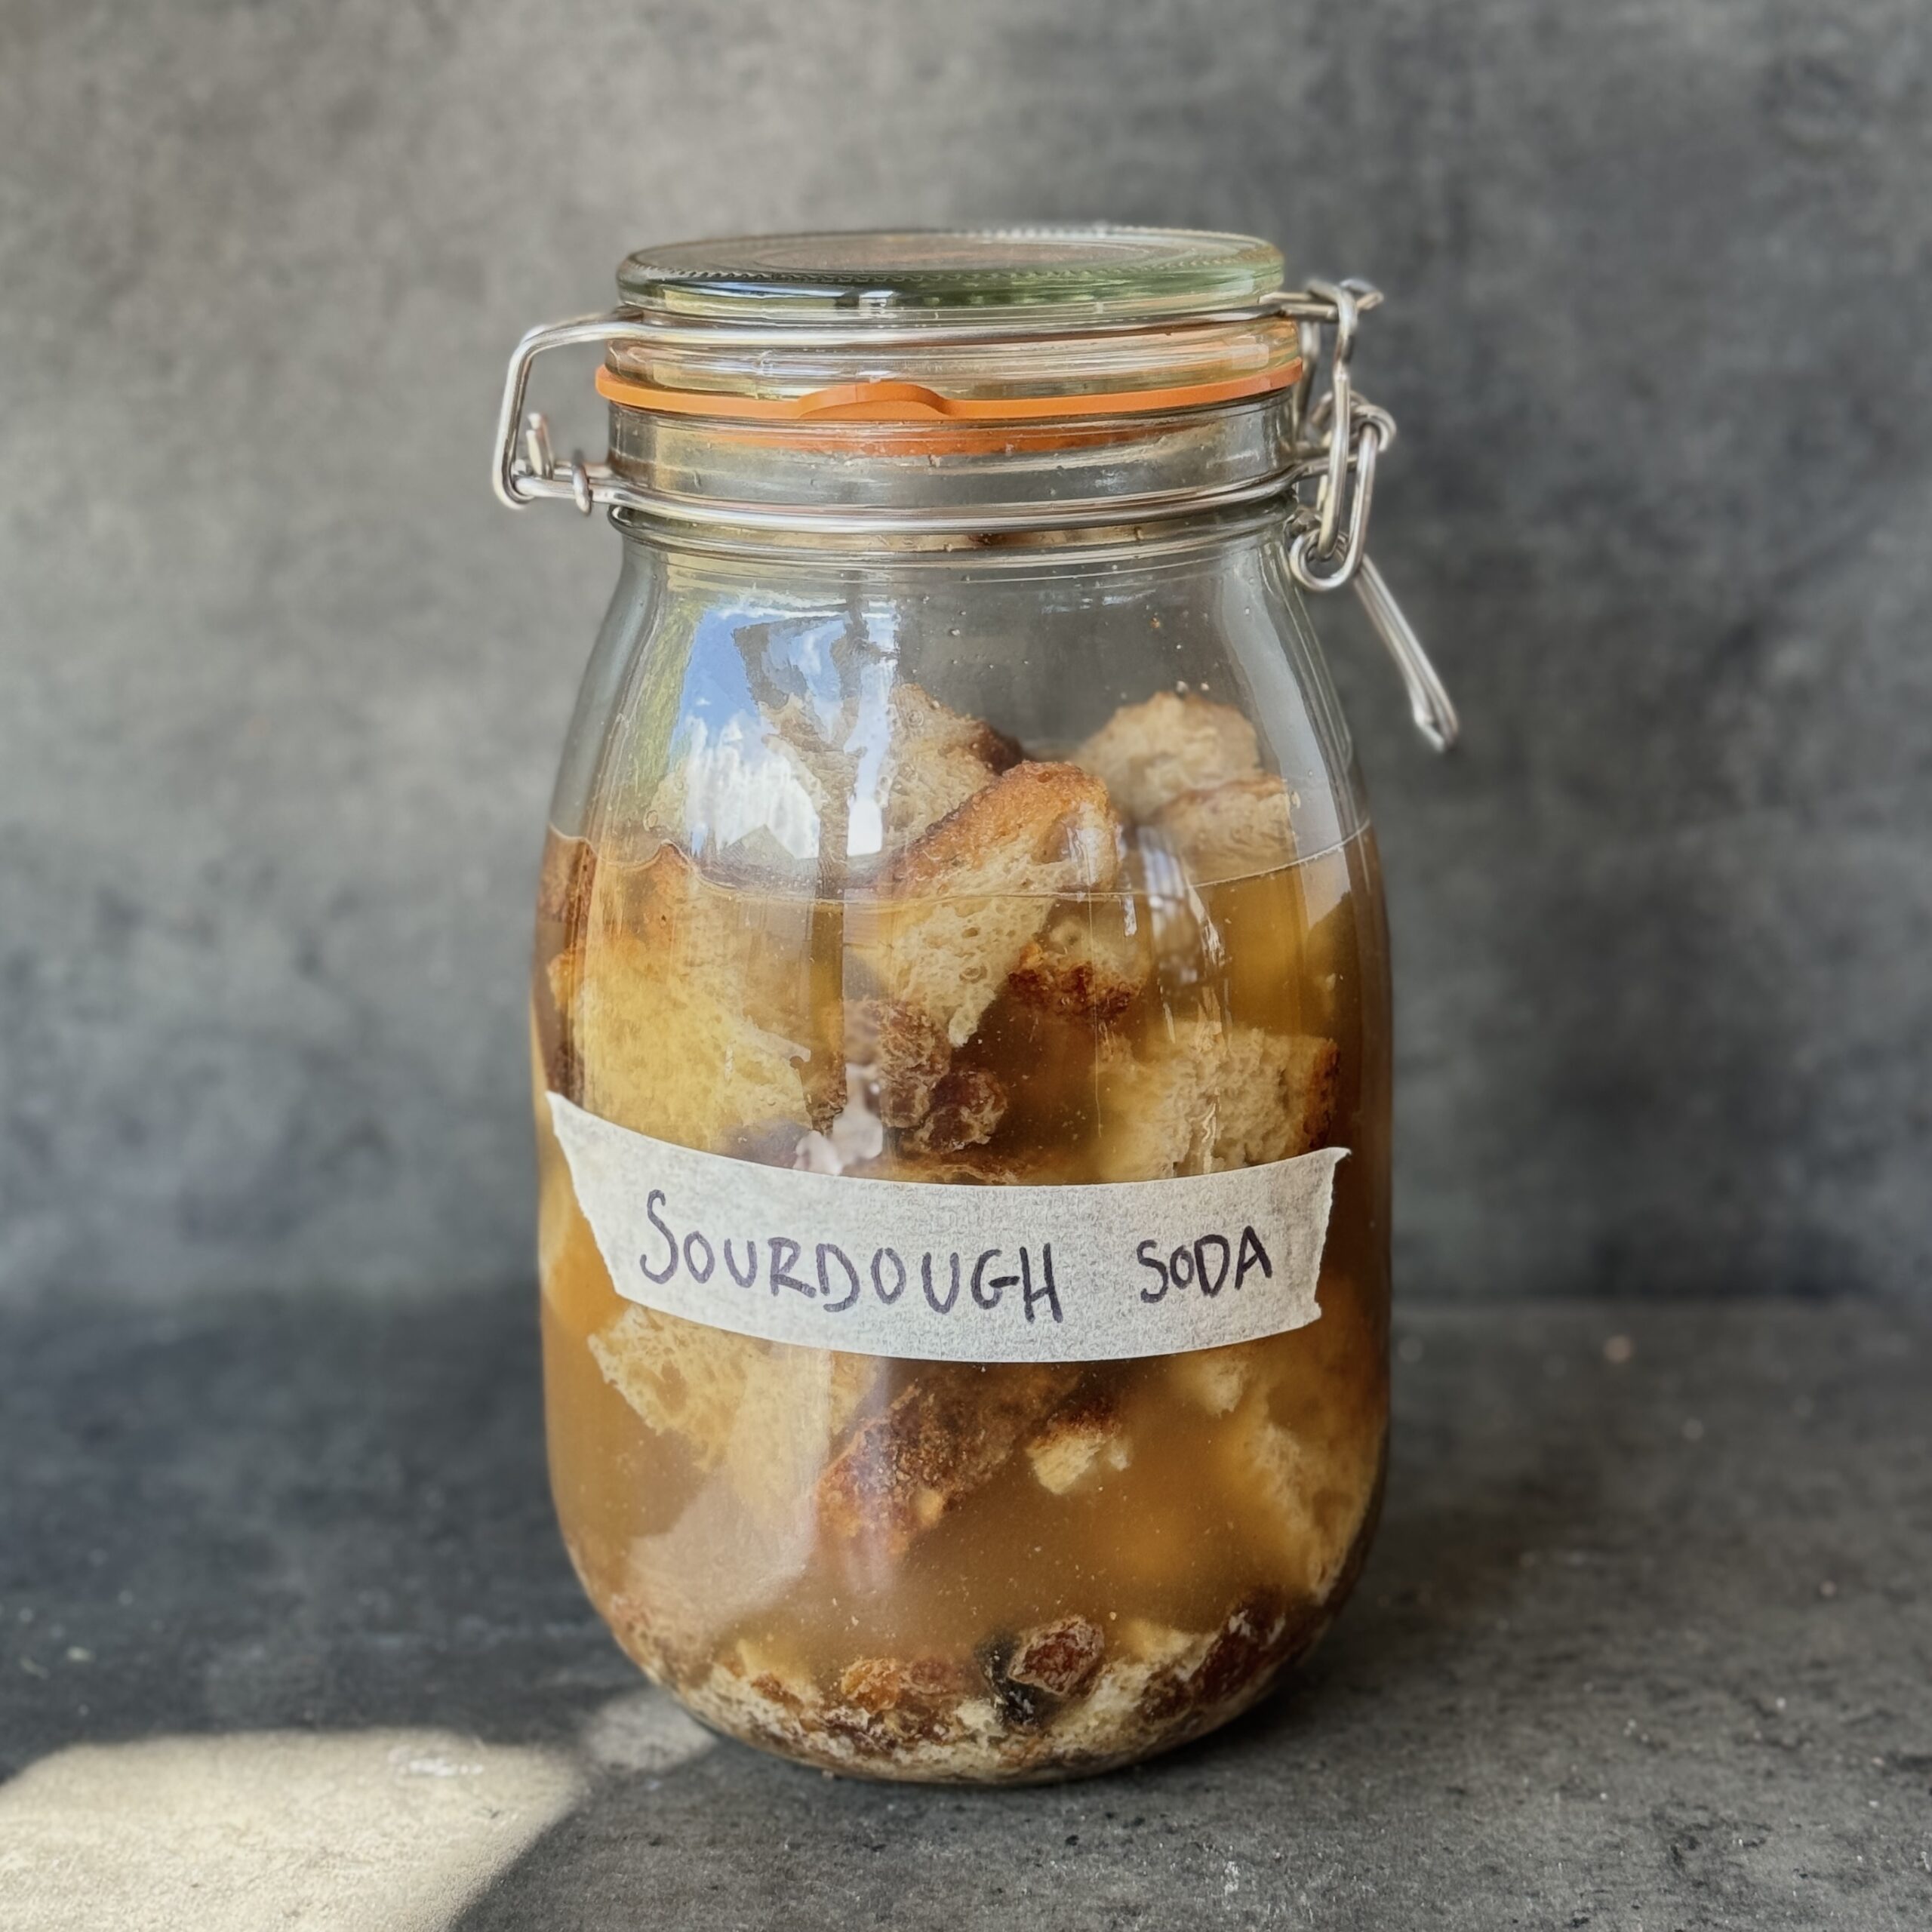
Sourdough Soda with Cinnamon & Raisin
Takes 3 days
Serves 4
Ingredients
- 5 slices stale sourdough bread approx 200g
- 75 g raisins about ½ cup
- 1 litre water 4 cups
- 50 g coconut or brown sugar ¼ cup, packed
- 250 ml water 1 cup, for topping up later
- 1 tbsp coconut or brown sugar for topping up later
Instructions
- Toast the sourdough and tear into pieces and pop them into a large clean jar or jug. Add the raisins, 1 litre water, and the 50g of brown sugar. Stir well so the sugar dissolves.
- Cover loosely with a cloth and leave it out at room temperature for 1–2 days. You’ll start to see little bubbles and smell a tang as it begins to ferment.
- Strain the liquid through a fine sieve or muslin into a large bowl and then using a funnel pour into a clean 750ml swing top bottle, add in any extra water until the bottle is almost full along with 1 tablespoon sugar.
- Seal the jar or bottle and leave it at room temperature for another 2–3 days until it’s nice and fizzy. You will need to burp it each day which simply means opening the bottle and closing it, this simply prevents the build up of carbon too much. Keep an eye on it and once it’s bubbly enough for you and you are happy with the taste, store in the fridge to stop fermentation..
- Enjoy cold.
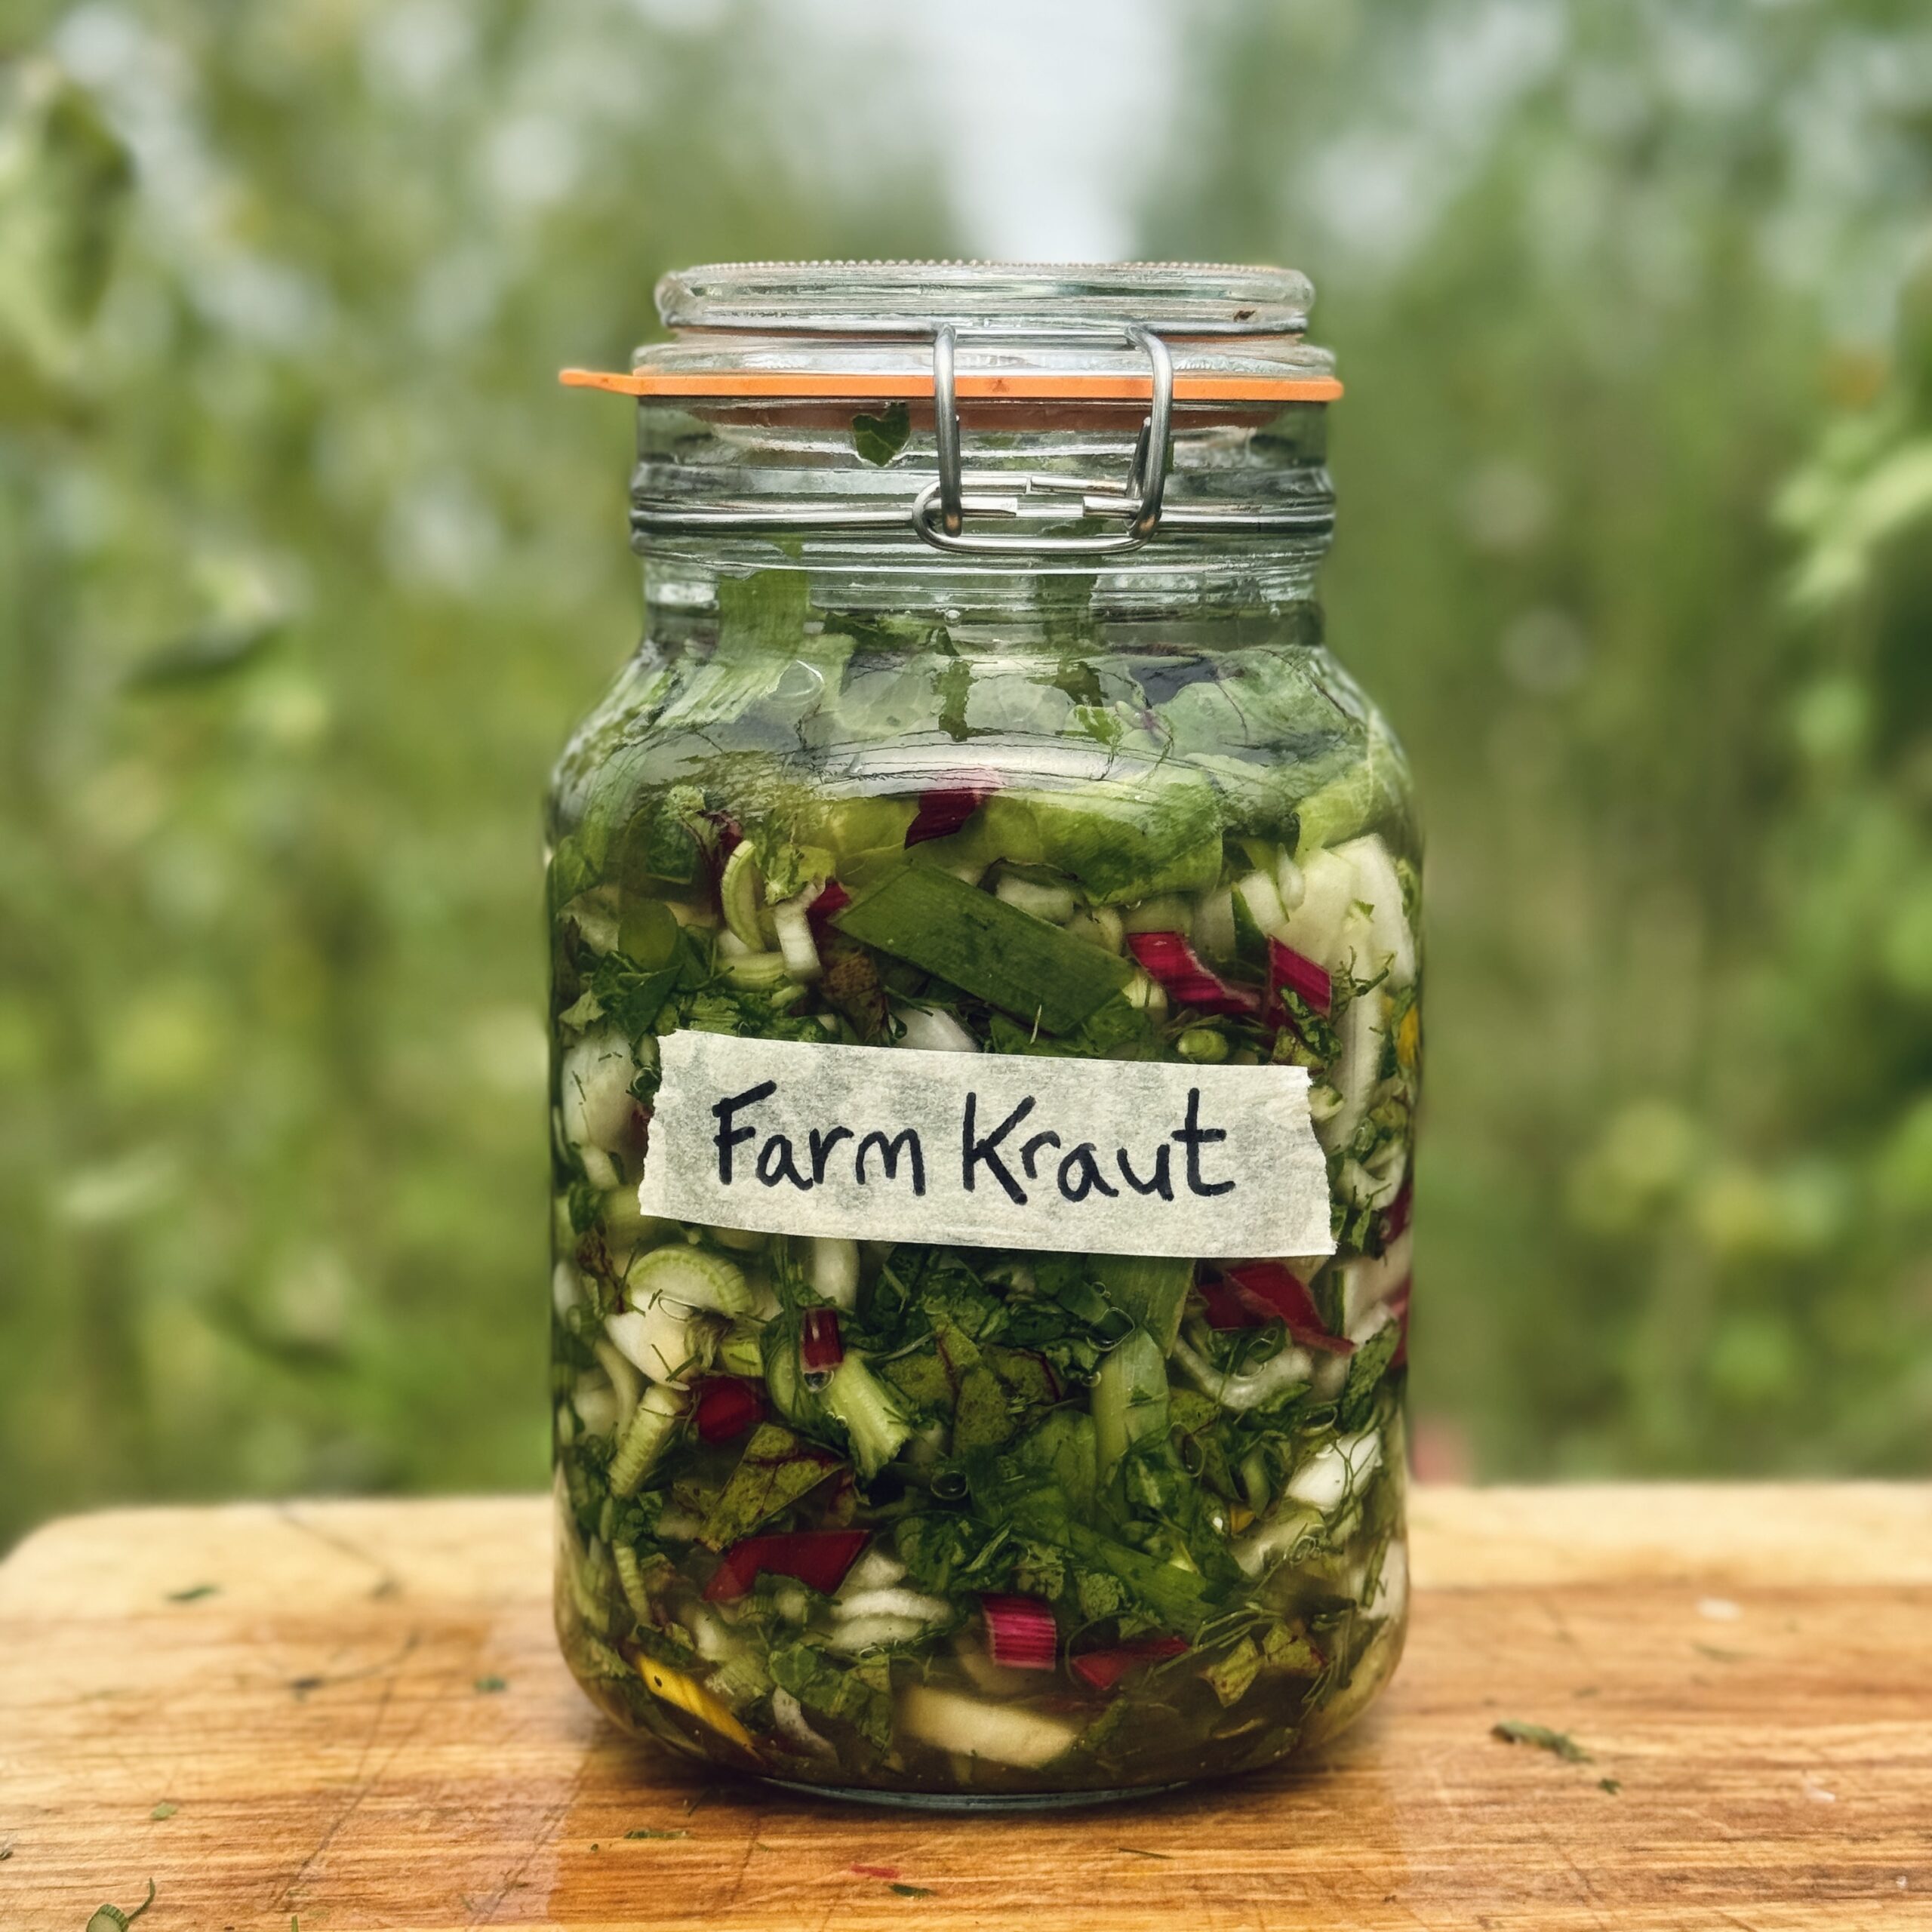
Summer Farm Kraut
Takes 10 days 15 minutes
Serves 10
Ingredients
- 2 heads of pak choi
- 2 heads of fennel
- Fronds from the fennel heads
- A few chard leaves
- 4 scallions green onions
- Sea salt 2% of total prepared vegetable weight
- Water to top up
Instructions
Prepare the vegetables:
- Clean all the vegetables thoroughly. Chop the pak choi, fennel, fennel fronds, chard leaves, and scallions into bite-sized pieces.
Weigh and salt:
- Weigh the prepared vegetables. Calculate 2% of this weight—for example, if you have 900g of veg, add 18g of sea salt. Sprinkle the salt over the veg and mix thoroughly using clean hands, gently massaging to start drawing out liquid.
Pack into jars:
- Tightly pack the salted veg into one large fermentation jar or a few smaller jars. Press down firmly as you go to remove air pockets and help release more brine.
Submerge and weigh down:
- Top up with water so the veg is fully submerged. Place a fermentation weight or clean object (like a smaller jar or cabbage leaf) on top to keep everything below the surface. This is anaerobic fermentation, so keeping the vegetables under the liquid is essential to avoid mould.
Seal and ferment:
- Close the jar loosely with a lid (or use a fermentation airlock) and leave at room temperature for 2–3 weeks. Check every few days to ensure everything stays submerged.
Taste and store:
- Begin tasting after 2 weeks. It should be pleasantly acidic, lightly salty, and still have a bit of crunch. If it’s not tangy enough, leave it for another few days. Once you’re happy with the flavour, move the jar to the fridge to slow fermentation. It will keep for several months chilled.
Notes
- Use clean utensils and hands to reduce the risk of contamination.
- Serve with salads, grain bowls, or as a vibrant side to almost any meal.
The Happy Pear Podcast
This week, we chat with the one and only Jason Vale, also known as The Juice Master. Jason is a best-selling author, filmmaker, and juicing pioneer who transformed his life by turning to fresh juices after years of struggling with his health.

Episode 183
Having overcome obesity, smoking, and chronic skin conditions, he has since dedicated his life to helping millions reclaim their health through the power of juicing. Together, they explore the myths and misconceptions around juicing, the science behind its benefits, and how small, sustainable habits can create big shifts in our energy, mood, and overall wellbeing. Whether you’re new to juicing or a seasoned blender, Jason’s practical wisdom, contagious energy, and straight-talking approach will leave you feeling motivated and empowered to take charge of your health
Dave & Steve
Lots of love,
SPONSORS & DISCOUNT CODES:
Cuisinart – the partner we have dreamed of! Cuisinart has been cooking up reliable kitchen gear for over 50 years – helping to make mealtimes easier and more enjoyable! Check out the following link for more details.
LINK: https://www.cuisinart.co.uk/New-Cuisinart-Ambassadors-The-Happy-Pear.html
Namawell Juicers are AMAZING! They have absolutely revolutionised the juicing game. We have an exclusive 10% discount for you!
Enter the code HAPPYPEAR10
LINK: https://namawell.com/collections/juicers/products/nama-j2-cold-press-juicer?ref=thehappypear
THE WHOLE HEALTH TRIBE – Join our community
LINK: https://eu1.hubs.ly/H0bmqxd0
THE HAPPY PEAR RECIPE CLUB – Blending health and happiness through a range of over 500 delicious plant-based recipes.
LINK: https://eu1.hubs.ly/H0bmqss0
Sign up to our Newsletter, for updates on our latest recipes, events, and news.
LINK: https://share-eu1.hsforms.com/1hKXaawjoQOONmJe4EXkCdwf92py
Produced by Sean Cahill & Sara Fawsitt
Available now from all good podcast providers:


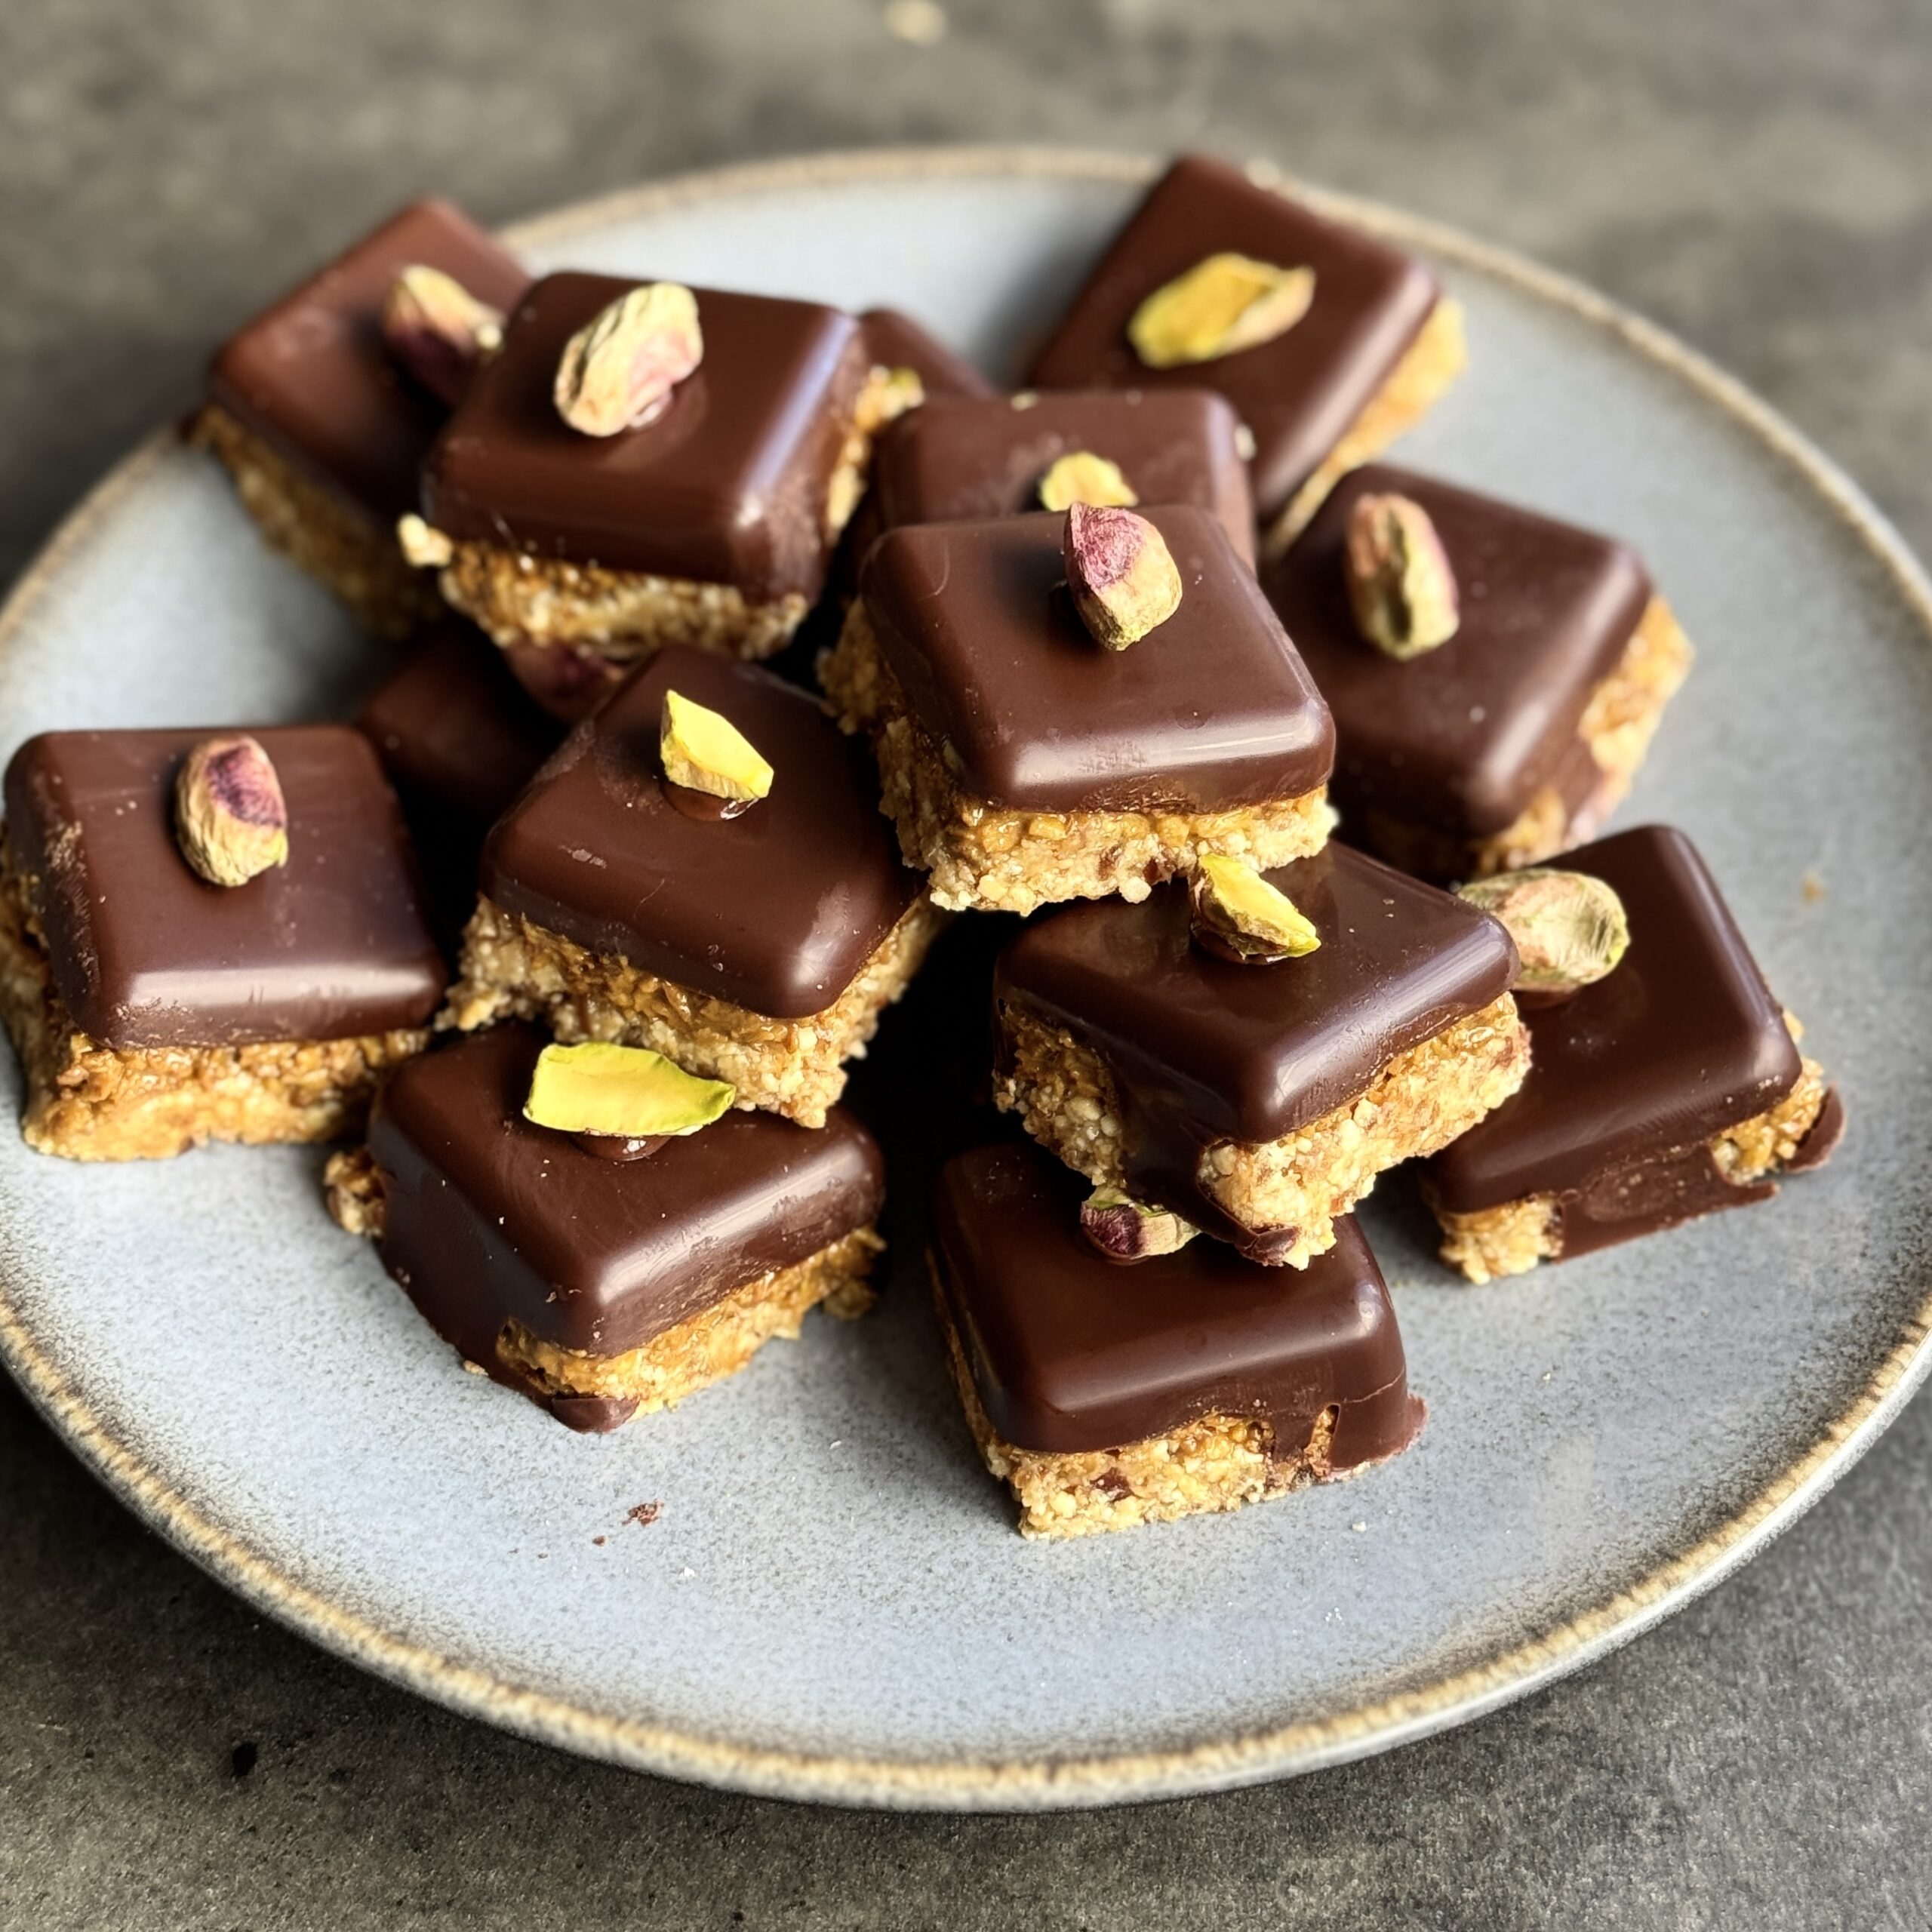
Dubai-Style Chocolate Pistachio Squares
Takes 15 minutes
Serves 24
Ingredients
Base & chocolate layer:
- 200 g dark chocolate for the base
- 100 g cashew nuts or nut of choice
- 100 g pitted dates
- 2 tbsp coconut oil
- Pinch of sea salt
Dubai pistachio layer:
- 4 tbsp pistachio butter or 100g of pistachios blended till smooth
- 2 tbsp toasted desiccated coconut
- Optional: ½ tsp maple syrup or pinch of cardamom for extra flair
Top chocolate coating:
- 60 g dark chocolate for final layer
- Optional garnish: crushed pistachios
Equipment:
- Silicone mould tray 24 squares, approx. 2.5cm x 2.5cm x 1cm deep
Instructions
Melt the base chocolate and create the shells:
- Finely chop 200g dark chocolate and melt it using a bain marie or microwave.
- Spoon chocolate into each cavity of the silicone mould, filling about ⅓ of the way.
- Use the back of a small spoon to brush chocolate up the sides to form little cups.
- Place in the freezer for 15 minutes to harden.
Prepare the Dubai pistachio filling:
- In a bowl, mix 4 tbsp pistachio butter with 2 tbsp toasted desiccated coconut until well combined.
- (Optional: stir in ½ tsp maple syrup or a pinch of ground cardamom for extra depth.)
Add the pistachio layer:
- Once the chocolate base is set, spoon a small amount of the pistachio mixture into each mould, filling until about ⅔ full. Smooth the tops gently with the back of a spoon.
Make the nut-date base layer:
- In a food processor, pulse 100g mixed nuts until they resemble coarse breadcrumbs.
- Add 100g pitted dates, 2 tbsp coconut oil, and a pinch of salt. Blend for 2–3 minutes until the mixture sticks together when pressed.
Start with the chocolate
- Divide the nut-date mixture evenly among the moulds, pressing it down firmly as the top layer of each square. Chill in the fridge for 20–30 minutes or until completely set.
- Remove and enjoy!
To store:
- Keep in an airtight container in the fridge for up to 2 weeks. Best served slightly chilled.
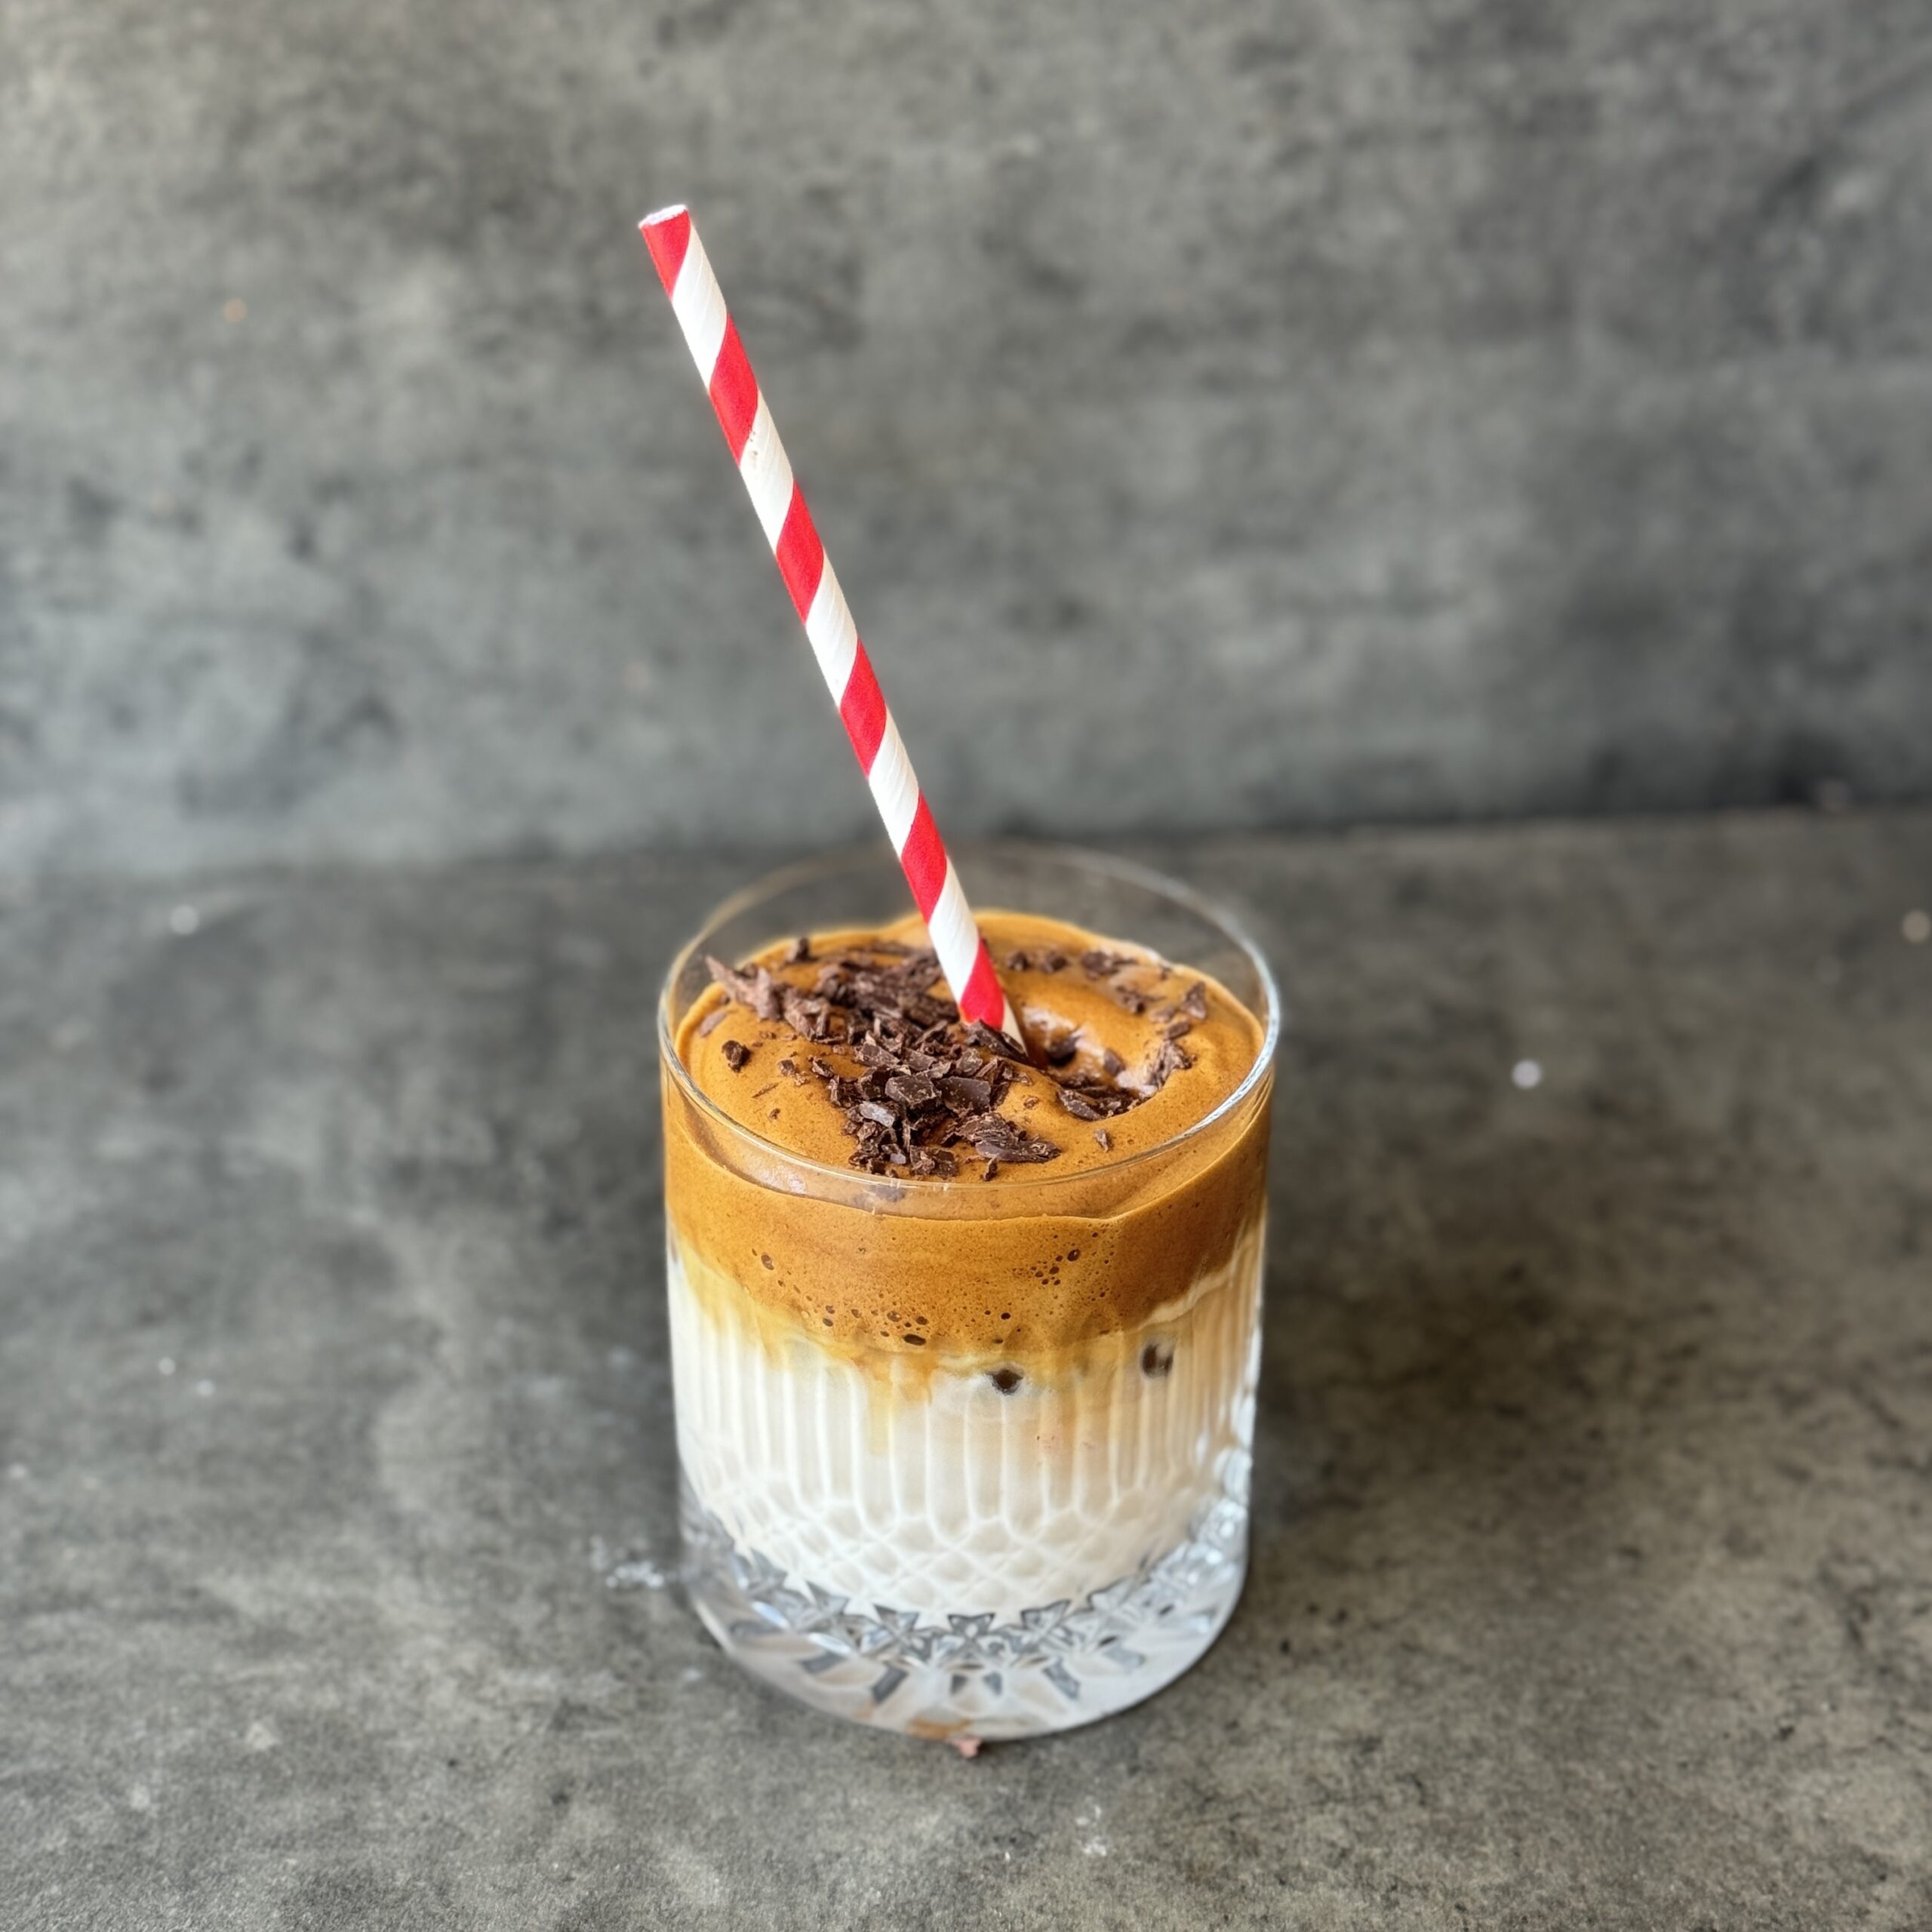
Whipped Coffee with Maple Syrup (Dalgona-style)
Takes 5 minutes
Serves 1
Ingredients
- 2 tsp instant coffee
- 2 tsp maple syrup
- 2 tbsp boiling water
- Ice cubes
- 200 ml ¾ cup + 1 tbsp oat milk (or milk of choice)
Instructions
Make the whipped coffee:
- In a small bowl or glass, combine 2 tsp instant coffee, 2 tsp maple syrup, and 2 tbsp boiling water. Whip using a handheld milk frother or whisk vigorously by hand for 2–3 minutes until light and frothy. (You can also use a small electric whisk.)
Prepare your glass:
- Fill a serving glass with ice cubes and pour over 200ml oat milk.
Top and serve:
- Spoon the whipped coffee over the oat milk. Stir gently before drinking, or sip as-is for a layered effect.
Optional Additions
- A pinch of cinnamon or cacao powder in the whip
- A drop of vanilla extract for extra depth
- Swap oat milk for almond, coconut, or soy if preferred
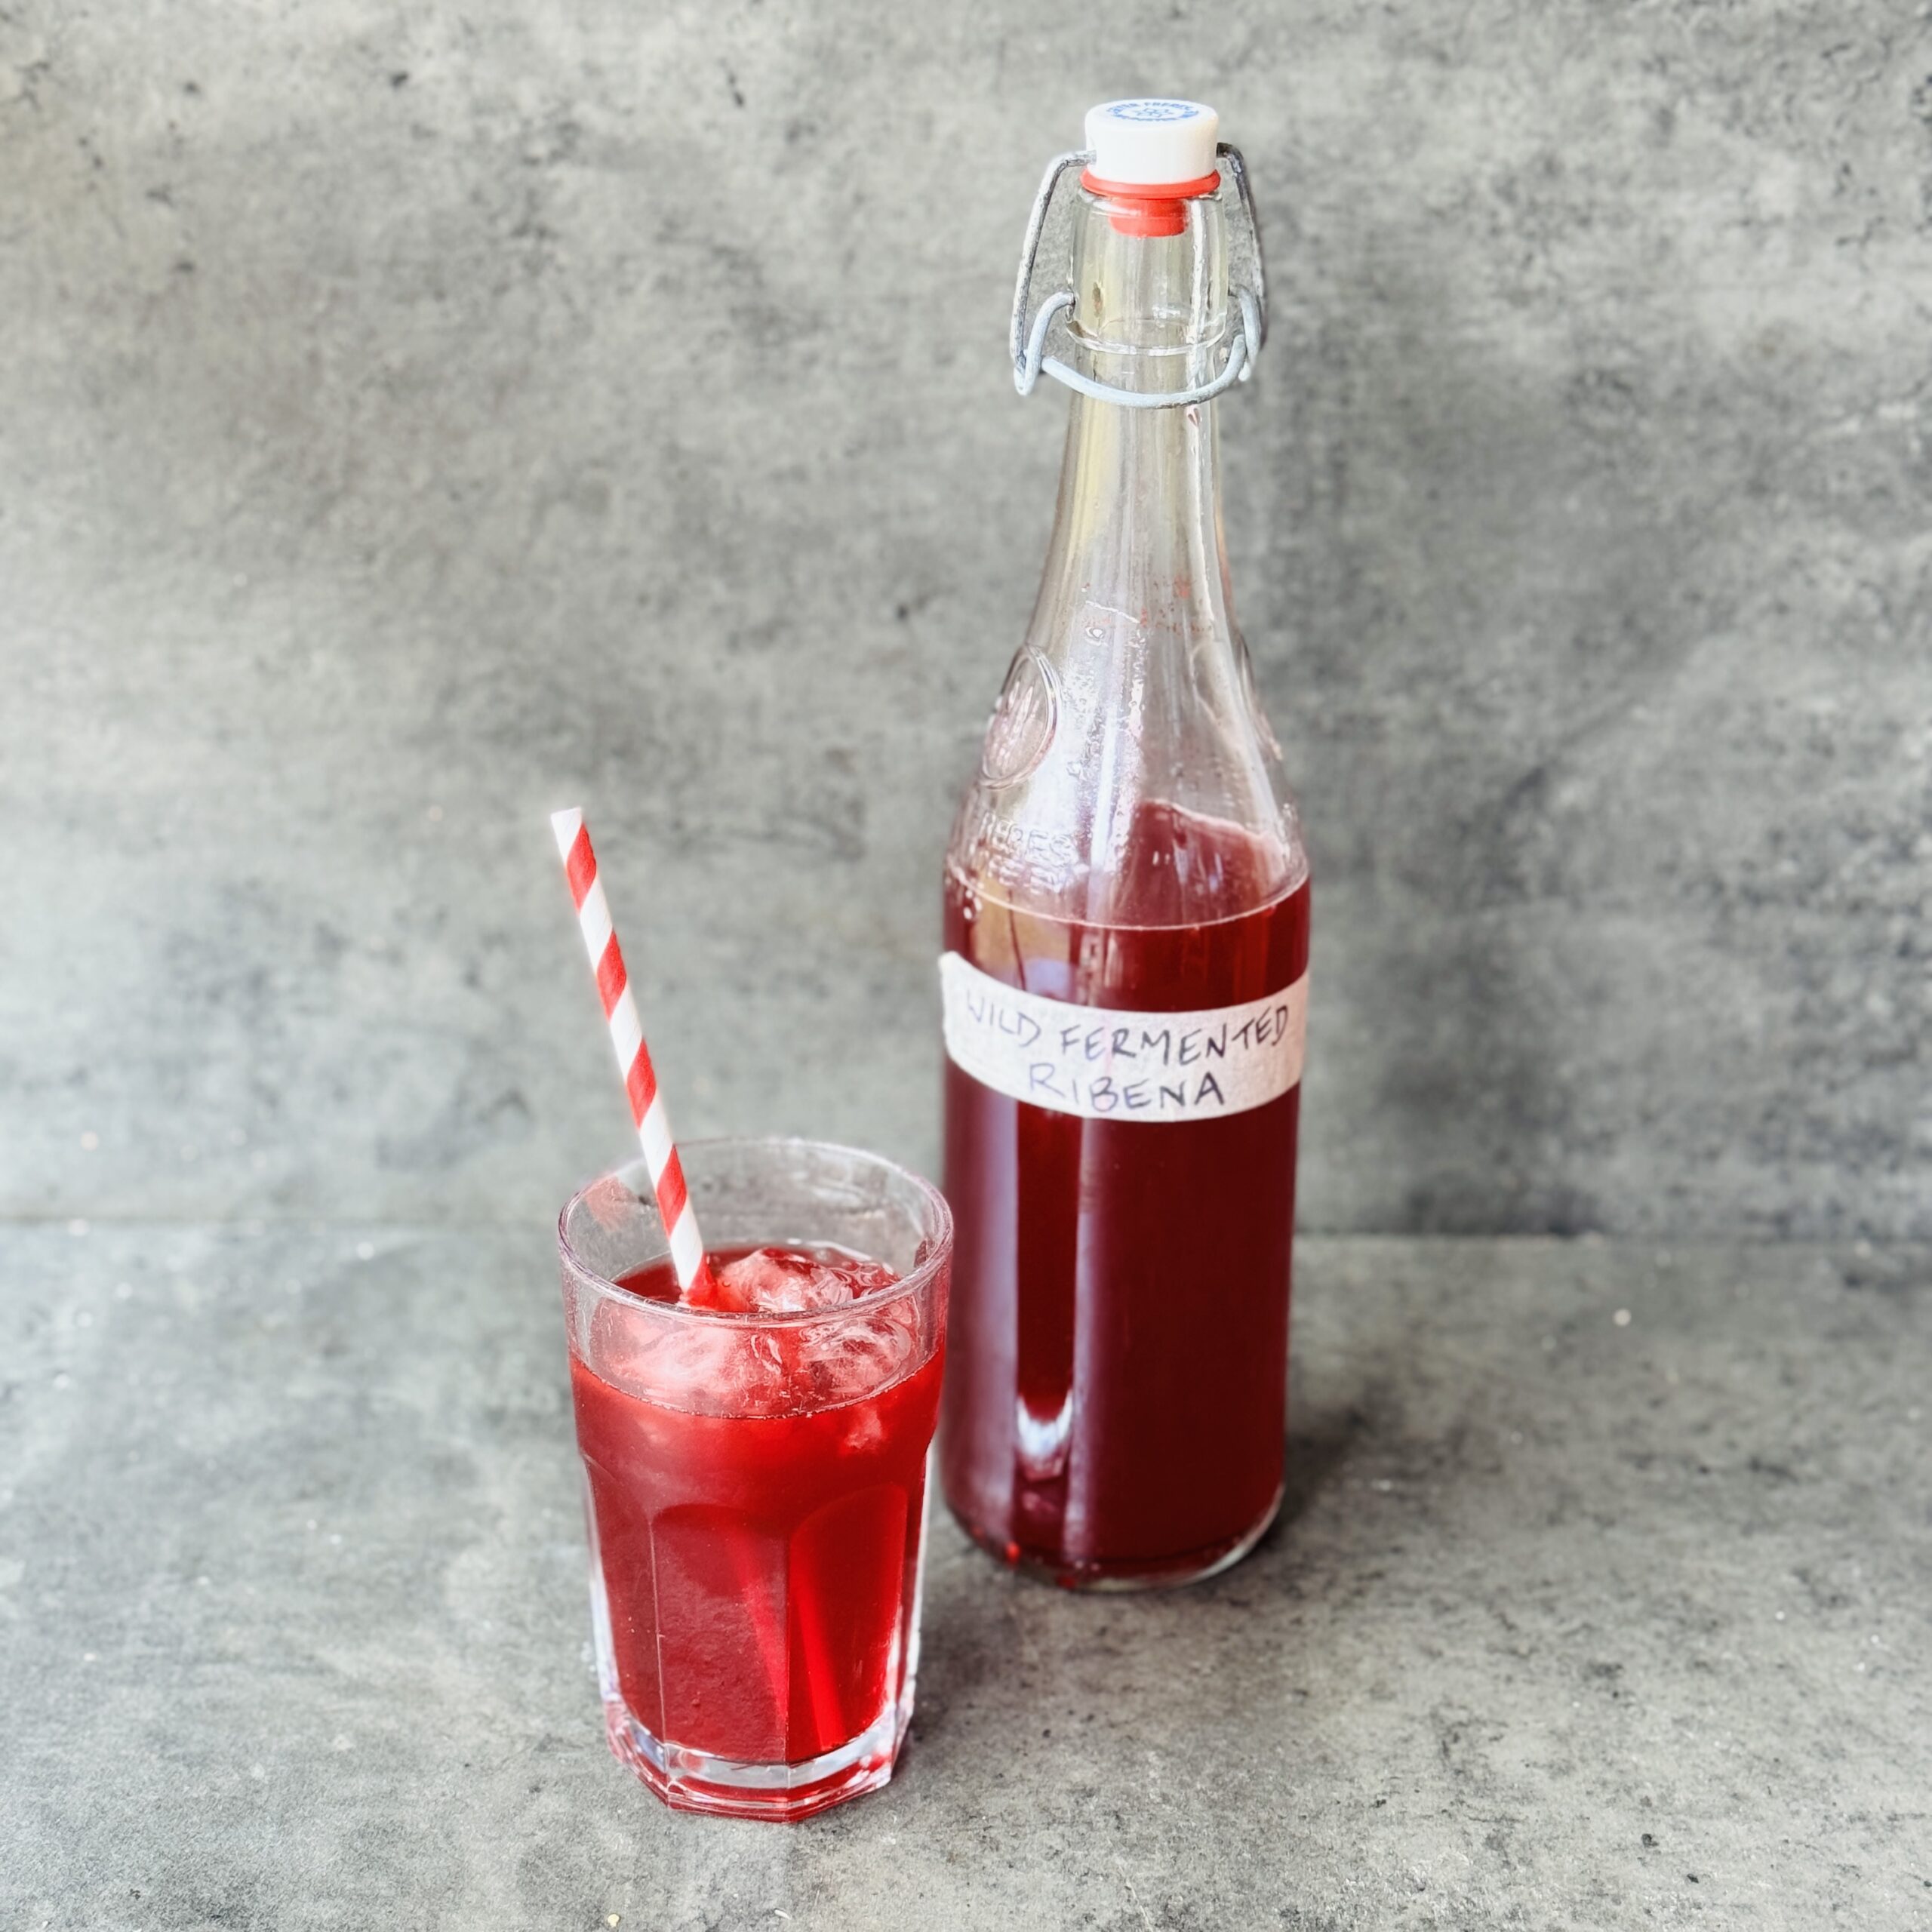
Wild Fermented Ribena
Takes 5 days 10 minutes
Serves 8
Ingredients
- 200 g wild blackberries or elderberries about 1½ cups
- 200 g caster sugar 1 cup
- 2 litres water 8 cups
- 3 apples unwashed, organic if possible (about 600g total)
- 1 lemon unwaxed (about 120g)
Instructions
Make the berry syrup
- In a saucepan, combine the 200g berries (1½ cups) and 200g sugar (1 cup) with 200ml water (¾ cup). Bring to a boil, then reduce to a simmer for 5 minutes, stirring occasionally.
Cool and strain
- Remove from the heat and pass the mixture through a sieve into a jug, pressing the berries to extract as much liquid as possible. Allow the syrup to cool until just below body temperature.
Combine and ferment
- In a clean 3-litre jar, pour in 2 litres water (8 cups) and stir in the cooled berry syrup. Roughly chop the 3 apples (skins on) and the lemon, then add them to the jar.
Cover and bulk ferment
- Cover loosely with a lid or cloth and leave at room temperature for 1–2 days to ferment. You’ll start to see small bubbles form.
Bottle for secondary fermentation
- Strain out the apple and lemon pieces, then funnel the liquid into clean swing-top bottles, leaving about 3cm headspace at the top.
Carbonate and chill
- Leave the bottles at room temperature for 1–3 more days until fizzy. Once carbonated to your liking, refrigerate to slow further fermentation.
Notes
Tips
- Open bottles slowly to release pressure—natural fermentation can build up a lot of fizz.
- Store in the fridge and consume within 1–2 weeks for best taste and fizz.
- Always use clean bottles and equipment to avoid unwanted bacteria.
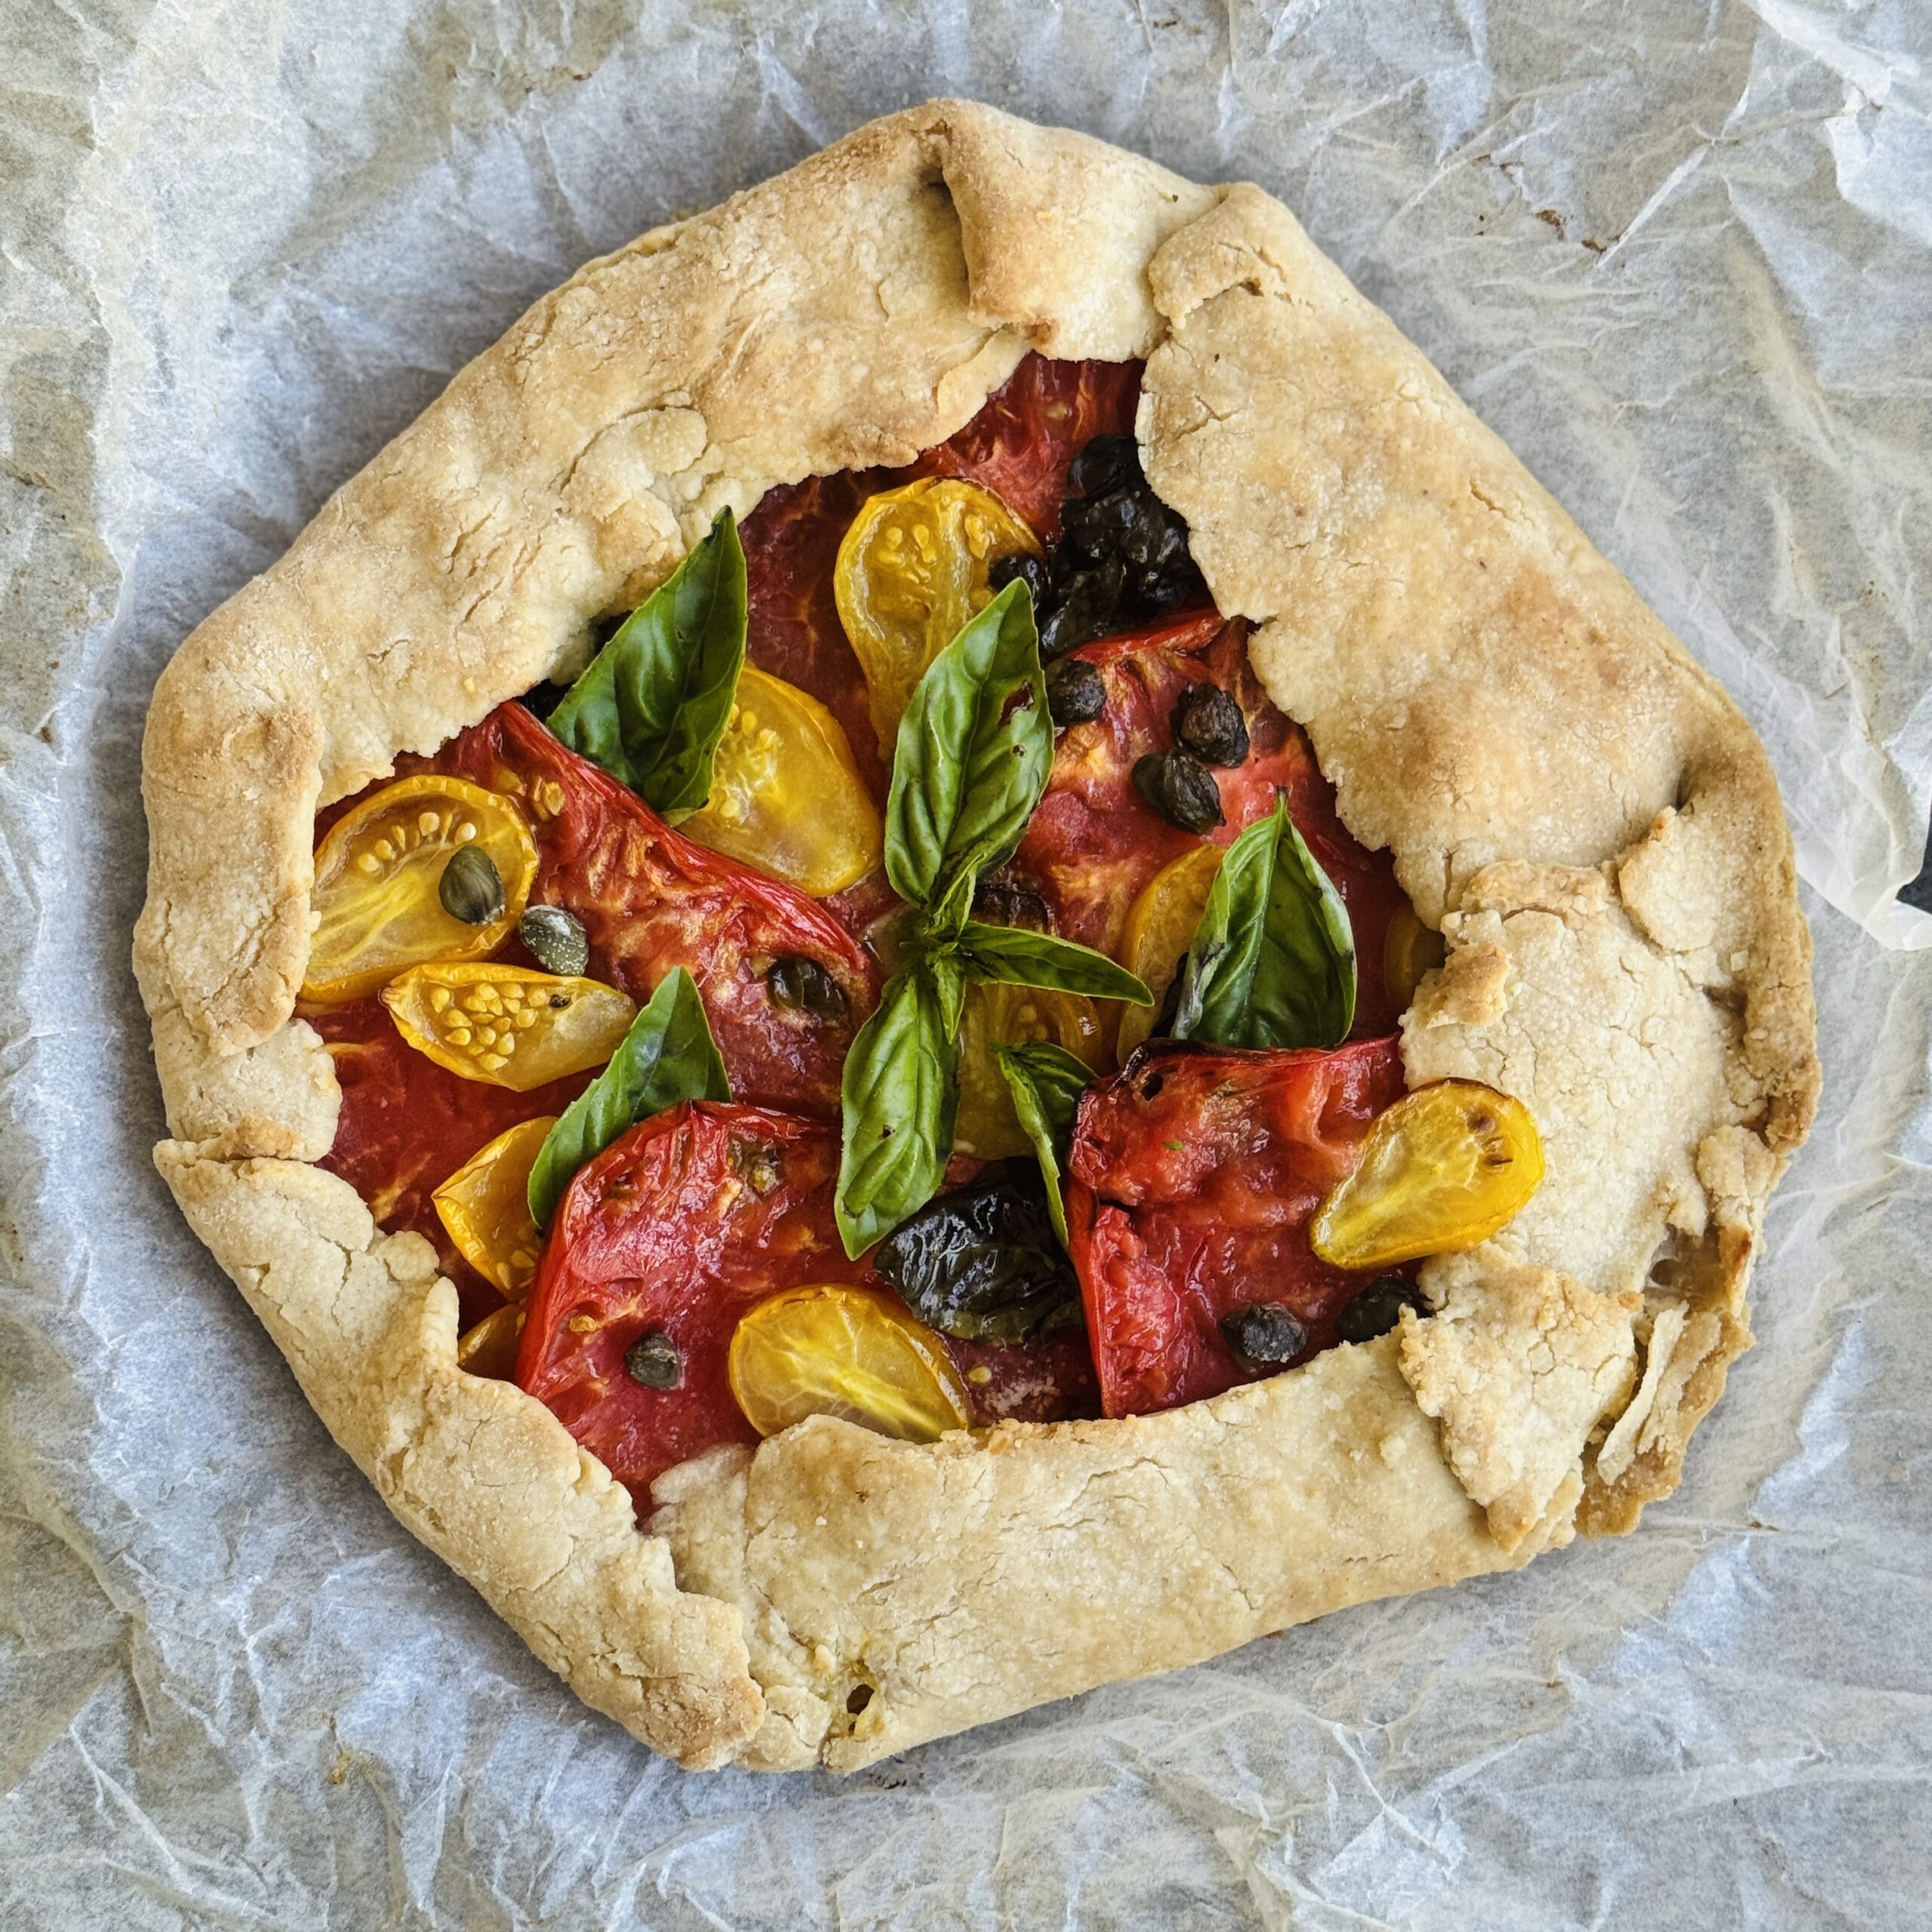
Summer Heirloom Tomato & Basil Galette
Takes 1 hour 15 minutes
Serves 6
Ingredients
For the shortcrust pastry:
- 200 g 7 oz plain flour
- 100 g 3.5 oz vegan butter or cold coconut oil
- 2 –4 tbsp cold water
- ½ tsp sea salt
For the herby cashew cream:
- 100 g 3.5 oz raw cashews (soaked in hot water for 10 mins)
- 1 tbsp lemon juice
- ½ tsp of garlic powder or 1 clove of fresh garlic
- 1 tbsp nutritional yeast
- 2 tbsp water adjust for consistency
- 1 tbsp chopped fresh basil or parsley
- Pinch of salt
For the tomato filling:
- 4 –5 heirloom tomatoes mixed colours and sizes, sliced into rounds
- 1 –2 tsp sea salt for pre-salting tomatoes
- Freshly ground black pepper
- Optional: 1 tbsp capers
- Handful of fresh basil leaves to bake and more to garnish
To garnish:
- Balsamic glaze for drizzling
- Extra basil leaves
- Optional: crushed black pepper or a few chilli flakes
To serve:
- Handful of fresh rocket arugula
- Drizzle of olive oil and squeeze of lemon juice
Instructions
Prepare the pastry:
- In a large bowl, rub 100g vegan butter into 200g plain flour and ½ tsp salt until it resembles breadcrumbs. Add 2–4 tbsp cold water, one spoon at a time, mixing gently until a dough forms. Wrap and chill for 15–20 minutes.
Pre-salt the tomatoes:
- Slice the heirloom tomatoes and lay them on a plate. Sprinkle with 1–2 tsp sea salt and leave for 10–15 minutes to draw out excess moisture. Pat dry with kitchen paper to avoid a soggy base.
Make the herby cashew cream:
- Drain the soaked cashews. Blend with lemon juice, garlic, nutritional yeast, 2 tbsp water, herbs, and salt until smooth and creamy. Add more water if needed for a spreadable consistency.
Roll out the dough:
- On a lightly floured surface, roll the pastry into a rough circle about 30cm (12 inches) wide. Transfer to a parchment-lined baking tray.
Assemble the galette:
- Spread the cashew cream over the centre of the dough, leaving a 4–5cm (2 inch) border. Layer the salted tomato slices over the cream. Tuck in a few basil leaves and optional capers. Season with black pepper.
Fold and bake:
- Fold the pastry edges up and over the tomatoes, pleating as you go. Brush edges with plant milk or olive oil for a golden crust. Bake at 190C (375F) for 45–50 minutes until the pastry is golden and the tomatoes are bubbling.
Finish and serve:
- Let cool for 5–10 minutes. Drizzle with balsamic glaze, top with fresh basil leaves, and optional chilli flakes. Serve warm or at room temperature with a generous handful of rocket tossed in olive oil and lemon juice.
Tips
- Use a mix of red, yellow, and green tomatoes for a beautiful colour contrast.
- Galette can be made ahead and served at room temperature for picnics or alfresco dining.
- If short on time, use store-bought shortcrust pastry.

Banoffee Pancakes (Beach Edition)
Takes 15 minutes
Serves 2
Ingredients
For the pancakes:
- 120 g 1 cup self-raising flour
- 210 ml ¾ cup + 1 tbsp oat milk or milk of choice
- ½ ripe banana
- ½ tsp vanilla extract
- Pinch of salt
- Spray oil for cooking
For the date caramel:
- 100 g about 6 soft dates (e.g. Medjool), pitted
- 50 g 3 tbsp almond or peanut butter
- 2 tbsp oat milk or water
- Pinch of sea salt
- Optional: ½ tsp vanilla extract or ground cinnamon
For the topping:
- 1 ripe banana sliced
- 1 tsp maple syrup or coconut sugar
- 4 tbsp coconut yoghurt
- 10 g about 2 tsp dark chocolate, chopped
- Optional: extra pinch of cinnamon for dusting
Instructions
Make the pancake batter in the blender
- Add the oat milk, ½ ripe banana, and vanilla extract to your blender. Blend until smooth. Add the flour and salt, then pulse just until combined—avoid over-blending. Leave to rest while you make the caramel.
Make the date caramel
- Without washing the blender, add the dates, nut butter, oat milk or water, sea salt, and optional vanilla or cinnamon. Blend until silky smooth. Scrape into a jar or container and set aside.
Cook the pancakes
- Heat a non-stick frying pan over medium heat and lightly spray with oil. Pour small rounds of batter into the pan (about 2 tbsp per pancake). Cook for 2–3 minutes per side, until golden and fluffy. Repeat until all batter is used.
Caramelise the banana slices
- Wipe out the pan, then return to medium heat with a little spray oil or 1 tsp coconut oil. Add the banana slices and drizzle with maple syrup or sprinkle with coconut sugar. Cook for 1–2 minutes per side until golden and sticky.
Assemble and serve
- Stack the pancakes, spreading a spoonful of date caramel between each layer. Top with the caramelised bananas, a dollop of coconut yoghurt, chopped dark chocolate, and a dusting of cinnamon if desired.
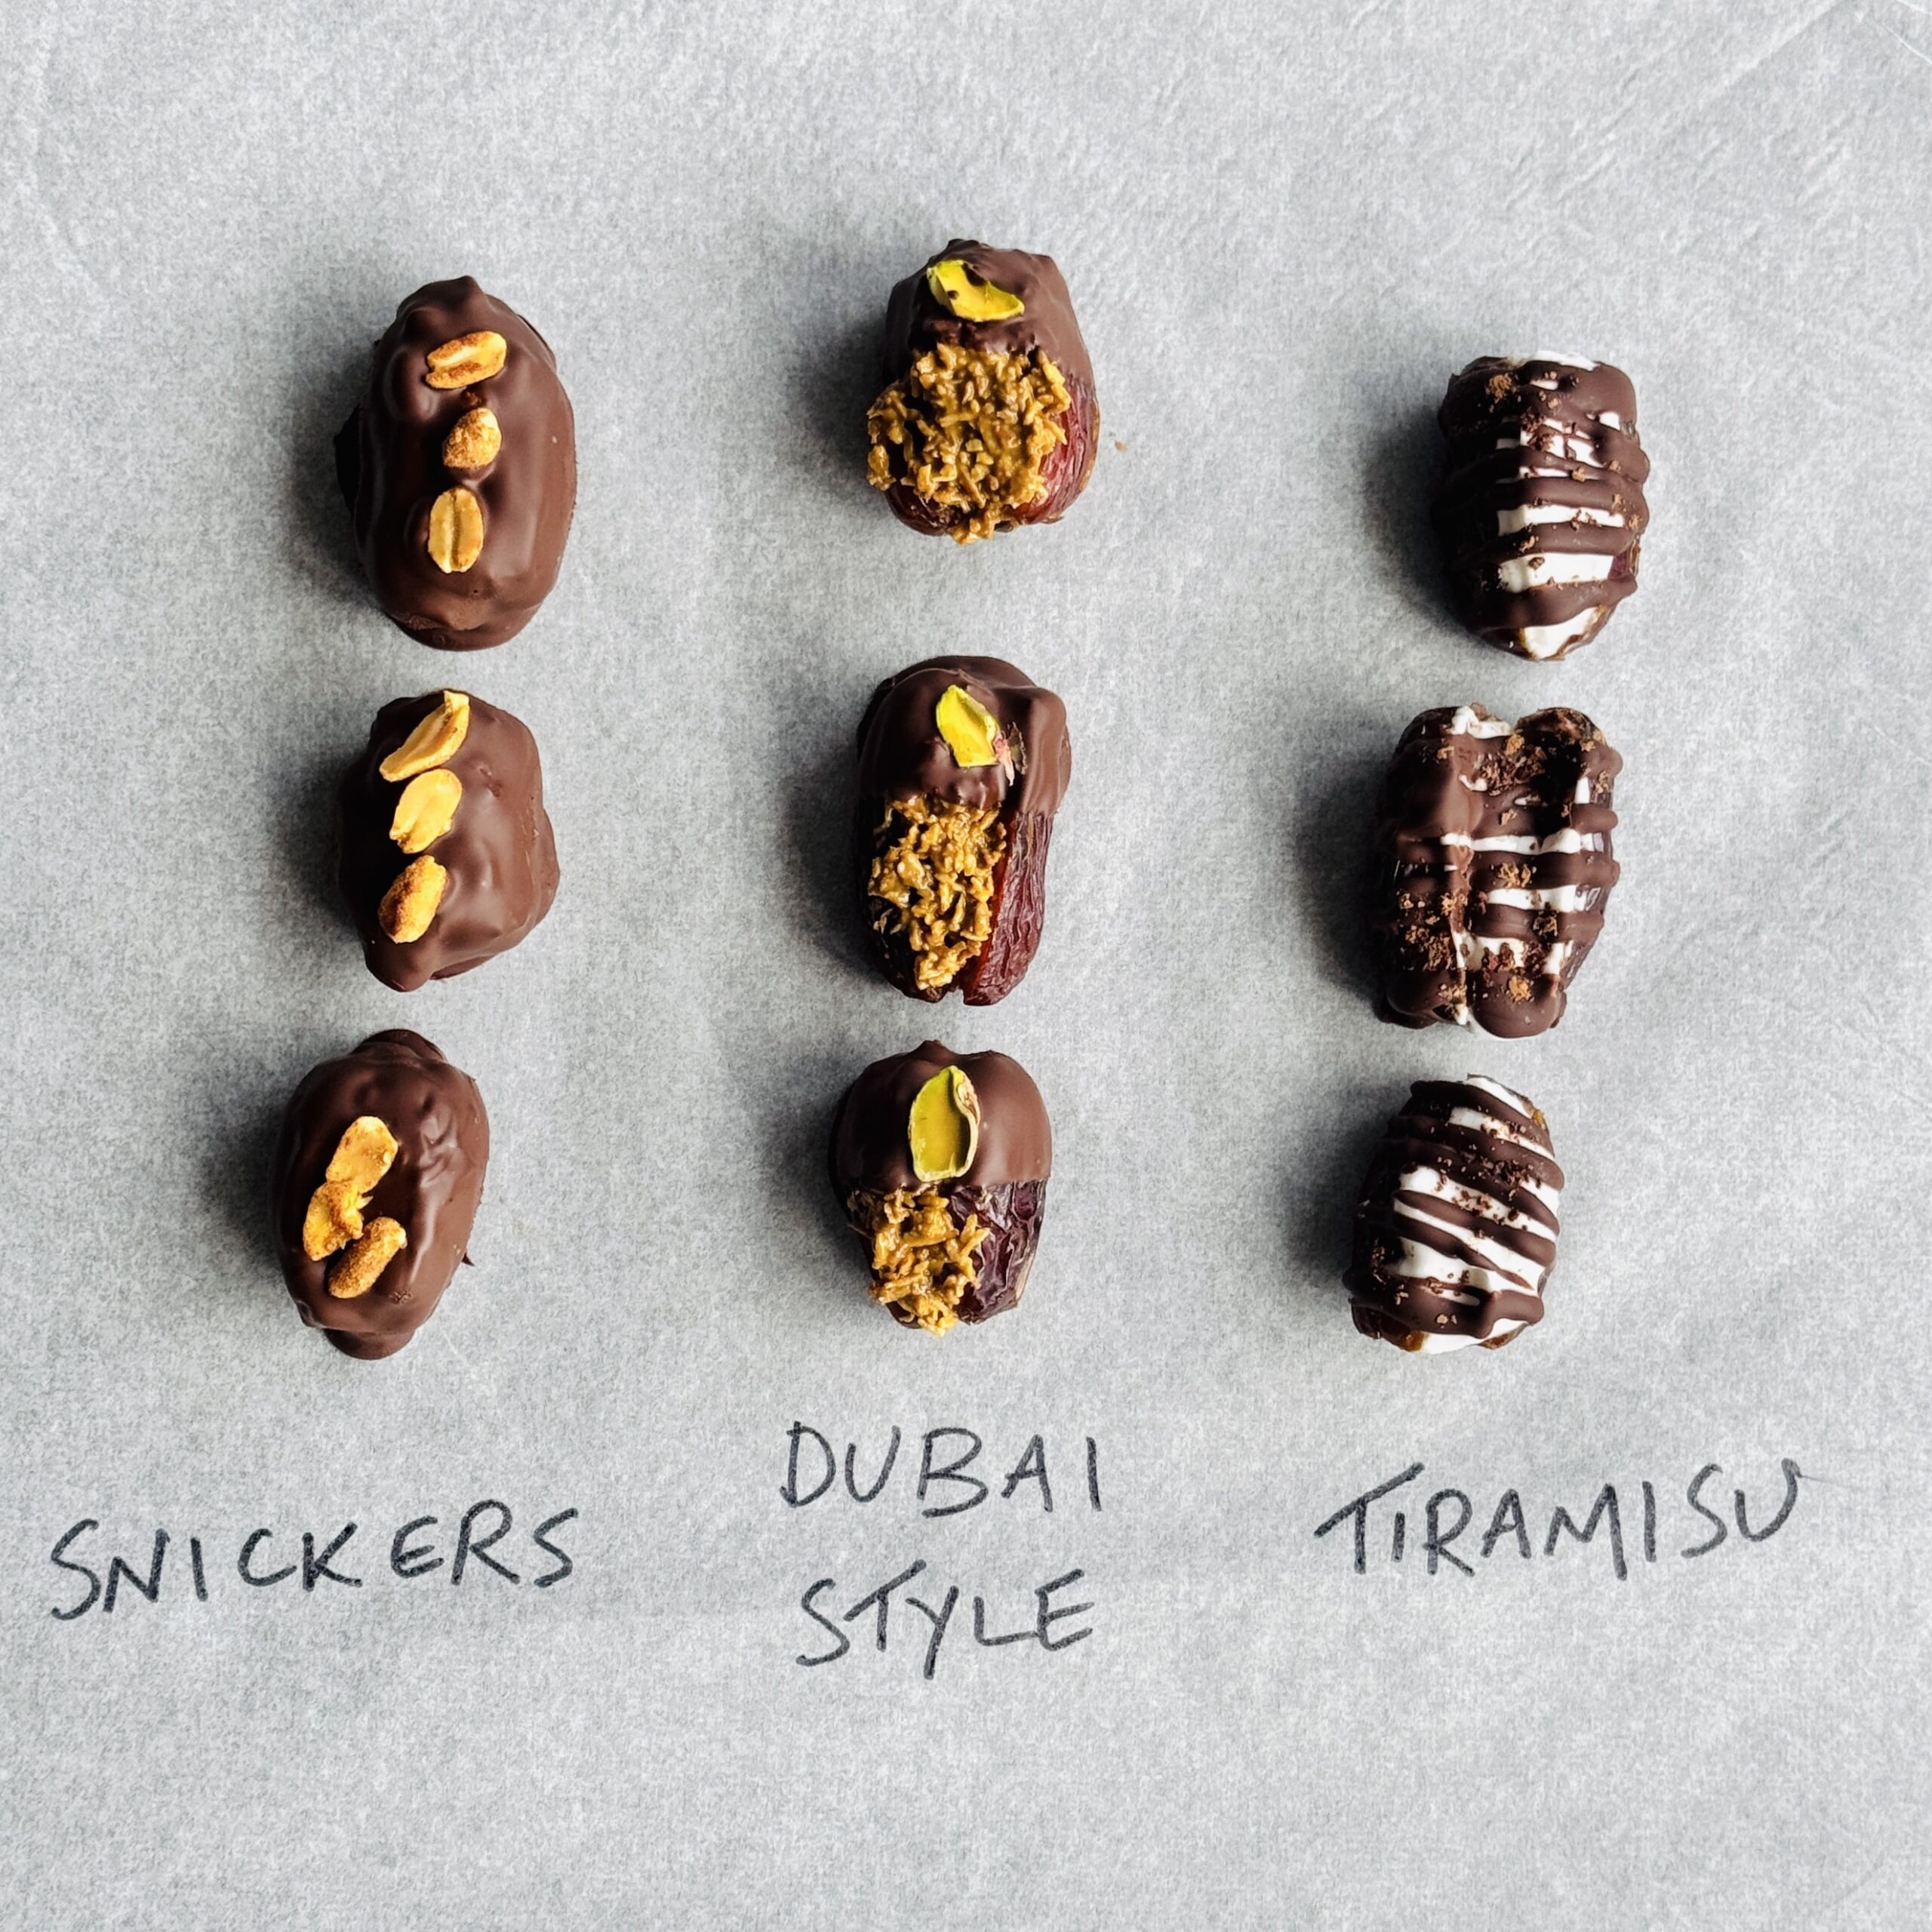
Stuffed Medjool Dates – 3 Ways
Takes 25 minutes
Serves 12
Ingredients
Snickers Style (4 dates):
- 4 tsp peanut butter
- 2 tbsp roasted peanuts roughly chopped
- 60 g dark chocolate for coating
- Optional: flaky sea salt and peanuts for topping
Dubai Style (4 dates):
- 2 tbsp pistachio butter
- 1 tbsp toasted desiccated coconut
- 60 g dark chocolate for coating
- Optional: crushed pistachios for garnish
Tiramisu Style (4 dates):
- 2 tbsp almond butter
- 1 tbsp thick coconut yoghurt
- ½ tsp espresso powder or instant coffee
- ½ tsp maple syrup optional
- Pinch of sea salt
- 60 g dark chocolate for coating
- Optional: cacao powder or coffee bean for decoration
Instructions
Prep the dates:
- Slice each Medjool date along one side and remove the pit, keeping the date intact like a pocket.
Snickers Style
- Fill and finish:
- Stuff each of the 4 dates with 1 tsp peanut butter and a few chopped peanuts. Close the date gently.
- Dip in melted dark chocolate, place on a parchment-lined tray, and sprinkle with flaky sea salt if using.
- Chill until the chocolate sets.
Dubai Style
- Mix and fill:
- Stir 2 tbsp pistachio butter with 1 tbsp toasted coconut until combined.
- Fill each of the 4 dates with this mixture and gently close.
- Dip in melted dark chocolate and garnish with a sprinkle of crushed pistachios if desired.
- Chill until set.
Tiramisu Style
- Make the cream filling:
- Mix 2 tbsp almond butter with 1 tbsp coconut yoghurt, ½ tsp espresso powder, a pinch of sea salt, and maple syrup if using.
- Stir until thick and creamy.
- Fill each of the 4 dates with approx. 1 tsp of the mixture.
- Dip in melted dark chocolate, then dust with cacao or espresso powder.
- Chill until firm.
Notes
Storage
Store all dates in an airtight container in the fridge for up to 5 days. Best served slightly chilled or at room temperature.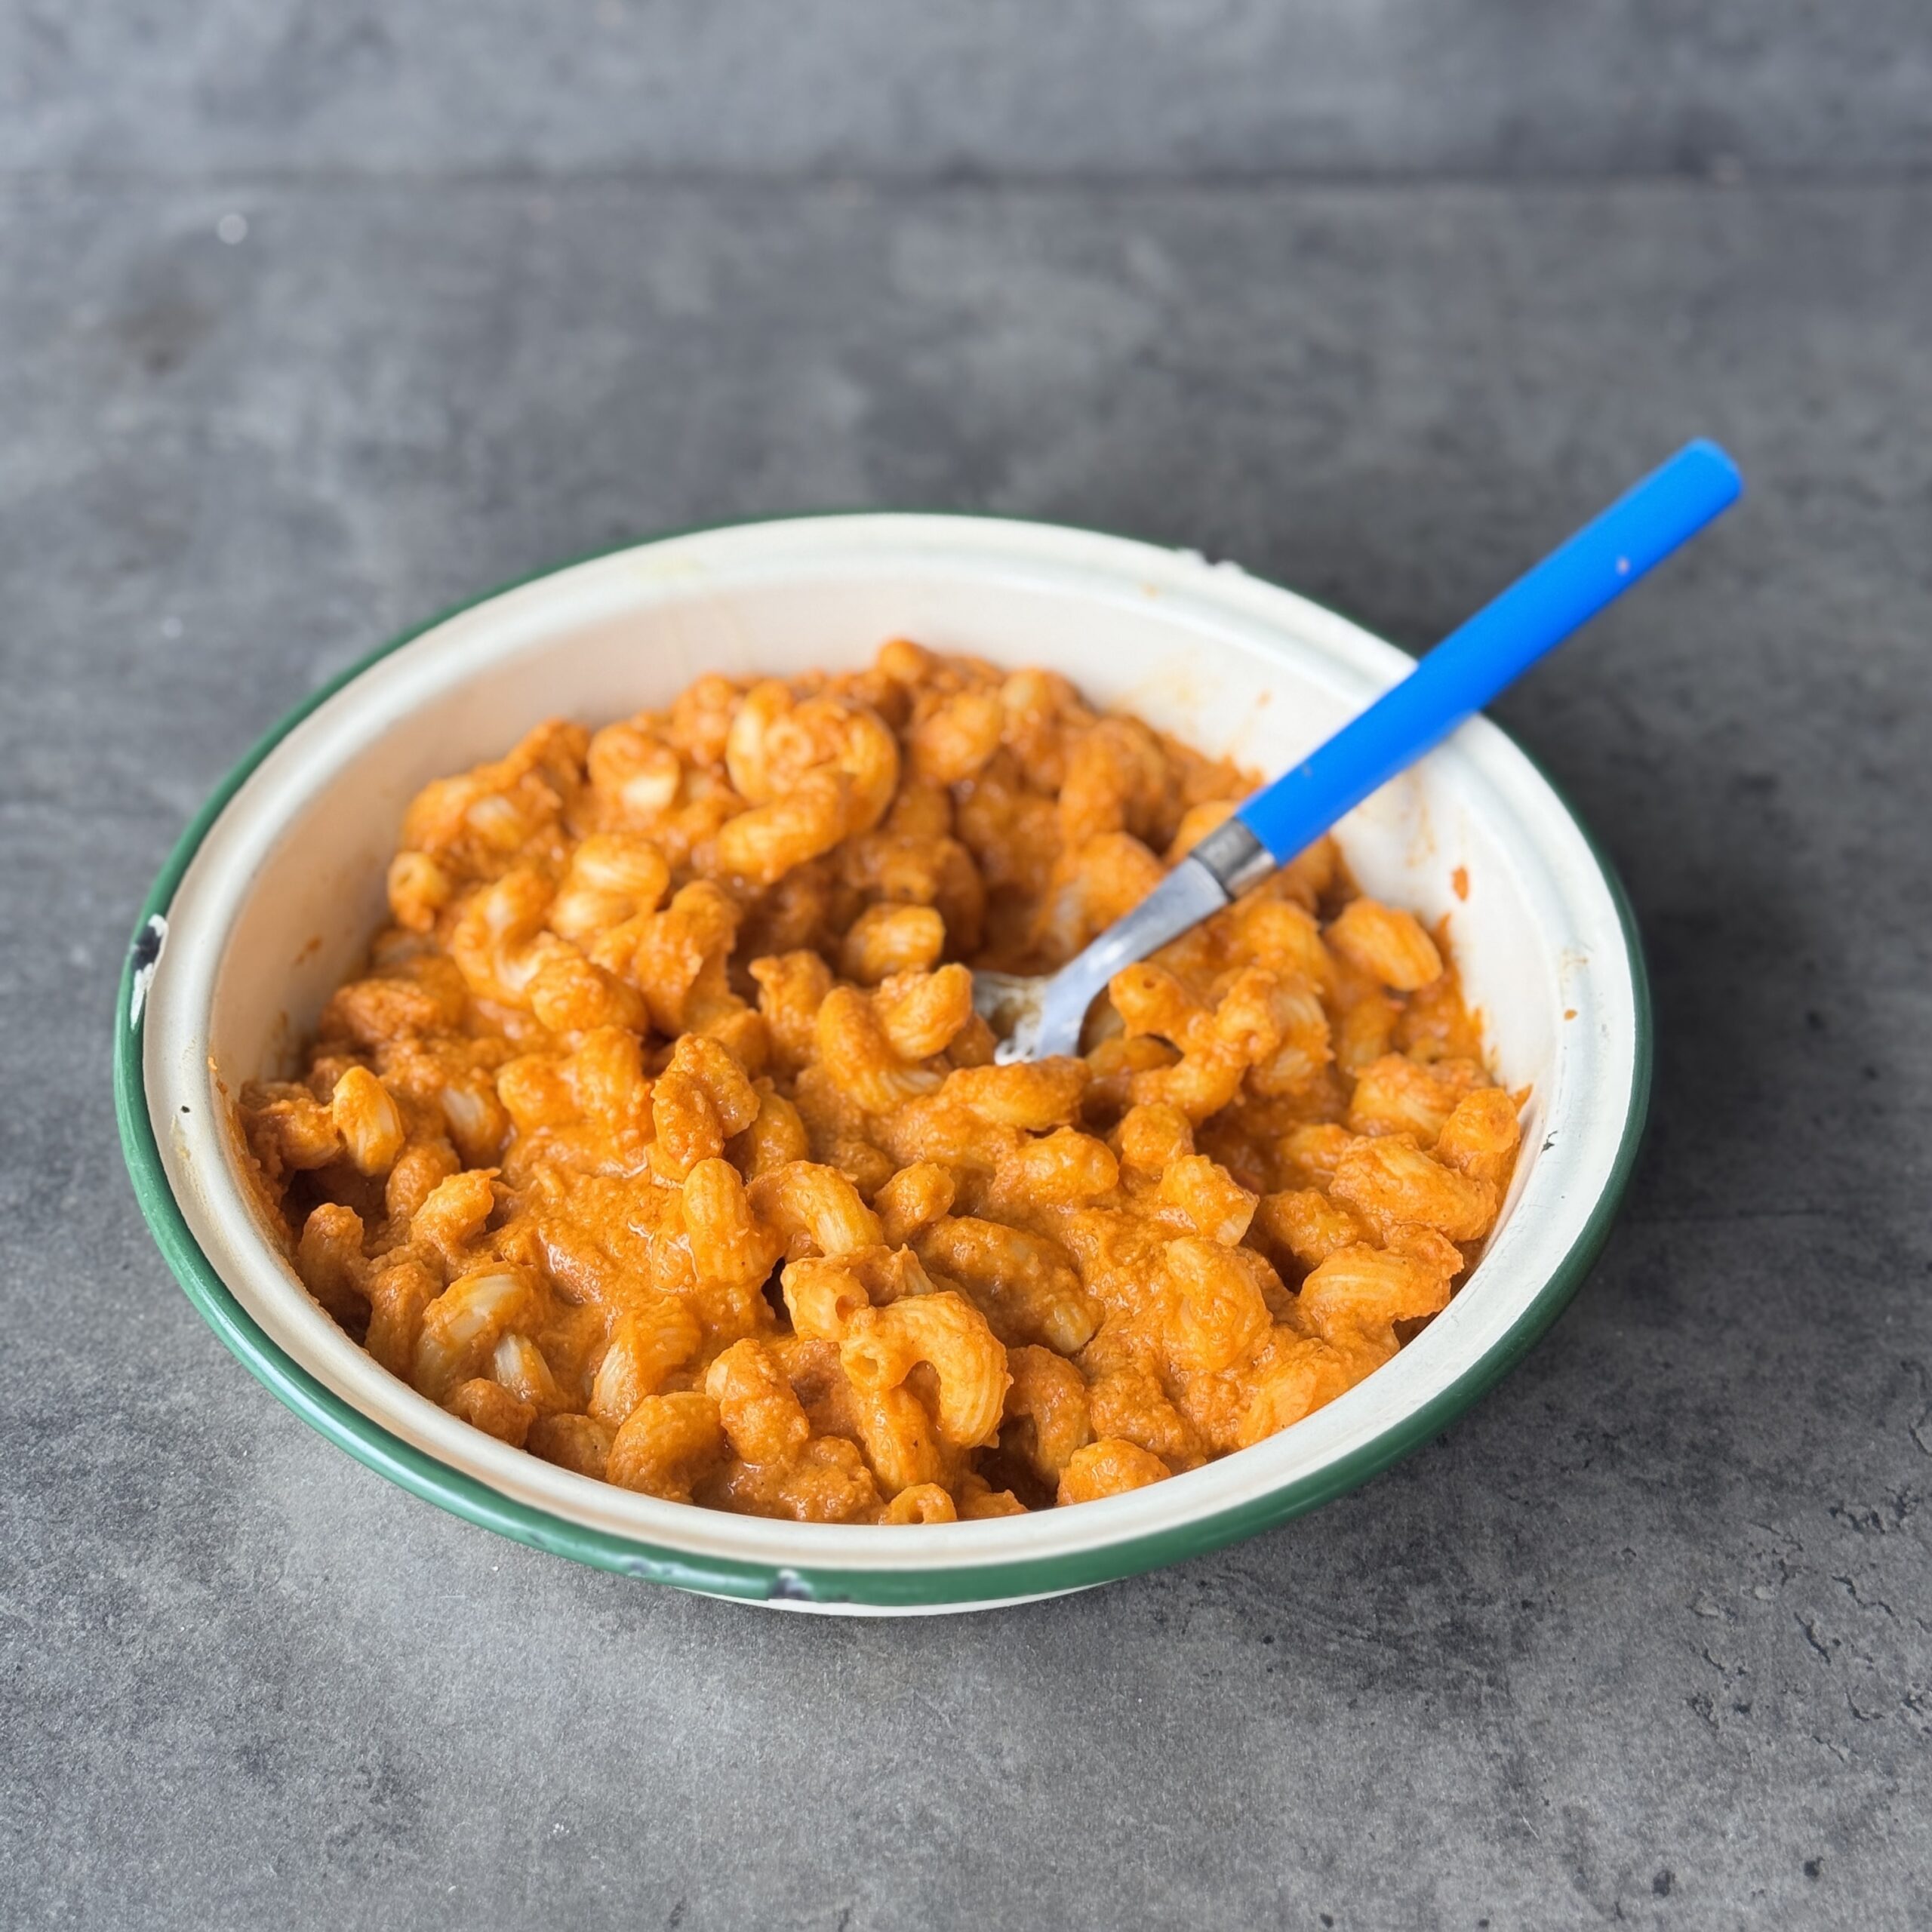
Creamy Sundried Tomato & White Bean Pasta
Takes 10 minutes
Serves 2
Ingredients
- 1 tin 400g white beans (cannellini or butter beans), drained – approx. 240g drained weight (1½ cups)
- 4 tbsp 4 tbsp The Happy Pear Sundried Tomato Pesto
- 140 g roasted red peppers
- 1 garlic clove peeled
- 1 tbsp lemon juice
- 3 –4 tbsp pasta water
- Salt & pepper to taste
To serve:
- 160 –180g dried pasta about 1½–1¾ cups
- Optional: Sautéed spinach fresh basil, toasted pine nuts, or nutritional yeast
Instructions
Cook the pasta:
- Bring a large pan of salted water to the boil. Add the pasta and cook according to packet instructions until al dente (8–10 minutes). Just before draining, reserve a cup of the pasta water. Drain and return pasta to the pan.
Make the sauce:
- In a blender, add the drained white beans, The Happy Pear Sundried Tomato Pesto, garlic, lemon juice, and 3 tablespoons of reserved pasta water. Blend until smooth and creamy. Add an extra tablespoon of pasta water if needed to loosen the sauce.
Season:
- Taste and add salt and pepper to your liking.
Combine:
- Pour the sauce over the cooked pasta and stir well to coat evenly. Heat gently if needed.
Serve and garnish:
- Serve as is or top with sautéed spinach, fresh basil, toasted pine nuts, or a sprinkle of nutritional yeast for a cheesy finish.

Watermelon & Lime Electrolyte Ice Pops
Takes 6 hours 5 minutes
Serves 8
Ingredients
- 500 g 3 heaped cups watermelon, cubed, rind removed
- 250 g 1 heaped cup pineapple, peeled and chopped
- 1 small cucumber approx. 150g, chopped
- Juice of 1–2 limes about 30ml
- 1 pinch sea salt about ⅛ tsp
- Optional: a few mint leaves for extra freshness
Instructions
- Juice the watermelon, pineapple, and cucumber using a slow juicer like the Nama Well.
- Stir in the lime juice and sea salt once juiced.
- Taste and adjust – add more lime for sharpness or a bit more pineapple for sweetness.
- Serve over ice or pour into moulds to freeze into post-workout ice lollies.
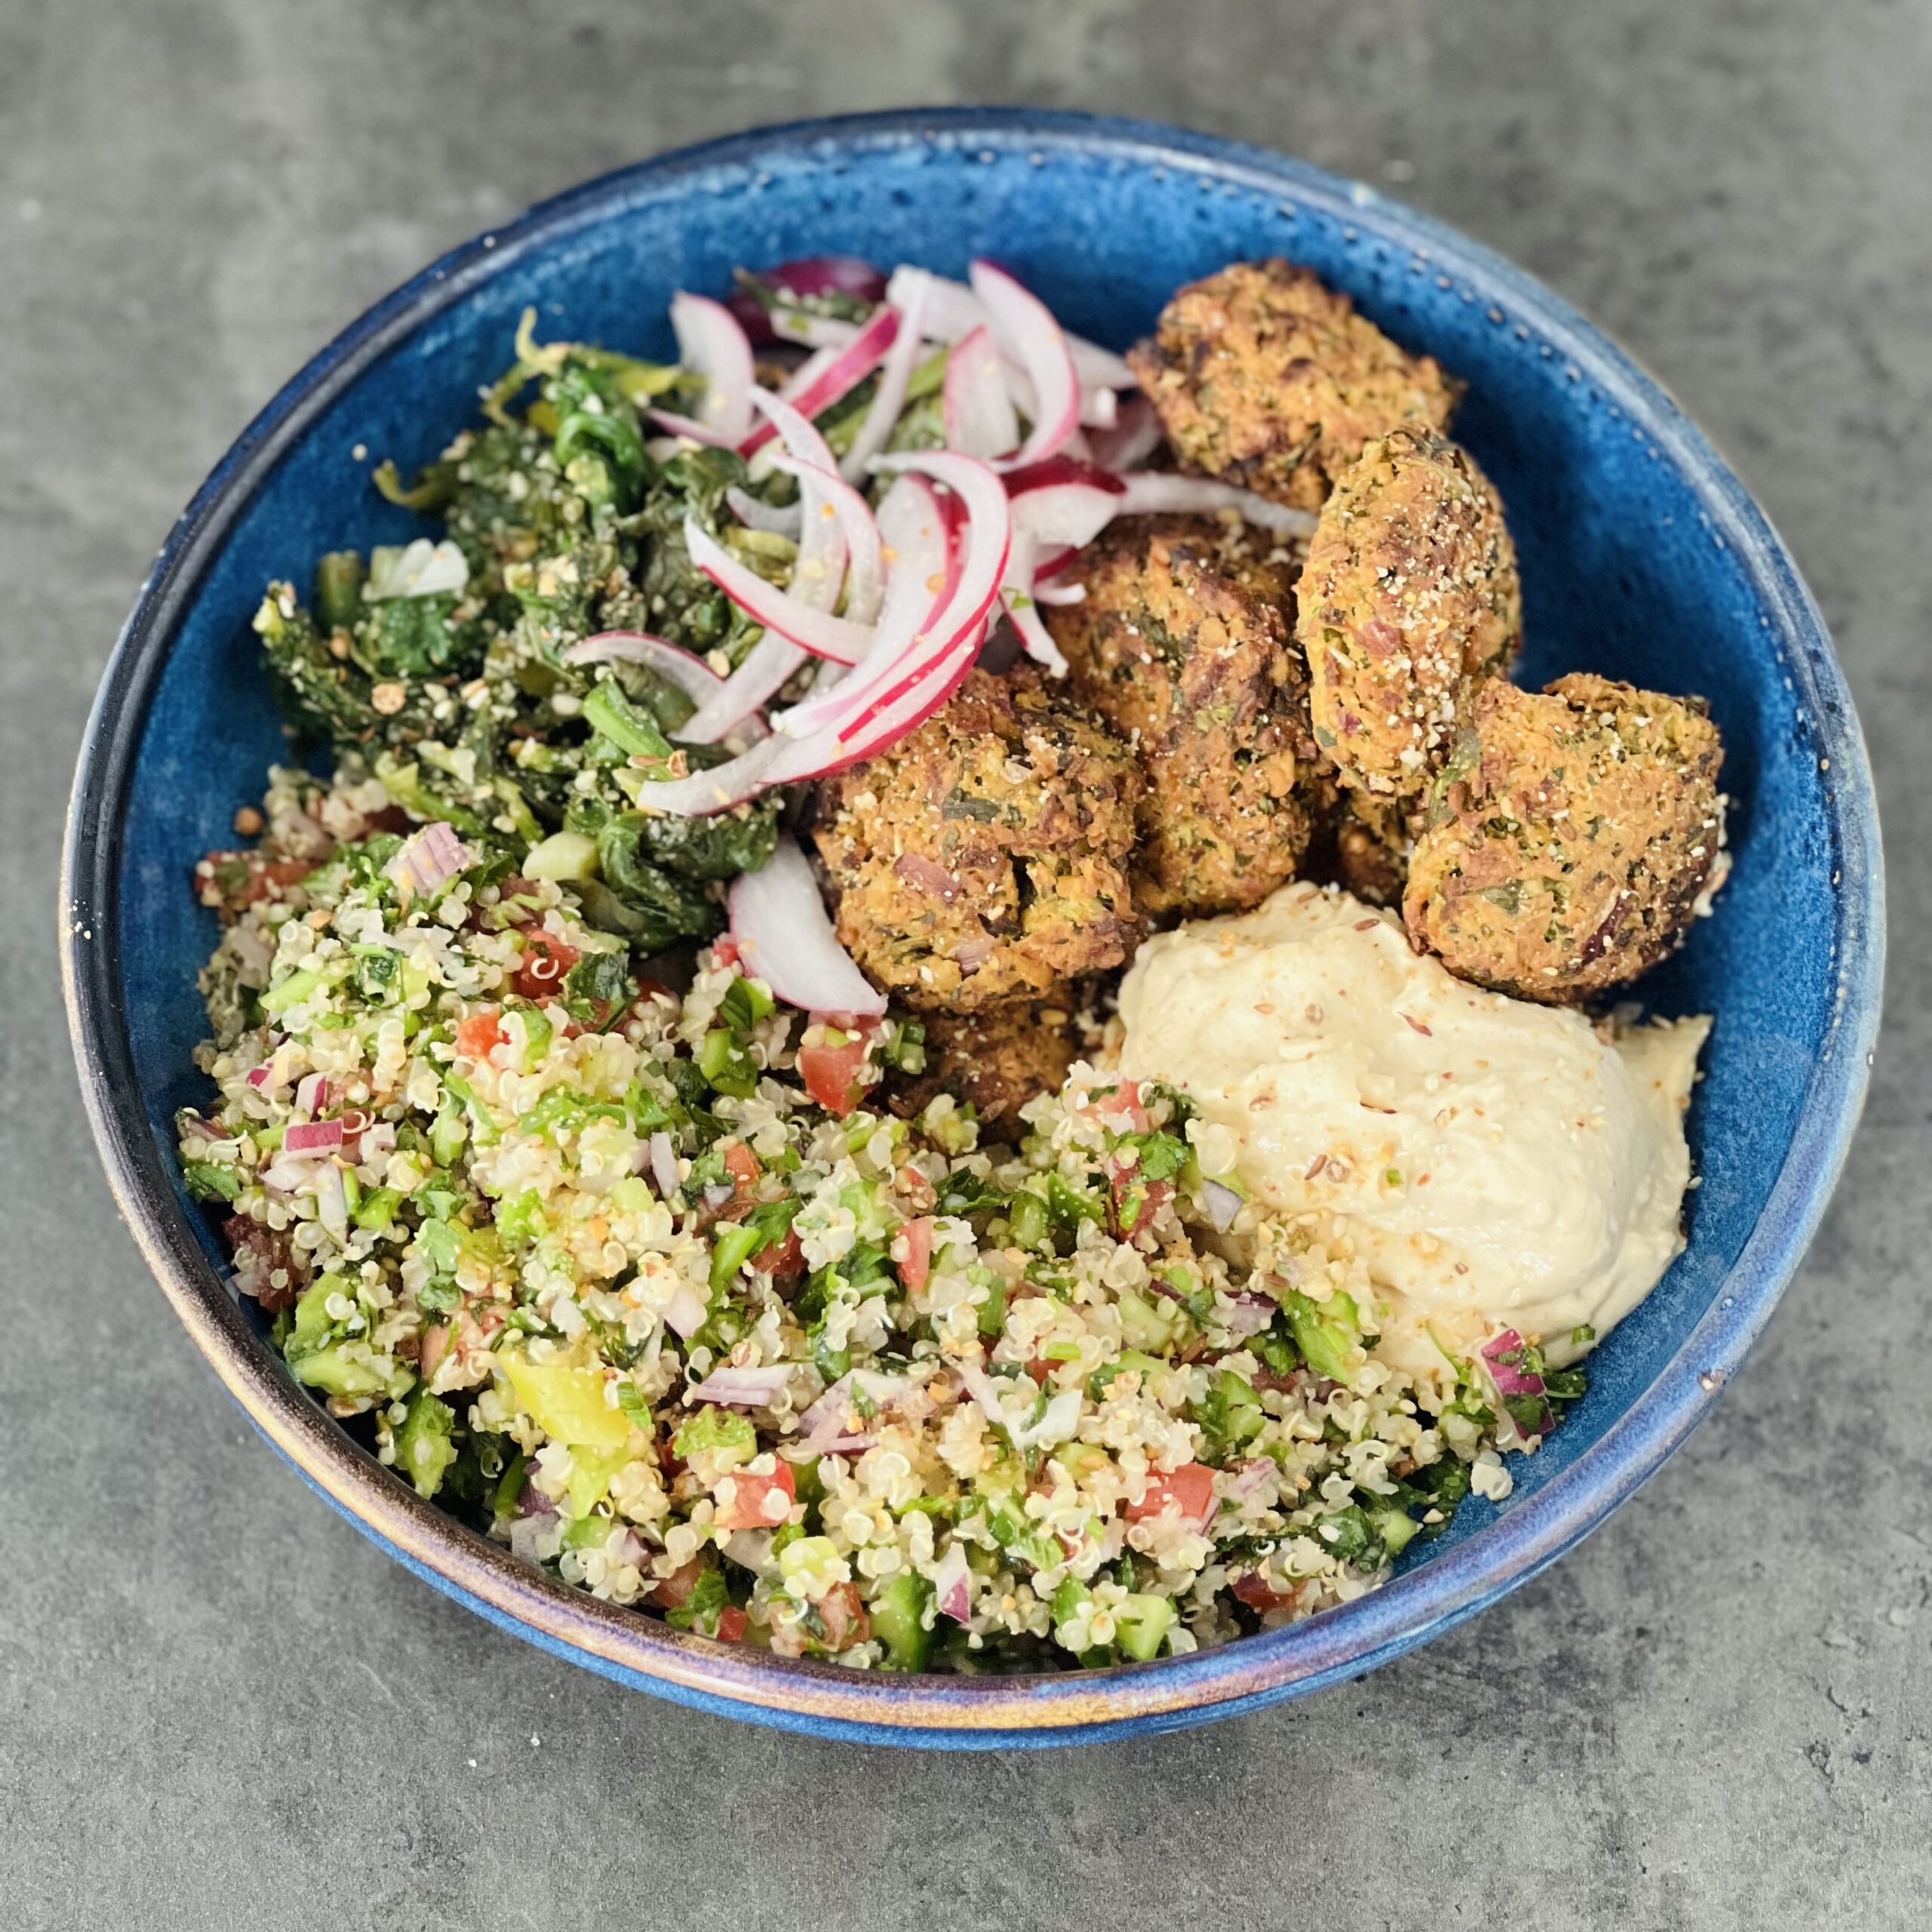
High Protein Falafel Mezze Bowl
Takes 50 minutes
Serves 2
Ingredients
For the Baked Falafel:
- 1 × 400g tin chickpeas drained & rinsed
- 1/2 small red onion roughly chopped
- 1 garlic cloves
- 20 g fresh parsley
- 20 g fresh coriander
- 1 tbsp ground cumin
- 1 tbsp ground coriander
- 1 tbsp ground cumin
- ½ tsp salt
- 2 tbsp gram flour or plain flour
- 1 tbsp lemon juice
- 1 tbsp olive oil
For the Quinoa Tabbouleh:
- 100 g quinoa ½ cup, rinsed
- 1 large tomato finely chopped
- ½ cucumber finely chopped
- 15 g fresh mint finely chopped
- 15 g fresh parsley finely chopped
- 1 tbsp olive oil
- Juice of ½ lemon
- Salt & pepper
For the Spinach Spanakopita-Style Sauté:
- 200 g spinach fresh or frozen
- 1 tbsp olive oil
- 1 spring onion finely sliced
- 1 garlic clove finely chopped
- Zest of ½ lemon
- Pinch of salt
For the Quick Pickled Onions:
- 1 small red onion thinly sliced
- 75 ml apple cider vinegar
- 75 ml water
- Pinch of salt
- 1 tsp maple syrup
For the Dukkah:
- 2 tbsp sesame seeds
- 2 tbsp almonds or hazelnuts chopped or whole
- 1 tsp cumin seeds
- 1 tsp coriander seeds
- Pinch of salt
To Serve:
- 2 generous dollops of Happy Pear Hummus
Instructions
Make the Quick Pickled Onions
- Thinly slice the red onion and place in a small bowl or jar. Add the apple cider vinegar, maple syrup, and a pinch of salt. Mix well and set aside to pickle while you prepare the rest. These will become vibrant pink and tangy.
Prepare the Baked Falafel
- Preheat your oven to 200°C (fan 180°C / 400°F) and line a baking tray with parchment. In a food processor, add the chickpeas, red onion, garlic, parsley, cumin, coriander, salt, gram flour, lemon juice, and olive oil. Pulse until just combined — keep a bit of texture. Using damp hands, form the mixture into 6–8 small balls or discs. Place on the tray, brush lightly with olive oil, and bake for 25 minutes, flipping halfway, until golden and crisp.
Cook the Quinoa
- Rinse the quinoa under cold water. Add to a small saucepan with double the amount of water (200ml for 100g quinoa). Bring to the boil, then reduce to a simmer and cook for 10–12 minutes, until fluffy and the water is absorbed. Remove from heat, fluff with a fork, and allow to cool slightly.
Make the Tabbouleh
- Finely chop the tomato, cucumber, mint, and parsley. In a bowl, combine the cooled quinoa with the chopped veg and herbs. Add olive oil, lemon juice, salt and pepper to taste. Mix well and set aside.
Sauté the Spanakopita-Style Spinach
- Heat the olive oil in a frying pan over medium heat. Add the spring onion and garlic, and sauté for 1–2 minutes. Add the spinach and a pinch of salt, and stir until wilted (or defrosted if using frozen).Finish with lemon zest and remove from heat.
Make the Dukkah
- In a dry frying pan, toast the almonds or hazelnuts over medium heat for 2–3 minutes until golden. Add the sesame seeds, cumin seeds, and coriander seeds and toast for another 1–2 minutes until fragrant. Allow to cool slightly, then crush in a mortar and pestle or pulse in a blender until crumbly (not powdered). Stir in a pinch of salt.
Assemble the Mezze Bowl
- Divide the quinoa tabbouleh between two bowls. Add the spinach sauté, 3–4 falafel per bowl, a generous spoon of pickled onions, and a large dollop of Happy Pear hummus. Finish with a generous sprinkle of dukkah and a wedge of lemon.
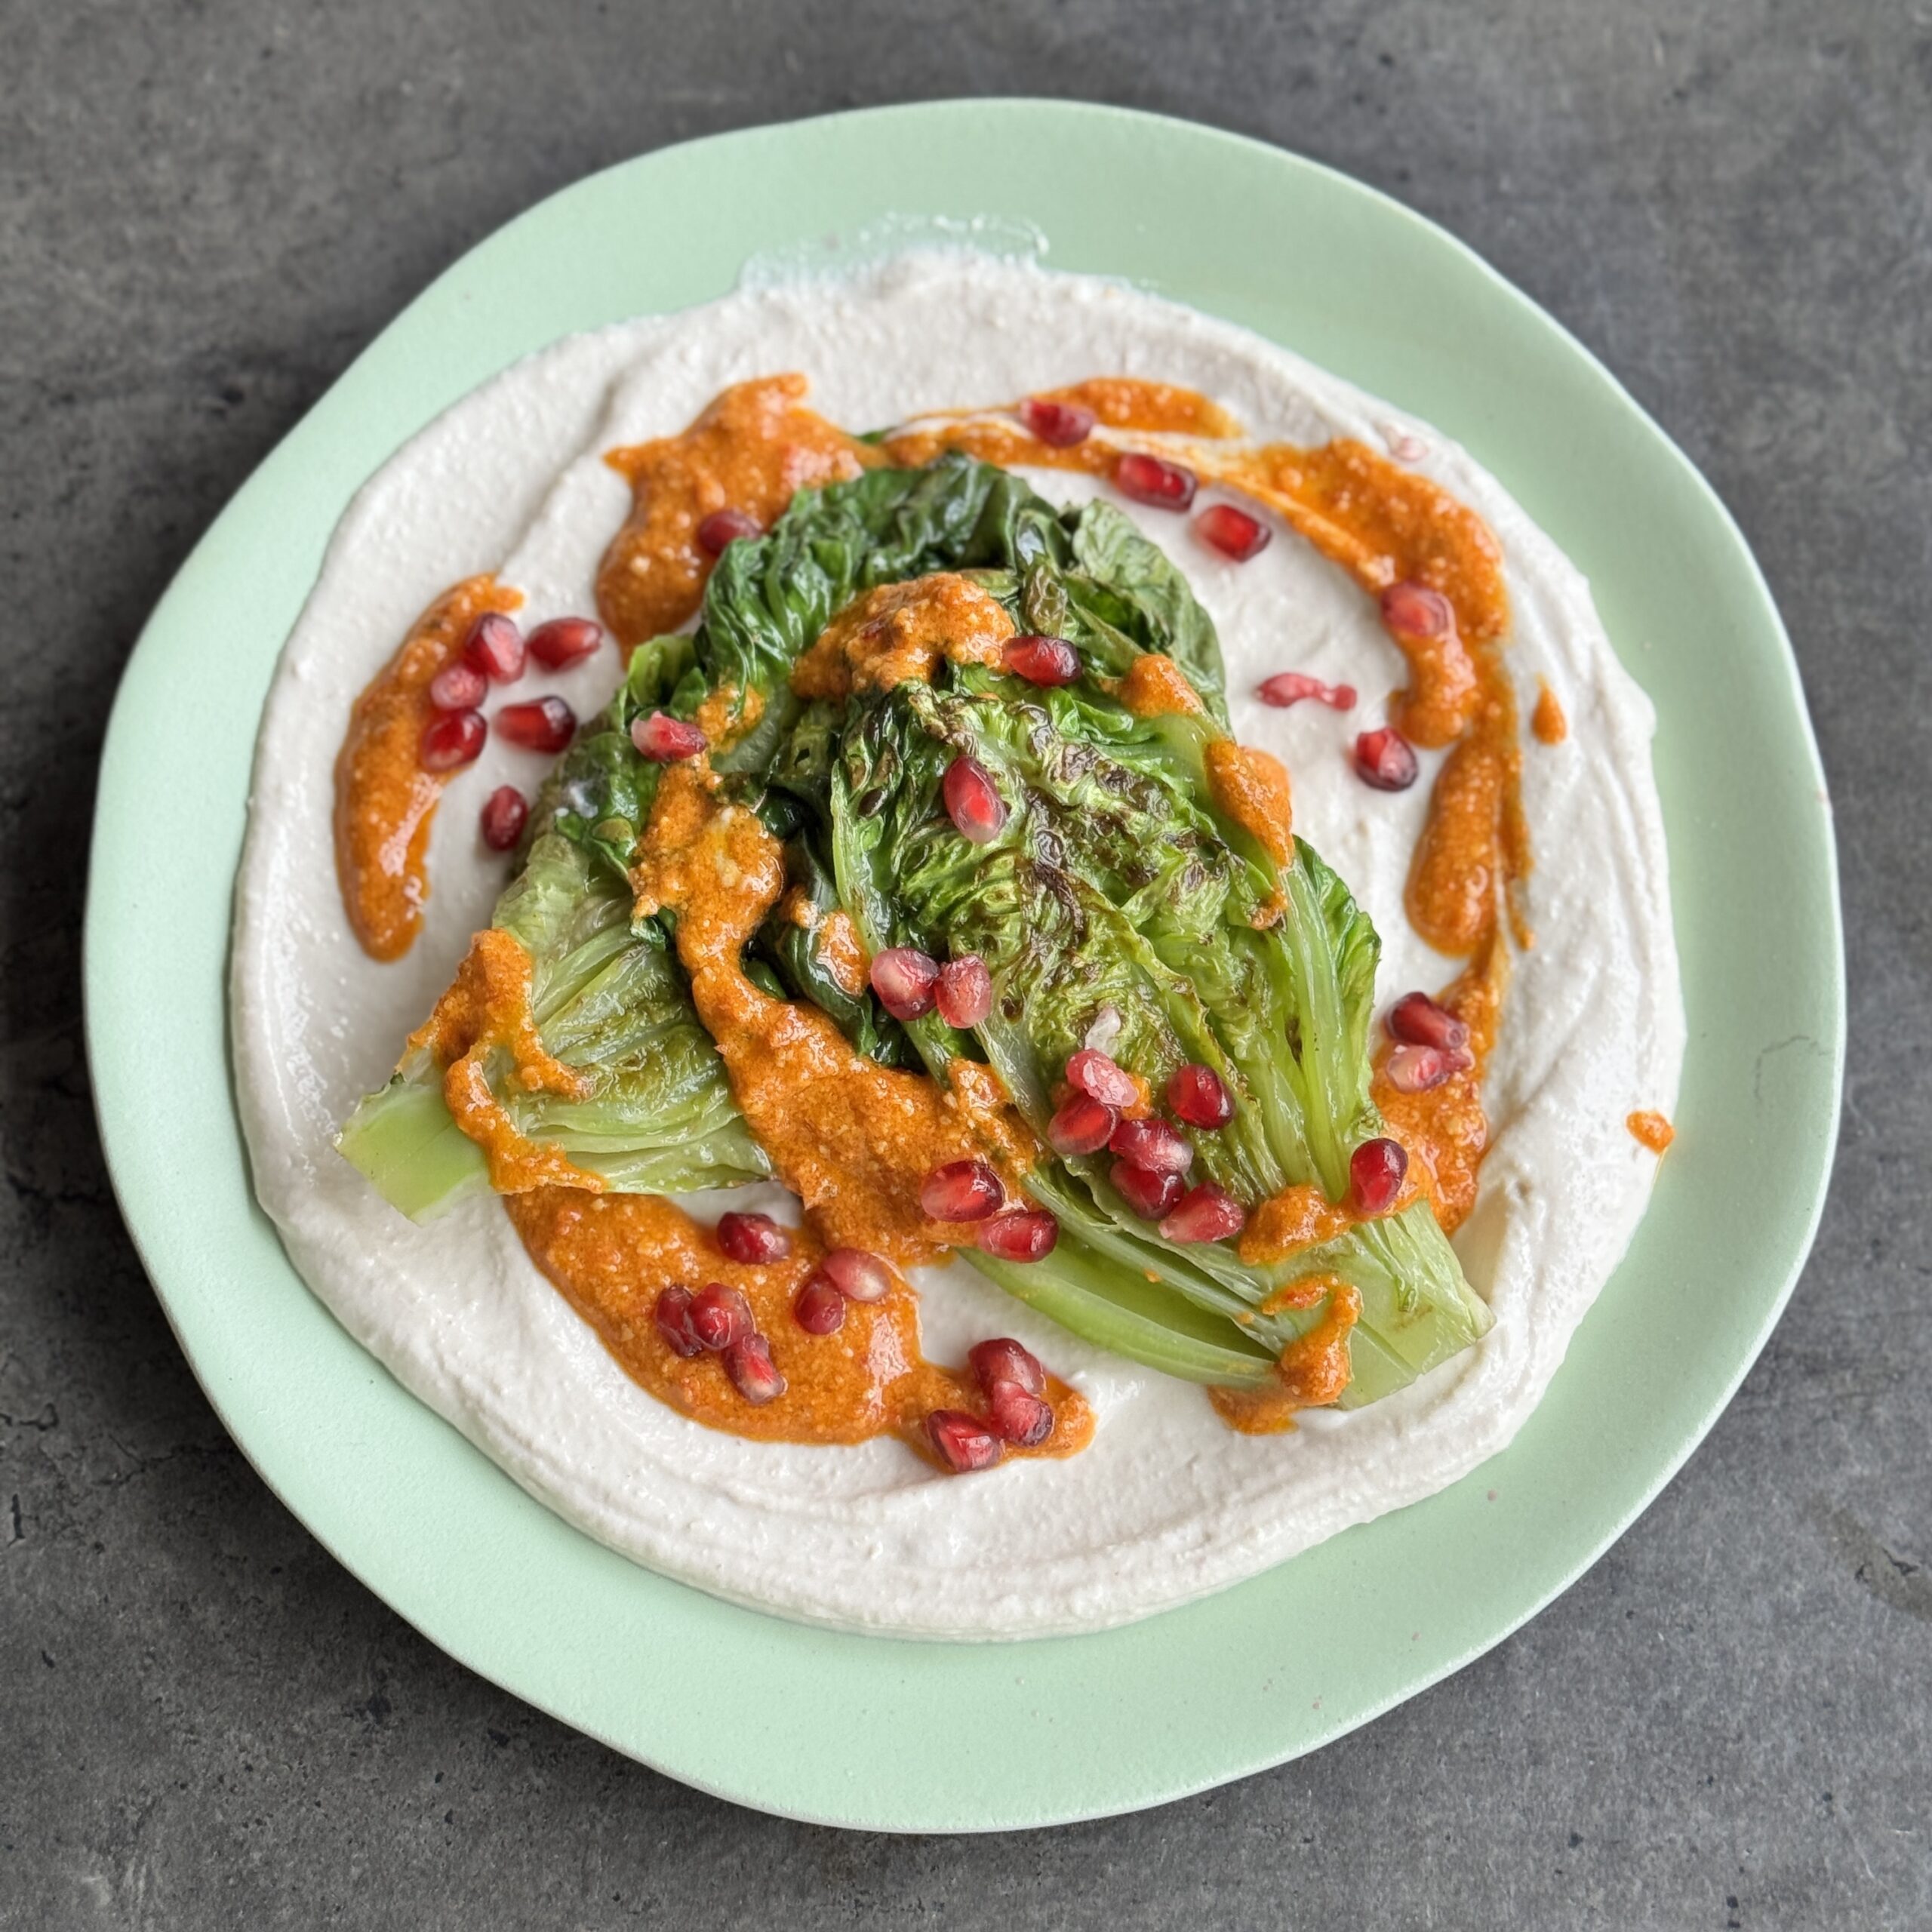
Grilled Lettuce on Tahini Cream
Takes 20 minutes
Serves 4
Ingredients
For the grilled lettuce:
- 2 heads romaine or baby gem lettuce halved lengthways
- 1 tub of Happy Hummus or tahini cream
- Olive oil for drizzling
- Pinch of salt
For the Tahini Cream (optional)
- 4 tbsp tahini hulled, runny kind works best
- 2 –4 tbsp water adjust for desired consistency
- 1 –2 tbsp lemon juice to taste
- 1 small garlic clove grated or minced (optional)
- Pinch of salt
To serve:
- 4 tbsp The Happy Pear Spicy Red Pepper Pesto to drizzle
- 3 tbsp pomegranate seeds
Instructions
Prepare the lettuce:
- Slice the romaine or baby gem in half lengthways. Drizzle with a little olive oil, and sprinkle with salt.
Grill the lettuce:
- Heat a griddle pan or BBQ to high. Grill the lettuce cut side down for 2–3 minutes until nicely charred. Flip and grill the outer side for 1 minute.
Make the Tahini Cream (optional)
- In a bowl, whisk together tahini and lemon juice — it might thicken up at first. Slowly add water, 1 tablespoon at a time, whisking until smooth and creamy. Stir in garlic (if using) and salt. Adjust seasoning to taste. Add more water to thin it out if needed.
To serve:
- Spread a spoonful of Hummus or Tahini Cream on each plate. Place the grilled lettuce on top, drizzle with The Happy Pear Spicy Red Pepper Pesto, and finish with pomegranate seeds for a burst of freshness.
The Happy Pear Podcast
John Stewart is a world-renowned speaker, author, and educator with over 25 years of global impact. Former Head of Green School Bali—celebrated as the world’s greenest school—and author of Thriving at School, he now leads Living School Lismore, a pioneering community learning space he built in his own home.

Episode 182
This is our second episode recording with John, and it brings fresh energy, deeper reflection, and new stories. Together, Dave and Steve explore the evolution since our 2021 chat—what’s changed, what’s next, and how the Living School model is developing in real time.
In this heartfelt conversation, John offers candid updates on the Living School learning hub: how it’s grown, the successes and challenges of community-based education, and how children and caregivers are thriving within its evolving design. He unpacks new practices that have emerged since our first episode—creative rituals, altered rhythms, and how families are weaving learning into daily life without walls or schedules.
John again questions traditional school structures—touching on schools as community cornerstones, safety vs. freedom, and why education must foster curiosity and connection over conformity. But now, he goes one step further—sharing honest reflections from a teacher’s point of view, how to nourish educators’ wellbeing, and how Living School is experimenting with new forms of leadership, rhythm, and environment.
This conversation lands at a moment when many of us are reimagining schooling post‑pandemic, questioning outdated systems, and yearning for education that benefits mind, heart, and community. John’s fresh insights, grounded in real‑world practice, offer practical inspiration for educators, changemakers, parents—or anyone curious about reshaping how we learn together.
Dave & Steve
Lots of love,
SPONSORS & DISCOUNT CODES:
Cuisinart – the partner we have dreamed of! Cuisinart has been cooking up reliable kitchen gear for over 50 years – helping to make mealtimes easier and more enjoyable! Check out the following link for more details.
LINK: https://www.cuisinart.co.uk/New-Cuisinart-Ambassadors-The-Happy-Pear.html
Namawell Juicers are AMAZING! They have absolutely revolutionised the juicing game. We have an exclusive 10% discount for you!
Enter the code HAPPYPEAR10
LINK: https://namawell.com/collections/juicers/products/nama-j2-cold-press-juicer?ref=thehappypear
THE WHOLE HEALTH TRIBE – Join our community
LINK: https://eu1.hubs.ly/H0bmqxd0
THE HAPPY PEAR RECIPE CLUB – Blending health and happiness through a range of over 500 delicious plant-based recipes.
LINK: https://eu1.hubs.ly/H0bmqss0
Sign up to our Newsletter, for updates on our latest recipes, events, and news.
LINK: https://share-eu1.hsforms.com/1hKXaawjoQOONmJe4EXkCdwf92py
Produced by Sean Cahill & Sara Fawsitt
Available now from all good podcast providers:

Healthier Ice Cream 3 Ways
Takes 1 day 5 minutes
Serves 3
Ingredients
Berry Bliss Ice Cream
- 1 frozen ripe banana approx. 90 g
- 75 g ½ cup frozen mixed berries
- 8 g ½ tbsp almond or cashew butter
- 5 ml 1 tsp maple syrup, or to taste
- 2.5 ml ½ tsp vanilla extract
- Optional: splash of water approx 10 ml if needed to blend
Pistachio Dream
- 1 frozen ripe banana approx 90 g
- 15 g 1 tbsp pistachio butter
- 8 g ½ tbsp almond or cashew butter (optional, for extra body)
- 7 ml 1½ tsp maple syrup
- 2.5 ml ½ tsp vanilla extract
- Pinch of salt
Choc Chip Cookie Dough Ice Cream
- 1 frozen ripe banana approx 90 g
- 15 g 1 tbsp nut butter of choice (peanut, almond or cashew)
- 7 ml 1½ tsp maple syrup
- 2.5 ml ½ tsp vanilla extract
- Pinch of salt
- Optional: pinch of cinnamon and tiny splash of water if needed
- To fold in: small chunks of cookie dough after blending
Instructions
- Add all ingredients to the Freeze Wand cup and freeze overnight.
- When ready, attach the wand and blend until thick and creamy.
- Serve immediately.
Notes
- These ice creams are best enjoyed freshly blended.
- Chop ingredients before freezing
- Keep the pre-measured ingredients in the cups in the fridge or freezer, so you’re always ready to go for when a craving hits!

Ice Cream Sandwiches – 3 Ways
Takes 1 hour 30 minutes
Serves 12
Ingredients
Cashew butter cookies (makes 24 cookies for 12 sandwiches)
- 240 g 8.5 oz / 1 cup all-natural roasted cashew butter (or almond/peanut butter)
- 5 tbsp coconut sugar
- 3 tbsp maple syrup
- 1 tsp vanilla extract
- 2 tbsp ground flaxseed linseed
- ½ tsp bicarbonate of soda baking soda
- ½ tsp baking powder
- Coarse sea salt optional, for topping
Ferrero Rocher ice cream
- 1 ripe banana frozen in chunks
- 60 g ¼ cup hazelnut butter
- 1 tbsp cocoa powder
- 2 tbsp maple syrup optional
- Pinch of sea salt
- 50 ml of coconut milk
Dubai chocolate ice cream
- 1 ripe bananas frozen
- 50 g pistachio nuts shelled
- 2 tbsp maple syrup
- Pinch of sea salt
- 50 ml of coconut milk
Snickers-style ice cream
- 1 ripe bananas frozen
- 50 g peanut butter natural, unsweetened
- 1 –2 tbsp maple syrup optional
- 50 ml of coconut milk
- Pinch salt
- 20 g roasted peanuts
Instructions
Make the cookie dough:
- Add 240g (1 cup) cashew butter, 5 tbsp coconut sugar, 3 tbsp maple syrup, 1 tsp vanilla extract, 2 tbsp ground flaxseed, ½ tsp bicarbonate of soda, and ½ tsp baking powder to a bowl. Mix until fully combined. Chill for 30 minutes to firm up.
Bake the cookies:
- Preheat the oven to 200°C (400°F). Roll the dough into 24 small balls (just smaller than golf balls) and place on a lined baking tray. Gently flatten with your palm. Sprinkle with coarse sea salt if using. Bake for 7–8 minutes for soft cookies, or up to 10 minutes for crisp ones. Cool completely.
Make the Ferrero Rocher ice cream:
- In a blender or food processor, combine 1 banana, 60g (¼ cup) hazelnut butter, 1 tbsp cocoa powder, 2 tbsp maple syrup (if using), a pinch of sea salt, and 50ml coconut milk. Blend until smooth. Churn in the Cuisinart Freeze Wand until scoopable.
Make the Dubai chocolate ice cream:
- Blend 1 banana, 50g shelled pistachio nuts, 2 tbsp maple syrup, a pinch of sea salt, and 50ml coconut milk until smooth. Churn in the Cuisinart Freeze Wand until thick and creamy.
Make the Snickers-style ice cream:
- Blend 1 banana, 50g peanut butter, 1–2 tbsp maple syrup (if using), 50ml coconut milk, and a pinch of salt until velvety and smooth. Stir in the roasted peanuts, then churn in the Freeze Wand until scoopable.
Assemble the sandwiches:
- Once the ice creams are churned and semi-frozen, scoop a generous tablespoon onto the flat side of a cookie and sandwich with a second cookie. Repeat with all three flavours to make 12 sandwiches.
Freeze to firm up:
- Place sandwiches on a tray and freeze for 20–30 minutes until firm enough to hold. Serve immediately or store in an airtight container in the freezer for up to 1 week.

Mushroom Shawarma with Caramelised Apricot Salsa
Takes 40 minutes
Serves 4
Ingredients
For the Mushroom Shawarma
- 8 large portobello mushrooms
- 3 tbsp olive oil
- 2 tbsp tamari
- 2 tbsp maple syrup
- 1 tbsp smoked paprika
- Pinch of sea salt and black pepper
For the Quinoa Tabbouleh
- ½ cucumber finely diced
- 2 ripe tomatoes finely diced
- 1 small red onion finely diced
- 30 g fresh parsley finely chopped
- 30 g fresh coriander finely chopped
- 100 g cooked quinoa or couscous approx. ⅔ cup
- 1 tbsp olive oil
- ½ tbsp apple cider vinegar
- Sea salt and black pepper to taste
For the Charred Apricot & Bean Salad
- 10 fresh cherries halved and pitted
- 4 ripe apricots stoned and sliced into thin strips
- 100 g French beans
- ½ tbsp olive oil
- Pinch of sea salt
- 1 tsp apple cider vinegar
To Serve
- 300 g hummus approx. 1¼ cups
- 4 flatbreads or pitta breads
Instructions
Make the Quinoa Tabbouleh
- Finely dice the cucumber, tomatoes, red onion, parsley, and coriander. In a large bowl, mix together with the cooked quinoa or couscous, olive oil, vinegar, salt, and pepper. Taste and adjust seasoning as needed.
Prepare the Charred Apricot & Bean Salad
- Heat a griddle pan over high heat. Add the olive oil and once hot, grill the apricot slices on each side until nicely charred. Steam the French beans for 4 minutes until just tender, then cool under cold running water. Slice the beans finely. In a bowl, mix the charred apricots, cherries, green beans, vinegar, and salt. Toss well and adjust seasoning to your taste.
Cook the Mushroom Shawarma
- Slice the portobello mushrooms into thick strips. In a bowl, mix together the olive oil, tamari, maple syrup, smoked paprika, salt and pepper. Add the mushrooms and stir to coat well. Heat a frying pan over medium-high heat and cook the mushrooms for 5–7 minutes, stirring occasionally, until softened and starting to caramelise.
To Serve
- Warm the flatbreads or pittas. Spread with a generous dollop of hummus, top with the mushroom shawarma, a spoonful of tabbouleh, and finish with the apricot and bean salad. Enjoy!
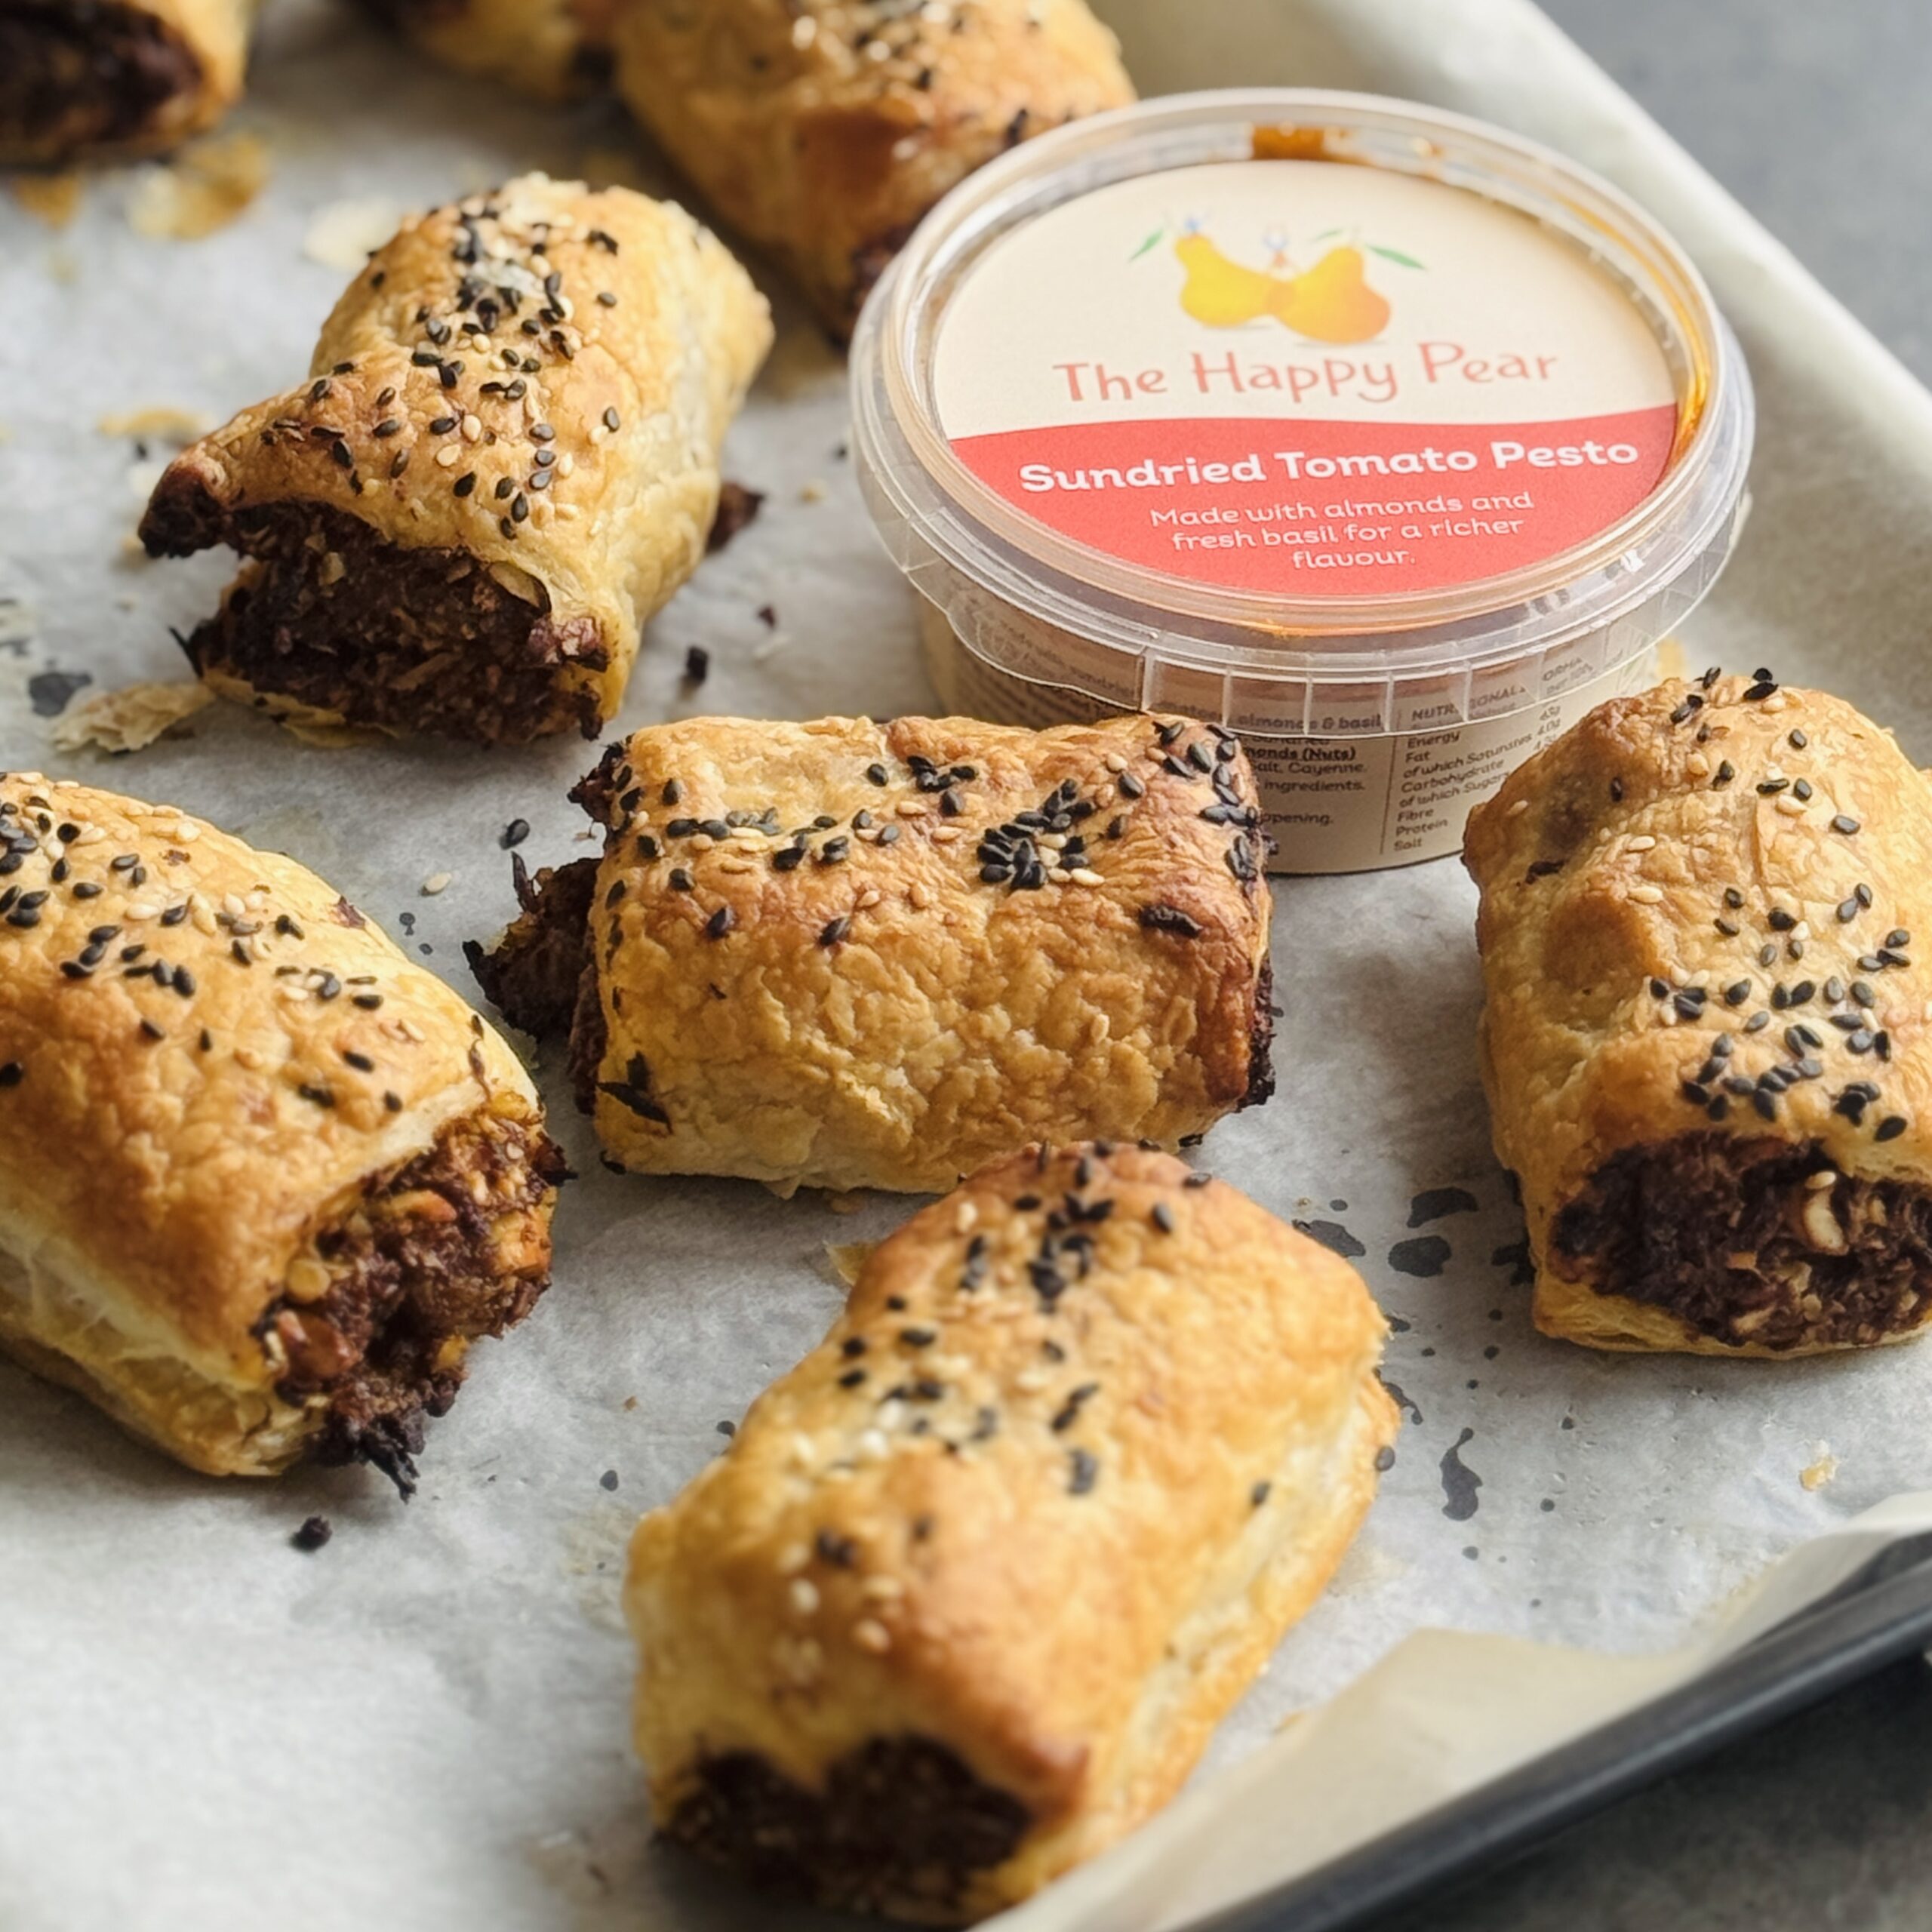
Sundried Tomato & Carmelised Onion Sausage Rolls
Takes 30 minutes
Serves 8
Ingredients
- 1 sheet 320g vegan puff pastry (shop-bought)
For the filling:
- 1 medium red onion
- 3 tbsp balsamic vinegar
- 3 tbsp maple syrup
- 250 g approx. 2½ cups oyster mushrooms or mushrooms of choice
- 2 tbsp tamari or soy sauce
- 100 g ¾ cup cashew nuts
- 100 g ⅓ cup The Happy Pear Sundried Tomato Pesto (or pesto of choice)
- 50 ml 3 tbsp + 1 tsp oat milk or other plant milk
- 2 tbsp sesame seeds
- Pinch of sea salt and black pepper
- 1 tbsp oil for cooking
Instructions
Preheat the oven & prep ingredients:
- Preheat the oven to 200°C (fan) / 220°C (conventional) / 392°F.
- Peel and finely slice the red onion. Clean and slice the mushrooms.
Cook the filling:
- Heat 1 tbsp oil in a frying pan over high heat. Once hot add the onions and cook for 2-3 mins, then add the mushrooms with a pinch of salt and sauté for 5-7 minutes stirring regularly until browned and most of the moisture from the mushrooms has evaporated. Reduce the heat to medium heat.
Season and add cashews:
- In the same pan, add in the tamari maple syrup, balsamic vinegar and cashew nuts and sun-dried tomato pesto and cook for another 2–3 minutes stirring regularly until sticky and jammy.
Blend the filling:
- Using an immersion blender or stick blender blend until smooth but keeping a little bite of texture. Alternative add to either a food processor or blender and blend till smooth. Taste and adjust the seasoning to your liking.
Shape the sausages:
- Divide the filling into 4 equal portions (approx. 80g each) and shape into sausages about 12–13cm long.
Assemble the rolls:
- Unroll the puff pastry and cut into 4 rectangles (roughly 12 x 16 cm). Place a sausage on the short edge of each rectangle and roll tightly. Seal the edge with oat milk and press to secure. Place seam-side down on a lined baking tray.
Brush and bake:
- Brush the tops with oat milk and sprinkle over the sesame seeds. Bake for 20 minutes at 200°C (fan) / 220°C (conventional) until golden brown and crisp.

Tropical Mango Berry Ice Cream Bars
Takes 1 hour 30 minutes
Serves 8
Ingredients
For the mango nougat base
- 200 g dried mango approx. 2 cups
- 150 g cashew nuts approx. 1½ cups
For the berry cream filling
- 200 g frozen mixed berries approx. 1 cup
- 100 g coconut cream approx. ½ cup
Toppings & chocolate coating
- A handful of frozen raspberries
- 200 g dark chocolate approx. 1¼ cups, melted
- Flaky sea salt or freeze-dried raspberries
Instructions
Prepare the mango nougat base
- Soak the dried mango in boiling water for 5 minutes. In a food processor, blend the cashew nuts until fine. Drain the soaked mango, then add it to the food processor along with a pinch of salt. Blend until smooth and the mixture comes together and holds when pressed.
Make the berry cream filling
- In a clean food processor or blender, combine the frozen berries and coconut cream. Blend until completely smooth and creamy. Taste and, if needed, add a touch of maple syrup depending on the tartness of the berries.
Assemble the layers
- Line a loaf tin or small rectangular tray with parchment paper. Press the mango-cashew nougat mixture evenly into the base of the tin. Wetting the back of a spoon can help spread it more easily. Pour the berry cream filling over the top and smooth it out with a spatula. Scatter a handful of frozen raspberries on top for extra texture and flavour.
Freeze to set
- Place the tin in the freezer for 1 hour, or until the mixture is firm enough to slice.
Coat in chocolate
- Remove from the freezer and cut into 8–10 rectangular bars. Dip each bar into the melted dark chocolate, then immediately sprinkle with a pinch of flaky sea salt or freeze-dried raspberries.
Final set
- Lay the chocolate-coated bars on a parchment-lined tray and return to the freezer for 10 minutes, or until the chocolate has fully set.
Serve and enjoy
- Your Tropical Mango Berry Ice Cream Bars are ready to enjoy! Store any extras in the freezer and allow them to soften for a few minutes before eating.
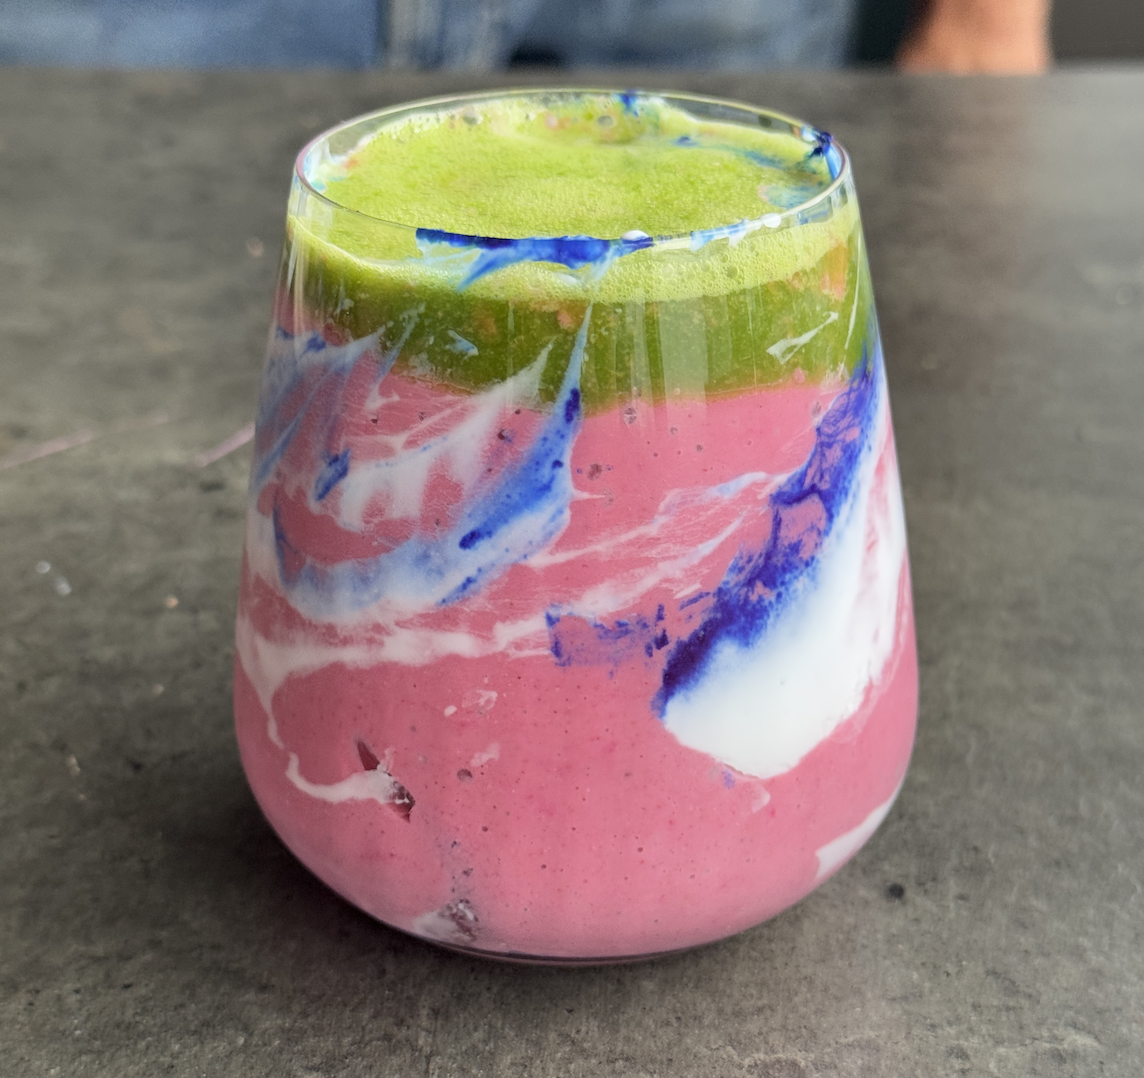
Space Smoothie
Takes 10 minutes
Serves 2
Ingredients
Juice Base – Electrolytes
(Use the juicer attachment on the Naamwell C2)
- 1 bunch kale
- 1 head pak choi
- 1 cucumber approx. 250g – hydrating, electrolyte-rich
- 2 apples approx. 300g total
- 1 lime peeled – Vitamin C + zing
Smoothie Stage – Protein + Fibre
(Switch to the blender attachment on the same base)
- 1 handful mixed berries approx. 75g
- ½ tsp spirulina – gives a blue-green glow
- 1 frozen banana approx. 100g
- 2 tbsp hemp seeds approx. 20g – plant protein & omega-3
- 240 ml oat milk 1 cup
- 75 g almonds ½ cup – for creaminess and fibre
Instructions
Juice the greens:
- Fit the juicer attachment on the Naamwell C2. Feed in the kale, pak choi, cucumber, apples, and peeled lime. Let the machine extract the fresh green juice — rich in electrolytes, antioxidants, and fibre-supportive compounds.
Switch to blend:
- Remove the juicer attachment and swap to the blender jug. Pour the fresh green juice into the blender.
Add smoothie ingredients:
- Add the berries, spirulina, frozen banana, hemp seeds, oat milk, and almonds to the jug. Blend on high until completely smooth and creamy.
Serve and enjoy:
- Pour into two glasses and drink fresh. It’s vibrant, refreshing, and loaded with goodness.

Spicy Spiral Courgette Hot Dog (Zucchini)
Takes 20 minutes
Serves 4
Ingredients
For the courgettes
- 4 –5 small courgettes about 400g / 14 oz total
- 1 tbsp olive oil
Gochujang Marinade
- 60 g ¼ cup gochujang paste or The Happy Pear Spicy Red Pepper Pesto
- 2 tbsp tamari or soy sauce
- 2 tbsp maple syrup or agave
- 1 tbsp rice vinegar or lime juice
- 1 tbsp toasted sesame oil
- 2 garlic cloves
- 1 tsp fresh ginger
To serve (optional but recommended)
- Toasted buns or flatbreads
- Gherkins
- Vegan mayo
- Tomato ketchup
- Fresh coriander or mint
- Fried red onions
Instructions
Skewer and spiral-cut the courgettes:
- Wash and trim 4–5 courgettes (about 400g / 14 oz). Carefully insert a metal or soaked wooden skewer lengthwise through the centre of each courgette, from end to end. Using a small sharp knife, slice diagonally at a 45° angle along one side, then rotate to the opposite side and make straight cuts that connect with the diagonal ones—this creates a spiral pattern along the skewer. The skewer prevents you from cutting too deep and helps the courgette hold its shape. Once cut, gently stretch the courgette to reveal the accordion shape, increasing surface area for flavour and caramelisation.
Make the marinade:
- Finely grate 2 garlic cloves and 1 tsp fresh ginger. In a bowl, whisk together with 60g gochujang paste, 2 tbsp tamari, 2 tbsp maple syrup, 1 tbsp rice vinegar, and 1 tbsp toasted sesame oil. Taste and adjust for balance—add more sweetness, acidity, or spice as needed.
Grill until caramelised:
- Preheat a BBQ, frying pan or griddle pan over medium-high heat. Brush the courgettes with 1 tbsp olive oil and sprinkle with a generous pinch of salt. Grill for 3–4 minutes per side, turning carefully, until tender, caramelised, and slightly charred.
Brush on the marinade:
- Using a pastry brush, generously brush the marinade onto the grilled courgettes, ensuring it gets inside all the folds. Continue cooking for a further 2–3 minutes, turning regularly so they cook evenly and the marinade begins to caramelise.
Serve hot off the grill:
- Serve the grilled courgettes (remove the skewers) in toasted buns or flatbreads, topped with gherkins, vegan mayo, tomato ketchup, fresh herbs, and a handful of fried onions. Alternatively, slice and serve over bowls of grains, salads, or noodles for a vibrant summer dish.
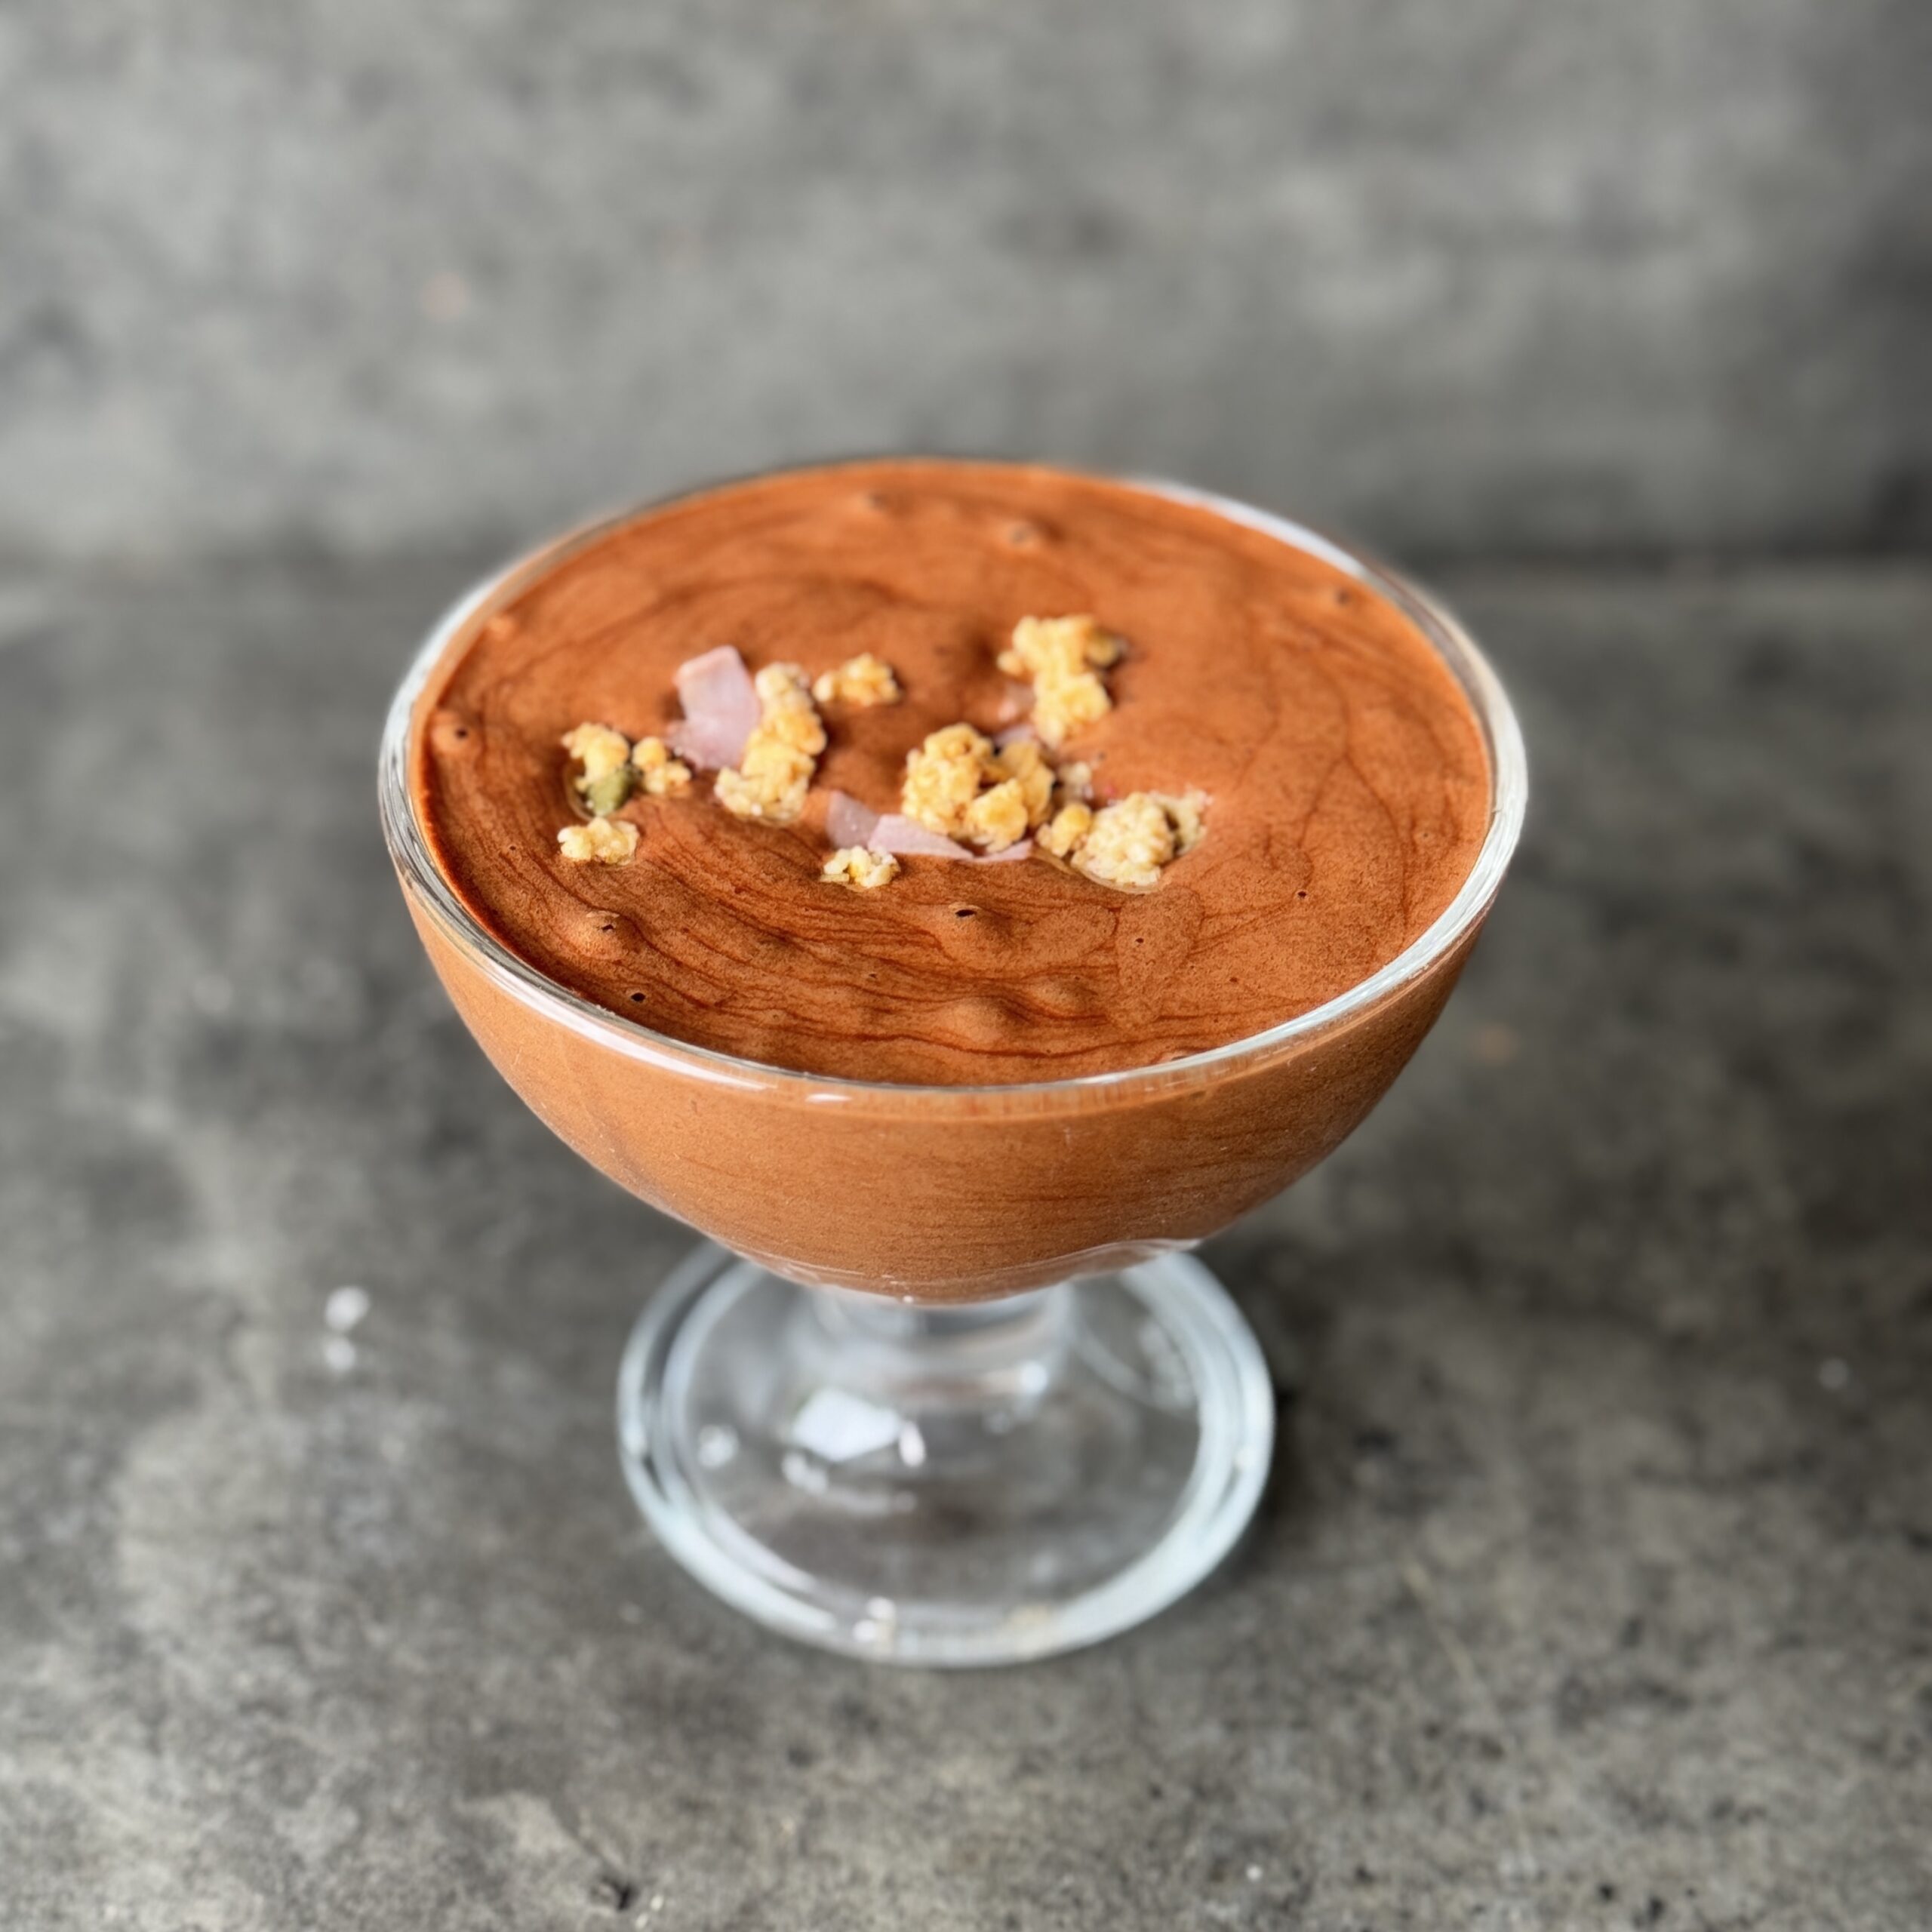
Easy Vegan Chocolate Mousse
Takes 1 hour 15 minutes
Serves 4
Ingredients
- 160 g aquafaba liquid from one 400g tin of chickpeas
- 250 g dark chocolate chips around 54% cocoa
- 20 g caster sugar
- 1 tsp vinegar or 1 tsp lemon juice
- 75 ml sunflower oil
- Optional: 1 tsp vanilla extract or pinch of sea salt for extra depth
Instructions
Melt the chocolate:
- Place the chocolate chips in a heatproof bowl and melt them over a bain-marie (a bowl set over gently simmering water) or microwave in short bursts, stirring until smooth. Remove from heat and stir in the sunflower oil until fully combined.
Whip the aquafaba:
- Using an electric whisk or stand mixer, beat the aquafaba with the vinegar or lemon juice on high speed until stiff peaks form—this may take 6–8 minutes.
Add sugar gradually:
- Reduce the speed to low and gradually sprinkle in the sugar. Once incorporated, return to high speed and whip for another 5–8 minutes until glossy and stable.
Combine with chocolate:
- With the mixer running on low, slowly pour in the melted chocolate mixture. Mix until fully incorporated and smooth, about 1–2 more minutes. The texture should be light but pourable.
Chill:
- Spoon or pour the mousse into serving glasses or ramekins and chill for at least 1–2 hours until set.
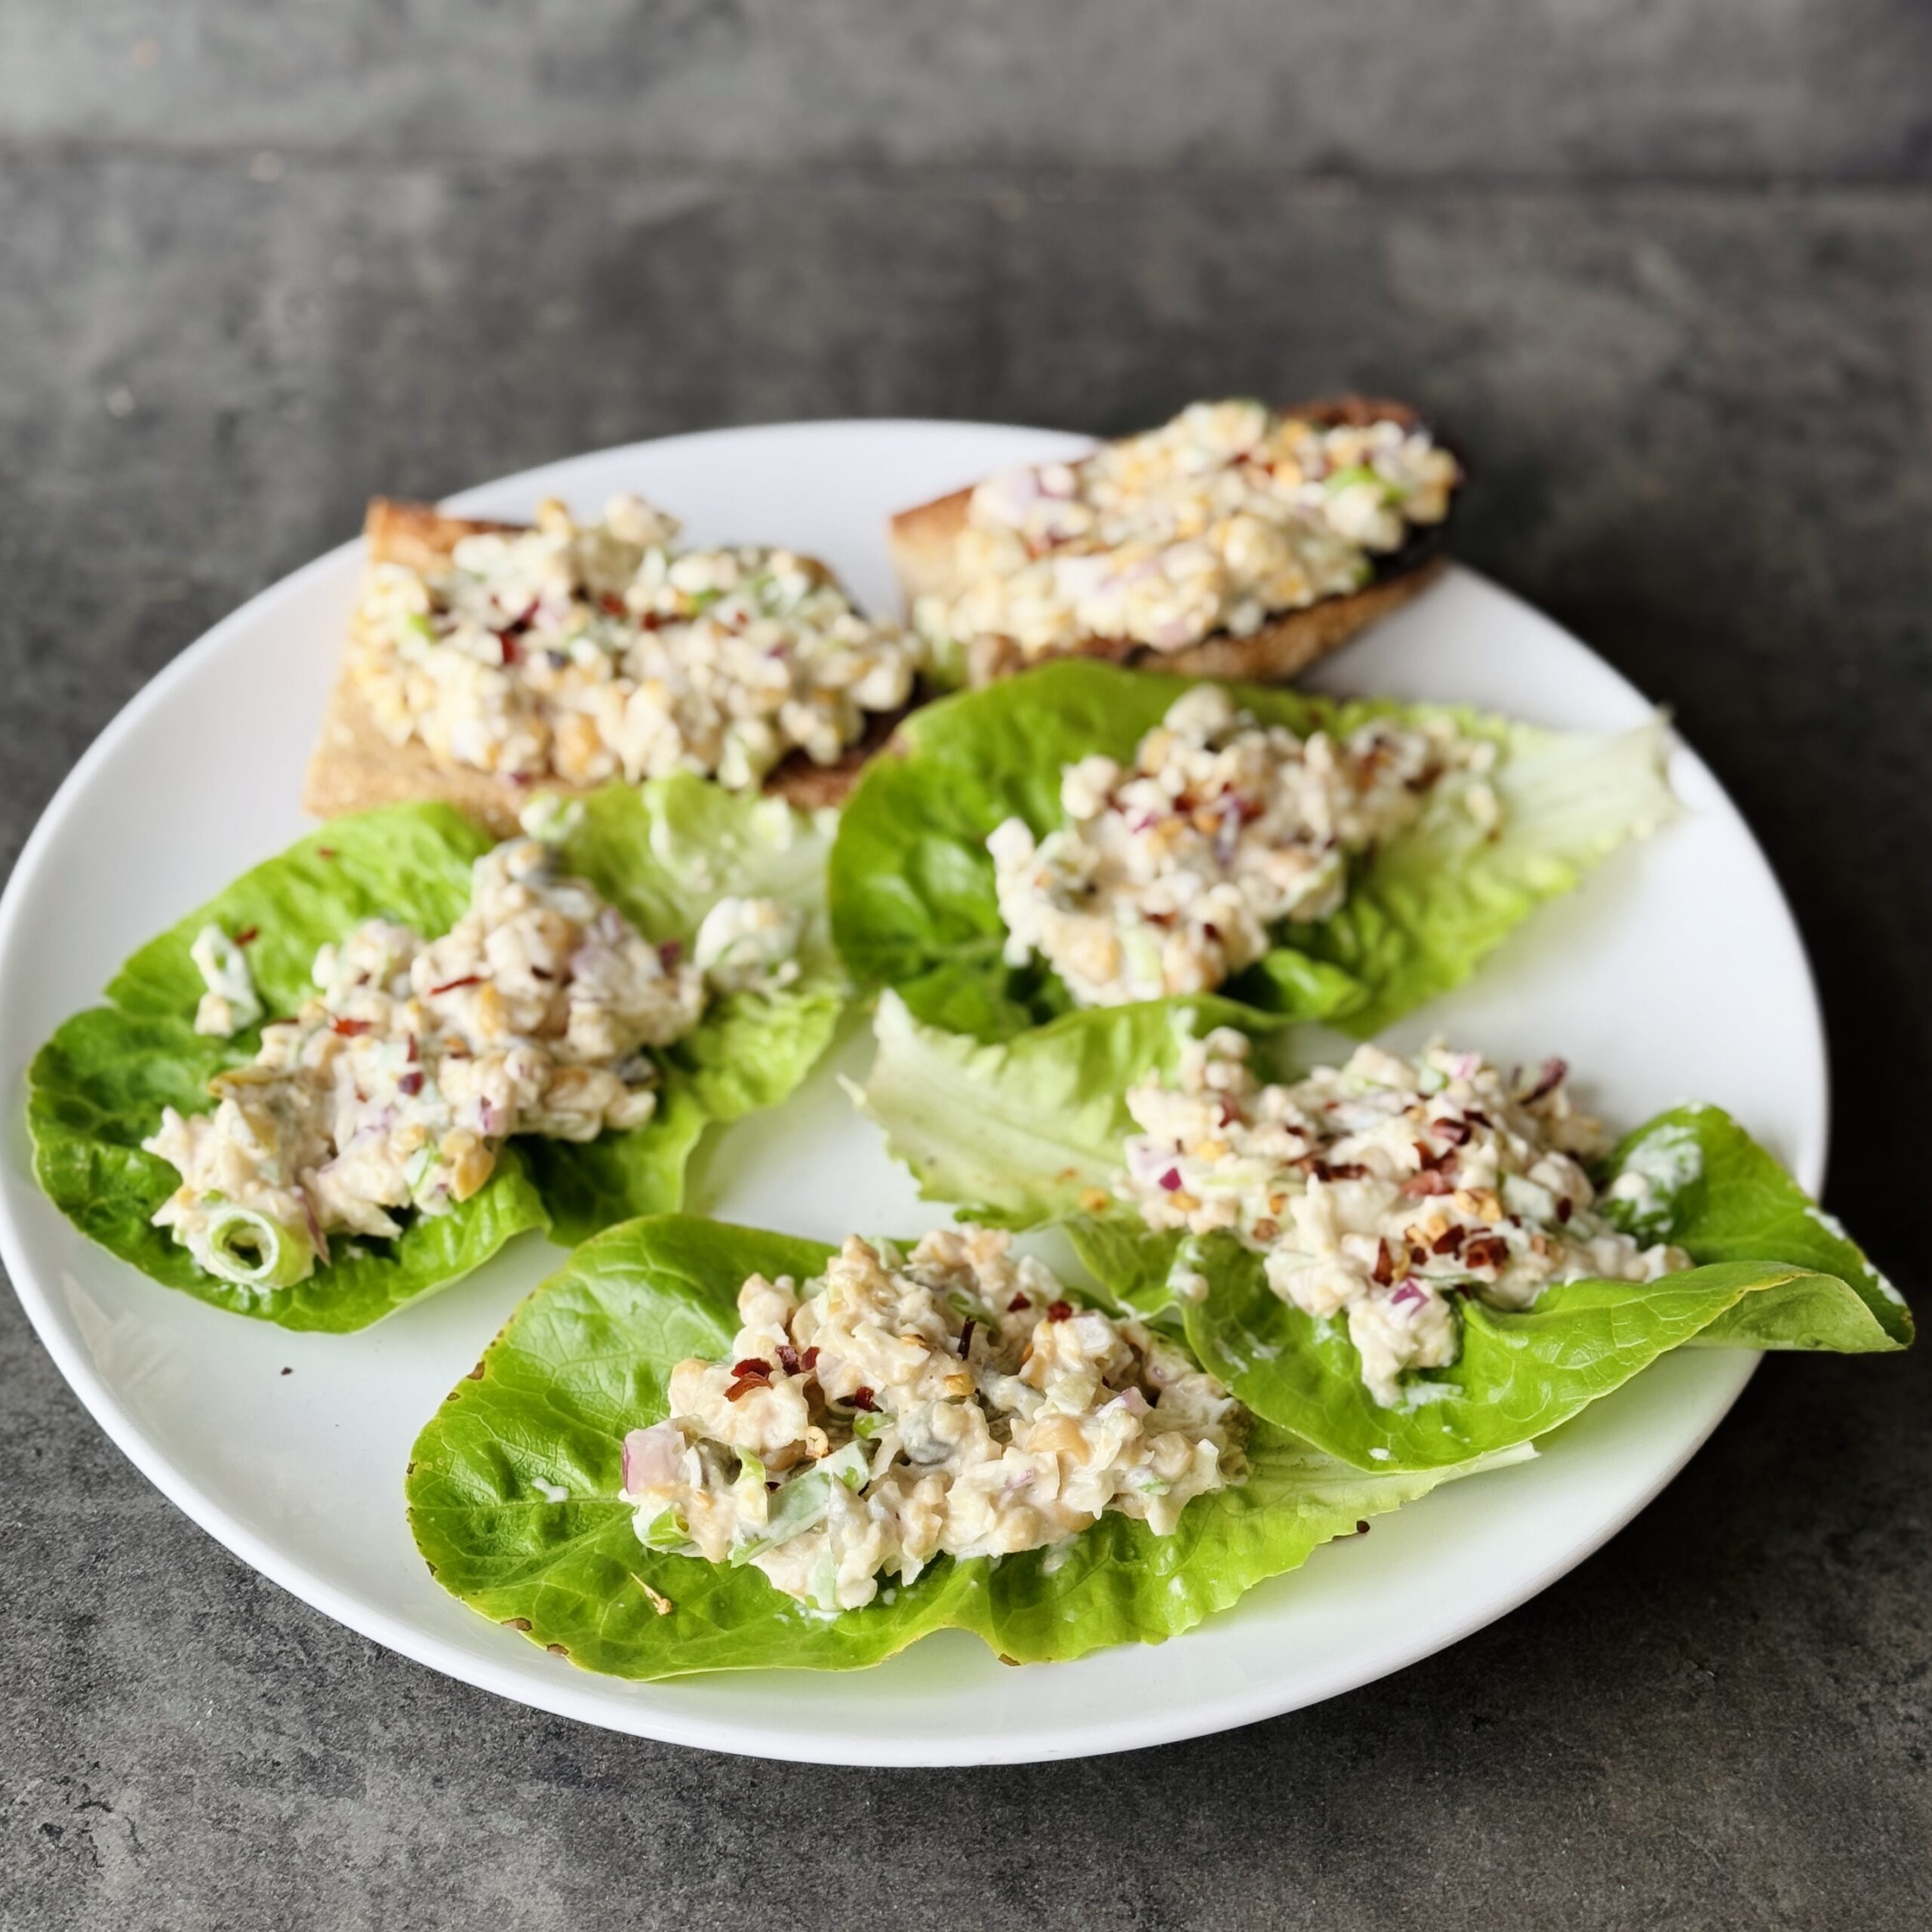
Chickpea “Tuna” Salad in Lettuce Cups
Takes 10 minutes
Serves 4
Ingredients
- 1 × 400g tin of chickpeas drained and rinsed (approx. 1½ cups)
- 1 small red onion finely diced
- 2 cloves of garlic finely chopped or crushed
- 3 scallions spring onions, finely sliced
- 150 g vegan mayonnaise ½ cup + 2 tbsp (see page x for recipe)
- Salt to taste
- Pinch of black pepper
- 5 small gherkins finely chopped (optional)
- 1 tbsp Dijon mustard
- 1 tbsp capers chopped
- ½ tsp seaweed powder optional, for a hint of the sea
To Serve
- 1 head of lettuce e.g. romaine, little gem or iceberg, leaves separated
- or
- Slices of toasted sourdough bread
Instructions
- In a mixing bowl, roughly mash the chickpeas with a fork or potato masher until chunky but spreadable.
- Add the red onion, garlic, scallions, mayonnaise, mustard, capers, gherkins (if using), seaweed powder, a pinch of salt and pepper. Mix well until fully combined.
- Taste and adjust the seasoning, adding more salt, mustard, or mayo if needed.
- Serve spooned into individual lettuce leaves for a fresh take, or spread generously over sourdough toast.
- This will keep well in the fridge for 3–4 days, so it’s great for meal prep too.
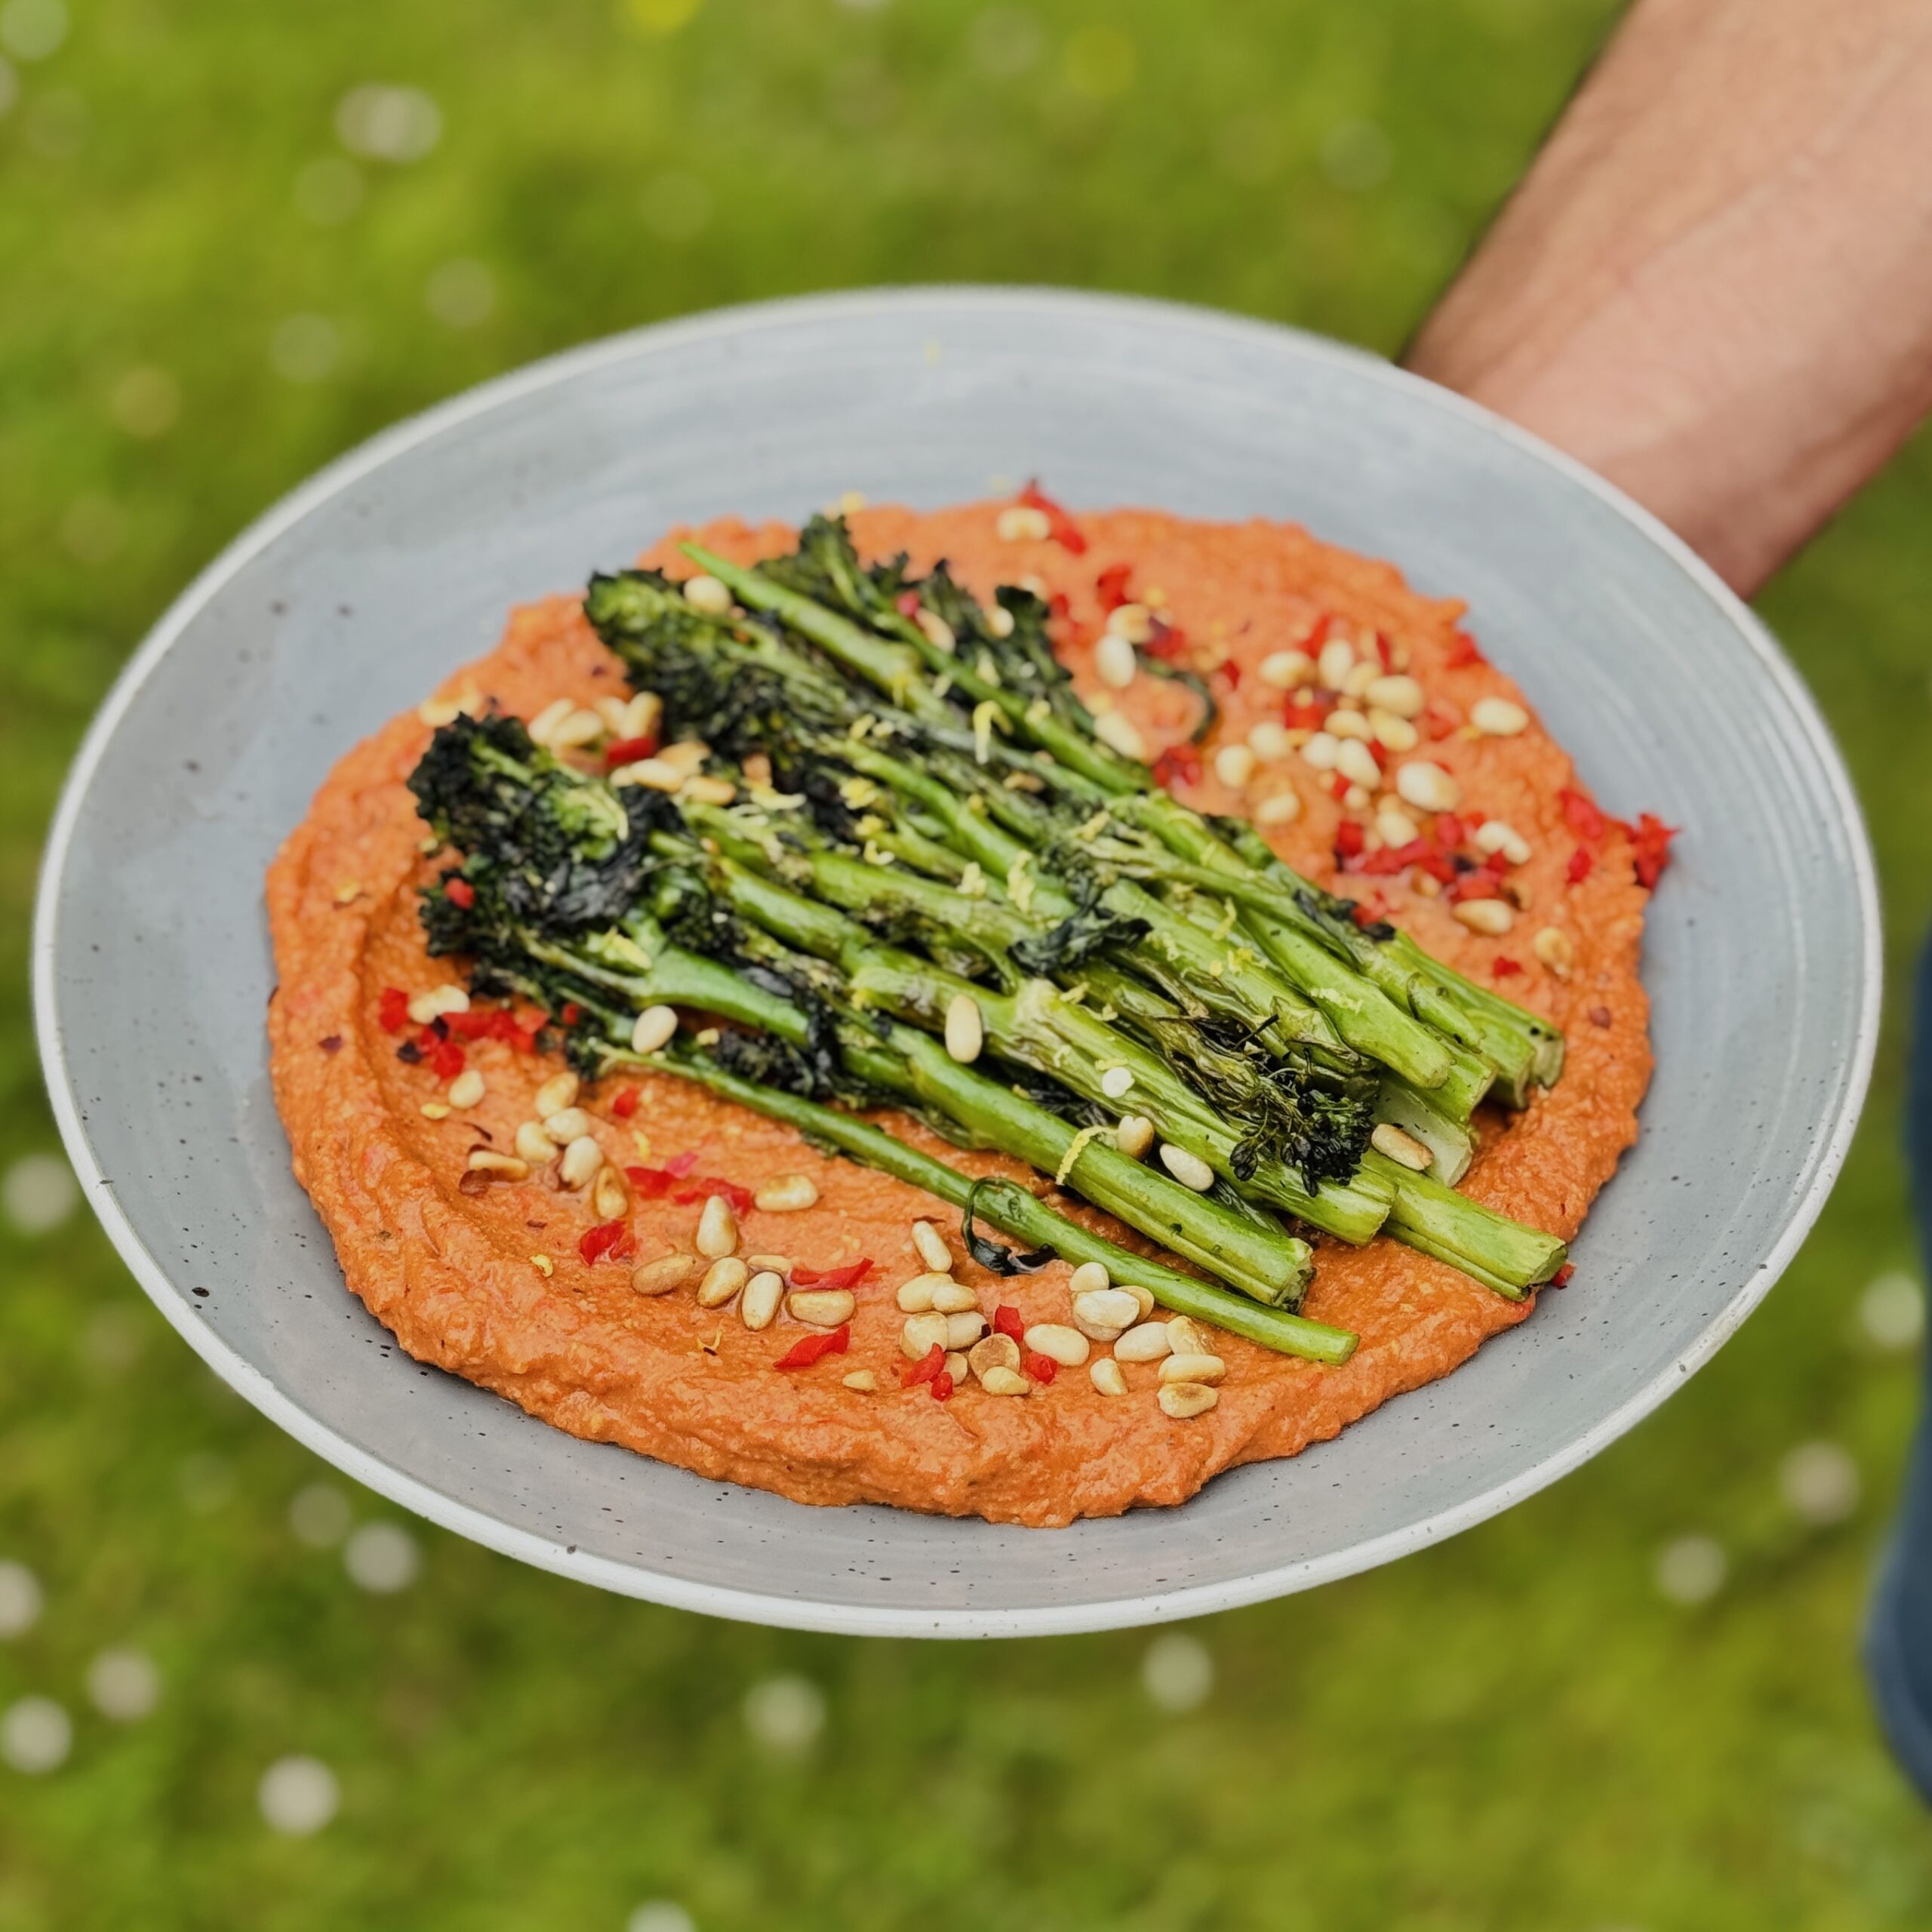
Charred Tenderstem Broccoli with Romesco, Tahini Cream & Toasted Pine Nuts
Takes
Serves
Ingredients
For the broccoli
- 300 g tenderstem broccoli
- 2 tbsp olive oil
- Pinch of salt
For the romesco
- 2 large red peppers approx. 300g
- 2 cloves garlic peeled
- 40 g blanched or flaked almonds about ¼ cup
- 25 g stale bread or sourdough about 1 slice
- 1 tbsp vinegar of choice e.g. sherry or red wine vinegar
- 1 tsp smoked paprika
- ¼ tsp chilli flakes optional
- 4 tbsp extra virgin olive oil
- Salt and freshly ground black pepper to taste
For the tahini cream
- 2 tbsp tahini
- 1 tbsp lemon juice
- ½ tsp maple syrup
- 2 tbsp water to loosen
- Pinch of salt
To finish
- 2 tbsp pine nuts toasted until golden
- Optional: pinch of smoked salt or finely grated orange zest
Instructions
Make the romesco sauce:
- Char the red peppers (approx. 300g) on a barbecue or directly over a gas flame until blackened. Place in a covered bowl to steam for 5–10 minutes, then peel and remove seeds. Toast the garlic cloves and almonds in a dry pan over medium heat until golden. In a blender, combine the peeled peppers, garlic, almonds, bread, vinegar, smoked paprika, and chilli flakes. Blend until mostly smooth. Slowly drizzle in 3 tablespoons of olive oil while blending until emulsified. Season to taste with salt and pepper.
Prepare the tahini cream:
- In a small bowl, whisk together the tahini, lemon juice, maple syrup, and a pinch of salt. Gradually add the water until the mixture is smooth and drizzle-able.
Toast the pine nuts:
- Place the pine nuts in a dry frying pan over medium heat. Toast for 3–4 minutes, stirring frequently, until golden and fragrant. Set aside.
Barbecue the tenderstem broccoli:
- Toss the broccoli with olive oil and a pinch of salt. Grill over a hot barbecue for 6–8 minutes, turning occasionally, until nicely charred but still tender.
Assemble the dish:
- Spread the romesco sauce across a serving plate. Arrange the charred broccoli on top. Drizzle generously with the tahini cream, then sprinkle over the toasted pine nuts. Garnish with smoked salt or a little orange zest, if using.
Vegan Mayonnaise
Takes 15 minutes
Serves 20
Ingredients
- 1 tsp garlic powder
- 300 ml olive oil 1¼ cups
- 300 ml soy milk 1¼ cups
- 2 tbsp lemon juice 2 tbsp = ⅛ cup
- ½ tsp salt
- ¼ tsp ground black pepper
- 1 tbsp dijon mustard 1 tbsp = 1/16 cup
Instructions
- Blend the base ingredients
- In a blender, combine all the ingredients except the olive oil. Blend for 1 minute until well mixed.
- Emulsify the mixture
- While the blender is running, slowly add the olive oil in a thin, steady stream until the mixture emulsifies.
- Achieve the perfect consistency
- Continue blending until the mixture reaches a smooth, creamy mayonnaise consistency.
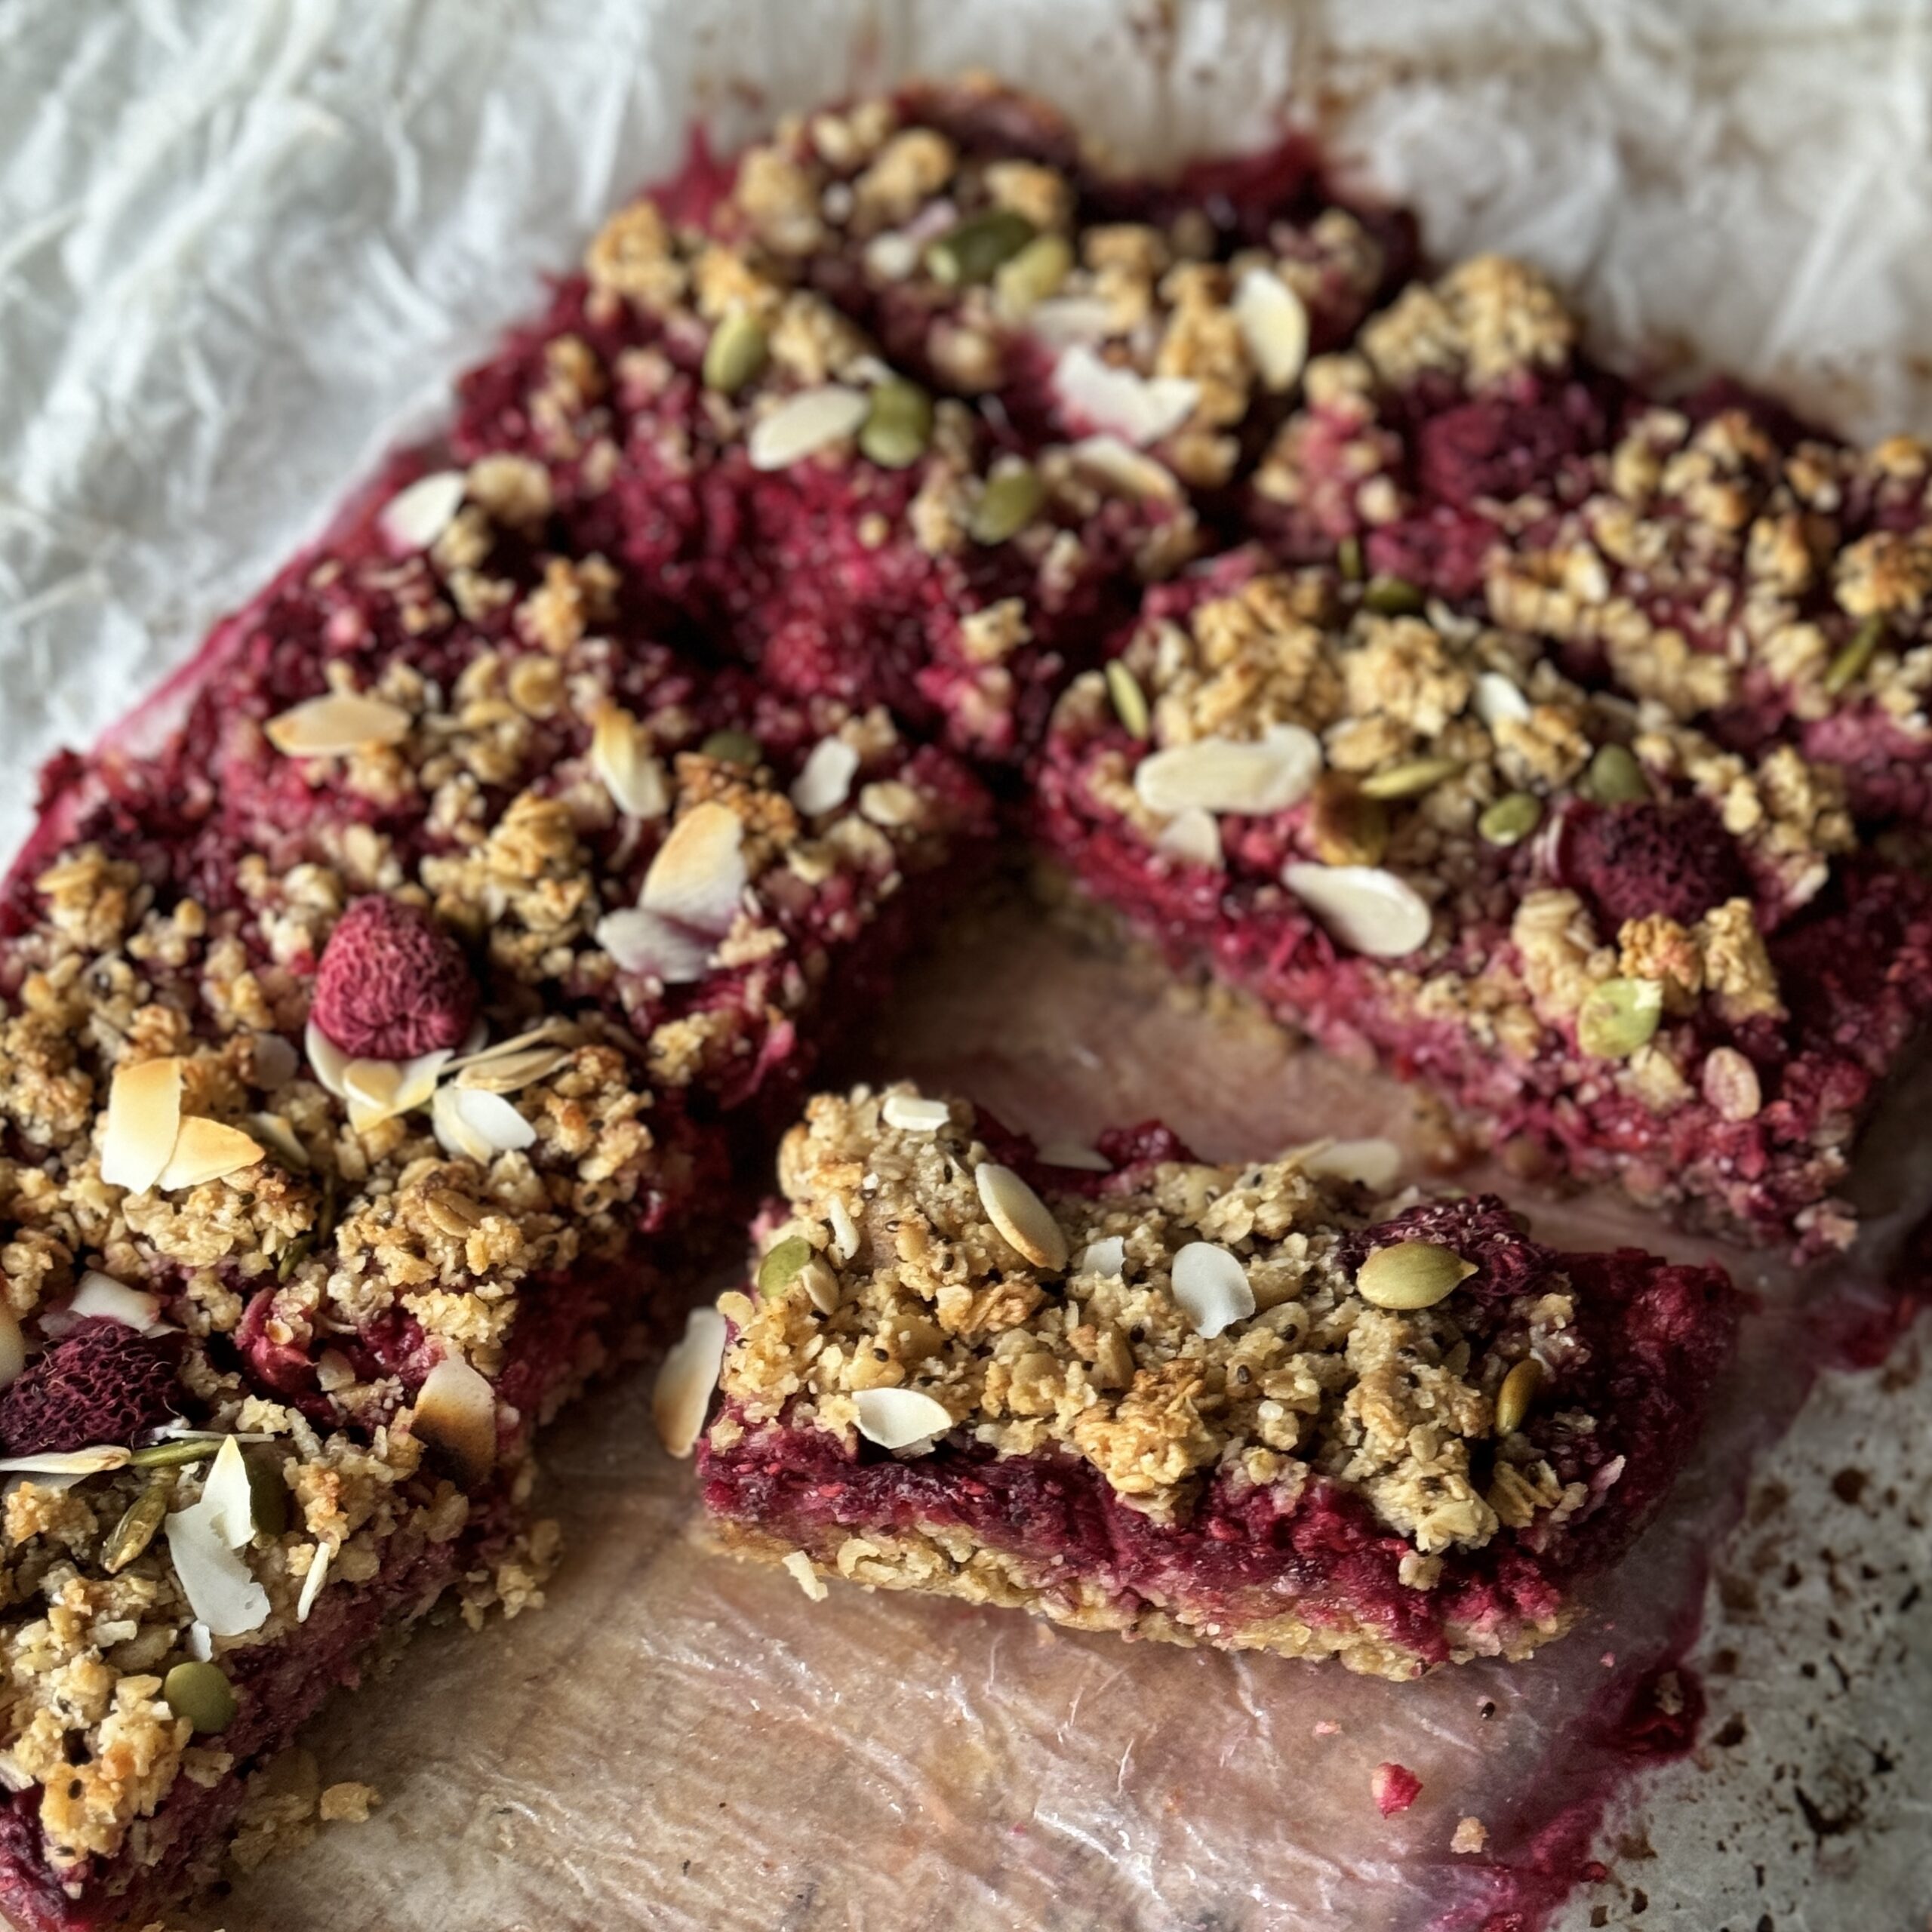
Berry Crumble Breakfast Bars
Takes 40 minutes
Serves 10
Ingredients
Base:
- 180 g rolled oats 2 cups
- 100 g almond flour or whole wheat flour 1 cup
- 60 ml maple syrup or honey 1/4 cup
- 60 ml coconut oil melted (1/4 cup)
- 5 ml vanilla extract 1 tsp
- 1 g cinnamon 1/2 tsp
- Pinch of salt
- 4 tbsp desiccated coconut
- 3 tbsp chia seeds
- 3 tbps peanut butter
Berry Filling:
- 300 g mixed berries fresh or frozen (2 cups)
- 20 g chia seeds 2 tbsp
- 15-30 ml maple syrup or honey to taste (1-2 tbsp)
- 15 ml lemon juice 1 tbsp
- 5 g lemon zest 1 tsp
Topping
- 100 g Steve's Dreamy Granola
Instructions
- Preheat the oven to 350°F (180°C) and line an 8×8 inch baking dish with parchment paper.
Make the base:
- In a large bowl, mix the rolled oats, almond flour, cinnamon, chia seeds, desiccated coconut and a pinch of salt.
- Add the melted coconut oil, maple syrup, and vanilla extract. Stir until everything is well combined.
- Press the ⅗ or a little over ½ of the mixture into the bottom of the lined baking tray (24cm x 16cm x 4cm) to form an even layer.
- Place in the oven for 8 mins while you prepare the berries and tidy up.
Prepare the berry filling:
- In a small bowl, combine the mixed berries, lemon juice, lemon zest, and maple syrup and mix well
Assemble the bars:
- Take the base out of the oven and spread the berry filling evenly over the oat base.
Add crumble topping:
- Gentle sprinkle over the remaining crumble mixture across the top ensuring to cover all the berries. We added a sprinkling of Steve's Dreamy Granola to the topping for an extra crunch!
Bake:
- Bake for 25-30 minutes, until the top is golden and the bars are set.
Serve
- Let cool completely before slicing into bars.
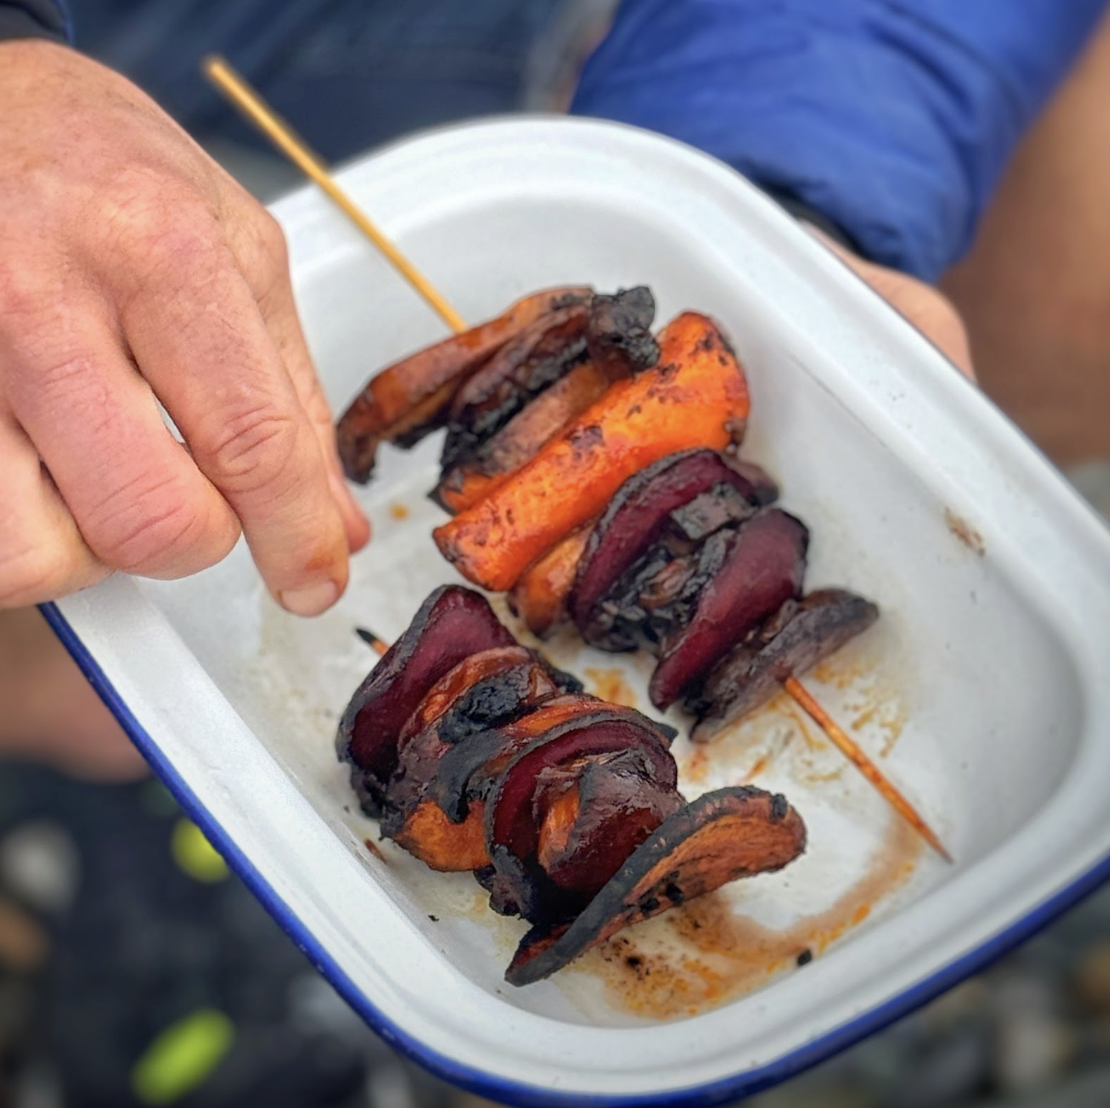
BBQ Korean-Style Veg Skewers
Takes 25 minutes
Serves 4
Ingredients
Ingredients
- 1 sweet potato
- 1 medium beetroot
- 200 g portobello mushrooms
- 1 tbsp oil
- 2 tbsp tamari or soy sauce
Dressing
- 2 tsp oil
- 3 tbsp gochujang or similar chilli sauce
- 1 tbsp balsamic vinegar/ vinegar of choice
- 2 tbsp maple syrup
- 1 clove of garlic
- 1 tbsp tamari
Instructions
- Prepare the Skewers: If using wooden skewers, soak them in water to prevent burning on the BBQ.
- Prepare the Vegetables: Finely slice the sweet potato and beetroot. Cut the mushrooms into long, thin strips. In a bowl, mix the sliced vegetables with 1 tbsp of oil, a pinch of salt, and 2 tbsp of tamari or soy sauce.
- Make the Dressing: Peel and finely dice the garlic. In a mug, combine the diced garlic with the rest of the dressing ingredients and mix well.
- Skewer the Vegetables: Thread the marinated vegetables onto the soaked skewers, alternating between sweet potato, beetroot, and mushroom slices. Repeat the pattern, folding some of the larger pieces of vegetables over and back on themselves to create an interesting shapes. You should get at least 5-6 filled vegetable skewers.
- Brush with Dressing: Using a pastry brush, generously coat the vegetable skewers with the prepared dressing.
- Barbecue: Cook the skewers on a barbecue over medium heat or on an open flame, preferably on the embers, to cook the sweet potato before charring. Brush the skewers with more dressing midway through cooking to encourage caramelization.
- Serve: Serve with your favourite salad for an easy and delicious barbecue dish.
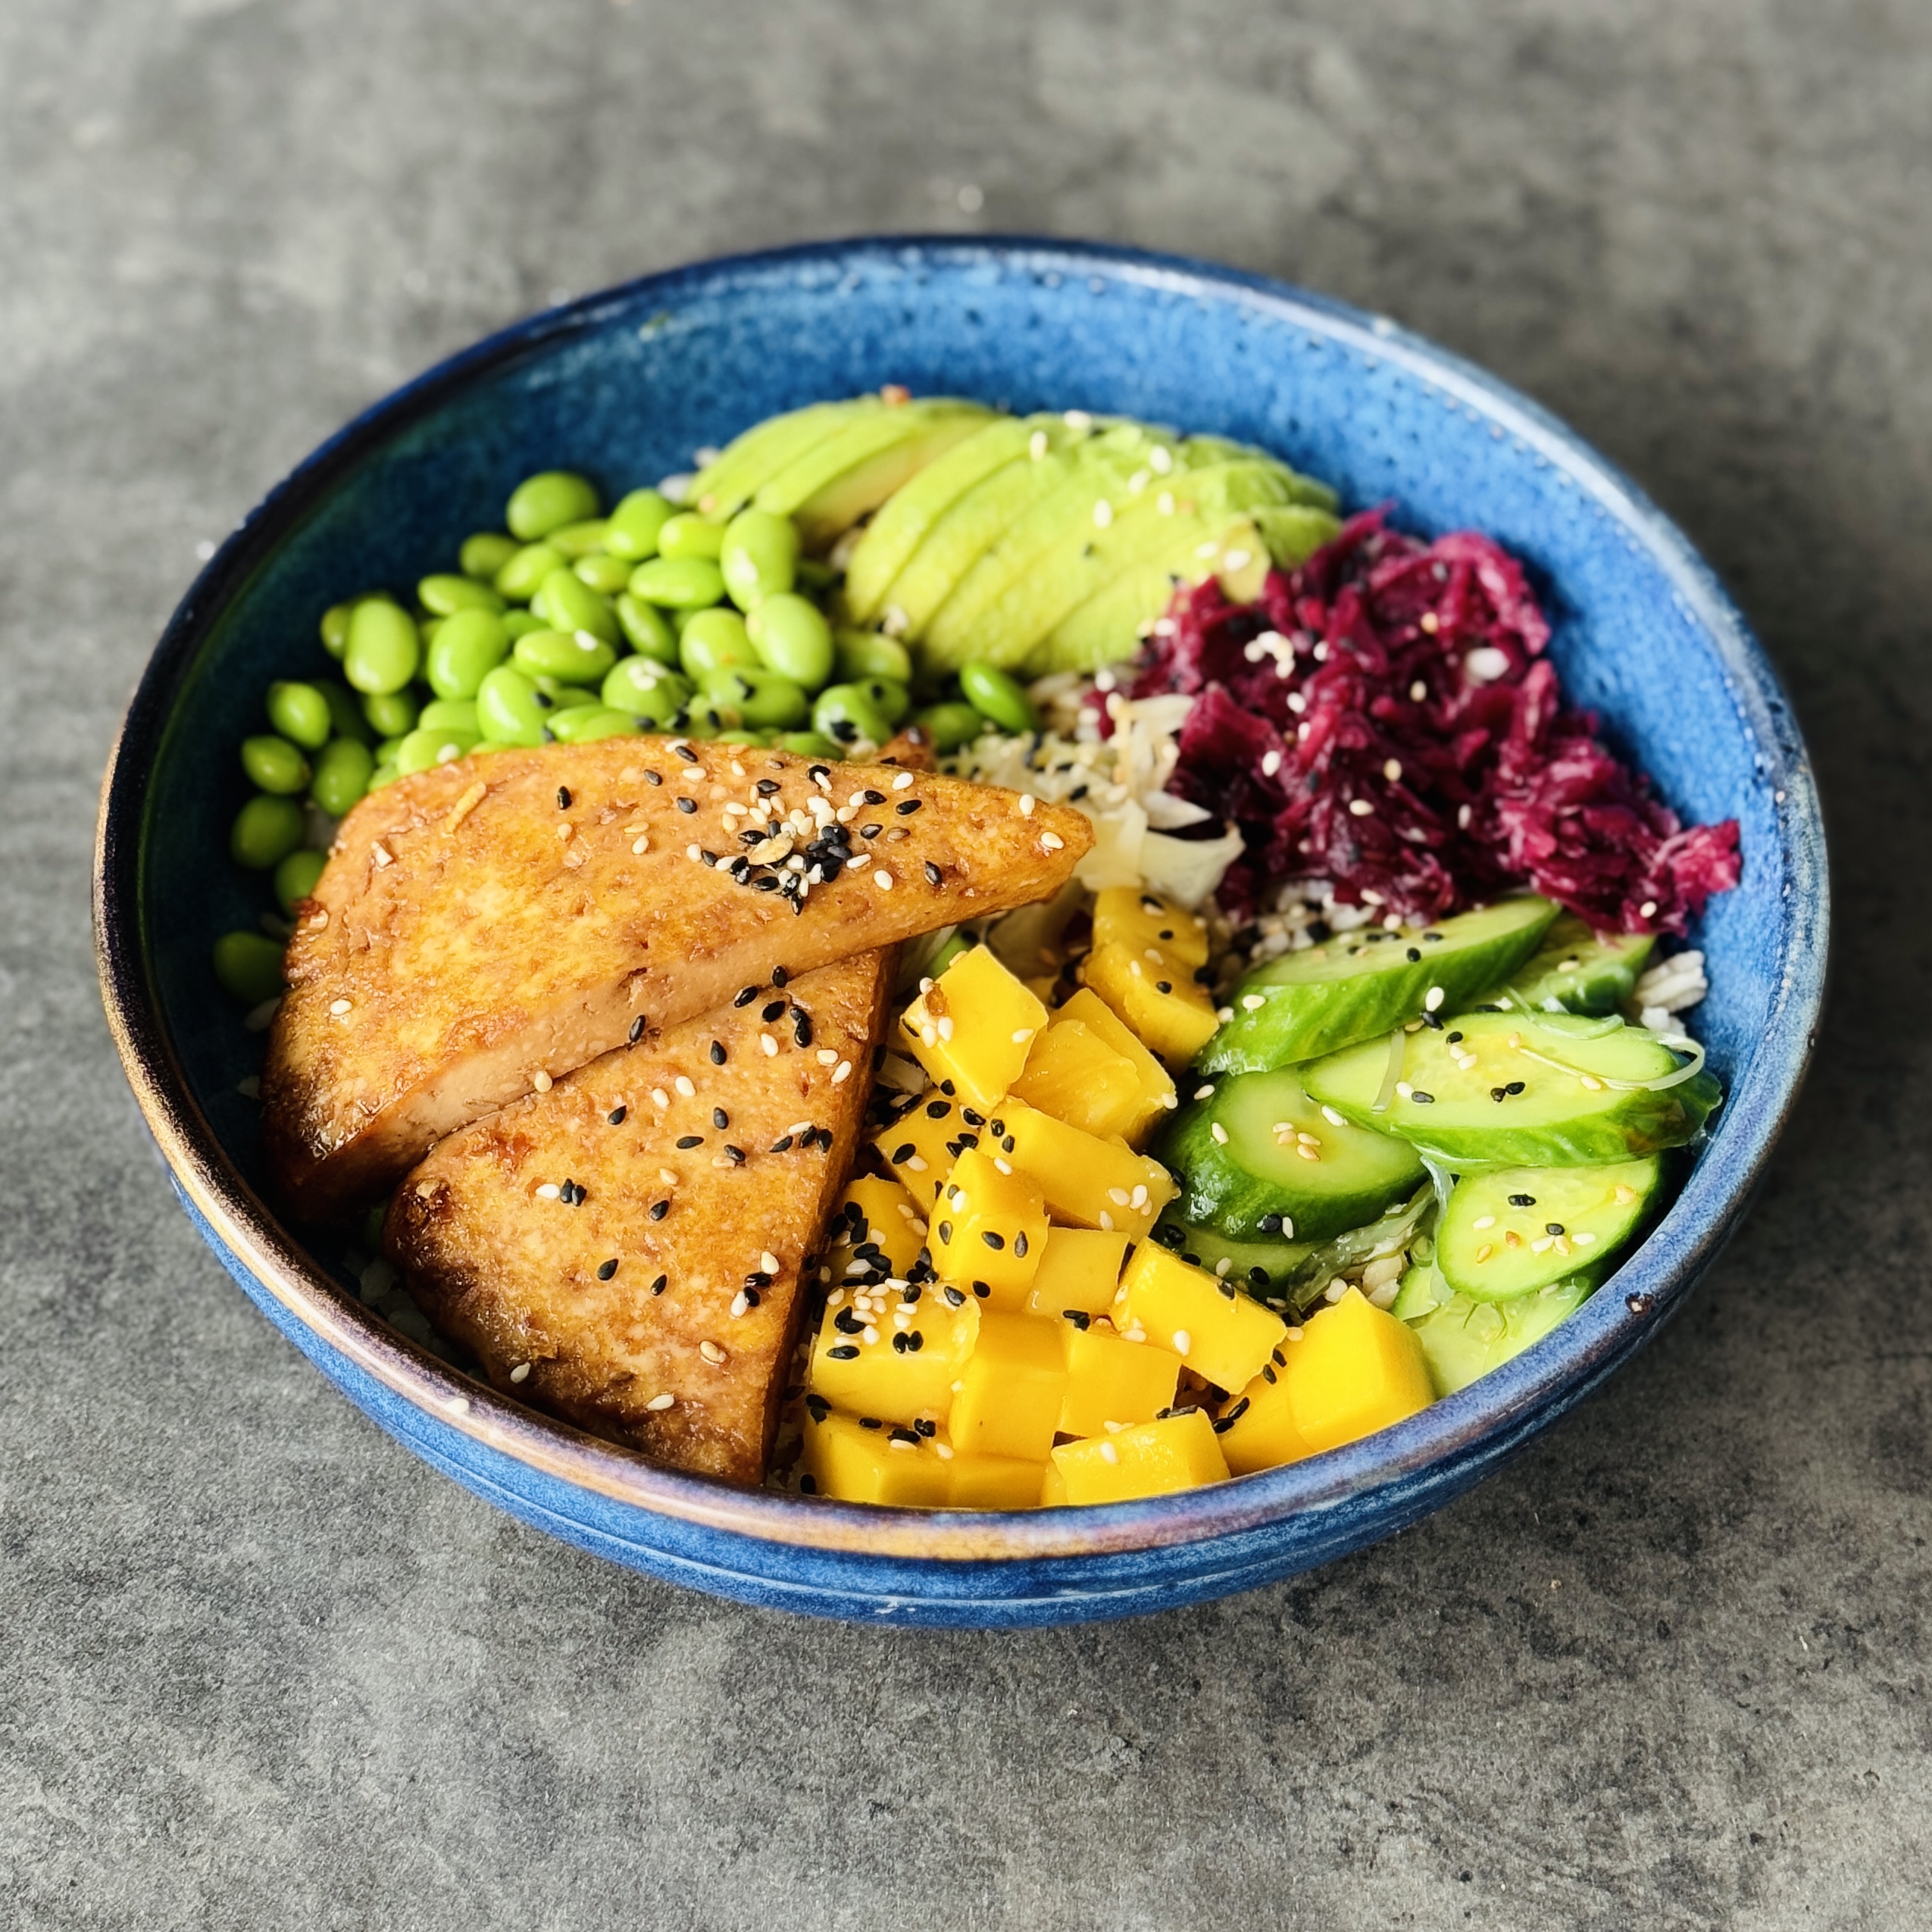
High Protein Poke Bowl
Takes 35 minutes
Serves 2
Ingredients
Teriyaki Tofu
- 200 g firm tofu
- 45 g tamari or soy sauce approx. 3 tbsp
- 30 g rice vinegar approx. 2 tbsp
- 15 g maple syrup approx. 1 tbsp
- 10 g fresh ginger grated
- 1 garlic clove finely chopped
- 15 g sesame oil approx. 1 tbsp
Rice
- 200 g cooked brown rice
Wakame Cucumber Salad
- 1 tbsp dried wakame seaweed
- 100 g cucumber
- Pinch of salt
- 5 g sesame seeds approx. 1 tsp
- 7 g tamari approx. ½ tbsp
- 15 g rice vinegar approx. 1 tbsp
- 15 g maple syrup approx. 1 tbsp
Toppings
- 200 g edamame steamed or boiled
- 1 ripe avocado approx. 70g flesh
- 4 tbsp red sauerkraut approx. 60g
- 1 ripe mango diced (approx. 150g)
- 2 tbsp pickled ginger approx. 6g
Plant-Based Furikake (for garnish)
- 15 g white sesame seeds approx. 2 tbsp
- 15 g black sesame seeds approx. 2 tbsp
- 1 tbsp nutritional yeast
- 1 nori sheet finely crumbled or chopped
- 1.5 g sea salt approx. ¼ tsp
- Optional: ½ tsp smoked paprika
Satay Sauce
- 30 g almond or peanut butter approx. 2 tbsp
- 15 g rice vinegar approx. 1 tbsp
- 30 g tamari approx. 2 tbsp
- 15 g coconut sugar approx. 1 tbsp
- 1 garlic clove finely chopped
- 5 g sesame oil approx. 1 tsp
- Juice of ½ lime
- 10 g grated fresh ginger approx. ½ thumb-sized piece
- 15 g water approx. 1 tbsp – adjust as needed for consistency
Instructions
Marinate and Cook the Tofu:
- Cut the tofu into bite-sized cubes. In a bowl, combine tamari, vinegar, maple syrup, grated ginger, garlic and sesame oil. Toss the tofu in the marinade and let it sit for at least 10 minutes. Then bake at 200°C for 20 minutes, turning halfway, until golden and crisp at the edges.
Cook the Edamame:
- Steam or boil the edamame for 5 minutes. Drain and set aside.
Prepare the Cucumber Wakame Salad:
- Soak the wakame in water for 5 minutes, then drain. Thinly slice the cucumber and sprinkle with a pinch of salt. Let it sit for 5 minutes, then squeeze out any excess liquid. Combine with wakame, tamari, vinegar, maple syrup and sesame seeds.
Reheat the Rice:
- Warm the cooked rice if needed.
Make the Satay Sauce:
- Blend or whisk together all the sauce ingredients until smooth. Add a splash more water if needed to reach a pourable consistency.
Toast the Furikake:
- In a dry frying pan, toast the white and black sesame seeds over medium heat for 2–3 minutes until fragrant. Remove from the heat and mix with nutritional yeast, crumbled nori, salt and any optional spices.
Assemble the Bowls:
- Divide the rice between two bowls. Top each with half the tofu, edamame, wakame cucumber salad and sliced avocado. Add diced mango, red sauerkraut and pickled ginger.
Garnish and Serve:
- Sprinkle with the furikake, drizzle with satay sauce, and top with any extra toasted seeds or a dollop of spicy almond mayo if desired.
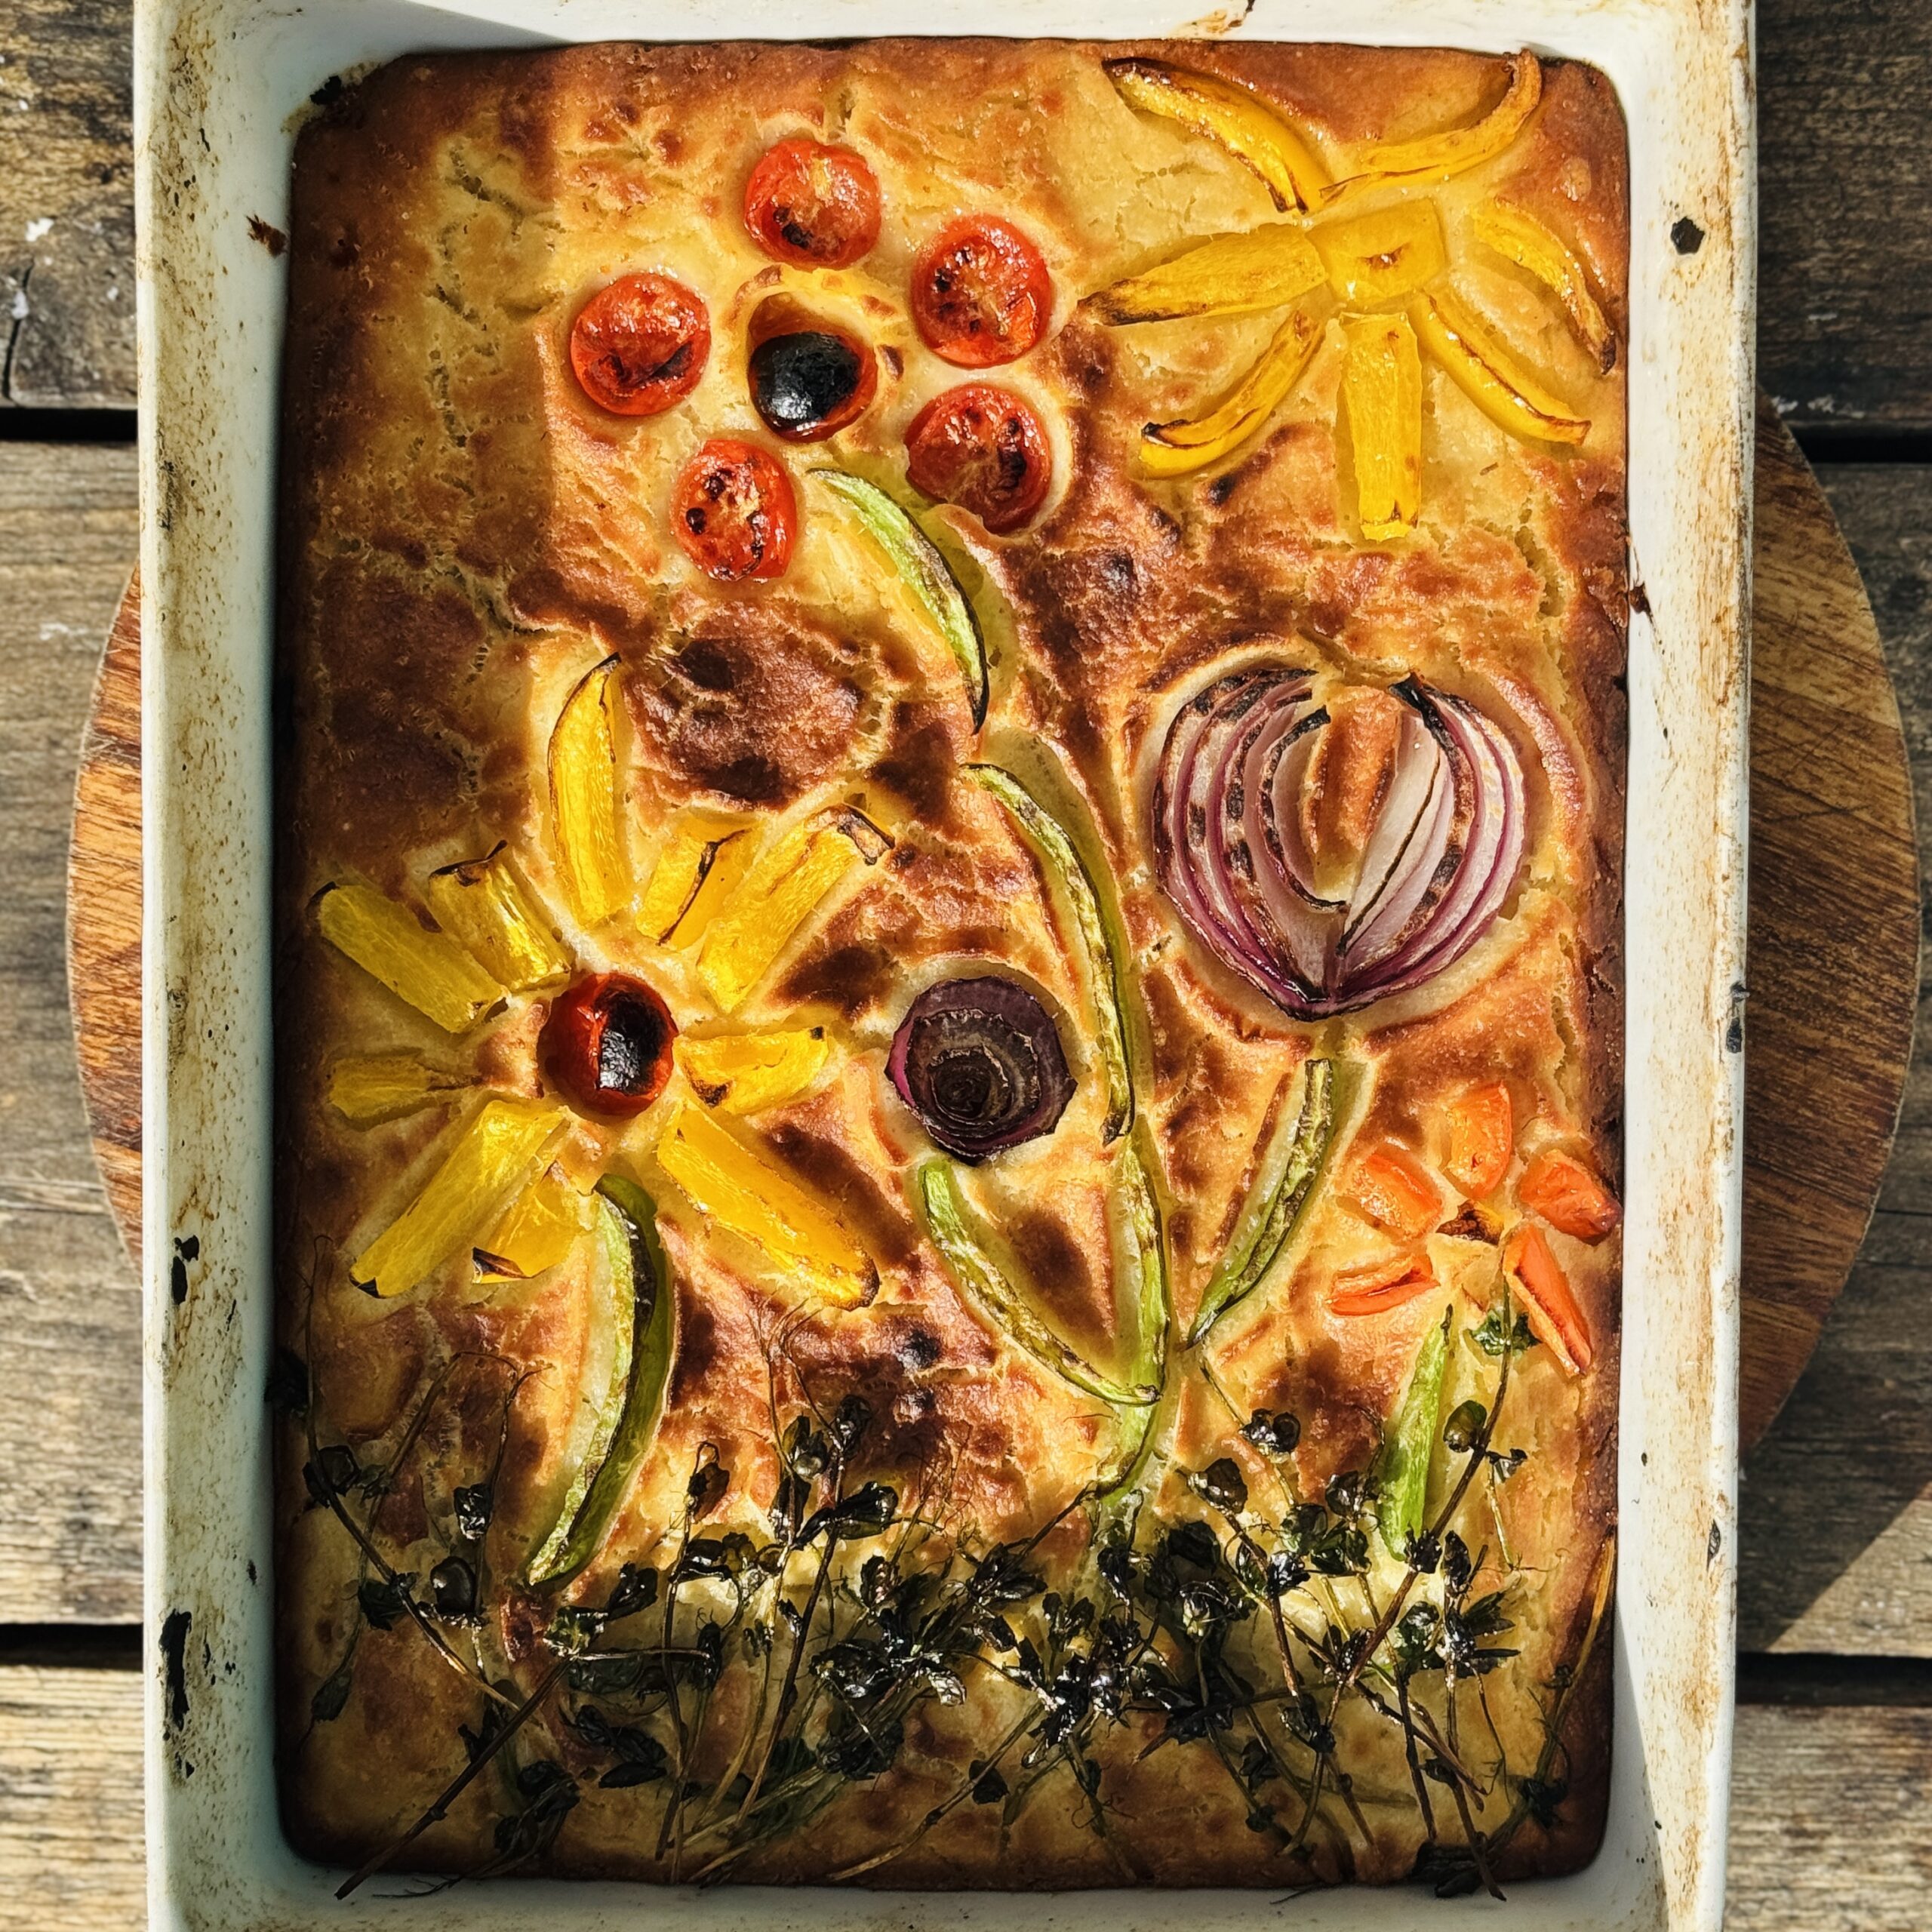
Focaccia Pizza (Same-Day, Open-Crumb)
Takes 5 hours 35 minutes
Serves 8
Ingredients
For the dough
- 500 g strong white bread flour approx. 3¼ cups
- 400 ml lukewarm water approx. 1⅔ cups
- 7 g dried instant yeast 1 sachet or approx. 2¼ tsp
- ½ tsp sugar for blooming the yeast
- 7 g fine sea salt approx. 2 tsp
- 15 g extra virgin olive oil approx. 1 tbsp
For shaping and baking
- Extra virgin olive oil for greasing and handling
- Semolina or coarse flour for dusting (optional)
Instructions
Begin with the autolyse:
- In a large mixing bowl, combine the 500g flour with 350ml of the lukewarm water (reserve 50ml). Mix until all flour is hydrated and no dry bits remain. Cover and let rest for 30–45 minutes.
Bloom the yeast:
- In a small bowl, dissolve the 7g yeast and ½ tsp sugar in the reserved 50ml lukewarm water. Let sit for 5–10 minutes until frothy.
Add yeast, salt, and oil:
- Pour the bloomed yeast mixture into the autolysed dough. Add the 7g salt and 15g olive oil. Mix thoroughly for 2–3 minutes, using stretch-and-fold or pinching motions, until the dough is cohesive. It will be soft and sticky.
Bulk fermentation with folds:
- Cover and leave the dough to rise at room temperature. Over the next 2½ hours, perform 3–4 sets of stretch-and-folds, spaced 30–45 minutes apart, to build gluten strength.
Final proof:
- Cover and let the dough rest undisturbed for 1½–2½ hours, or until it’s well-risen and bubbly.
Divide and pre-shape:
- Lightly oil your surface. Turn out the dough and divide into two pieces (about 460g each). Shape loosely into rounds and let rest for 20 minutes.
Final shaping in trays:
- Grease two baking trays (approx. 30 x 40 cm). Gently stretch each piece of dough to fill the trays, dimpling with oiled fingers. Let rest again for 30–45 minutes.
Preheat your oven:
- Wood-fired oven: Preheat to 400–450°C.
- Domestic oven: Preheat to 250°C with a baking stone or steel for at least 45 minutes.
Top and bake:
- Top with olive oil, tomatoes, herbs, or a light sauce—whatever you fancy.
- Wood-fired: Bake for 6–10 minutes, rotating as needed.
- Domestic oven: Bake for 15–18 minutes, until golden and crisp.
Tips for Success
- Using a full sachet (7g) of yeast speeds up fermentation without impacting flavour negatively in a same-day dough.
- Be gentle during handling to maintain the dough’s airy texture.
- A hot baking surface is key to getting great oven spring and beautiful browning.

Easy Black Sesame Flatbreads
Takes 20 minutes
Serves 4
Ingredients
- 200 g flour of choice approx. 1⅔ cups
- 150 ml natural soy yoghurt approx. ⅔ cup
- 1 tsp baking powder
- ½ tsp salt
- 3 tbsp sesame seeds
- Extra flour for dusting
- Oil for cooking – approx. 1 tbsp per flatbread
Instructions
- Prepare the dough:
- In a mixing bowl, combine the flour, baking powder, and salt. Add the soy yoghurt and mix until a uniform dough forms. Knead for about 5 minutes, until the dough becomes soft and pliable.
- Shape the flatbreads:
- Divide the dough into 4 equal pieces. Lightly flour a surface and roll each piece into a thin, round flatbread.
- Cook the flatbreads:
- Heat a large non-stick pan over high heat, then reduce to medium. Sprinkle some sesame seeds directly into the pan. Add 1 tablespoon of oil and place one flatbread on top. Cook for 1–2 minutes, until golden spots appear and air pockets form. Flip and cook the other side until done. Repeat with the remaining dough, adding fresh sesame seeds and oil for each flatbread.
- Best served warm.

Roasted Chickpea Mezze Platter with Hummus
Takes 40 minutes
Serves 4
Ingredients
For the crispy roasted chickpeas
- 1 × 400g tin chickpeas drained and rinsed
- 1 tbsp olive oil
- ½ tsp smoked paprika
- ½ tsp garlic powder
- ¼ tsp chilli flakes optional
- ¼ tsp freshly ground black pepper
- ½ tsp sea salt
- 1 tsp tamari or soy sauce
For the base
- 200 –250g ¾–1 cup Happy Pear Happy Hummus or homemade hummus
For the sides (choose a selection)
- 1 courgette or 1 aubergine sliced lengthways
- 150 g cherry tomatoes or ½ cucumber sliced
- A handful of olives
- Pickled red onions
- Flatbread or sourdough toast to serve
Instructions
Roast the chickpeas
- Preheat the oven to 200°C (fan). Pat the chickpeas dry with a clean tea towel. Toss with the olive oil, smoked paprika, garlic powder, chilli flakes, pepper, salt and tamari. Spread out on a baking tray and roast for 25–30 minutes, shaking halfway, until golden and crisp.
Grill the vegetables
- While the chickpeas are roasting, heat a grill pan or BBQ. Brush the courgette or aubergine slices with a little olive oil and season with salt. Grill for 2–3 minutes on each side, or until charred and tender.
Assemble the platter
- Spread the hummus in a generous swirl on a large serving plate or board. Pile the roasted chickpeas on top. Arrange the grilled vegetables, cherry tomatoes or cucumber, olives, and pickled onions around the edges.
Add bread and serve
- Warm the flatbread or toast the sourdough. Slice and add to the platter for scooping and sharing.

Crispy Courgette & Red Pepper Pesto Filo Spiral
Takes 50 minutes
Serves 6
Ingredients
Main Ingredients
- 7 sheets filo pastry approx. 270g
- 4 tbsp olive oil or melted vegan butter for brushing
- 2 medium courgettes approx. 300g
- Zest of 1 lemon
- 135 g The Happy Pear Spicy Red Pepper Pesto approx. ½ cup
To finish
- Small handful fresh herbs such as coriander chives, parsley, or basil, finely chopped
- Pinch of flaky sea salt optional
Instructions
Preheat and prepare the tin:
- Preheat the oven to 180°C (fan 160°C) / 356°F. Lightly oil or line a 20cm x 30cm (8 in x 12 in) pie dish, ideally one with a removable base. If using a fixed-base tin, line with baking parchment for easier removal.
Create the base layer:
- Take 1 sheet of filo pastry and fold it in half lengthways. Brush the surface with 1 tbsp of the red pepper pesto, then lay it flat across the bottom of the dish with the pesto side facing upwards.
Prepare the courgettes:
- Using a mandoline or sharp knife, finely slice the courgettes. Place in a bowl with 2 tbsp olive oil, the zest of 1 lemon, and a pinch of salt. Toss to coat evenly.
Assemble the spiral pastry:
- Take 1 sheet of filo at a time, brush evenly with 1–2 tbsp of pesto, and gently pleat it into an accordion shape (each fold about 2–3cm wide). Begin placing the folded sheet in the centre of the dish, spiralling outward. As you go, tuck an even layer of the courgette slices between the folds for even distribution. Repeat with the remaining filo sheets, pesto, and courgette until the dish is filled.
Bake until golden and crisp:
- Place the pie in the preheated oven and bake for 20–25 minutes, or until the pastry is deeply golden, crisp, and the pesto is caramelised on top.
Finish and serve:
- Remove from the oven and allow to cool slightly. Sprinkle with finely chopped herbs and a pinch of flaky sea salt, if using. Slice into wedges or squares and serve warm or at room temperature.
Green Couscous Salad ft Lovely Basil Pesto
Takes 20 minutes
Serves 4
Ingredients
- 200 g wholemeal couscous uncooked (1 cup)
- 1 red onion finely chopped
- 1 tbsp balsamic vinegar
- 1 tbsp maple syrup
- 8 tbsp raw or toasted sunflower seeds
- 1½ tsp salt
- ½ tsp ground cumin
- 30 g rocket/arugula 2½ cups loosely packed
- 1 pomegranate seeds extracted
- 3 tbsp The Happy Pear Lovely Basil Pesto
Instructions
Preheat the oven:
- Preheat your oven to 180℃.
Prepare the couscous:
- Put the couscous in a bowl, add the salt and cumin, and mix it through.
- Cover the couscous with boiling water, ensuring the water covers the couscous by about 1cm. Cover the bowl with a lid or plate, and leave to soak for 5 minutes.
Roast the onion and seeds:
- In a bowl, mix the chopped red onion with the sunflower seeds, balsamic vinegar, and maple syrup.
- Spread the mixture evenly on a baking tray and bake in the preheated oven for 15 minutes.
Assemble the salad:
- Add the pesto to the couscous and mix well until the couscous is green and fluffy.
- Gently tap the back of the pomegranate halves to extract the seeds. Remove any remaining pith and set the seeds aside.
Finish the salad:
- Add the roasted onion and sunflower seed mixture to the couscous, along with the pomegranate seeds and rocket.
- Mix well and adjust the seasoning with more salt, cumin, black pepper, or lime juice to taste.
Serve:
- Serve immediately or chill for a refreshing, cool salad. Enjoy!

Dubai Chocolate Pistachio Oat Cups
Takes 1 hour 15 minutes
Serves 8
Ingredients
Chocolate Oat Base
- 100 g rolled oats approx. 1 cup
- 2 tbsp cocoa powder
- 100 g smooth peanut butter or nut butter of choice pistachio butter, almond butter, or peanut butter all work well (approx. ½ cup)
- 2 tbsp maple syrup
- 4 tbsp oat milk or plant milk of choice
Pistachio Coconut Filling
- 100 g pistachio butter or finely ground pistachios (approx. ½ cup)
- 30 g desiccated coconut approx. ⅓ cup
- 2 tbsp maple syrup
Chocolate Topping
- 200 g dark chocolate approx. 1 cup
Topping
- Handful of chopped roasted pistachios
- Pinch of flaky sea salt optional
Instructions
Prepare the Base
- Line a cupcake tin with 12 paper cases. In a mixing bowl, combine the oats, cocoa powder, nut butter, oat milk and maple syrup. Stir until the oats are fully coated and the mixture holds together.
Form the Base Layer
- Divide the mixture evenly between the cupcake cases. Press down firmly to create a compact base about 1 cm thick.
Make the Pistachio Coconut Filling
- In a small bowl, mix the pistachio butter, desiccated coconut, and maple syrup until well combined and smooth.
Layer the Filling
- Spoon the pistachio mixture evenly over the chilled base, pressing it down gently to create a smooth second layer.
Melt the Chocolate
- Break the remaining chocolate into small pieces and melt using a bain-marie (double boiler) or microwave in short bursts, stirring in between, until smooth.
Top with Chocolate
- Pour the melted chocolate evenly over the pistachio layer, creating a glossy top layer about ½ cm thick.
Decorate & Set
- Sprinkle with chopped roasted pistachios and a pinch of flaky sea salt, if using.
- Chill in the fridge for at least 30 minutes, or until fully set.
Serve
- Once firm, remove from the cases and enjoy your chocolatey, nutty, coconutty Dubai-inspired oat cups.

Crispy Buffalo Mushroom Wings with Creamy Ranch (Air-Fried)
Takes 40 minutes
Serves 4
Ingredients
For the crispy mushroom wings:
- 300 g oyster mushrooms
- 150 ml ½ cup + 2 tbsp unsweetened plant-based milk
- 1 tbsp lemon juice or apple cider vinegar
- 50 g ⅓ cup plain flour
- 50 g ⅓ cup cornflour (cornstarch)
- 1 tsp garlic powder
- 1 tsp smoked paprika
- Salt and black pepper to taste
- Olive oil spray or brush for air-frying
For the buffalo glaze:
- 4 tbsp hot sauce
- 2 tbsp olive oil or other oil of choice
- 1 tbsp maple syrup optional
For the vegan ranch sauce:
- 3 tbsp unsweetened plant-based yoghurt
- 2 tbsp vegan mayonnaise
- 1½ tsp lemon juice
- ½ tsp garlic powder
- 1 tsp dried dill
- ½ tsp dried chives or parsley
- Salt and black pepper to taste
- 1 –2 tbsp water to thin (optional)
Instructions
- Tear the oyster mushrooms into medium, wing-sized pieces, keeping some of the stem base intact to hold clusters together.
- In a bowl, combine the plant-based milk and lemon juice or vinegar. Let it sit for 5 minutes to curdle slightly and form a vegan buttermilk.
- In a separate bowl, whisk together the plain flour, cornflour, garlic powder, smoked paprika, salt and black pepper.
- Dip each mushroom piece into the buttermilk, then dredge in the flour mixture to coat thoroughly. Press gently to help the coating stick, then set aside.
- Preheat the air fryer to 200°C (392°F). Arrange the mushrooms in a single layer, spray or brush lightly with olive oil, and air-fry for 10–12 minutes, flipping halfway and brushing or spraying again, until crisp and lightly golden.
- To make the buffalo glaze, mix together the hot sauce, olive oil, and maple syrup (if using) in a small bowl until smooth.
- Toss the crispy mushrooms in the buffalo sauce until evenly coated, then return them to the air fryer and cook for a further 6 minutes at 200°C (392°F), until glazed and crisp at the edges.
- To prepare the vegan ranch, whisk together the yoghurt, vegan mayo, lemon juice, garlic powder, dill, chives or parsley, salt and pepper. Add a little water if needed to reach a creamy, pourable consistency.
- Serve the buffalo mushrooms hot with the ranch sauce on the side for dipping. Garnish with fresh herbs if desired.
Overnight Oats 3 Ways
Takes 4 hours 5 minutes
Serves 3
Ingredients
Base Oats Mixture
- 50 g ½ cup rolled oats
- 120 ml ½ cup plant-based milk
- 10 g 1 tbsp chia seeds or ground flaxseeds
- Small pinch of sea salt
Mixed Berry Bliss
- 75 g ½ cup frozen mixed berries
- ½ tsp vanilla extract optional
- 1 tsp maple syrup or sweetener of choice optional, if berries are tart
- Optional topping: a spoonful of plant-based yoghurt
Chocolate Coconut Crunch
- 1 tbsp cocoa or cacao powder
- 1 tsp maple syrup or 1 mashed date
- 1 tbsp desiccated coconut or coconut yoghurt
- Optional topping: crushed nuts or dark chocolate chips
Mango & Lime
- 75 g ½ cup chopped fresh or frozen mango
- Zest of ½ lime or a small squeeze of juice
- Optional: 1 tbsp coconut yoghurt or a few chopped mint leaves
Instructions
- Add the base ingredients to a jar or container.
- Stir in the ingredients for your chosen flavour variation.
- Mix well, cover, and refrigerate overnight (or for at least 4 hours).
- In the morning, give it a good stir and add any optional toppings before serving.
- Enjoy cold, or warm slightly if preferred.
Delicious organic leafy greens with cashew nuts.
Plant based
Gluten free
Eat Well, Feel Good, Live Better
INGREDIENTS
*CASHEW NUTS (32%) [Cashew NUTS, *Vegetable Oil (*Rapeseed Oil, *Sunflower Oil)], *Rapeseed Oil, *Sunflower Oil, *Spinach (11%), *Cooked Kale (6%), *Apple Cyder Vinegar, *Lemon Juice, *Yeast Extract, *Garlic, *Lemon Juice Concentrate, Sea Salt,
*Organic produce
ALLERGEN INFORMATION
For allergens, see highlighted ingredients.
Contains Cashew Nuts, Nuts
May also contain: Peanuts, Sesame
Caution: May also contain natural date stone pits.
NUTRITIONAL INFORMATION
| Typical | per 100g |
|---|---|
| Energy | 2169kJ |
| 525kcal | |
| Fat | 50g |
| of which: Saturates | 5.9g |
| Carbohydrates | 10g |
| of which: Sugars | 2.5g |
| Fibre | 2.2g |
| Protein | 7.7g |
| Salt | 1.4g |
| Sodium | 1.4g |
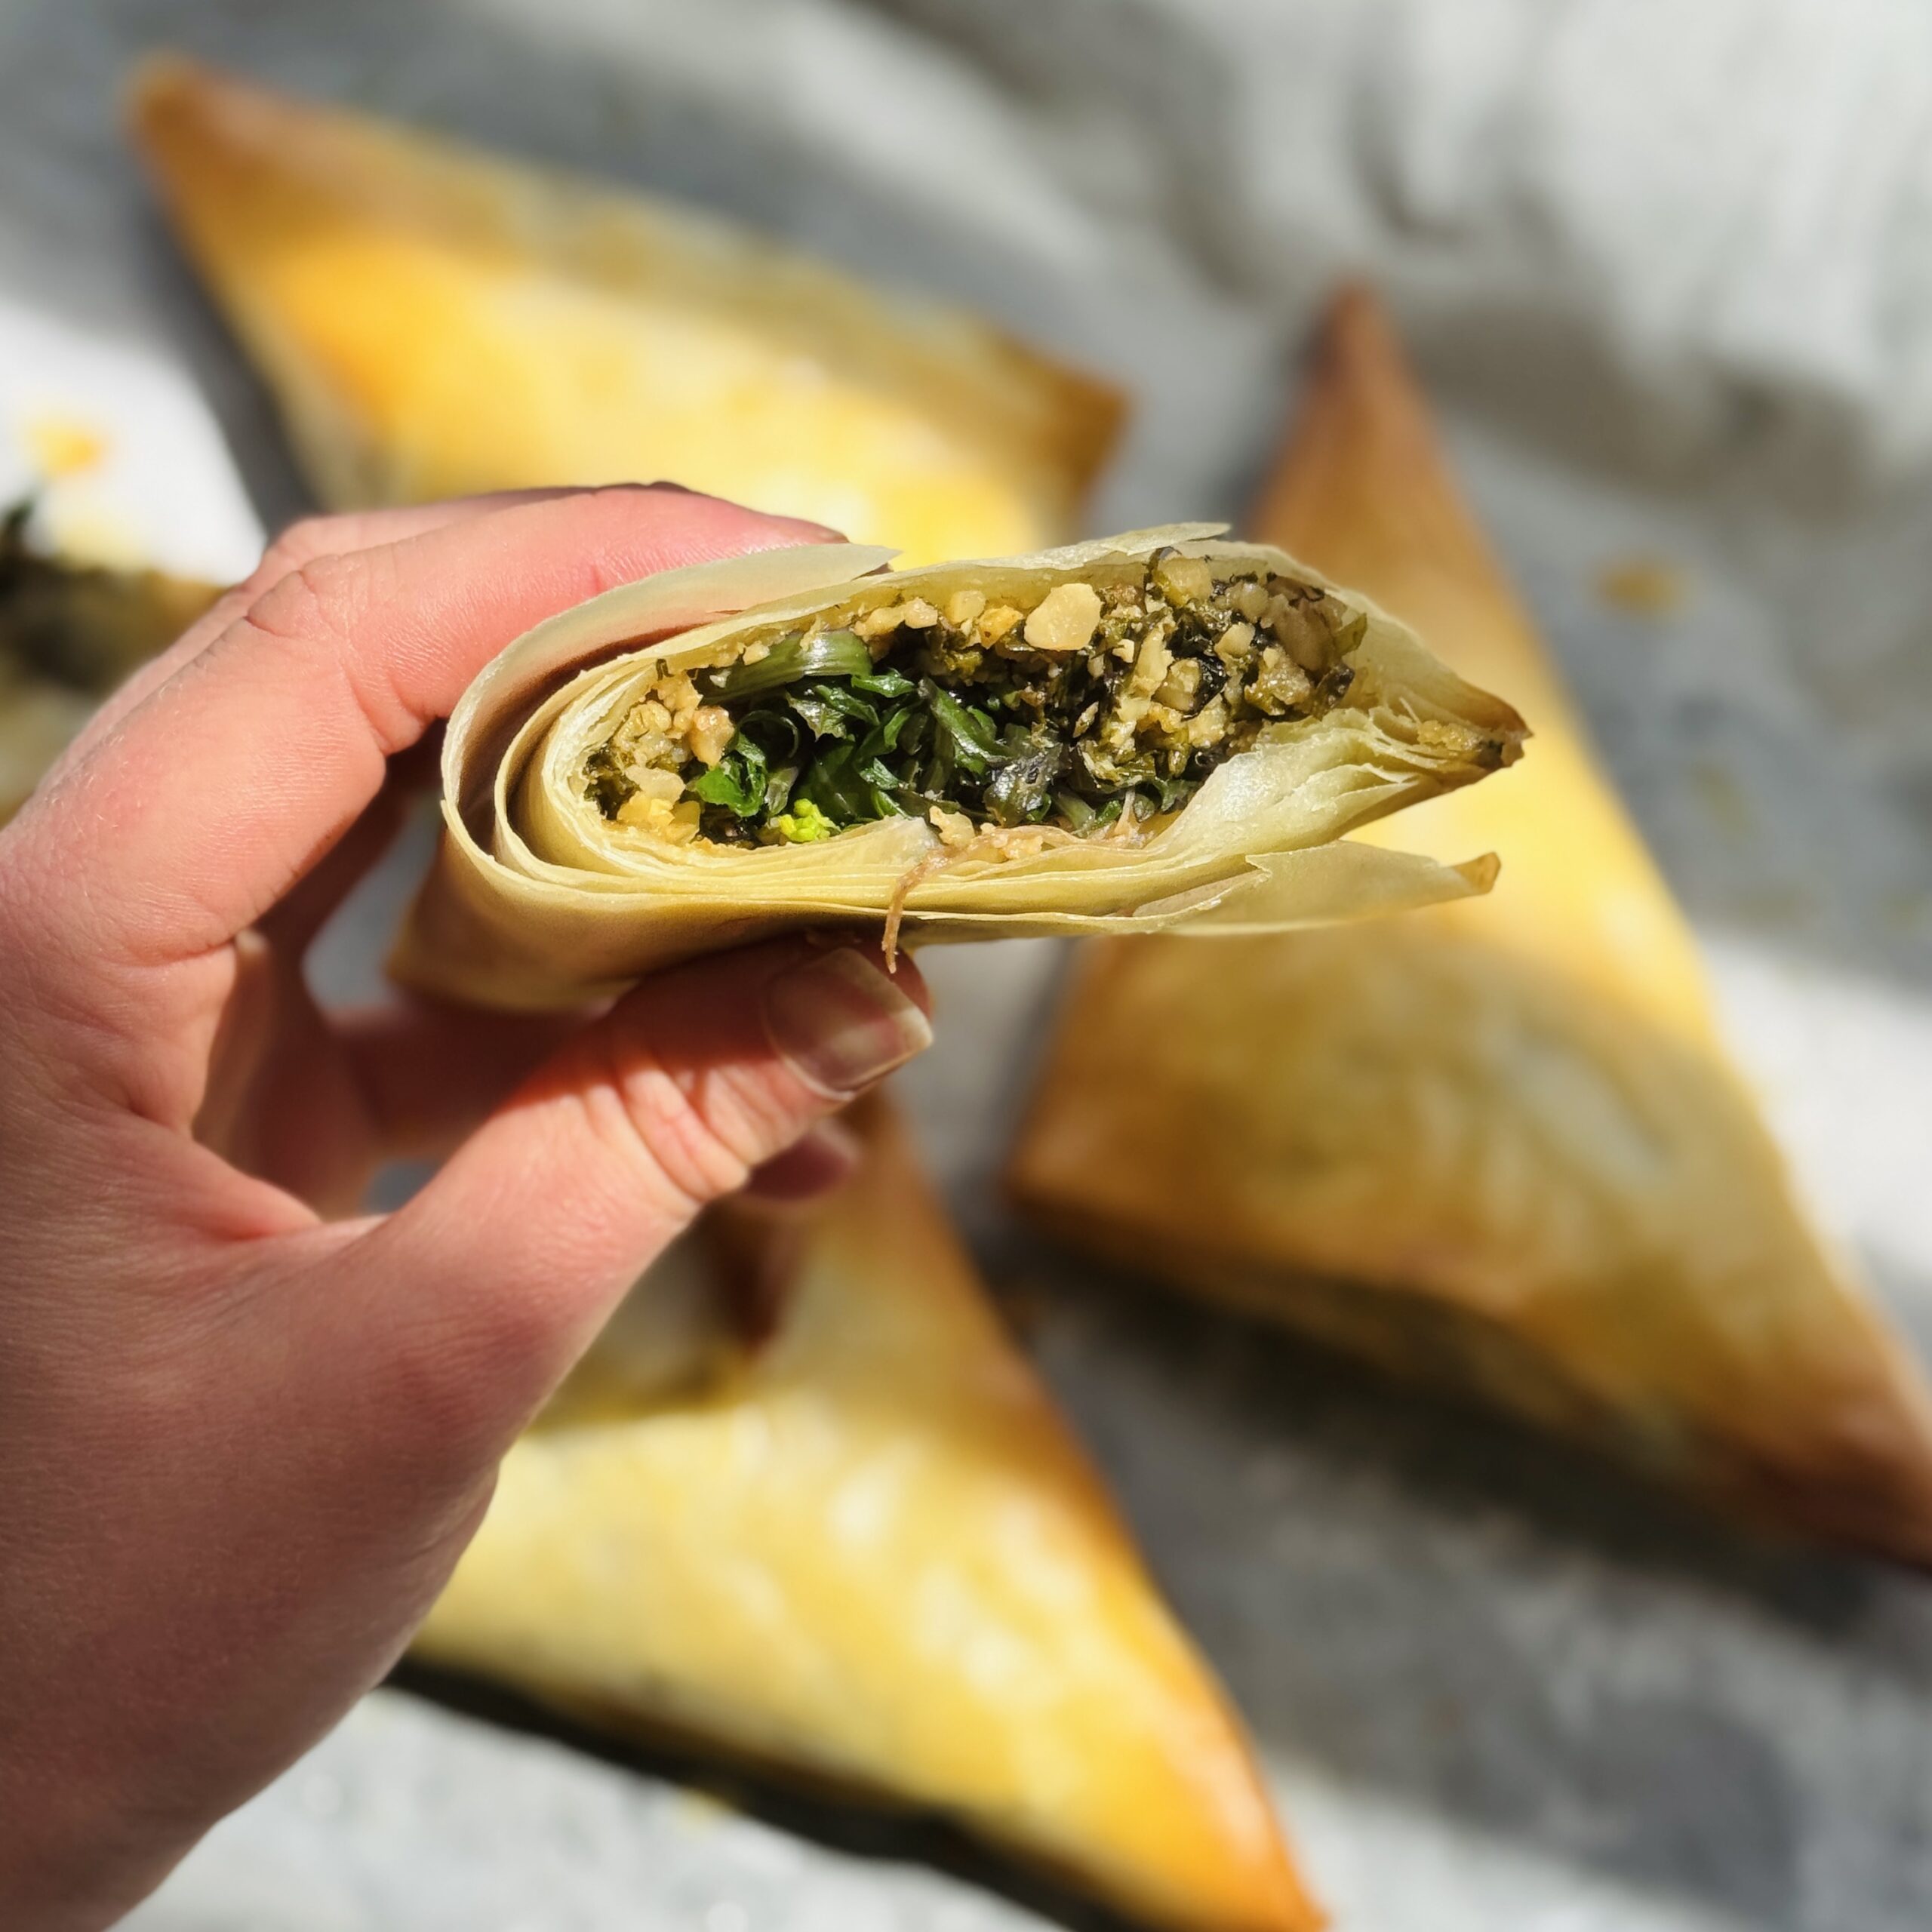
Greek-Style Spanakopita Parcels
Takes 45 minutes
Serves 6
Ingredients
For the spinach filling
- 1 tbsp oil
- 2 large onions
- 2 cloves of garlic
- 400 g fresh spinach about 6 packed cups
- 20 g fresh mint leaves about ½ cup, chopped
- 15 g fresh dill or fennel fronds about ⅓ cup, chopped
- Juice of 1 lemon
- ¼ tsp ground black pepper
For the filo parcels
- 7 sheets of filo pastry 270g, thawed if frozen
- Extra oil for brushing
Quick-fire cashew feta
- 150 g cashew nuts about 1 cup
- 2 tbsp lemon juice
- ¾ tsp salt
- 4 tbsp olive oil
Instructions
Prep and thaw ingredients
- Preheat the oven to 180°C (fan 160°C) / 356°F. Thaw the 270g filo pastry if frozen. Peel and finely dice the onions and garlic.
Cook the onions and garlic
- Heat 1 tbsp oil in a large non-stick pan over high heat. Add the diced onions with a pinch of salt and cook for 4–5 minutes, stirring regularly. Add the garlic and cook for 2 more minutes.
Add and steam the spinach
- Add the spinach, reduce the heat to medium, and cover with a lid. Allow it to steam in its own juices for 6–8 minutes. Then remove the lid and cook uncovered for another 2–3 minutes until most of the liquid has evaporated. The mixture should be as dry as possible.
Season the spinach filling
- Finely chop the mint leaves and dill/fennel fronds. Turn off the heat and stir in the herbs, lemon juice, and black pepper. Mix well and leave uncovered to cool fully and release any excess moisture.
Make the quick-fire cashew feta
- In a food processor, blend the cashew nuts, lemon juice, salt, and olive oil until smooth and creamy. Adjust seasoning to taste.
Combine the filling
- Mix the cashew feta into the cooled spinach mixture until well combined. Taste and adjust with more salt, pepper, lemon juice, or mint if needed.
Assemble the triangle parcels
- Cut the filo sheets lengthways into 3 strips per sheet (you’ll have 21 strips total). Keep them covered with a damp tea towel to prevent drying out.
- Take one strip and brush lightly with oil. Place 1 heaped tablespoon of filling at one end. Fold the bottom corner up diagonally to form a triangle. Continue folding the triangle along the strip (like folding a flag) until sealed. Repeat with the remaining strips and filling.
Bake the parcels
- Place the triangles on a lined baking tray. Brush the tops with a little oil and bake for 20–25 minutes, or until golden and crisp.

The Happy Pear is a Certified B Corporation
We’ve got exciting news to share—The Happy Pear is officially a Certified B Corporation™!
This is a huge milestone for us. When we started out over 20 years ago with a tiny fruit and veg shop, our mission was simple: to build a healthier, happier world through food, community, and connection. Becoming a B Corp feels like a big affirmation of that mission—but more than anything, it marks the beginning of a new chapter.
Why This Matters To Us
At The Happy Pear, we’ve always believed that food is more than just food—it’s a powerful tool for change. From our farm to our cafés, our products, and our community events, everything we do is rooted in the belief that health and sustainability go hand in hand.
We’ve been inspired by the growing awareness that business can play a meaningful role in tackling some of the biggest challenges of our time—climate change, inequality, biodiversity loss, and more. But real change takes collaboration, movements, and businesses holding themselves accountable.
That’s why this certification matters to us—not because it makes us “the best,” but because it pushes us to be better.
So what is a B Corp?
Certified B Corporations are businesses that have been verified by B Lab™ to meet high standards of social and environmental performance, accountability, and transparency. It means we’ve taken a long, hard look at every part of our business—from how we support our team, to how we grow our food, to how we impact our local community and the wider world—and we’re committed to continuous improvement in all those areas.
The journey to certification took over a year and asked a lot of us. It wasn’t straightforward—but it was important. We took time to reflect, to measure what really matters, and to look at ourselves honestly. Are we looking after our team as well as we could be? Are we caring for the soil and the land we grow from? Are we showing up for our local community in the right ways? Are we living the values we talk about?
This isn’t a badge—it’s a commitment!
We want to be clear: becoming a B Corp isn’t an end point, or an “award.” It’s a commitment to keep getting better, year after year. We’ll be re-certified every three years to ensure we’re continuing to meet (and exceed) the evolving standards set by B Lab. For us, this means deepening the work we’re doing on our farm, finding better ways to measure our environmental impact, investing in our team’s wellbeing, and continuing to support the community around us.
As a B Corp, we’re joining a global movement of businesses that are using business as a force for good—businesses working together to create a more inclusive, equitable, and regenerative economy. That means one that puts people and the planet first, not just profit.
We now stand alongside more than 8,000 B Corps across 80+ countries and 150+ industries, all committed to changing the rules of the game. Instead of prioritising short-term gain, we’re working towards long-term value for our team, our community, and future generations.
Thank You!
This wouldn’t have happened without the incredible work of our amazing team, and you—our community, who’ve supported us from the start. You’ve inspired us to keep going, keep evolving, and keep showing that a different kind of business is possible.
We’re delighted to be part of the B Corp movement—a global community proving that you can build successful businesses while also building a better world.
This is just the beginning – Thanks for being with us on the journey!
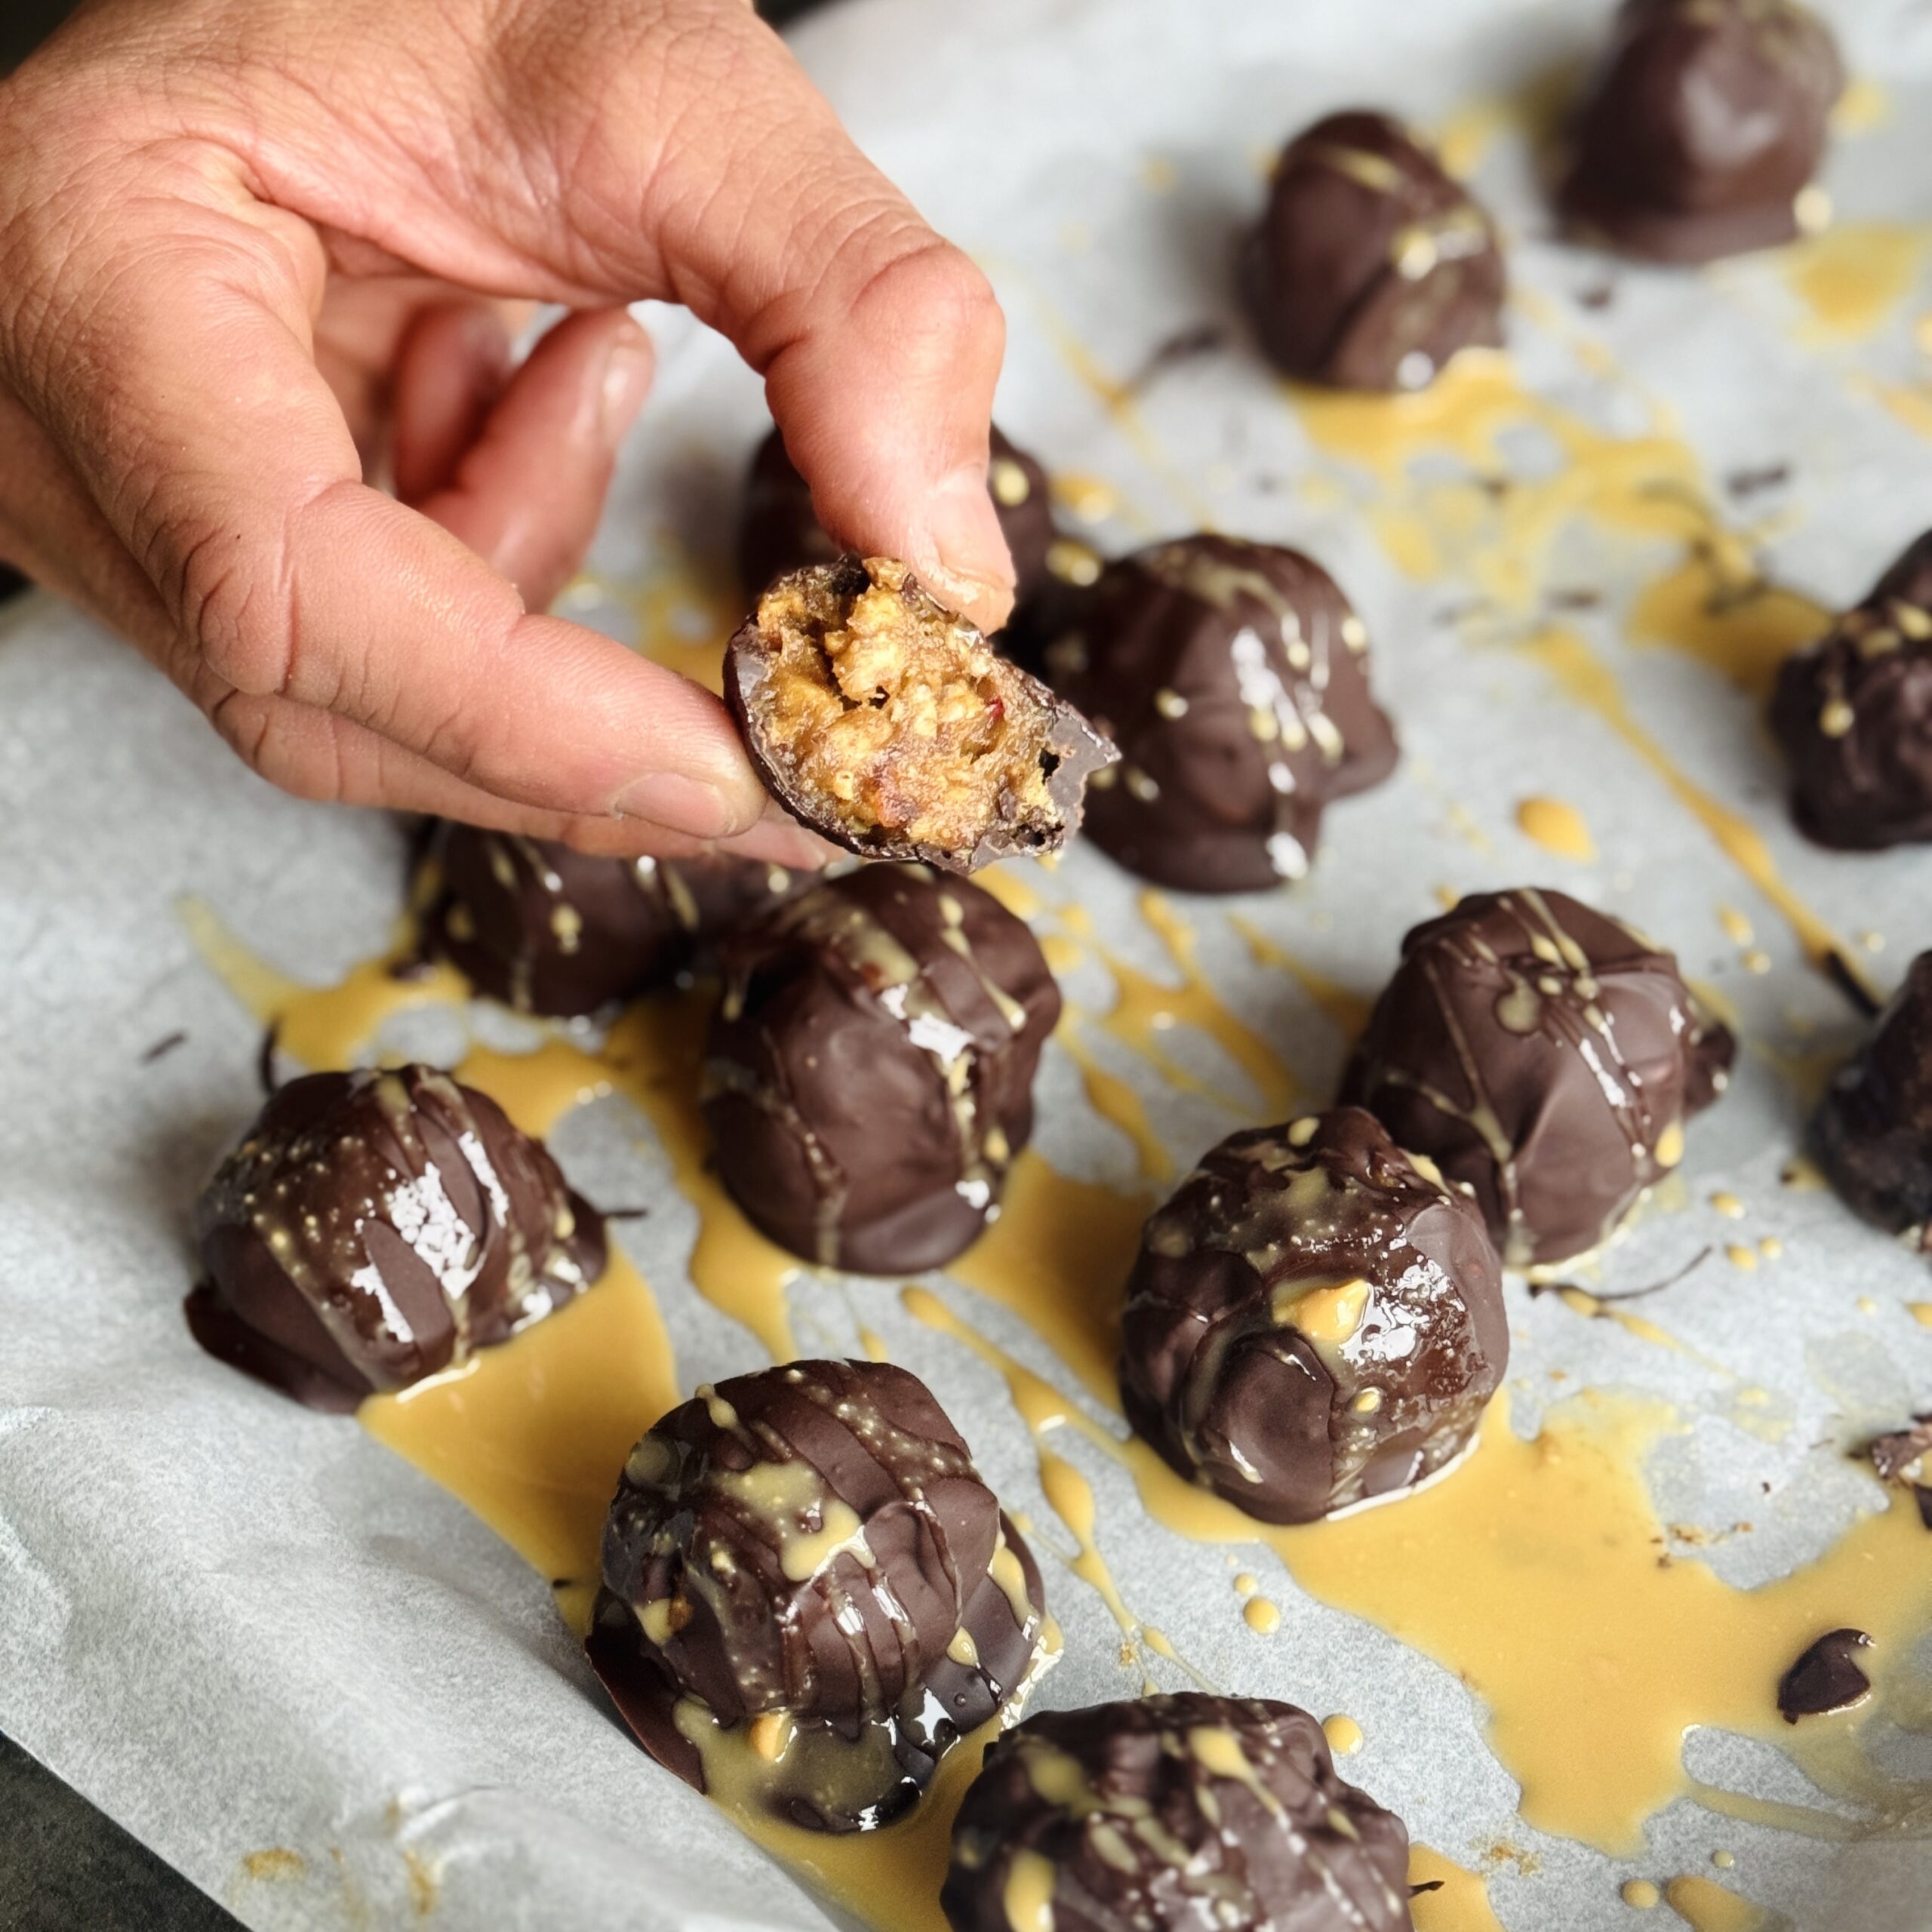
Granola Clusters with Chocolate Coating
Takes 45 minutes
Serves 12
Ingredients
Date Caramel Base
- 200 g 1 cup soft dates, pitted
- 100 g ½ cup smooth peanut butter
- 6 tbsp water
- Generous pinch of sea salt
Crunch
- 200 g 2 cups crunchy granola (e.g., The Happy Pear Steve’s Dreamy Granola)
Coating
- 200 g 1 cup dark chocolate (70% or higher)
Instructions
Soften the dates:
- Place 200g (1 cup) pitted dates in a bowl and cover with warm water. Soak for 5 minutes, then drain well.
Make the date caramel:
- In a food processor, blend the soaked dates, 100g (½ cup) peanut butter, 6 tbsp water, and a generous pinch of sea salt until smooth. Scrape down the sides as needed to create a thick, spreadable caramel.
Mix in the granola:
- Transfer the caramel to a mixing bowl. Fold in 200g (2 cups) crunchy granola until fully coated and starting to clump together.
Melt the chocolate:
- Break 200g (1 cup) dark chocolate into pieces and melt gently in a bain-marie or microwave, stirring until smooth.
Form into clusters and coat in melted chocolate:
- Using damp hands or a spoon, shape the mixture into small bite-sized clusters or balls and dip each chilled cluster into the melted chocolate to coat fully, letting any excess drip off. Return to the parchment-lined tray.
Set and serve:
- Refrigerate for at least 15 minutes, or until the chocolate is fully set. Enjoy straight from the fridge or store in an airtight container for up to 1 week.

This fella’s made fresh with toasted cashews for a sweet nutty taste. Delicious with pasta, epic in a sandwich-actually, it’s gorgeous with almost anything. Enjoy! Dave & Steve
INGREDIENTS
Cashew Nuts (32%) [Cashew Nuts, Vegetable Oil (Rapeseed Oil, Sunflower Oil)], Olive Oil (20%), Rapeseed Oil, Basil (15%), Lemon Juice, Garlic, Nutritional Yeast, Sea Salt, Apple Cider Vinegar, Natural Flavour, Yeast Extract
ALLERGEN INFORMATION
For allergens, see ingredients highlighted.
May contain traces of Peanuts and Sesame.
NUTRITIONAL INFORMATION
| Typical | Per 100g |
|---|---|
| Energy | 2274kJ / 551kcal |
| Fat | 53.0g |
| Of which: Saturates | 6.9g |
| Carbohydrates | 8.8g |
| Of which: Sugars | 2.9g |
| Fibre | 3.0g |
| Protein | 8.2g |
| Salt | 1.1g |
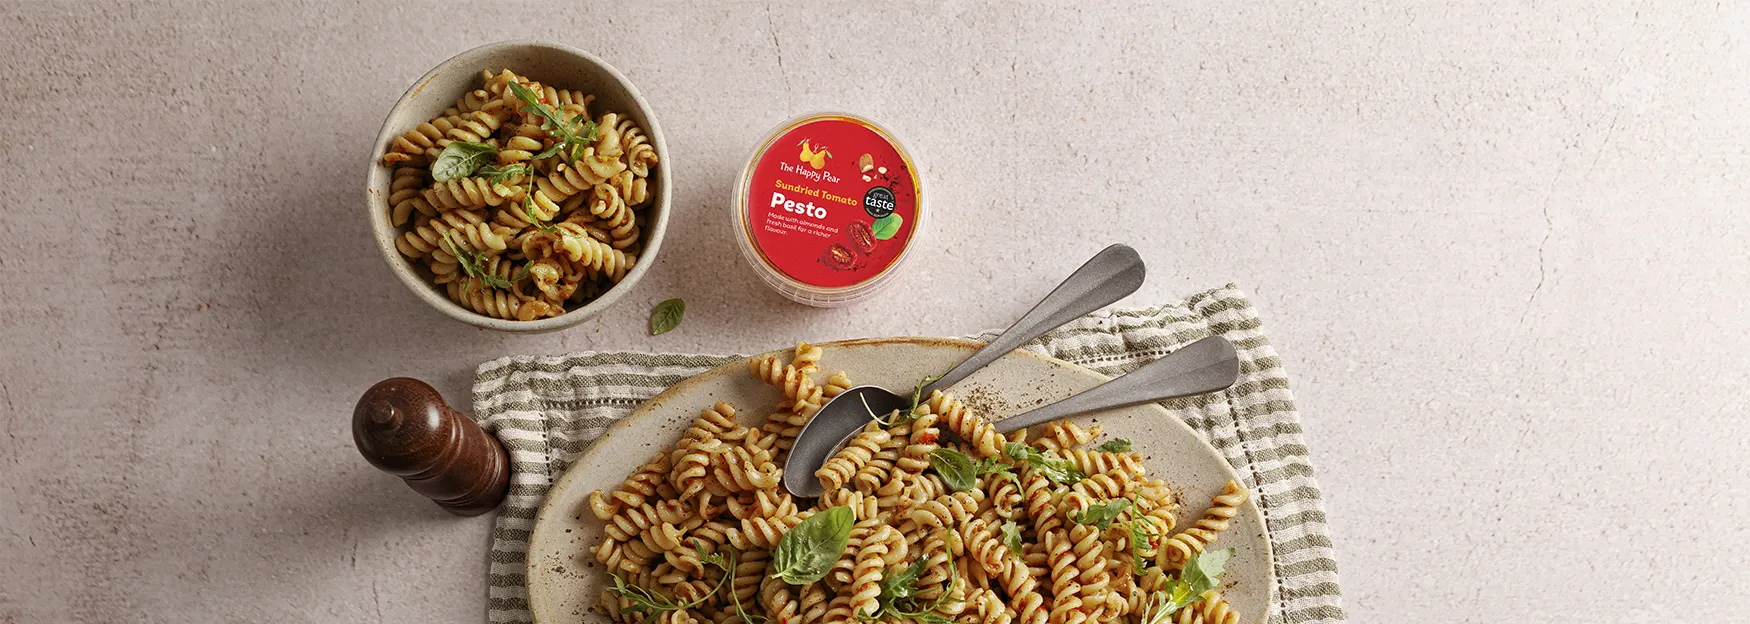
Our Sun-dried Tomato Pesto is a delicious blend of olive oil, fresh basil, sun-dried tomatoes and almonds, with a delicate hint of cayenne pepper and balsamic vinegar. Perfect with pasta, sensational in sandwiches and delightful as a dip – our pesto is packed with flavour and goes great with just about anything savoury! Dave & Steve X
INGREDIENTS
Olive Oil, Rapeseed Oil, Water, Sun-dried Tomatoes (16%) (Sun-dried Tomatoes, Salt), Almonds (Nuts) (8%), Basil (7%), Balsamic Vinegar, Garlic, Sea Salt, Cayenne
ALLERGEN INFORMATION
For allergens, see ingredients highlighted.
May contain traces of Peanut and Sesame.
NUTRITIONAL INFORMATION
| Typical | per 100g |
|---|---|
| Energy | 1756kJ |
| 426kcal | |
| Fat | 43.0g |
| Of Which: | |
| Saturates | 4.0g |
| Carbohydrate | 4.2g |
| Of Which: | |
| Sugars | 4.2g |
| Fibre | 3.6g |
| Protein | 3.8g |
| Salt | 1.5g |
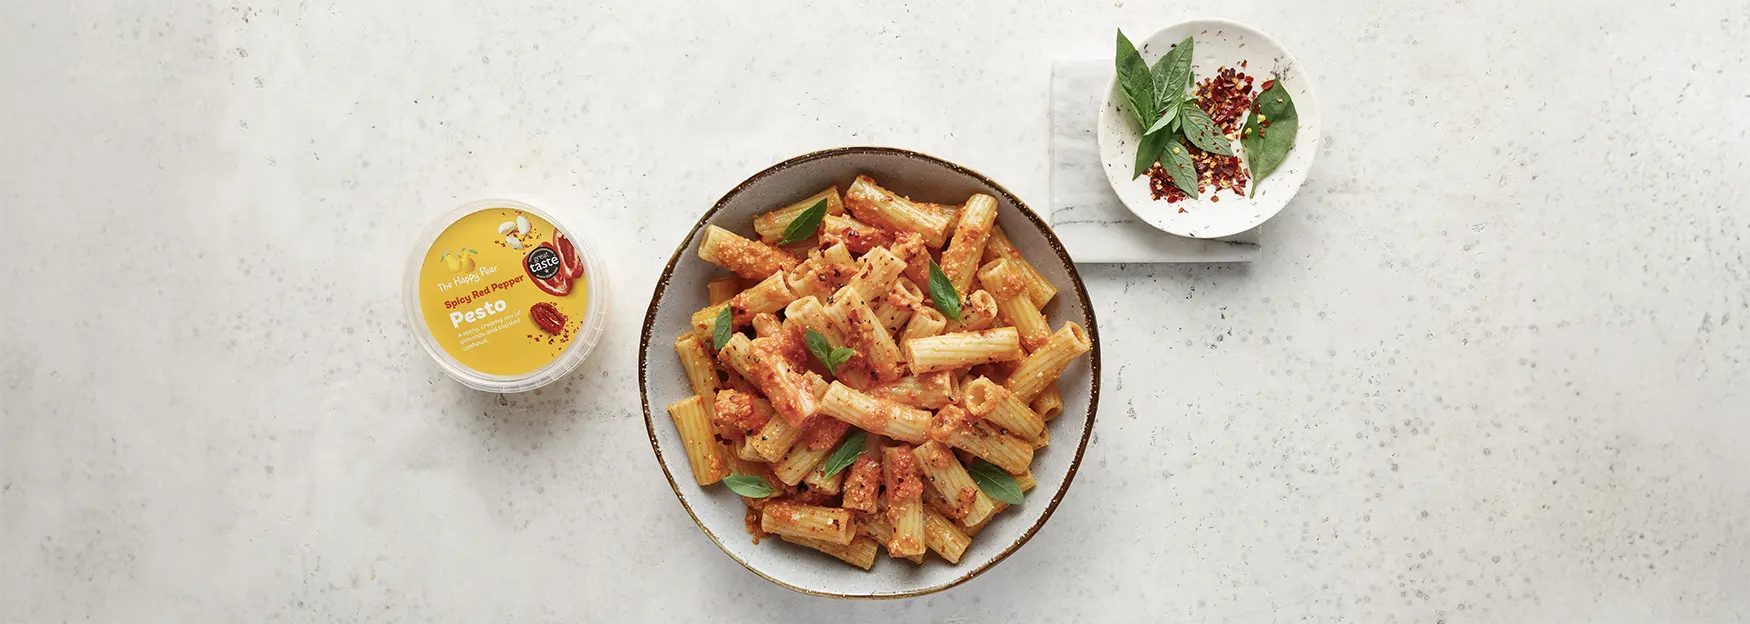
This pesto is a real flavour explosion – it’s bright, spicy and a little creamy. You’re going to love it!
INGREDIENTS
Red Pepper (30%), Olive Oil, Almonds (13%) (Nuts), Water, Cashew Nuts (15%) [Cashew Nuts, Vegetable Oil (Rapeseed, Sunflower)], Balsamic Vinegar, Lemon Juice, Garlic, Sundried Tomatoes [Sundried Tomatoes, Salt], Sea Salt, Red Chilli Flakes (1%), Cayenne.
ALLERGEN INFORMATION
For allergens, see ingredients highlighted.
May contain traces of Peanuts and Sesame
NUTRITIONAL INFORMATION
| Typical | per 100g |
|---|---|
| Energy | 1632kJ |
| 395kcal | |
| Fat | 37g |
| Of which: | |
| Saturates | 5.2g |
| Carbohydrates | 7.2g |
| Of which: | |
| Sugars | 4.6g |
| Fibre | 4.8g |
| Protein | 6g |
| Salt | 1.2g |
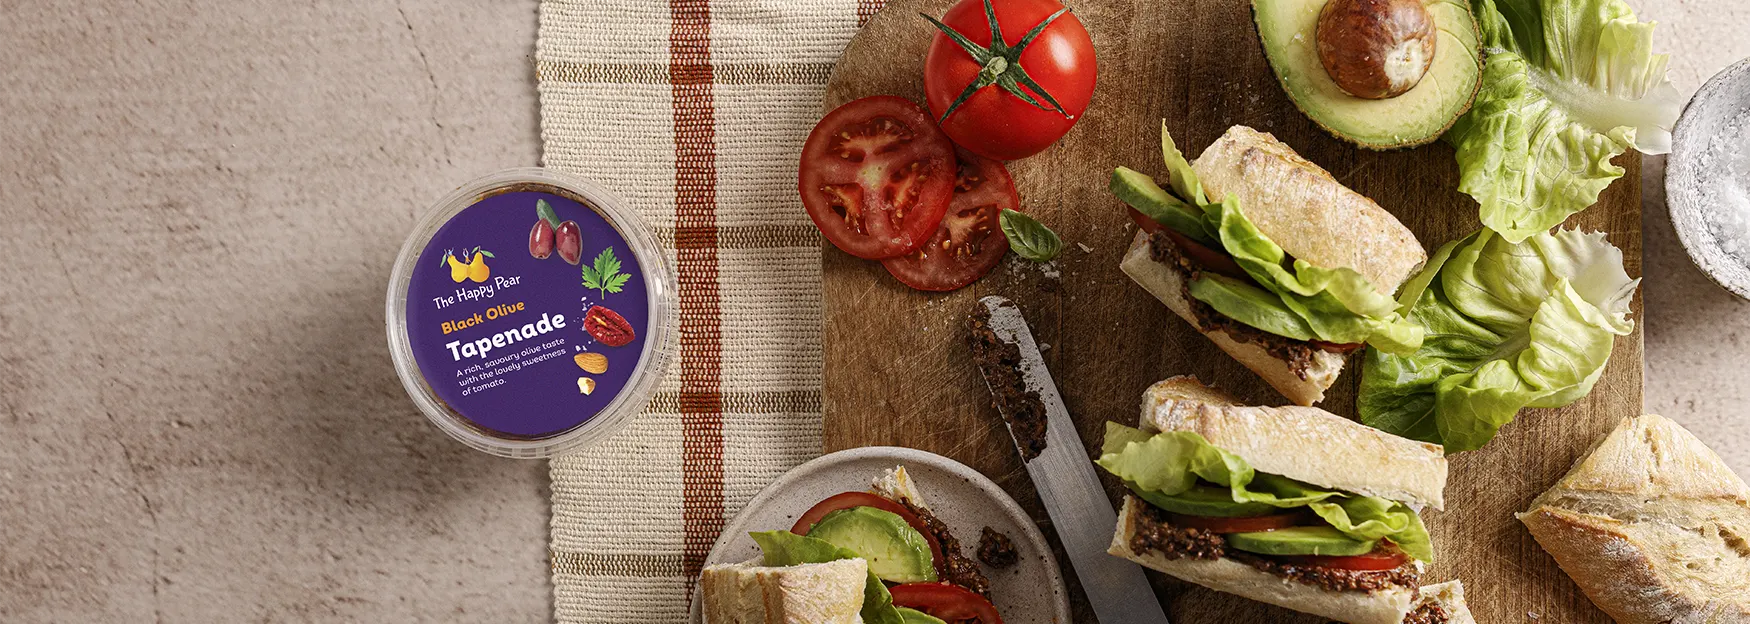
This tapenade has a rich, savoury olive taste mixed with a lovely sweetness of sundried tomato. It’s rockin’ smeared on bread or equally yummy stirred through pasta. Let your imagination take over!
INGREDIENTS
Black Olives (33%) [Black Olives, Salt, Vinegar, Extra Virgin Olive Oil], Olive Oil, Rapeseed Oil, Almonds (Nuts), Water, Sundried Tomatoes (6%) [Sundried Tomatoes, Salt], Lemon Juice, Capers (4%) [Capers, Vinegar, Salt], Garlic, Date Syrup, Balsamic Vinegar, Parsley, Oregano, Black Pepper.
ALLERGEN INFORMATION
For allergens, see ingredients highlighted.
May contain traces of Peanuts and Sesame
Although every care has been taken to remove olive pits, some fragments may remain
NUTRITIONAL INFORMATION
| Typical | per 100g |
|---|---|
| Energy | 1396kJ |
| 339kcal | |
| Fat | 33g |
| Of which: | |
| Saturates | 4.3g |
| Carbohydrates | 3.2g |
| Of which: | |
| Sugars | 3.2g |
| Fibre | 5.3g |
| Protein | 4.6g |
| Salt | 2.0g |

This fella’s smooth, creamy & beautifully full-flavoured with a touch of zing! Magic as a healthy snack and makes most foods taste great! David & Stephen X
INGREDIENTS
Cooked Chickpeas (49%) [Chickpeas, Water], Rapeseed Oil, Tahini (15%) (SESAME SEEDS), Water, Lemon Juice Concentrate, Garlic (1%), Sea Salt, Rowanberry Extract, Cumin, Cayenne
ALLERGEN INFORMATION
For allergens, see ingredients highlighted.
May contain traces of Nuts
NUTRITIONAL INFORMATION
| Typical | per 100g |
|---|---|
| Energy | 1416kJ |
| 342kcal | |
| Fat | 29.0g |
| Of which: | |
| Saturates | 2.6g |
| Carbohydrates | 12g |
| Of which: | |
| Sugars | 0.6g |
| Fibre | 2.9g |
| Protein | 6.8g |
| Salt | 1.0g |
15-Minute Pizza (No Yeast)
Takes
Serves 2
Ingredients
Quick Pizza Dough – Makes 1 Medium Pizza
- 200 g self-raising flour sieved (approx. 1⅓ cups)
- A pinch of salt
- 2 tbsp olive oil
- 110 ml water room temperature (approx. ½ cup minus 1 tbsp)
Toppings:
- 3-5 tbsp of tomato sauce passata or homemade pizza sauce
- 3 tbsp The Happy Pear Lovely Basil Pesto
- A few dollops of Quick-Fire Cashew Feta recipe below
- Veggies of choice
Quick-Fire Cashew Feta
- 75 g cashew nuts approx. ½ cup
- 1 tbsp lemon juice
- ¾ tsp salt
- 3 tbsp olive oil
Instructions
Mix dry ingredients:
- In a large bowl, combine the sieved self-raising flour and a pinch of salt.
Add wet ingredients:
- Pour in the olive oil and water. Stir with a spoon or your hand until a dough begins to come together.
Knead the dough:
- Transfer the dough to a lightly floured surface and knead for 2–3 minutes until smooth and soft. If the dough feels too sticky, sprinkle over a little more flour.
Roll it out:
- Roll the dough into a round or rectangular shape, around 0.5 cm thick. You can roll it directly onto a piece of baking paper for easier transfer.
Pre-bake (optional for a crispier base):
- Heat a non-stick frying pan over a medium-high heat. Place the rolled-out dough into the dry pan and cook for 2–3 minutes until lightly golden underneath. Flip and cook the other side for 1–2 minutes. Remove from the pan.
Make your Cashew Feta:
- Add all ingredients to a high-speed blender or food processor. Blend until smooth and creamy, scraping down the sides as needed. If it’s too thick, add a small splash of water to loosen.
Add your toppings and bake:
- You can bake the topped pizza in a preheated oven at 200°C (fan) / 220°C (conventional) for 8–10 minutes, or until the base is golden and the toppings are heated through. Alternatively
Notes
Pan-Cooked Pizza Final Method (Instead of Baking)
Preheat a large non-stick frying pan over medium-low heat. Carefully slide the topped pizza onto the pan. Cover with a lid (or a baking tray if you don’t have a lid that fits) – this traps the steam and helps the toppings heat and melt while the base crisps up. Cook for 5–7 minutes, checking occasionally to make sure the bottom doesn’t burn. You want a golden, crisp base and hot toppings. If the toppings aren’t fully heated, reduce the heat slightly and cook for an extra 1–2 minutes
With 30% less fat then our Happy Hummus, this smooth and creamy hummus is packed full of flavour. Like its brother, this gorgeous dip goes great with crackers or fresh veg for a delicious snack.
INGREDIENTS
Cooked Chickpeas (58%) [Chickpeas, Water], Water, Rapeseed Oil, Tahini (11%) (SESAME SEEDS), Lemon Juice Concentrate, Garlic (1%), Sea Salt, Rowanberry Extract, Cumin, Cayenne
ALLERGEN INFORMATION
For allergens, see ingredients highlighted.
May contain traces of Nuts.
NUTRITIONAL INFORMATION
| Typical | per 100g |
|---|---|
| Energy | 1033kJ |
| 250kcal | |
| Fat | 20.0g |
| of which: saturates | 2.0g |
| Carbohydrate | 6.8g |
| of which: sugars | 0.6g |
| Fibre | 0.7g |
| Protein | 7.3g |
| Salt | 0.79g |

Our award-winning Sweet Beet Hummus is a deliciously vibrant blend of cooked beetroot, chickpeas, tahini and extra virgin rapeseed oil. Smooth and creamy, our sensational Sweet Beet Hummus makes a tasty and colourful dip or spread, that can be enjoyed in sandwiches, with crackers, fresh veggies and other savoury foods. Dave & Steve X
INGREDIENTS
Cooked Chickpeas (48%) [Chickpeas, Water], Cooked Beetroot (25%), Rapeseed Oil, Tahini (9%) (SESAME SEEDS), Lemon Juice Concentrate, Garlic, Sea Salt, Rowanberry Extract, Cumin, Cayenne
ALLERGEN INFORMATION
For allergens, see ingredients highlighted.
May contain traces of Nuts
NUTRITIONAL INFORMATION
| Typical | per 100g |
|---|---|
| Energy | 1017kJ |
| 245kcal | |
| Fat | 19.0g |
| Of which: | |
| Saturates | 1.7g |
| Carbohydrates | 11.0g |
| Of which: | |
| Sugars | 2.5g |
| Fibre | 3.5g |
| Protein | 5.8g |
| Salt | 0.86g |

This hummus is a deliciously smooth, absolutely flavour packed and has that tiny little bit of a hit. Its great as a dip for pittas or veggies and always brings strong a vibrant colour to any sandwich.
INGREDIENTS
Cooked Chickpeas (41%) [Chickpeas, Water], Rapeseed Oil, Chargrilled Red Pepper (17%) [Red Pepper (97%), Sunflower Oil], Tahini (14%) (SESAME SEEDS), Lemon Juice Concentrate, Onion Powder, Garlic, Date Syrup, Sea Salt, Sunflower Oil, Smoked Paprika, Rowanberry Extract, Cumin, Cayenne, Black Pepper
ALLERGEN INFORMATION
For allergens, see ingredients highlighted.
May contain traces of Nuts
NUTRITIONAL INFORMATION
| Typical | per 100g |
|---|---|
| Energy | 1371kJ |
| 331kcal | |
| Fat | 28.0g |
| of which: Saturates | 2.6g |
| Carbohydrates | 10.0g |
| of which: Sugars | 2.7g |
| Fibre | 5.3g |
| Protein | 7.2g |
| Salt | 0.78g |
Farm Kale Caesar Salad
Takes 30 minutes
Serves 4
Ingredients
Salad
- 3 baby gem lettuces 600g / approx 8 cups chopped
- 100 g kale or baby kale approx 3 cups, packed
- 50 g capers drained (approx 4 tbsp)
- 300 g tempeh or tofu (approx 2¼ cups cubed)
Tempeh Marinade
- 4 tbsp tamari
- 2 tbsp apple cider vinegar
- 2 tsp maple syrup
- 2 tsp smoked paprika
- 1 tsp garlic powder
- Pinch of salt
Sourdough Croutons
- 4 slices sourdough bread approx 150g / 3 cups cubed
- 2 –3 tbsp oil
- 1 tbsp tamari or soy sauce
- Pinch of salt
- 1 tbsp mixed herbs
Dressing
Choose one:
Option 1:
- 75 g plant-based yoghurt approx ⅓ cup
- 25 g tahini approx 2 tbsp
Option 2:
- 100 g vegan mayo approx ½ cup
For both options:
- 20 ml caper brine approx 1 tbsp + 1 tsp
- Pinch of black pepper
Instructions
Preheat the oven to 200°C (fan 180°C).
Prepare the tempeh “facon”:
- Slice the tempeh into thin strips (around 3mm), then into matchsticks. Mix all marinade ingredients in a bowl, add the tempeh and toss to coat. Spread on a baking tray in a single layer. Bake for 10 minutes, give them a stir, then bake for another 5 minutes until slightly crisp.
Make the sourdough croutons:
- In a bowl, mix the oil, tamari, herbs, and salt. Chop the sourdough into 1cm x 1cm cubes and toss them in the seasoned oil. Spread on a tray and bake for 5 minutes. Stir, then bake for a further 10 minutes until golden and crisp.
- Remove tempeh and croutons from oven and allow to cool slightly.
Prep the greens:
- Slice the base off the baby gem to release the leaves, then shred them thinly and place in a large bowl. (Tip: use a plastic knife to reduce browning). Tear the kale leaves from the stalks and roughly chop. Add both to the bowl. Add drained capers.
Make the dressing:
- In a small bowl, mix the plant yoghurt and tahini or the vegan mayo with the caper brine and black pepper. Whisk until smooth and creamy. If it’s too thick, add a splash more caper brine.
Dress the salad:
- Pour the dressing over the greens and toss well to coat everything evenly.
Top & serve:
- Sprinkle generously with the crispy tempeh “facon” and sourdough croutons. Don’t mix them in too much – they’re best left on top like little flavour bombs waiting to be discovered!
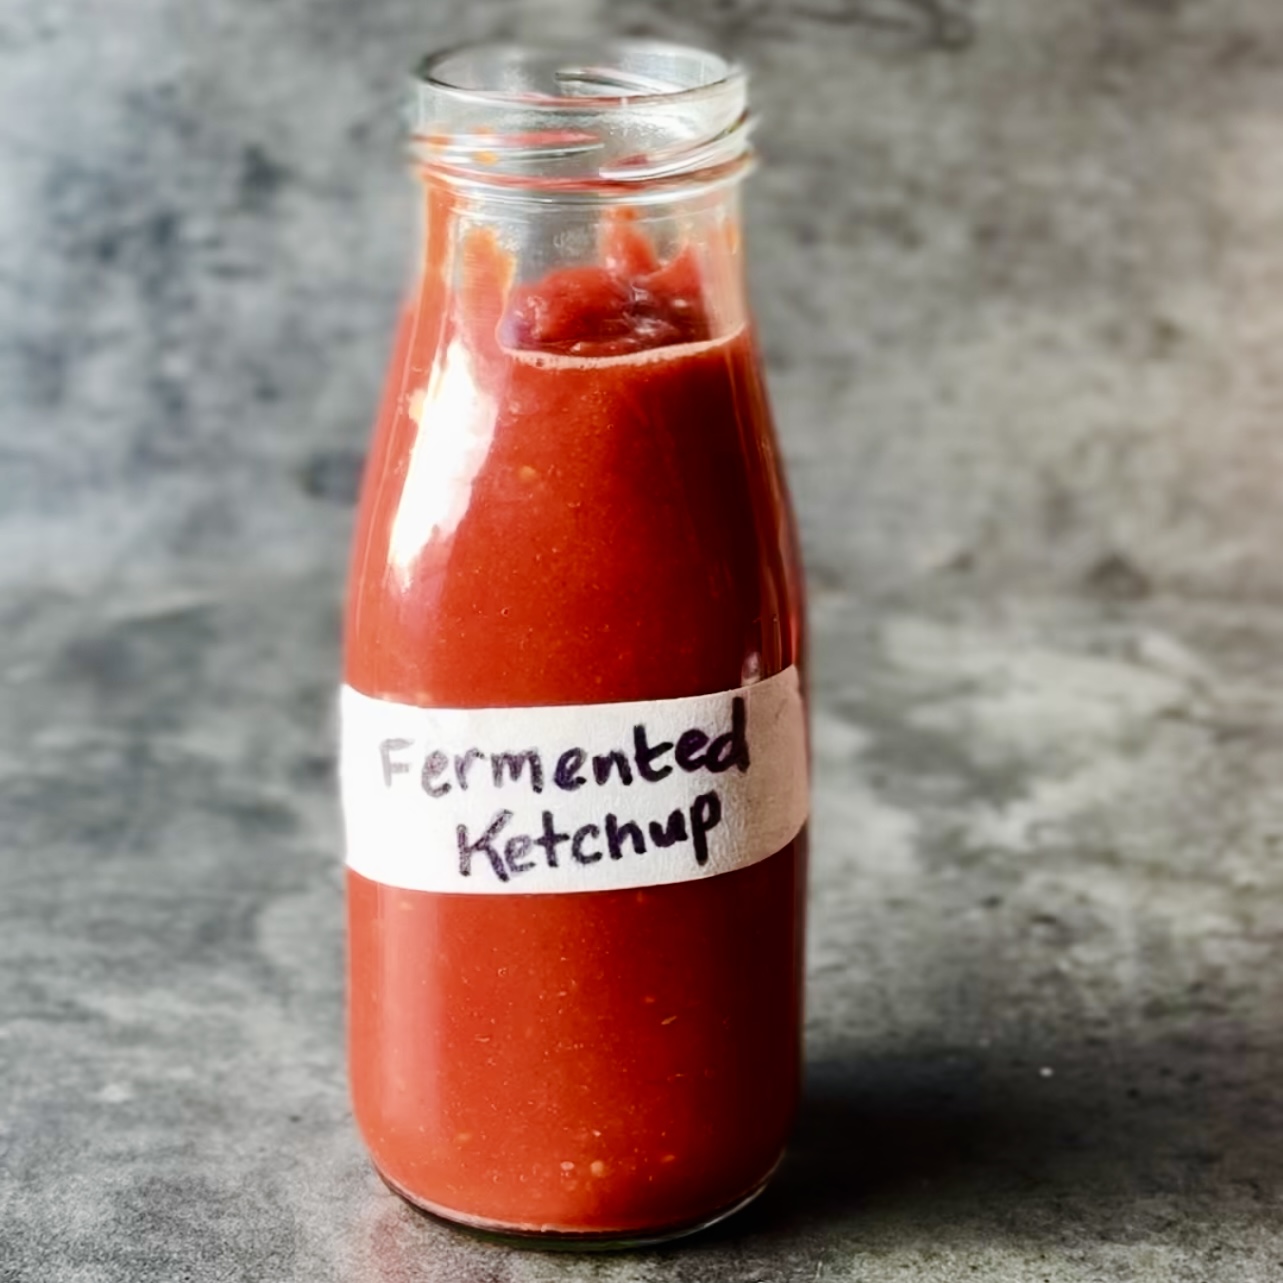
Fermented Tomato Ketchup
Takes 7 days 15 minutes
Serves 12
Ingredients
For fermentation:
- 500 g cherry tomatoes about 3 cups, ripe and organic
- 10 g sea salt or Himalayan salt 2 tsp, non-iodized
- 240 ml water 1 cup
- ½ red onion
- 2-3 garlic cloves
- 10 g fresh ginger 1 thumb sized piece
- 1 sprig fresh thyme optional, for aroma
- 1 green chilli
For ketchup blending:
- 30 –45 ml apple cider vinegar 2–3 tbsp, adjust for taste
- 45 ml maple syrup (1–2 tbsp, adjust sweetness)
- 2.5 tbsp tamari or soy sauce
- 1/2 tsp smoked paprika
- 130 ml tomato puree/ tomato concentrate 8 tbsp approx
Instructions
Prepare the vegan and fermentation jar:
- Cut the cherry tomatoes in half.
- Peel and finely dice the onion, garlic cloves, ginger and green chilli
- Place the tomatoes in a clean glass jar along with the onion, garlic, chilli and thyme,
Make the brine:
- Dissolve the sea salt in filtered water to create a simple brine.
- Pour the brine over the tomatoes and other veg, ensuring they are fully submerged. Use a fermentation weight or a small, clean jar lid to keep the tomatoes submerged under the water
Ferment the tomatoes:
- Cover the jar with a loose-fitting lid or a piece of cloth secured with a rubber band.
- Place the jar in a room at room temperature out of direct sunlight and leave to ferment for 5-7 days (20–25°C / 68–77°F).
- Check daily to ensure the tomatoes remain submerged, and burp the jar (if sealed) to release gas buildup. The tomatoes are ready when they taste tangy, slightly fizzy, and have developed a fermented aroma.
Blend into ketchup:
- Strain the fermented tomatoes, reserving some of the brine.
- Blend the tomatoes with apple cider vinegar, maple syrup, tomato concentrate, tamari/ soy sauce until smooth. Add reserved brine, a tablespoon at a time, to adjust the consistency.
Taste and adjust:
- Taste the ketchup and adjust the seasoning to your liking by adding more sweetener for balance or vinegar for extra tang.
Store and use:
- Transfer the ketchup to a clean jar or bottle. Store in the refrigerator, where it will keep for 4–6 weeks.
Tips
- For smoother ketchup, pass the blended mixture through a fine mesh sieve.
- If you like a spicier ketchup, add a pinch of chili flakes or a fermented chili pepper to the blend.
- Save leftover brine to start another batch of fermented vegetables or use as a savory probiotic shot.
Baked Stuffed Onions (Salantourmasi)
Takes 1 hour 40 minutes
Serves 6
Ingredients
For the onions:
- 8 medium yellow onions preferably oval-shaped
- Fresh parsley for garnish
For the stuffing:
- 100 g quinoa ½ cup, rinsed
- 40 ml olive oil 2½ tbsp
- 3 garlic cloves finely chopped
- 100 g walnuts 1 cup, roughly chopped
- 1 × 200g tin kidney beans drained and rinsed (about 1 cup cooked)
- 1 medium tomato diced
- 50 g tomato purée 3 tbsp
- Juice of ½ lemon
- 10 g fresh parsley small handful, finely chopped
- 10 g fresh mint small handful, finely chopped
- 1 tsp salt
- ½ tsp ground black pepper
- 50 ml water or vegetable stock 3 tbsp + 1 tsp
- 1 tsp dark miso
- 1 tsp dried oregano
For the tomato sauce:
- 400 g tin chopped tomatoes
- 240 ml water 1 cup
- 60 g tomato paste ¼ cup
- 60 ml lemon juice 4 tbsp
- 1½ tsp salt
- ½ tsp ground black pepper
Instructions
Pre-cook the onions:
- Bring a large pot of water to a gentle boil. Slice off the tops and roots of the onions, and make a cut halfway through each to help separate the layers. Peel the onions and boil them for 10 minutes, until softened but still holding their shape. Drain and allow to cool slightly.
Prepare the filling:
- In a large mixing bowl, combine the rinsed quinoa, chopped garlic, walnuts, kidney beans (crush a few slightly with the back of a spoon), diced tomato, tomato purée, lemon juice, chopped parsley and mint, salt, black pepper, oregano, dark miso, and water or stock. Mix thoroughly until well combined.
Hollow out the onions:
- Carefully separate the cooled onions into layers to form onion ‘cups’. Finely chop the inner cores of the onions and stir them into the filling for added flavour and texture.
Stuff the onions:
- Generously fill each onion cup with the mixture, pressing gently to pack it in. Arrange the stuffed onions tightly in a deep baking dish.
Make the tomato sauce:
- In a jug or bowl, mix together the chopped tomatoes, water, tomato paste, lemon juice, salt, and pepper. Stir or blend until smooth and well combined. Taste and adjust seasoning if needed.
Bake:
- Pour the tomato sauce over and around the stuffed onions. Cover the dish tightly with foil or a lid and bake in a preheated oven at 180°C (fan 160°C / gas mark 4) for 60 minutes. Remove the foil or lid and bake for a further 15 minutes, until the tops are golden and the sauce is bubbling.
Garnish and serve:
- Sprinkle with fresh parsley and serve warm, with plenty of tomato sauce spooned over each onion.
Watermelon Lime Sorbet
Takes 9 hours 10 minutes
Serves 4
Ingredients
- 1 small watermelon approx. 2 kg, chopped and frozen overnight
- Zest and juice of 2 limes
- 30 g 2 tbsp maple syrup (optional)
- Pinch of sea salt optional
Instructions
- Chop the watermelon into chunks and freeze overnight until solid.
- Fit your Nama J2 juicer with the sorbet attachment.
- Feed the frozen watermelon through the juicer, adding the lime zest and juice as you go.
- Once fully processed, stir in the maple syrup if using, and add a small pinch of salt.
- Serve immediately for a soft sorbet, or transfer to a container and freeze for 1–2 hours for a firmer texture.
Video
The Happy Pear Peanut & Cranberry Energy Balls 50g
INGREDIENTS
Dates (67%), Roasted PEANUT Butter (17%), Desiccated Coconut, Roasted PEANUT Pieces (4.5%), Chia Seeds, Cranberries (3.5%) [Cranberries, Apple Juice Concentrate, Sunflower Oil]
ALLERGEN INFORMATION
For allergens, see highlighted ingredients.
Contains Peanuts
May also contain: Brazil Nuts, Cashew Nuts, Hazelnuts, Macadamia Nut / Queensland Nut, Nuts, Pecan Nuts, Pecan Nuts, Pistachio Nuts, Soya, Walnuts
Caution: May also contain natural date stone pits.
NUTRITIONAL INFORMATION
| Typical | per 100g |
|---|---|
| Energy | 1690kJ |
| 402kcal | |
| Fat | 11g |
| of which: Saturates | 2.8g |
| Carbohydrates | 63g |
| of which: Sugars | 41g |
| Fibre | 9.3g |
| Protein | 8.1g |
| Salt | 0.02g |
| Sodium | 0.02g |
The Happy Pear Choc Date Caramel Crisp Energy Balls 50g
INGREDIENTS
Dates (68%), Dark Chocolate (19%) [Cocoa Mass, Sugar, Cocoa Butter, Cocoa Powder, Emulsifier (SOYA Lecithins), Vanilla Extract], Crunchy PEANUT Butter, SOYA Crispies [SOYA Protein], Sea Salt (0.3%), Dark Chocolate contains: Cocoa Solids 58% min.
ALLERGEN INFORMATION
For allergens, see highlighted ingredients.
Contains Peanuts, Soya
May also contain: Brazil Nuts, Cashew Nuts, Hazelnuts, Macadamia Nut / Queensland Nut, Nuts, Pecan Nuts, Pecan Nuts, Pistachio Nuts, Walnuts
Caution: May also contain natural date stone pits.
NUTRITIONAL INFORMATION
| Typical | per 100g |
|---|---|
| Energy | 1594kJ |
| 378kcal | |
| Fat | 8.4g |
| of which: Saturates | 3.8g |
| Carbohydrates | 64g |
| of which: Sugars | 50g |
| Fibre | 5.3g |
| Protein | 9g |
| Salt | 0.44g |
| Sodium | 0.44g |
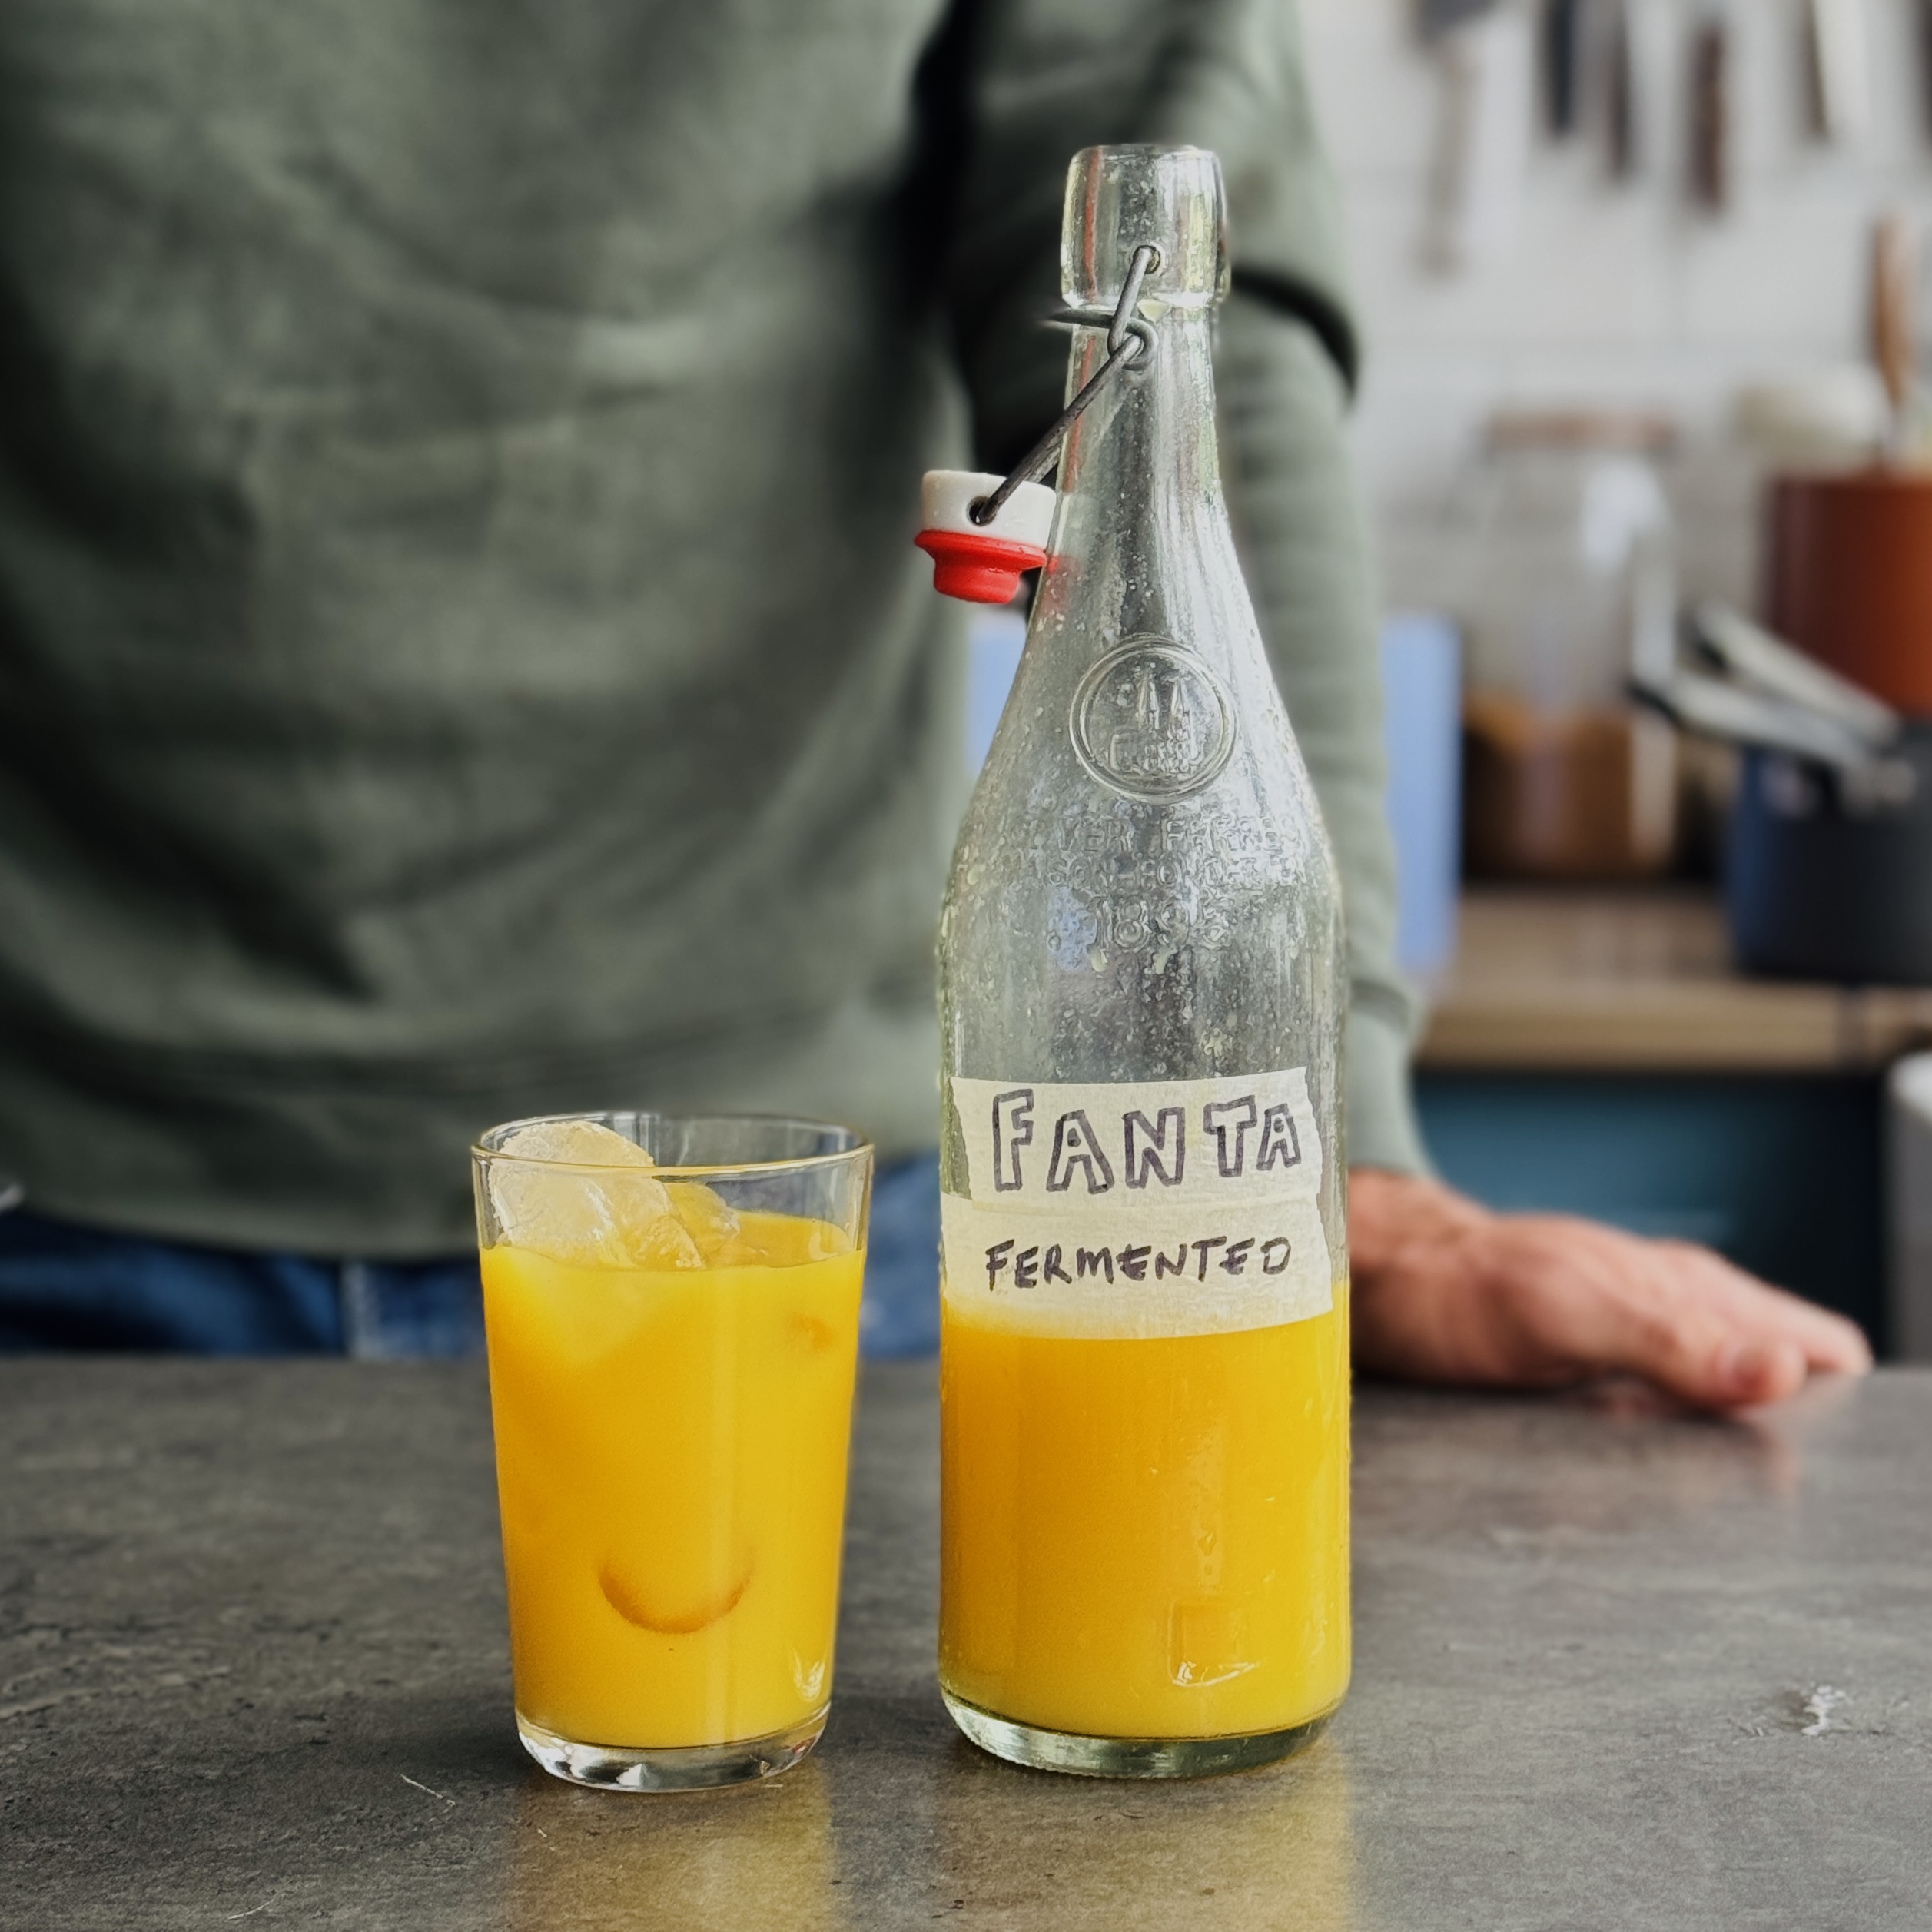
Wild Fermented Probiotic Fanta
Takes 6 days 15 minutes
Serves
Ingredients
For the bulk ferment:
- 10 – 12 oranges unwaxed and ideally organic
For secondary fermentation:
- Maple syrup to taste approx. 1–2 tsp per 500ml bottle
Instructions
Juice the oranges and prepare the skins
- Wash the oranges thoroughly. Juice them – you should get around 1–1.2 litres (4–5 cups) of juice. Set aside the juice and reserve the skins from only 3–4 of the oranges to reduce bitterness and gelling.
Combine juice and peels for wild fermentation
- Pour the juice into a clean 2-litre (8 cup) glass jar or jug. Add the reserved peels from 3–4 of the juiced oranges – these introduce wild yeast without overpowering the flavour.
Cover and ferment at room temperature
- Cover the jar with a lid. Leave the mixture to ferment at room temperature (21–24°C) for 3–4 days. Look for small bubbles and a slightly tangy aroma.
Strain and bottle for secondary fermentation
- After 3–4 days, strain out the orange peels and pulp using a fine sieve or muslin cloth. Use a funnel to pour the liquid into clean swing-top bottles (2–3 x 500ml).
Sweeten and carbonate
- Add maple syrup to each bottle to taste – approx. 1–2 tsp per 500ml is a good starting point. This helps feed the yeast to produce natural fizz. Seal the bottles and leave them at room temperature for 1–2 days.
Burp and refrigerate
- Open (burp) the bottles once daily to release pressure, then reseal. Once nicely fizzy, move them to the fridge to slow fermentation. Chill for at least 12 hours before serving.
Serve and enjoy
- Pour gently to preserve carbonation. Serve chilled and enjoy within 1–2 weeks.
Notes
– Use only 3–4 orange peels for optimal flavour – more can cause bitterness and gelling from pectin.
– Choose fresh, sweet oranges to reduce the need for added sweetener.
– Maple syrup adds flavour and balances the tartness – you can also use agave or date syrup if preferred.
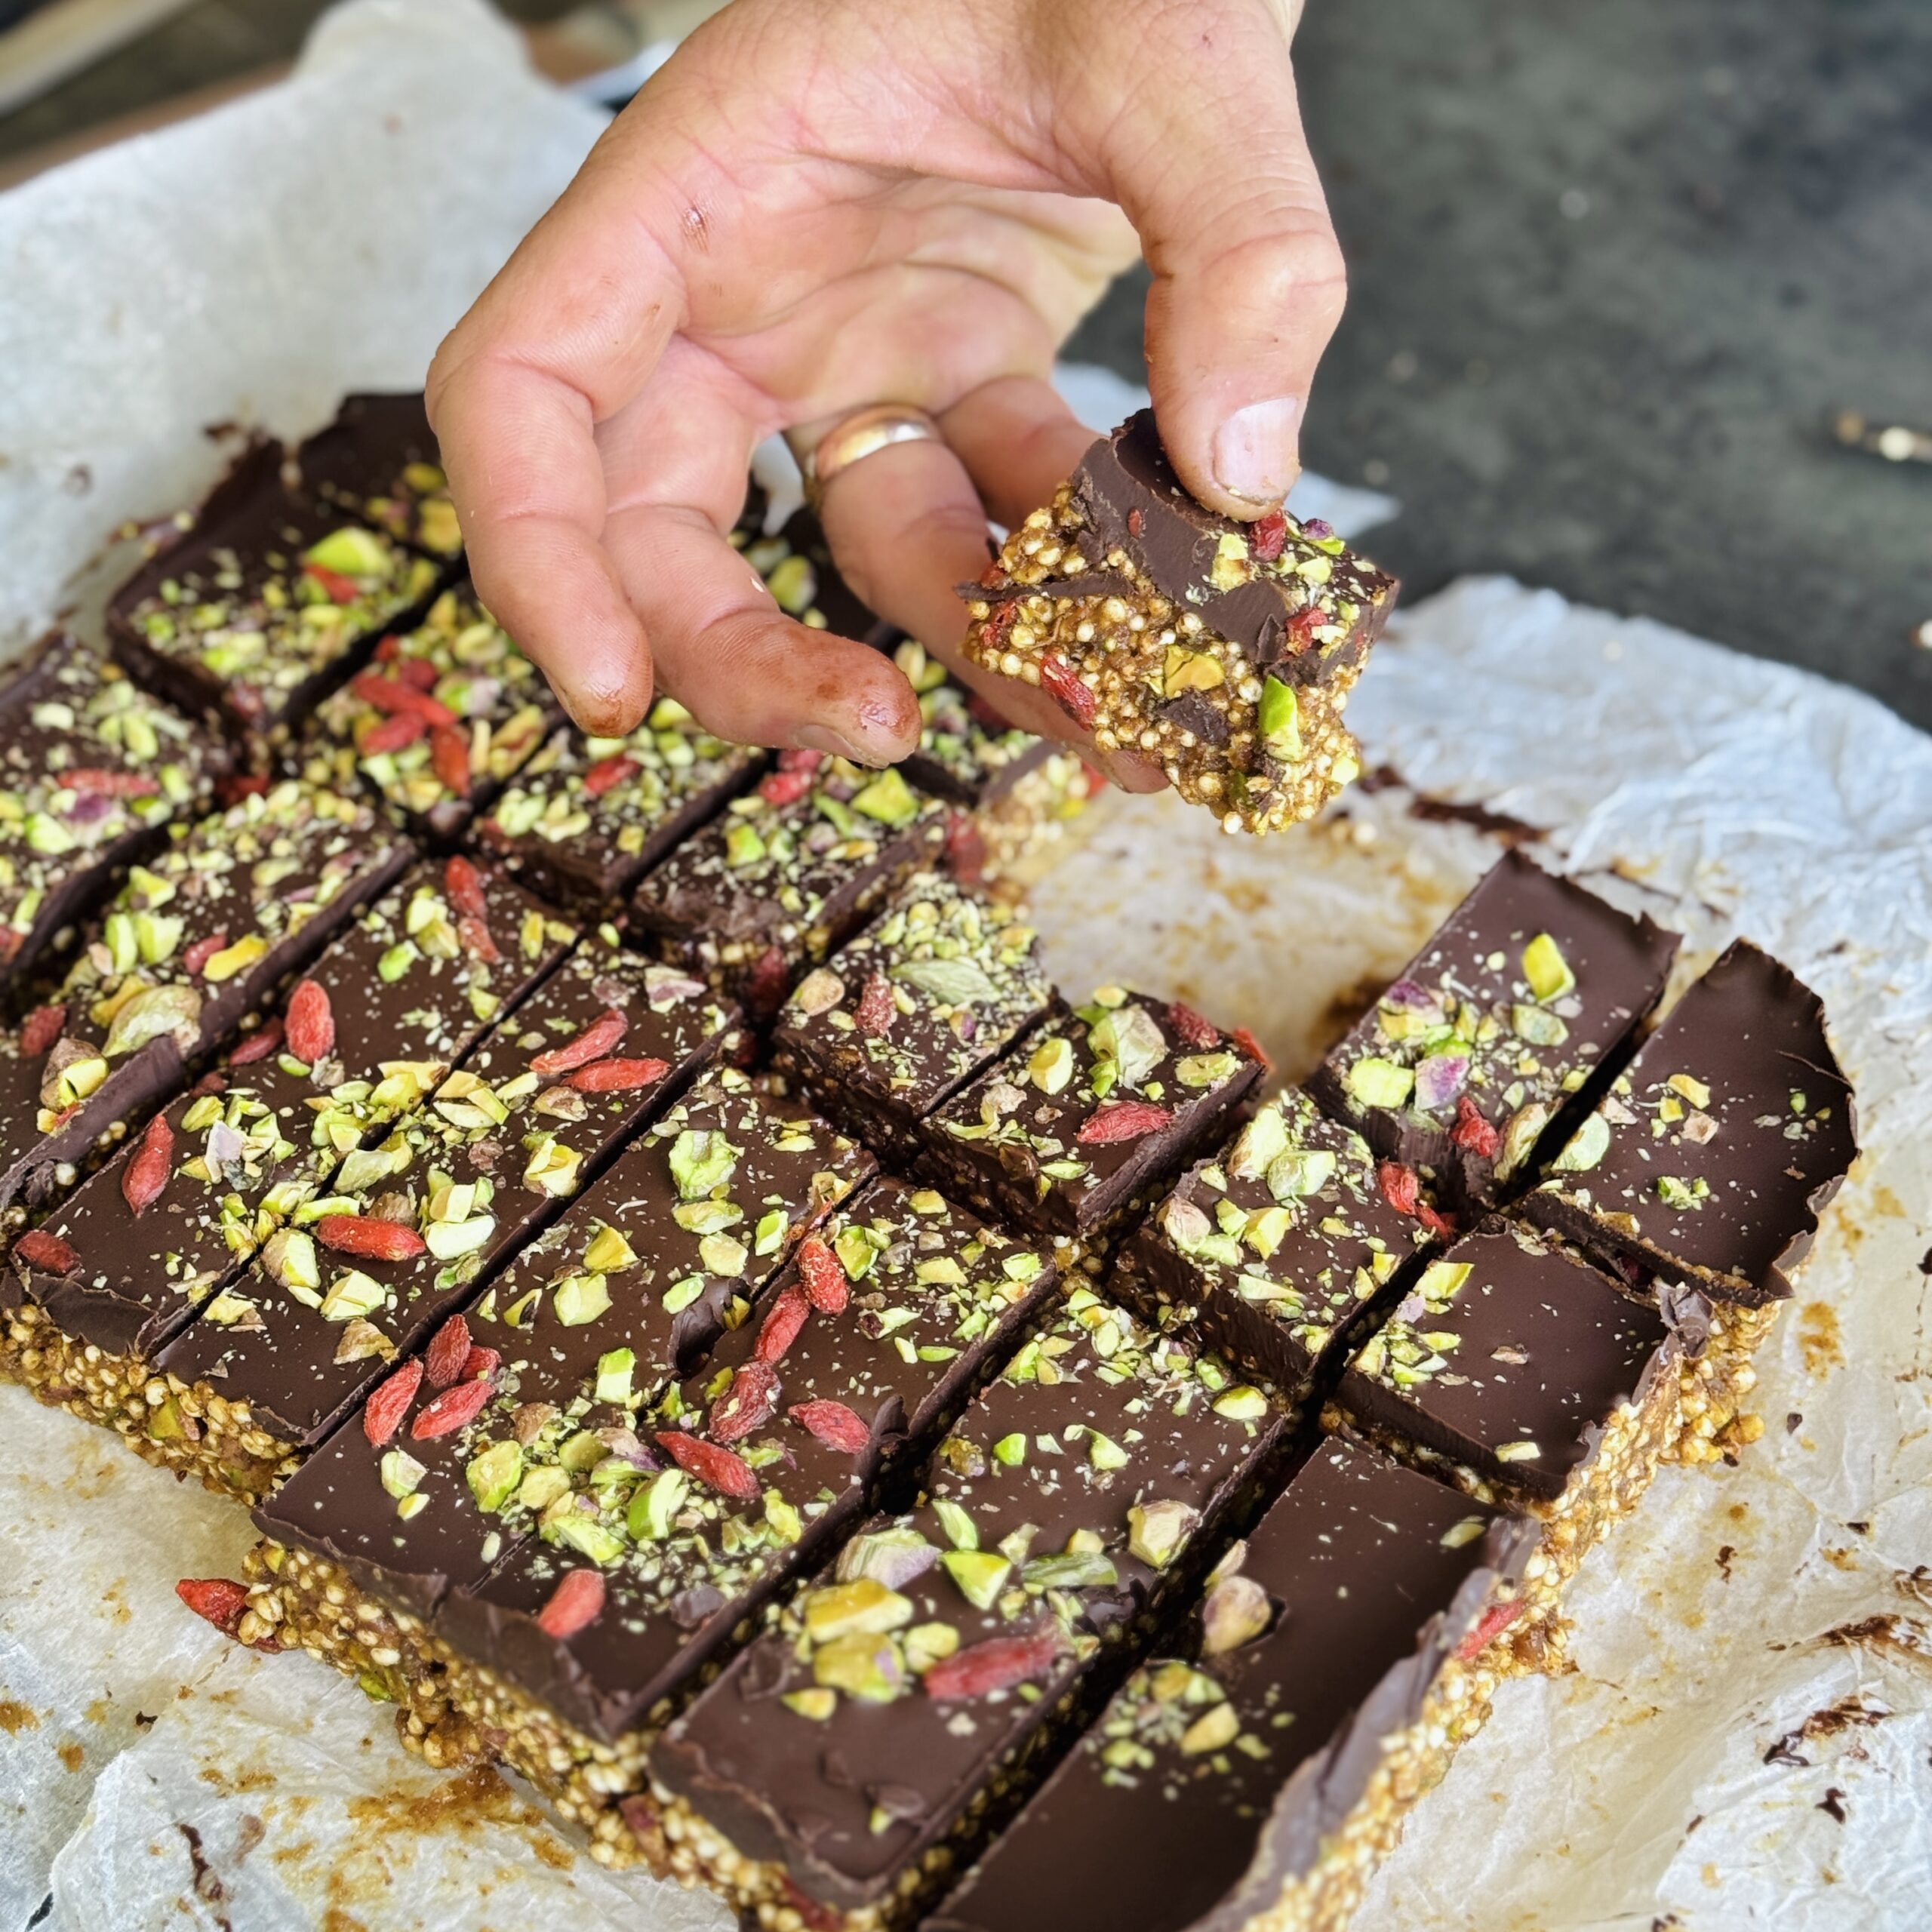
Puffed Quinoa Pistachio Bars
Takes 1 hour 20 minutes
Serves 6
Ingredients
Base Mixture
- 400 g dates pitted
- 200 g almond butter approx. ¾ cup
- 60 g coconut oil approx. 4 tbsp
- 8 –12 tbsp water
- Pinch of sea salt
- 100 g puffed quinoa approx. 4 cups
- 100 g shelled pistachios roughly chopped (approx. ¾ cup)
- 60 g goji berries approx. ½ cup
Chocolate Topping
- 300 g dark chocolate 70% cocoa or higher
- 10 g chopped pistachios for garnish
- 10 g goji berries for garnish
Instructions
Soften the dates
- Place the dates in a bowl and cover with warm water. Leave to soak for 5 minutes, then drain well.
Make the caramel base
- In a food processor, blend the softened dates, almond butter, coconut oil, 8–12 tablespoons of water, and a pinch of sea salt until smooth and creamy. Scrape down the sides as needed. If the mixture heats up too much, pause to allow it to cool slightly.
Mix in the dry ingredients
- Transfer the caramel mixture to a large mixing bowl. Stir in the puffed quinoa, chopped pistachios, and goji berries until well combined.
Press into tray
- Line a square baking tin (approx. 20 x 20 cm / 8 x 8 in) with baking parchment. Spoon in the mixture and press it down very firmly using the back of a spoon or spatula to compact it evenly.
Melt the chocolate
- Gently melt the dark chocolate (with 1 teaspoon of coconut oil if desired) using a bain-marie or microwave in short bursts, stirring between each one until smooth.
Top and garnish
- Pour the melted chocolate over the base and spread it evenly. Sprinkle with the chopped pistachios and goji berries.
Chill and slice
- Refrigerate for at least 1 hour or until firm. Once set, remove from the tin and slice into 10–12 bars.

Stuffed Fluffy Pitta Breads (No Yeast)
Takes 50 minutes
Serves 6
Ingredients
For the quick pitta dough (no yeast):
- 300 g 2 cups self-raising flour
- 250 g 1 cup unsweetened plant-based yoghurt
- 1 tbsp olive oil
- ½ tsp salt
- Extra flour for dusting
Filling 1 – Spanakopita-inspired (makes 3 pittas):
- 1 tbsp olive oil
- 1 large onion
- 2 cloves of garlic
- 400 g 6 packed cups fresh or frozen spinach or chard
- 20 g ½ cup, chopped fresh mint leaves
- Juice of 1 lemon
- ¼ tsp ground black pepper
- Salt to taste
- 1 tbsp The Happy Pear Lovely Basil Pesto
Quick-fire cashew feta (for Filling 1):
- 75 g 1 cup cashew nuts
- 1 tbsp lemon juice
- ¾ tsp salt
- 3 tbsp olive oil
Filling 2 – Red pepper, almond & bean (optional, makes 3 pittas):
- 75 g about ⅓ cup Happy Pear Spicy Red Pepper Pesto
- or
- A mix of roasted red peppers white beans, and ground almonds blended into a paste
Instructions
Make the dough:
- In a mixing bowl, combine the flour, yoghurt, olive oil, and salt. Mix until a dough forms, then knead on a floured surface for 2–3 minutes until smooth. Divide into 6 equal portions and shape into balls. Cover and set aside to rest while you prepare the fillings.
Make the spanakopita filling:
- Peel and finely chop the onion and garlic. Heat olive oil in a large pan over medium heat. Sauté the onion for 5–6 minutes until softened, then add the garlic. Stir in the spinach or chard with a generous pinch of salt and cook until wilted. Let cool slightly, squeeze out any excess moisture, and finely chop. Stir in the mint, lemon juice, pepper, salt and Lovely Basil Pesto to taste.
Make the quick-fire cashew feta:
- Roughly chop or blend the cashew nuts, lemon juice, salt, and olive oil in a food processor or blender until creamy but still a little textured. Fold into the cooled spinach mixture and mix well.
Assemble the pittas:
- Roll each dough ball into a 12cm (5 in) circle on a lightly floured surface. Place about 2 tbsp of the spanakopita filling in the centre. Bring the edges together and pinch to seal, then gently flatten into a disc about 2cm (0.8 in) thick, keeping the seam side down. Repeat with the remaining spanakopita filling. For variety, fill 2–3 with the red pepper pesto or bean-almond mix instead.
Cook the pittas – Choose your method:
- Pan-fry (golden crust):
- Heat a non-stick or lightly oiled pan over medium heat. Cook each pitta for 3–4 minutes per side until golden and puffed.
- Oven-bake (easy batch):
- Preheat the oven to 220°C (428°F). Place pittas on a parchment-lined baking tray, brush with olive oil, and bake for 10–12 minutes until puffed and golden.
Serve warm:
- Enjoy hot with herby olive oil, tahini drizzle, or lemon yoghurt.

Fizzy Wild-Fermented Elderflower Lemonade
Takes 6 days 15 minutes
Serves 8
Ingredients
- 4 –6 unwaxed lemons ideally organic
- 100 g sugar approx. ½ cup
- 1 litre cold water approx. 4¼ cups
- 10 fresh elderflower heads ideally harvested the same day
Instructions
Prepare the base mixture:
- Slice the lemons in half and place them in a large, clean 2-litre jar or jug. Add 100g sugar and 1 litre cold water. Stir well until the sugar is mostly dissolved.
Add elderflowers to infuse and ferment:
- Gently shake or tap the elderflower heads to remove any insects, but do not wash them as this preserves the wild yeasts. Add the elderflower heads directly to the lemon mixture.
Cover and begin wild fermentation:
- Cover the jar with a lid, or use cheesecloth, a paper towel, or a coffee filter secured with an elastic band. Leave to ferment at room temperature (21–24°C) for 3 days.
Strain and transfer to bottles:
- After 3 days, strain the mixture through a fine sieve or muslin cloth to remove the lemons, pips, and elderflowers. Use a funnel to pour the liquid into 2–3 clean swing-top bottles (500ml each), leaving a small gap at the top.
Secondary ferment to build fizz:
- Seal the bottles and leave them at room temperature for 1–2 days to develop carbonation. Open the bottles daily to release any built-up pressure.
Refrigerate to stop fermentation:
- Once nicely fizzy, transfer the bottles to the fridge to slow fermentation. Chill for at least 12 hours before serving.
Serve and enjoy:
- Pour gently into glasses to retain the fizz and serve chilled. Best consumed within 1–2 weeks.
Notes
- Use only fresh, unsprayed elderflowers picked on a dry, sunny day for the best flavour and fermentation.
- Do not wash the elderflowers—the wild yeast is essential for fermentation. Gently shake to remove insects etc.
- If your kitchen is cool, fermentation may take a little longer; if it’s warm, check the bottles sooner to prevent over-carbonation.
- For enhanced floral notes, you can add a few more elderflower heads during the secondary ferment—just strain them out before chilling.

Smoky Rice Paper Bacon
Takes 10 minutes
Serves 4
Ingredients
- 64 g rice paper approx. 8 sheets (2.25 oz)
- 45 g tamari or soy sauce 3 tbsp
- 15 g maple syrup 1 tbsp
- 8 g smoked paprika 1 tbsp
- 3 g garlic powder 1 tsp
- 18 g brown miso paste 1 tbsp
- 5 g nutritional yeast 1 tbsp
- 15 g neutral oil such as avocado or light olive oil (1 tbsp)
- 1 g dried mushroom powder shiitake or porcini (½ tsp)
- Freshly cracked black pepper to finish
Instructions
Rehydrate the rice paper
- Fill a large shallow bowl with water. Dip one sheet of rice paper (approx. 8g) into the water for 5–10 seconds until just softened but still holding its shape. Place it on a clean surface, then dip a second sheet and lay it directly on top to form a double layer. Repeat to create 4 double-layered stacks.
Make the smoky marinade
- In a shallow bowl, whisk together the tamari, maple syrup, smoked paprika, garlic powder, miso paste, nutritional yeast, oil, and mushroom powder until smooth and fully combined.
Coat the rice paper
- Dip each double-layered stack into the marinade, turning and pressing gently so both sides are evenly coated and the layers stick together well.
Slice into strips
- Using kitchen scissors or a sharp knife, cut each coated stack into strips approximately 12cm x 3cm (4.7 in x 1.2 in).
Fry until crisp and golden
- Heat a non-stick frying pan over high heat. Add the strips in batches and fry for 1–2 minutes on each side until golden brown and crispy. Avoid overcrowding the pan. They’ll firm up further as they cool slightly.
Finish and serve
- Remove from the pan and sprinkle with freshly cracked black pepper. Serve hot in sandwiches, crumbled over pasta or salads, or enjoy on their own for a smoky, crunchy snack.
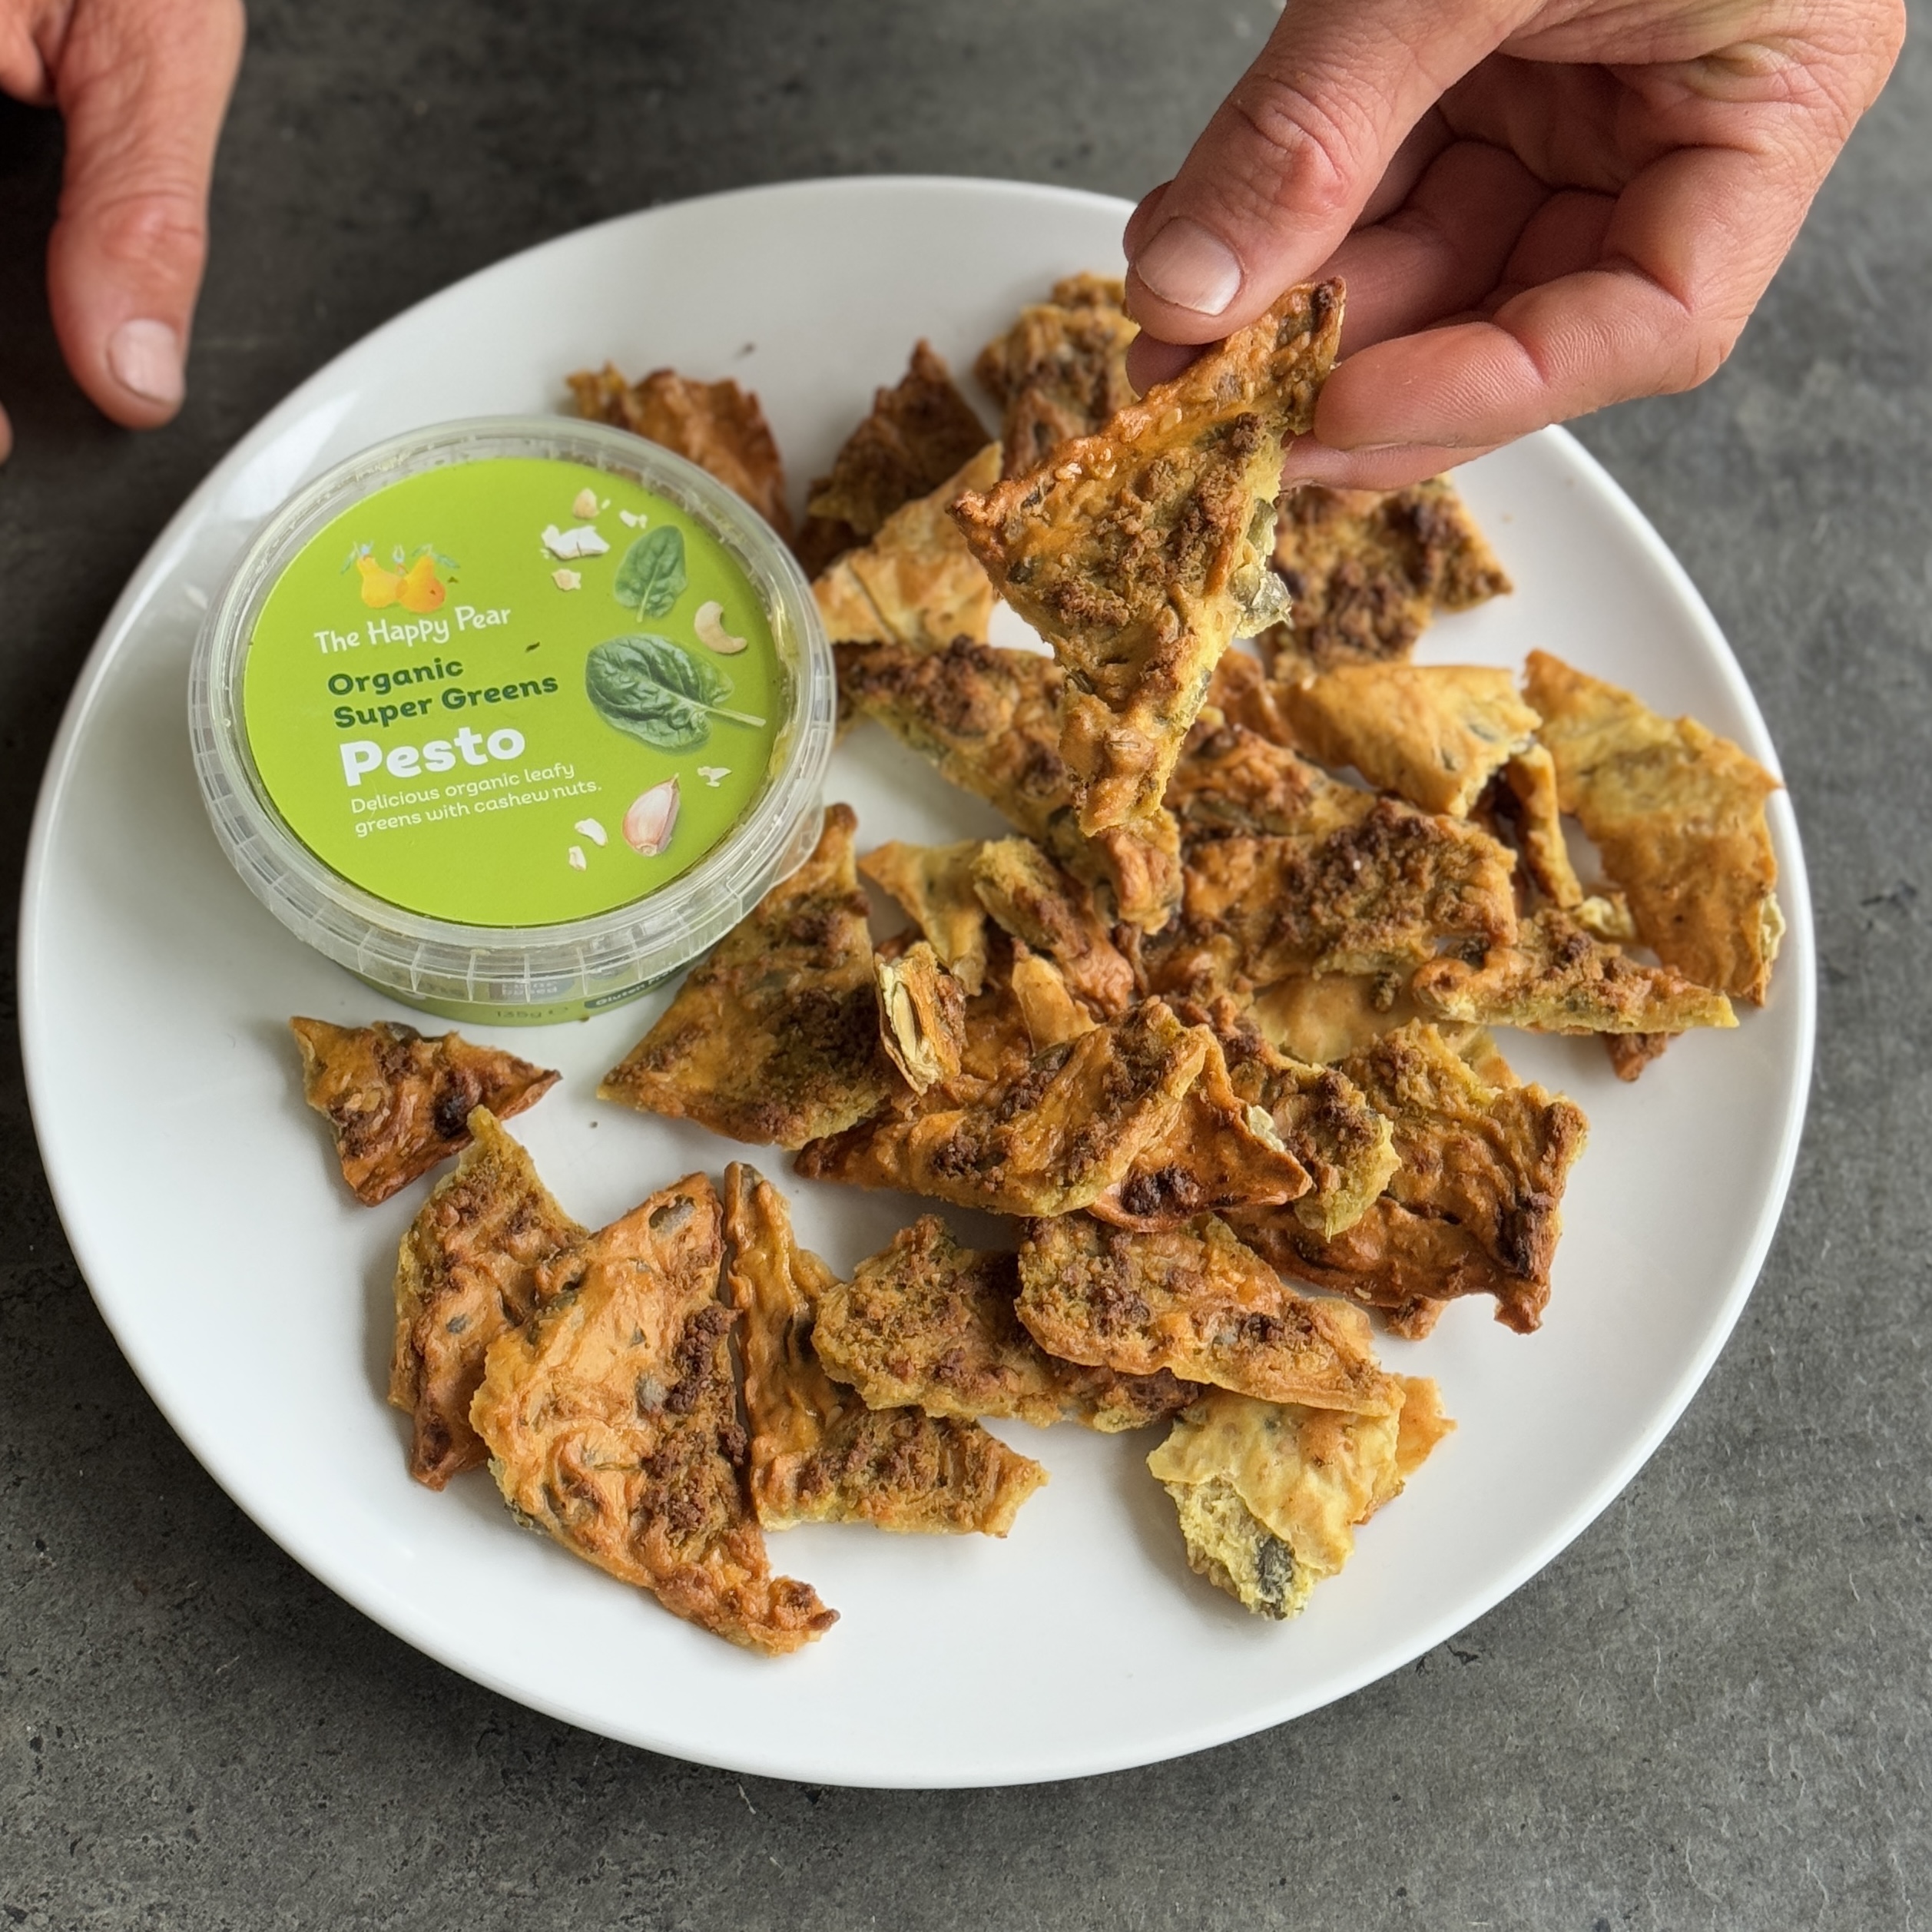
High Protein Pesto Crackers with Organic Super Greens Pesto
Takes 30 minutes
Serves 8
Ingredients
- 120 g chickpea flour gram flour (approx. 1 cup)
- 50 g mixed seeds e.g. flax, pumpkin (approx. ⅓ cup)
- 1 tsp garlic powder
- Pinch of sea salt
- 1 tbsp maple syrup
- 90 ml water approx. 6 tbsp
- 3 tbsp pesto of choice we used our Super Greens Pesto
Instructions
Mix dry ingredients:
- Sieve the chickpea flour into a large mixing bowl. Add the mixed seeds, garlic powder and a pinch of sea salt. Stir until evenly combined.
Add the wet ingredients:
- In a small jug, mix the maple syrup with the water. Pour into the dry mixture and stir well until a smooth, thick batter forms.
Spread on a tray:
- Line a baking tray with baking parchment. Pour the batter onto the tray and use a spatula to spread it out evenly to around ½ cm thick.
Add the pesto:
- Spoon the pesto over the surface and gently spread or swirl it into the top using the back of a spoon to create a marbled effect.
Score the crackers:
- Lightly score the mixture with a knife or pizza cutter into your preferred cracker shapes—this helps them snap easily after baking.
Bake until crisp:
- Place in a preheated oven at 180°C (fan 160°C / gas mark 4) and bake for 25–30 minutes, or until golden and crisp.
Cool and enjoy:
- Allow to cool completely on the tray. Once cool, snap along the scored lines and enjoy!

Meaty-Style Tempeh & Black Bean Veggie Burgers
Takes 25 minutes
Serves 4
Ingredients
Choose one:
- 300 g tempeh or firm tofu
Burger base:
- 50 g ½ cup rolled oats
- 75 g ½ cup sunflower seeds or pumpkin seeds
- 1 small onion
- 2 cloves of garlic
- 1 × 400g tin black beans drained and well dried
- 2 teaspoons beetroot powder
- 2 tablespoons tamari or soy sauce
- 1 tablespoon balsamic vinegar
- 1 tablespoon olive oil plus extra for cooking
- 1 teaspoon smoked paprika
- ½ teaspoon ground cumin
- Salt and black pepper to taste
To serve (optional):
- 4 burger buns
- Tomato ketchup
- Plant-based mayonnaise
- Gherkins
- 2 fresh tomatoes sliced
- Lettuce leaves
Instructions
Blend the burger mix:
- Add the oats and sunflower seeds to a food processor and blend until they form a fine powder. Roughly chop the onion and garlic, then add to the processor along with the tempeh or tofu, black beans, beetroot powder, tamari, balsamic vinegar, olive oil, smoked paprika, cumin, salt, and pepper. Blitz until the mixture just comes together into a thick, uniform paste—avoid over-processing.
Taste and adjust seasoning:
- Taste the mixture and adjust if needed with more salt, pepper, or tamari.
Rest the mixture:
- Transfer to a bowl and let it rest for 5 minutes to firm up slightly.
Shape the burgers:
- Divide the mixture into 4–6 even portions and shape into burger patties using your hands.
Cook the burgers:
- Pan-fry in a little oil over medium heat for 3–4 minutes on each side, until golden and heated through. Alternatively, bake at 180°C (fan 160°C / gas mark 4 / 356°F) for 20 minutes, flipping halfway.
Serve:
- Serve in buns with ketchup, plant-based mayo, tomato slices, lettuce, and gherkins—or your favourite toppings.
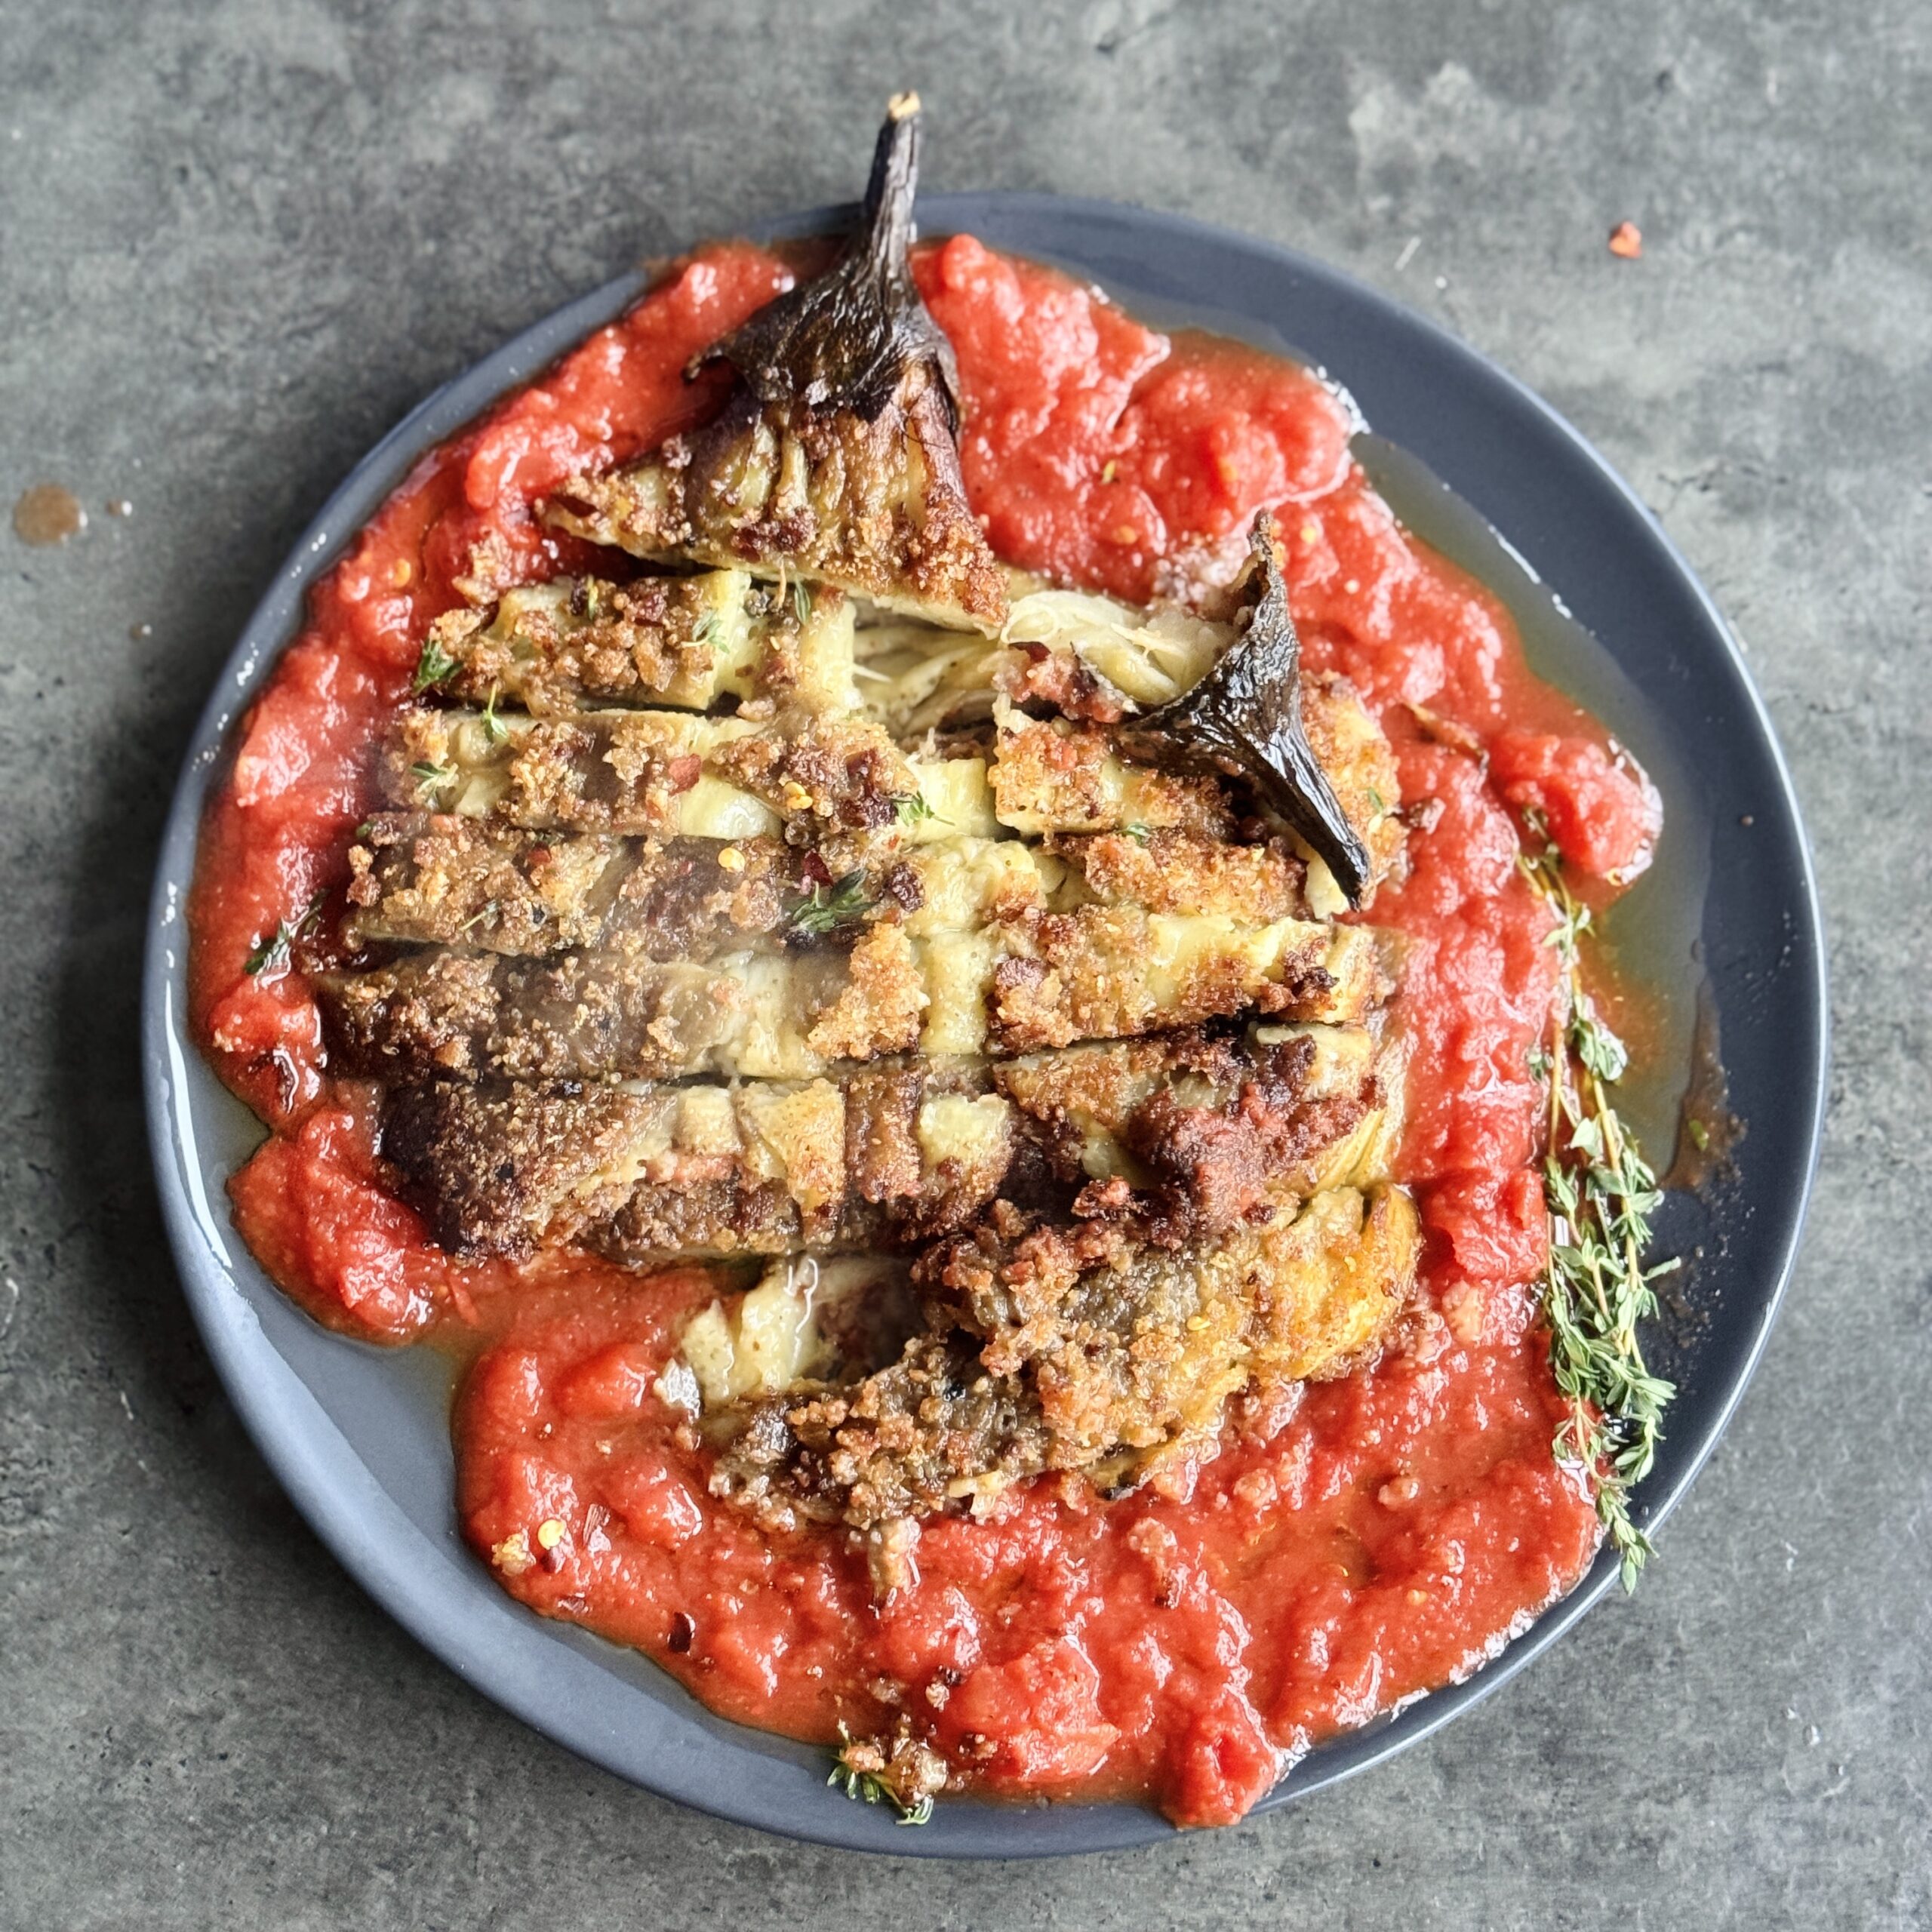
Aubergine Schnitzel
Takes 40 minutes
Serves 2
Ingredients
For the Schnitzel
- 2 aubergines eggplant
- 50 g 1/2 cup breadcrumbs
- 50 ml 3.4 tbsp flour
- 50 ml 3.4 tbsp oat milk
For the Tomato Sauce
- 3 tbsp olive oil
- 3 cloves of garlic
- 1 red chilli
- 1 x 400g tin of chopped tomatoes
- 1 tbsp maple syrup
- 1 tsp salt
- Black pepper to taste
For Frying
- 200 ml 7/8 cup vegetable oil
Instructions
Preheat the oven and prepare the aubergine:
- Preheat your oven to 200°C (392°F).
- Char the aubergines over a gas burner until the skin blisters and peels off easily, or alternatively bake it in the oven for 40 minutes until soft.
Make the tomato sauce:
- Peel and dice the garlic cloves and finely dice the chilli.
- Heat a saucepan over medium heat and add olive oil. Once hot, sauté the garlic and chilli for 2 minutes until the garlic turns golden. Add a tin of chopped tomatoes, maple syrup, salt, and a pinch of black pepper. Cook for 5 minutes, then remove from the heat.
- Taste and adjust the seasoning if needed.
Prepare the aubergine schnitzel:
- Once the aubergine is cooked, peel off the skin and flatten the flesh with a fork.
- Dip the flattened aubergine first into flour, then into oat milk, and finally coat it thoroughly with the breadcrumbs.
- Repeat with the second aubergine.
Fry the schnitzel:
- Heat the vegetable oil in a saucepan over medium heat.
- Once the oil is hot, add the breaded aubergine and fry until golden brown on both sides.
- Remove the schnitzel and place it on kitchen paper to absorb excess oil.
Serve:
- Spread a thin layer of the tomato sauce on a plate and place the aubergine schnitzel on top.
- Serve immediately and enjoy!
The Happy Pear Podcast
In this week’s episode, we sit down with Camilla Fayed, visionary founder of London’s Farmacy, a pioneering plant-based restaurant and biodynamic farm rooted in the principles of regenerative agriculture. After a successful career in fashion, Camilla redirected her passion towards food, wellness, and conscious living — driven by a desire to heal both people and the planet. Through Farmacy, she champions a return to nature, real food, and a more sustainable way of life.

Episode 181
This conversation is deeply inspiring, rich with practical insights and thought-provoking ideas. Camilla speaks with heart and clarity about how the future of health — both personal and planetary — begins with what’s on our plates.
We dive into topics including:
- Biohacking for modern wellness through food and lifestyle
- Why politics starts on your plate — and how personal food choices ripple out
- Modern agriculture vs regenerative farming — the urgent need for change
- Soil health as the foundation of real nutrition and planetary wellbeing
- The benefits of talking to plants — and tuning into the intelligence of nature
- Going back to nature — how reconnecting with land and cycles brings healing
- Lifestyle health issues — and why holistic approaches offer the best path forward
Camilla’s message is one of deep reconnection — with food, with the Earth, and with ourselves. Whether you’re curious about regenerative farming, conscious eating, or the subtle magic of growing your own food, this episode is packed with gems.
Listen now to feel inspired, grounded, and reminded that every bite we eat is a vote for the world we want to live in.
Dave & Steve
Lots of love,
SPONSORS & DISCOUNT CODES:
Cuisinart – the partner we have dreamed of! Cuisinart has been cooking up reliable kitchen gear for over 50 years – helping to make mealtimes easier and more enjoyable! Check out the following link for more details.
LINK: https://www.cuisinart.co.uk/New-Cuisinart-Ambassadors-The-Happy-Pear.html
Namawell Juicers are AMAZING! They have absolutely revolutionised the juicing game. We have an exclusive 10% discount for you!
Enter the code HAPPYPEAR10
LINK: https://namawell.com/collections/juicers/products/nama-j2-cold-press-juicer?ref=thehappypear
THE WHOLE HEALTH TRIBE – Join our community
LINK: https://eu1.hubs.ly/H0bmqxd0
THE HAPPY PEAR RECIPE CLUB – Blending health and happiness through a range of over 500 delicious plant-based recipes.
LINK: https://eu1.hubs.ly/H0bmqss0
Sign up to our Newsletter, for updates on our latest recipes, events, and news.
LINK: https://share-eu1.hsforms.com/1hKXaawjoQOONmJe4EXkCdwf92py
Produced by Sean Cahill & Sara Fawsitt
Available now from all good podcast providers:
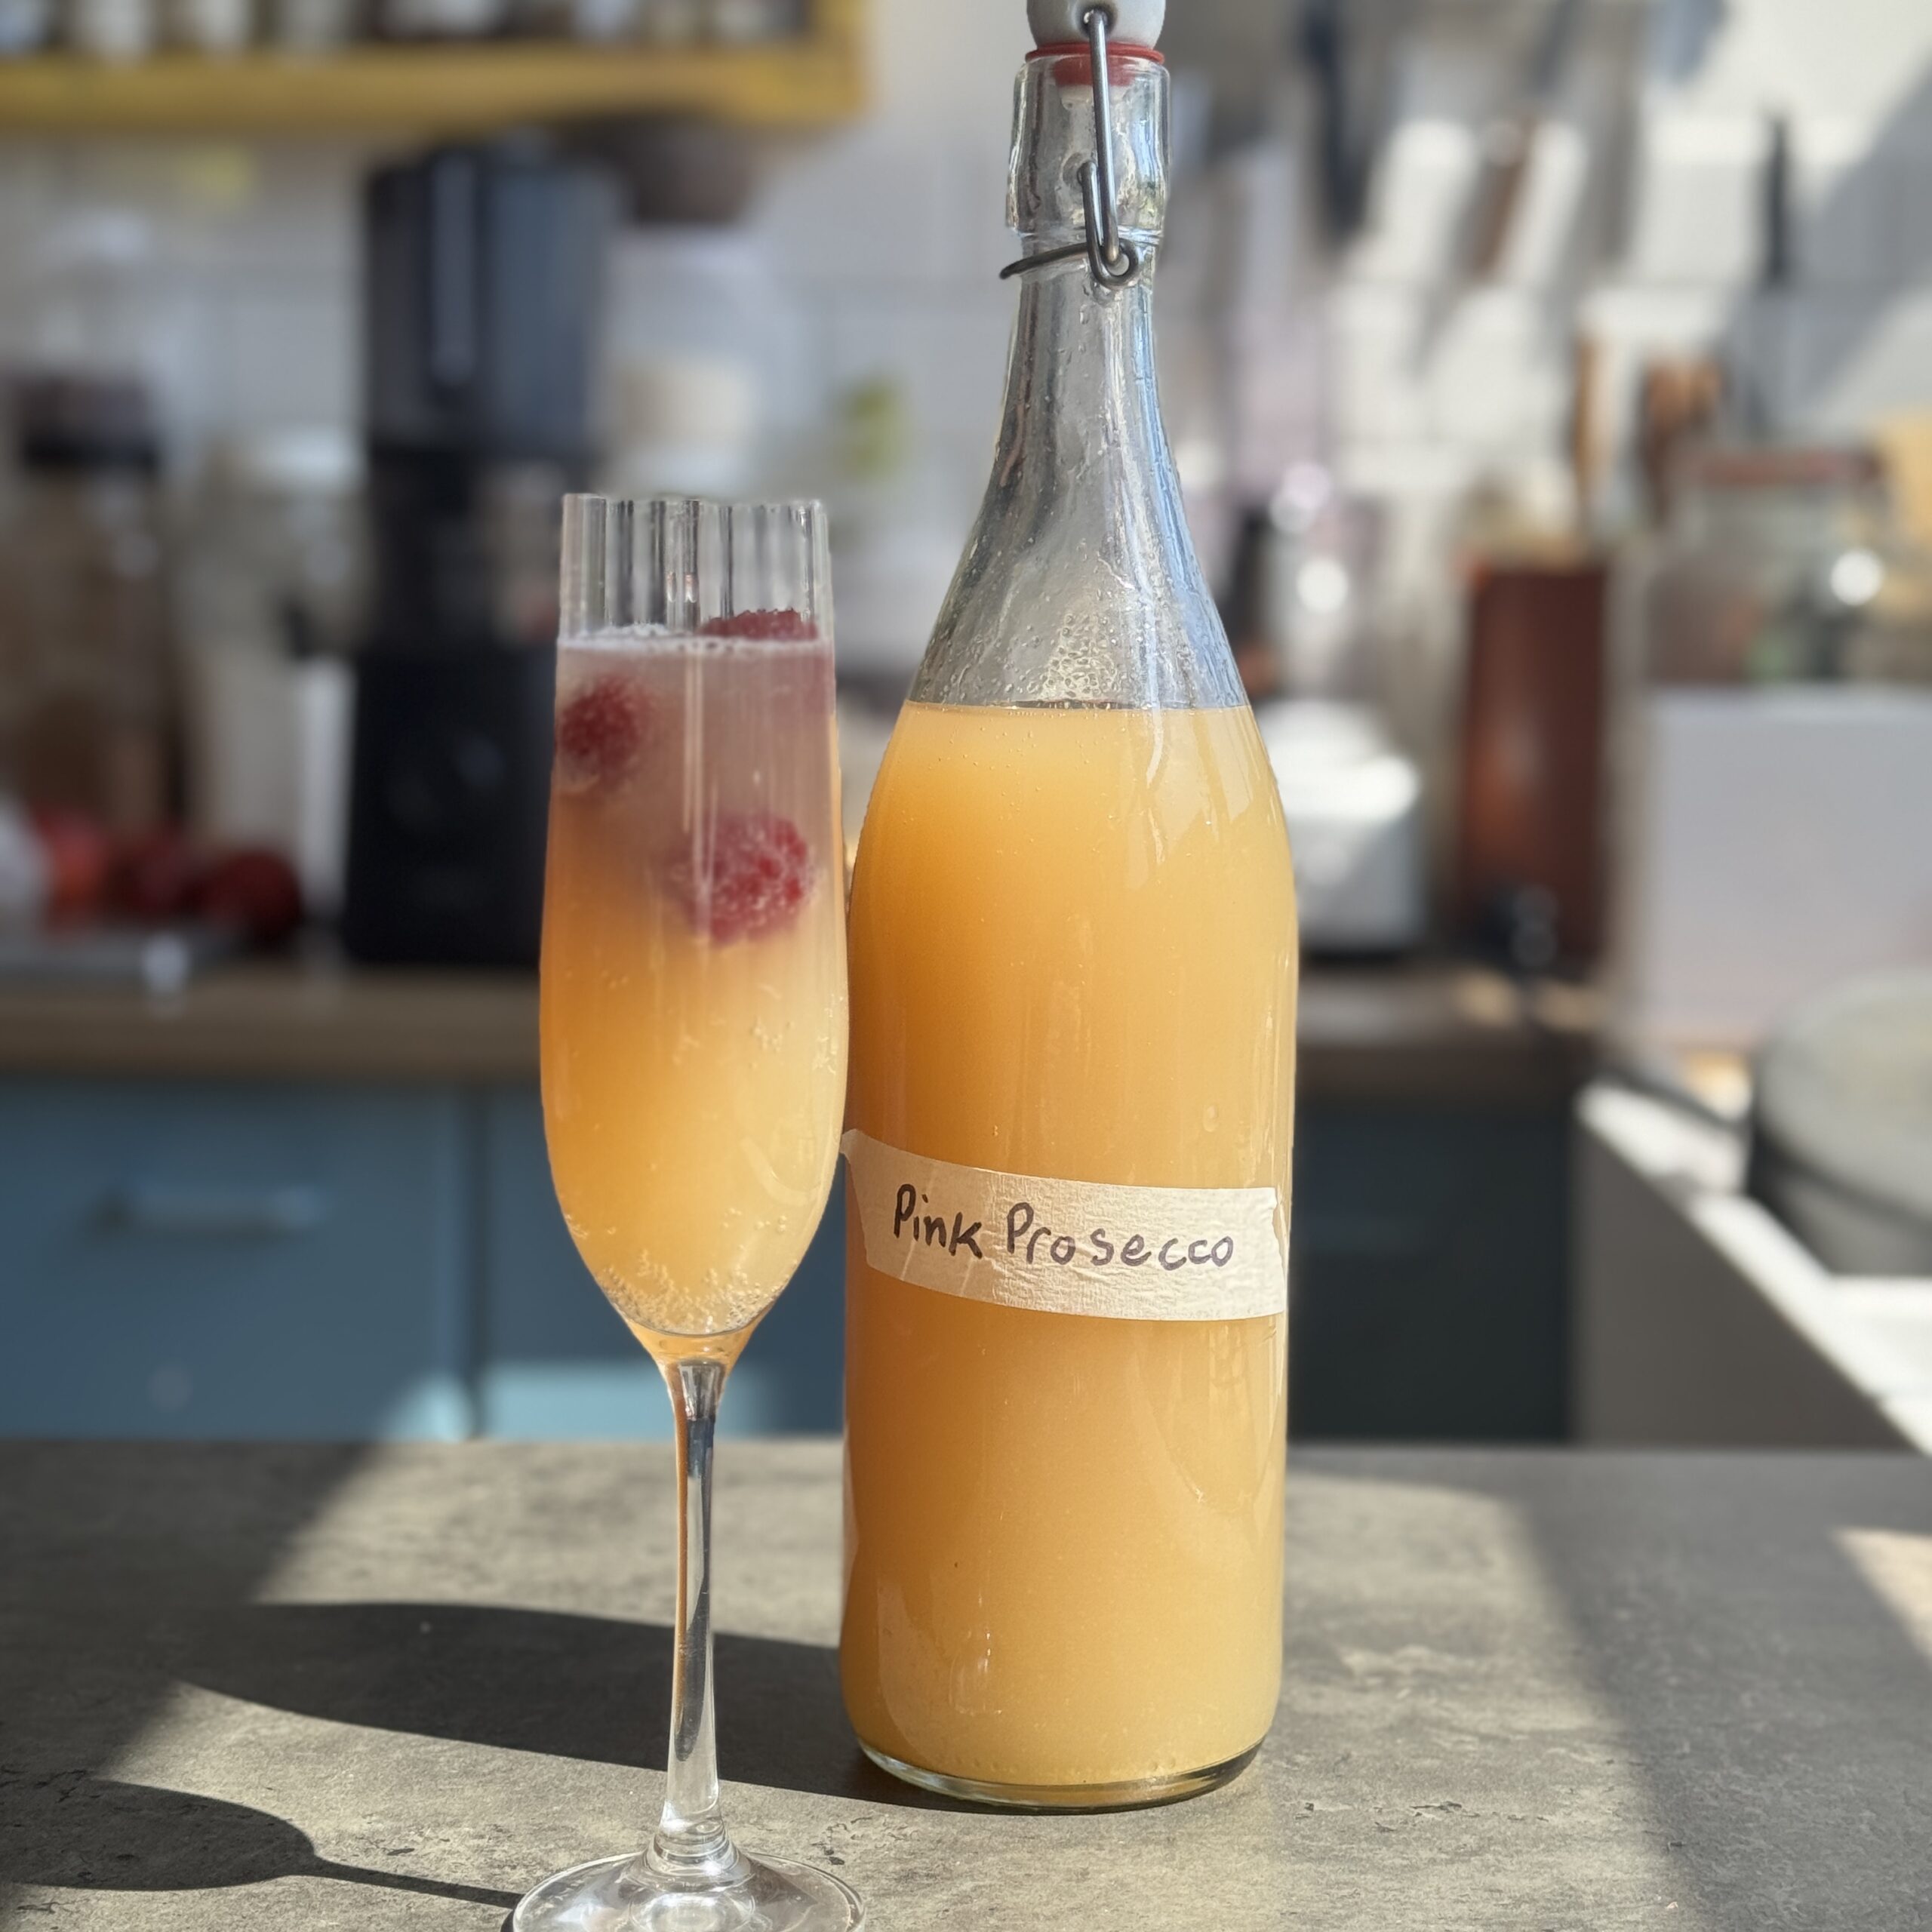
“Pink Prosecco” Wild Rhubarb Spritz
Takes 6 days 15 minutes
Serves 8
Ingredients
- 400 g rhubarb approx. 3 cups chopped
- 300 ml grape juice or 500g / 3¼ cups fresh grapes, juiced
- 1 unwaxed organic lemon
- 1 unwaxed organic lime
- 2 unwaxed organic oranges
- 120 g organic cane sugar or raw sugar ⅓ cup
- 1 thumb-sized piece of fresh ginger
- 1 L filtered water 4 cups
Instructions
Make the rhubarb syrup base:
- Roughly chop 400g rhubarb (approx. 3 cups) and place in a saucepan with 300ml water (1¼ cups) and 120g sugar (⅓ cup).
- Bring to a gentle simmer and cook for 10 minutes until the rhubarb softens and releases its colour.
- Remove from heat and allow to cool to room temperature.
Juice the grapes:
- While the syrup cools, juice enough muscat grapes to yield 300ml (1¼ cups). Set aside.
Prepare the fruit:
- Thinly slice 1 lemon, 1 lime, and 2 oranges (all unwaxed and organic), keeping the peel on.
- Slice the ginger (no need to peel if organic).
Combine for wild fermentation:
- In a clean 3-litre glass jar, add the cooled rhubarb syrup, 300ml grape juice, 1L filtered water (4 cups), sliced citrus fruit, and ginger.
- Stir well with a clean wooden spoon or silicone spatula.
Cover and ferment:
- Cover the jar with a clean cloth or paper towel secured with an elastic band.
- Leave to ferment at room temperature (20–24°C) for 2–3 days.
- Stir once or twice daily. Look for bubbles, floating fruit, a gentle fizz, and a fruity-tangy aroma.
Strain and bottle:
- After 2–3 days, strain the mixture through a fine sieve or muslin cloth into swing-top bottles, leaving about 3cm headspace.
Secondary fermentation (carbonation):
- Seal bottles and leave at room temperature for a further 2–3 days to build natural fizz.
- Burp daily to release pressure.
Chill and serve:
- Once bubbly to your liking, refrigerate.
- Chill thoroughly before serving. Pour into champagne flutes and garnish with a ribbon of rhubarb, citrus twist, or edible flower.
About Us
The Happy Pear exists to inspire people to eat well, feel good, and live better. It started out back in 2004 with Steve, Dave, a tiny shop and a dream of helping people to eat more veg! The Happy Pear now consists of over 80 food products, a membership App alongside a suite of online courses, our famous wholefood cafe & shop in Greystones, a range of bestselling cookbooks, an organic regenerative farm, a roastery and a community of over 1.6 million people living healthier! The mission is still the same, to create a healthier, happier world and build community!

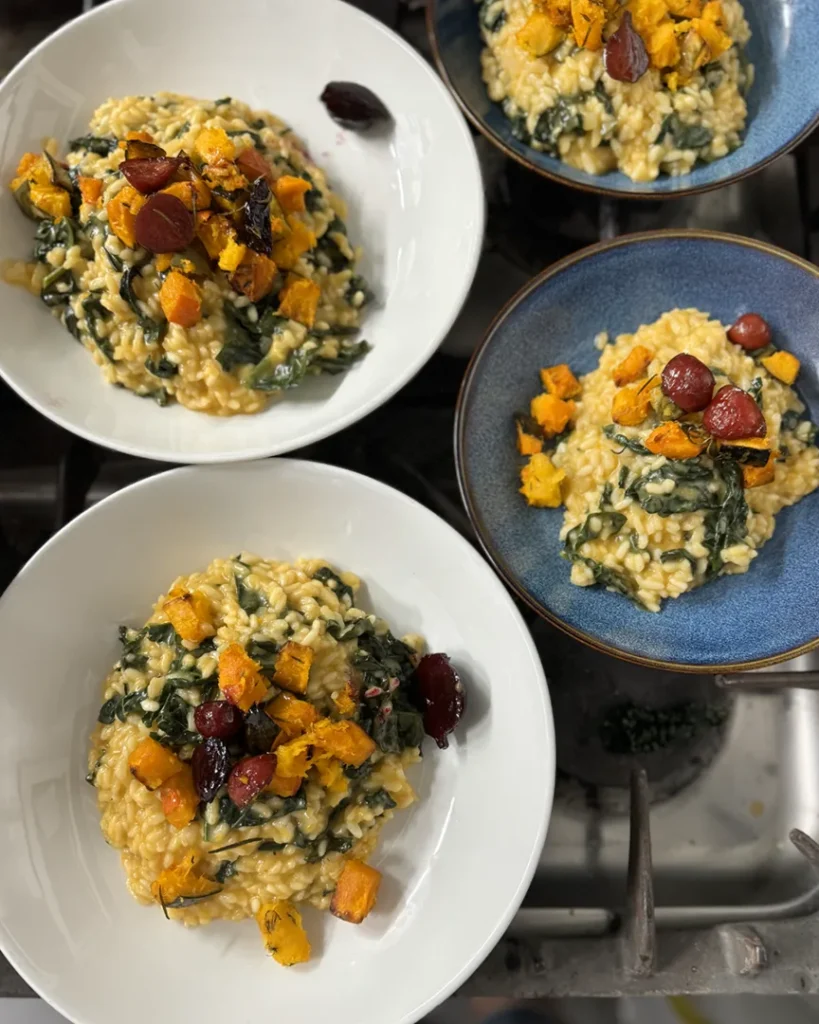
The Role
Working Location: The Happy Pear Shop, Church Road, Greystones, Co. Wicklow
Contract – Part Time
The successful candidate will work with the shop team in Church Road and report to the Shop Manager. They will ensure compliance with all internal and external procedures. They will ensure the highest levels of customer service and product quality throughout the shop.
The successful candidate will be an ambassador for The Happy Pear brand. They will take a warm approach to the role, and live our brand values of Passion, Excellence, Authenticity and Relationships. Working in a fast-paced environment, this role will also demand high levels of creativity, flexibility and strong organisational skills.
This role offers someone the opportunity to be part of an exciting and dynamic team in a business that is committed in supporting people to pursue a healthier lifestyle.
Principal Duties & Responsibilities:
- Following procedures for opening, daily operations and daily closure of the shop including cash handling and daily reports. Ensuring accounts are processed in accordance with internal procedures.
- Ensuring that the fresh produce is maintained to the highest standard through continual review of quality and stock rotation
- Accepting supplier deliveries and ensuring the stock is stored correctly and the paperwork is filled out as per company guidelines.
- Merchandising the shop to ensure that fresh produce, chilled and dried goods are displayed in an appealing and attractive way.
- Providing friendly and efficient customer service and positively engaging with our customers to support their shopping experience.
- Demonstrating an eagerness for ongoing training and learning in the products displayed and sold in the shop, including their source and content or continued learning about ingredients and how to use them.
- Escalating any facilities issue to the Shop Manager and/or Shop Supervisor.
- Alongside the shop team, ensuring the completion of HACCP and cleaning checklists is continual, ensuring that the look and appearance of the shop is always maintained to the highest standard.
- Preparing detailed handovers for the Shop Supervisor in their absence.
- Be present on the shop floor and regularly check-in with customers to ensure satisfaction.
- Attending weekly staff meetings


Essential Skills & Experience
- Minimum 1 -2 years retail experience and an interest in working with fresh produce.
- Strong social skills and customer focus.
- Ability to develop strong working relationships.
- Creativity and a positive “can do” attitude.
- Be self-motivated.
- Ability to work on your own initiative and as part of a team.
- Strong organisational and problem-solving skills.
- Flexible and able to manage multiple demands.
- Passion, Energy and Enthusiasm.
- Strong interest in a healthy way of living and/or willingness to grow in this way.
Desirable:
- Previous experience in a merchandising or stock control role.
- Previous experience within a customer facing retail environment.
- Keen interest in cooking.
- Interest in sustainability
To apply for this role, please send your CV to deirdre.doran@thehappypear.ie
*All candidates must be eligible to live and work in the EU.*
*No relocation assistance will apply.
*The Happy Pear is an equal opportunity employer committed to hiring a diverse workforce and sustaining an inclusive culture.
About Us
The Happy Pear exists to inspire people to eat well, feel good, and live better. It started out back in 2004 with Steve, Dave, a tiny shop and a dream of helping people to eat more veg! The Happy Pear now consists of over 80 food products, a membership App alongside a suite of online courses, our famous wholefood cafe & shop in Greystones, a range of bestselling cookbooks, an organic regenerative farm, a roastery and a community of over 1.6 million people living healthier! The mission is still the same, to create a healthier, happier world and build community!
The Role
Working Location: Kilcoole, Co. Wicklow
Part-Time 6 Month Contract 3-5 days/week (Monday, Thursday essential + 1-3 other flexible weekdays)
Join us in our mission to grow delicious, local, seasonal produce that nourishes people and the planet. The Happy Pear Organic Farm is a small, vibrant, market garden-style farm—run with love, graft, and muddy boots. We grow nutrient-dense organic vegetables, fruits, herbs, and edible flowers for our local community and customers of The Happy Pear.
We’re looking for a practical, positive, hands-in-the-soil kind of person to join our farm crew as a Farm Assistant. You’ll play a central role in getting our food from seed to harvest to happy homes.
Principal Duties & Responsibilities:
- Harvesting crops with care, speed, and precision—ensuring top-quality, visually appealing produce
- Washing, grading, and packing our veg boxes with accuracy and pride—each box counts!
- General farm maintenance: keeping tools sharp, tunnels tidy, and systems flowing smoothly
- Supporting seasonal planting, sowing, bed prep, and weeding
- Working efficiently outdoors in all weathers, with a positive attitude and a strong sense of teamwork
- Occasionally delivering produce or collecting supplies (van provided)
Essential Skills & Experience
- Have a full clean driving licence and are confident driving a small van
- Available to work on Mondays and Thursdays, plus at least one additional weekday (flexible)
- Have got experience working in a physical, production-style role—ideally on a farm, market garden, or similar
- Are highly detail-oriented, with proven experience in precision tasks such as crop harvesting or carefully packing veg boxes with exact quantities
- Are reliable, hardworking, and take pride in working quickly and with care
- Are happy outdoors in all seasons and physically capable of the demands of farm work (lifting, bending, kneeling)
- Excellent English, Communicates well, enjoys working as part of a team, and takes initiative when needed.
Desirable:
- Have worked with organic or no-dig growing methods
- Love working with your hands and find joy in a beautifully packed crate!
- Are passionate about sustainable, local food systems
- Have got basic knowledge of tools, irrigation, or light farm machinery
- Have worked in hospitality or food service and understand the value of fresh, quality produce
Why Join Us?
- Be part of a purpose-driven, values-led community rooted in health, happiness and sustainability.
- Learn about regenerative farming, soil health, and organic growing from a passionate team.
- Contribute to a meaningful mission – feeding people locally with fresh, nourishing food.
- Work in a beautiful outdoor setting with a team that loves what they do.
To apply for this role, please send your CV & a short note about why you’d be a great fit to deirdre.doran@thehappypear.ie
We welcome applicants from all backgrounds & experiences. If this role speaks to you, don’t hesitate to reach out!
*All candidates must be eligible to live and work in the EU.*
*No relocation assistance will apply.

DIY Natural Fruit Gummies for Glowing Skin
Takes 1 hour 15 minutes
Serves 50
Ingredients
For the gummies:
- 240 ml 1 cup fresh juice (use your Nama J2 juicer!)
- 75 ml 8 tbsp maple syrup
- 3 tsp agar powder or 3 tbsp agar flakes
- ½ tsp lemon juice optional
Three Flavour Ideas to Try
Berry Citrus Glow Juice – High in vitamin C for collagen support and antioxidants for skin repair.
- 150 g fresh beetroot or 1 cup strawberries
- 2 apples OR 1 orange
- ½ lemon peeled
- 1 handful of raspberries
Carrot-Orange Radiance Juice – Beta-carotene promotes glow; oranges and ginger support collagen and circulation.
- 3 large carrots
- 2 oranges
- 2 apples optional
- 1 thumb-sized piece of ginger
Cucumber-Mint Hydration Glow – Ultra-hydrating, refreshing, and rich in vitamin C.
- 1 cucumber
- 1 pak choi optional
- 1-2 green apple
- ½ lime
- Few mint leaves
Instructions
Prepare your silicone moulds:
- Place silicone gummy bear moulds (or any small silicone moulds) on a tray for easy transfer in and out of the fridge.
Juice the fruit:
- Use your Nama J2 to juice your chosen ingredients. Measure out 240ml (1 cup) of juice.
Reduce the juice to concentrate the flavour:
- Pour the 240ml (1 cup) juice into a small saucepan and gently simmer over low–medium heat until it reduces by half to about 120ml (½ cup). This intensifies flavour and helps set the gummies.
Sweeten and brighten:
- Stir in the maple syrup and lemon juice (if using) into the reduced juice.
Add agar and activate:
- Sprinkle in the agar powder (or flakes) while whisking constantly. Bring to a gentle simmer and continue to simmer for 2–3 minutes, whisking, until the agar is fully dissolved and the mixture thickens slightly.
Fill the moulds:
- Working quickly (as the mixture sets fast as it cools), use a dropper or small jug to fill your silicone moulds.
Set the gummies:
- Transfer the moulds to the fridge and chill for 30–60 minutes until firm and chewy. Alternatively, freeze for 15–20 minutes for quicker setting.
Unmould and store:
- Carefully pop the gummies out of the moulds and store them in an airtight container in the fridge for up to 5 days.

Crispy Tofu ‘Fish Fingers’
Takes 35 minutes
Serves 4
Ingredients
For the batter
- 2 tbsp white miso
- 2 tbsp plain flour use gluten-free for GF option
- 1 tsp lemon juice
- 1 tsp sesame oil
- 1 tbsp flaked nori or 1 sheet nori finely shredded or blended
- ½ tsp garlic powder
- 15 –30ml 1–2 tbsp water, just enough to form a thick batter
For the breadcrumb coating
- 60 g 2.1 oz / 1 cup panko breadcrumbs
- 1 tbsp nori flakes optional
- Pinch of sea salt
- Pinch of black pepper
Other
- 1 x 400g 14 oz block firm tofu, pressed
Instructions
Prepare the tofu:
- Press 1 x 400g (14 oz) block of firm tofu for at least 15–20 minutes to remove excess moisture. Slice into 8–10 finger-sized pieces. Optionally, lightly dust each tofu finger with a small amount of flour to help the batter adhere more evenly.
Make the batter:
- In a medium bowl, whisk together 2 tbsp white miso, 2 tbsp plain flour, 1 tsp lemon juice, 1 tsp sesame oil, 1 tbsp shredded nori, and ½ tsp garlic powder. Gradually add 15–30ml (1–2 tbsp) water until the mixture forms a thick, smooth batter that clings to the tofu without dripping off.
Prepare the coating:
- In a shallow dish, mix 60g (2.1 oz / 1 cup) panko breadcrumbs with 1 tbsp nori flakes (optional), a pinch of sea salt, and a pinch of black pepper.
Coat the tofu:
- Set up a coating station with one bowl of batter and one dish of breadcrumbs. Using one hand for wet and the other for dry ingredients, dip each tofu piece into the batter, ensuring it is completely coated, press gently and turn to cover all sides evenly. Allow any excess to drip off, then press the tofu into the breadcrumb mixture, turning to coat all sides thoroughly and evenly.
Optional chill:
- For best results, place the coated tofu fingers on a plate or tray and refrigerate for 10–15 minutes to help set the coating before cooking.
Cook the tofu:
- To bake: Preheat the oven to 200°C (fan 180°C / 400°F). Place the tofu fingers on a wire rack over a lined baking tray for even crisping. Lightly brush or spray them with oil. Bake for 20–25 minutes, flipping halfway, until golden and crisp.
- To fry: Heat 1–2 tbsp oil in a non-stick pan over medium heat. Fry each tofu finger for 2–3 minutes per side until golden brown and crisp on all sides.
Serve:
- Serve hot with tartar sauce, in a sandwich, or with chips and peas for a nostalgic plant-based dinner.
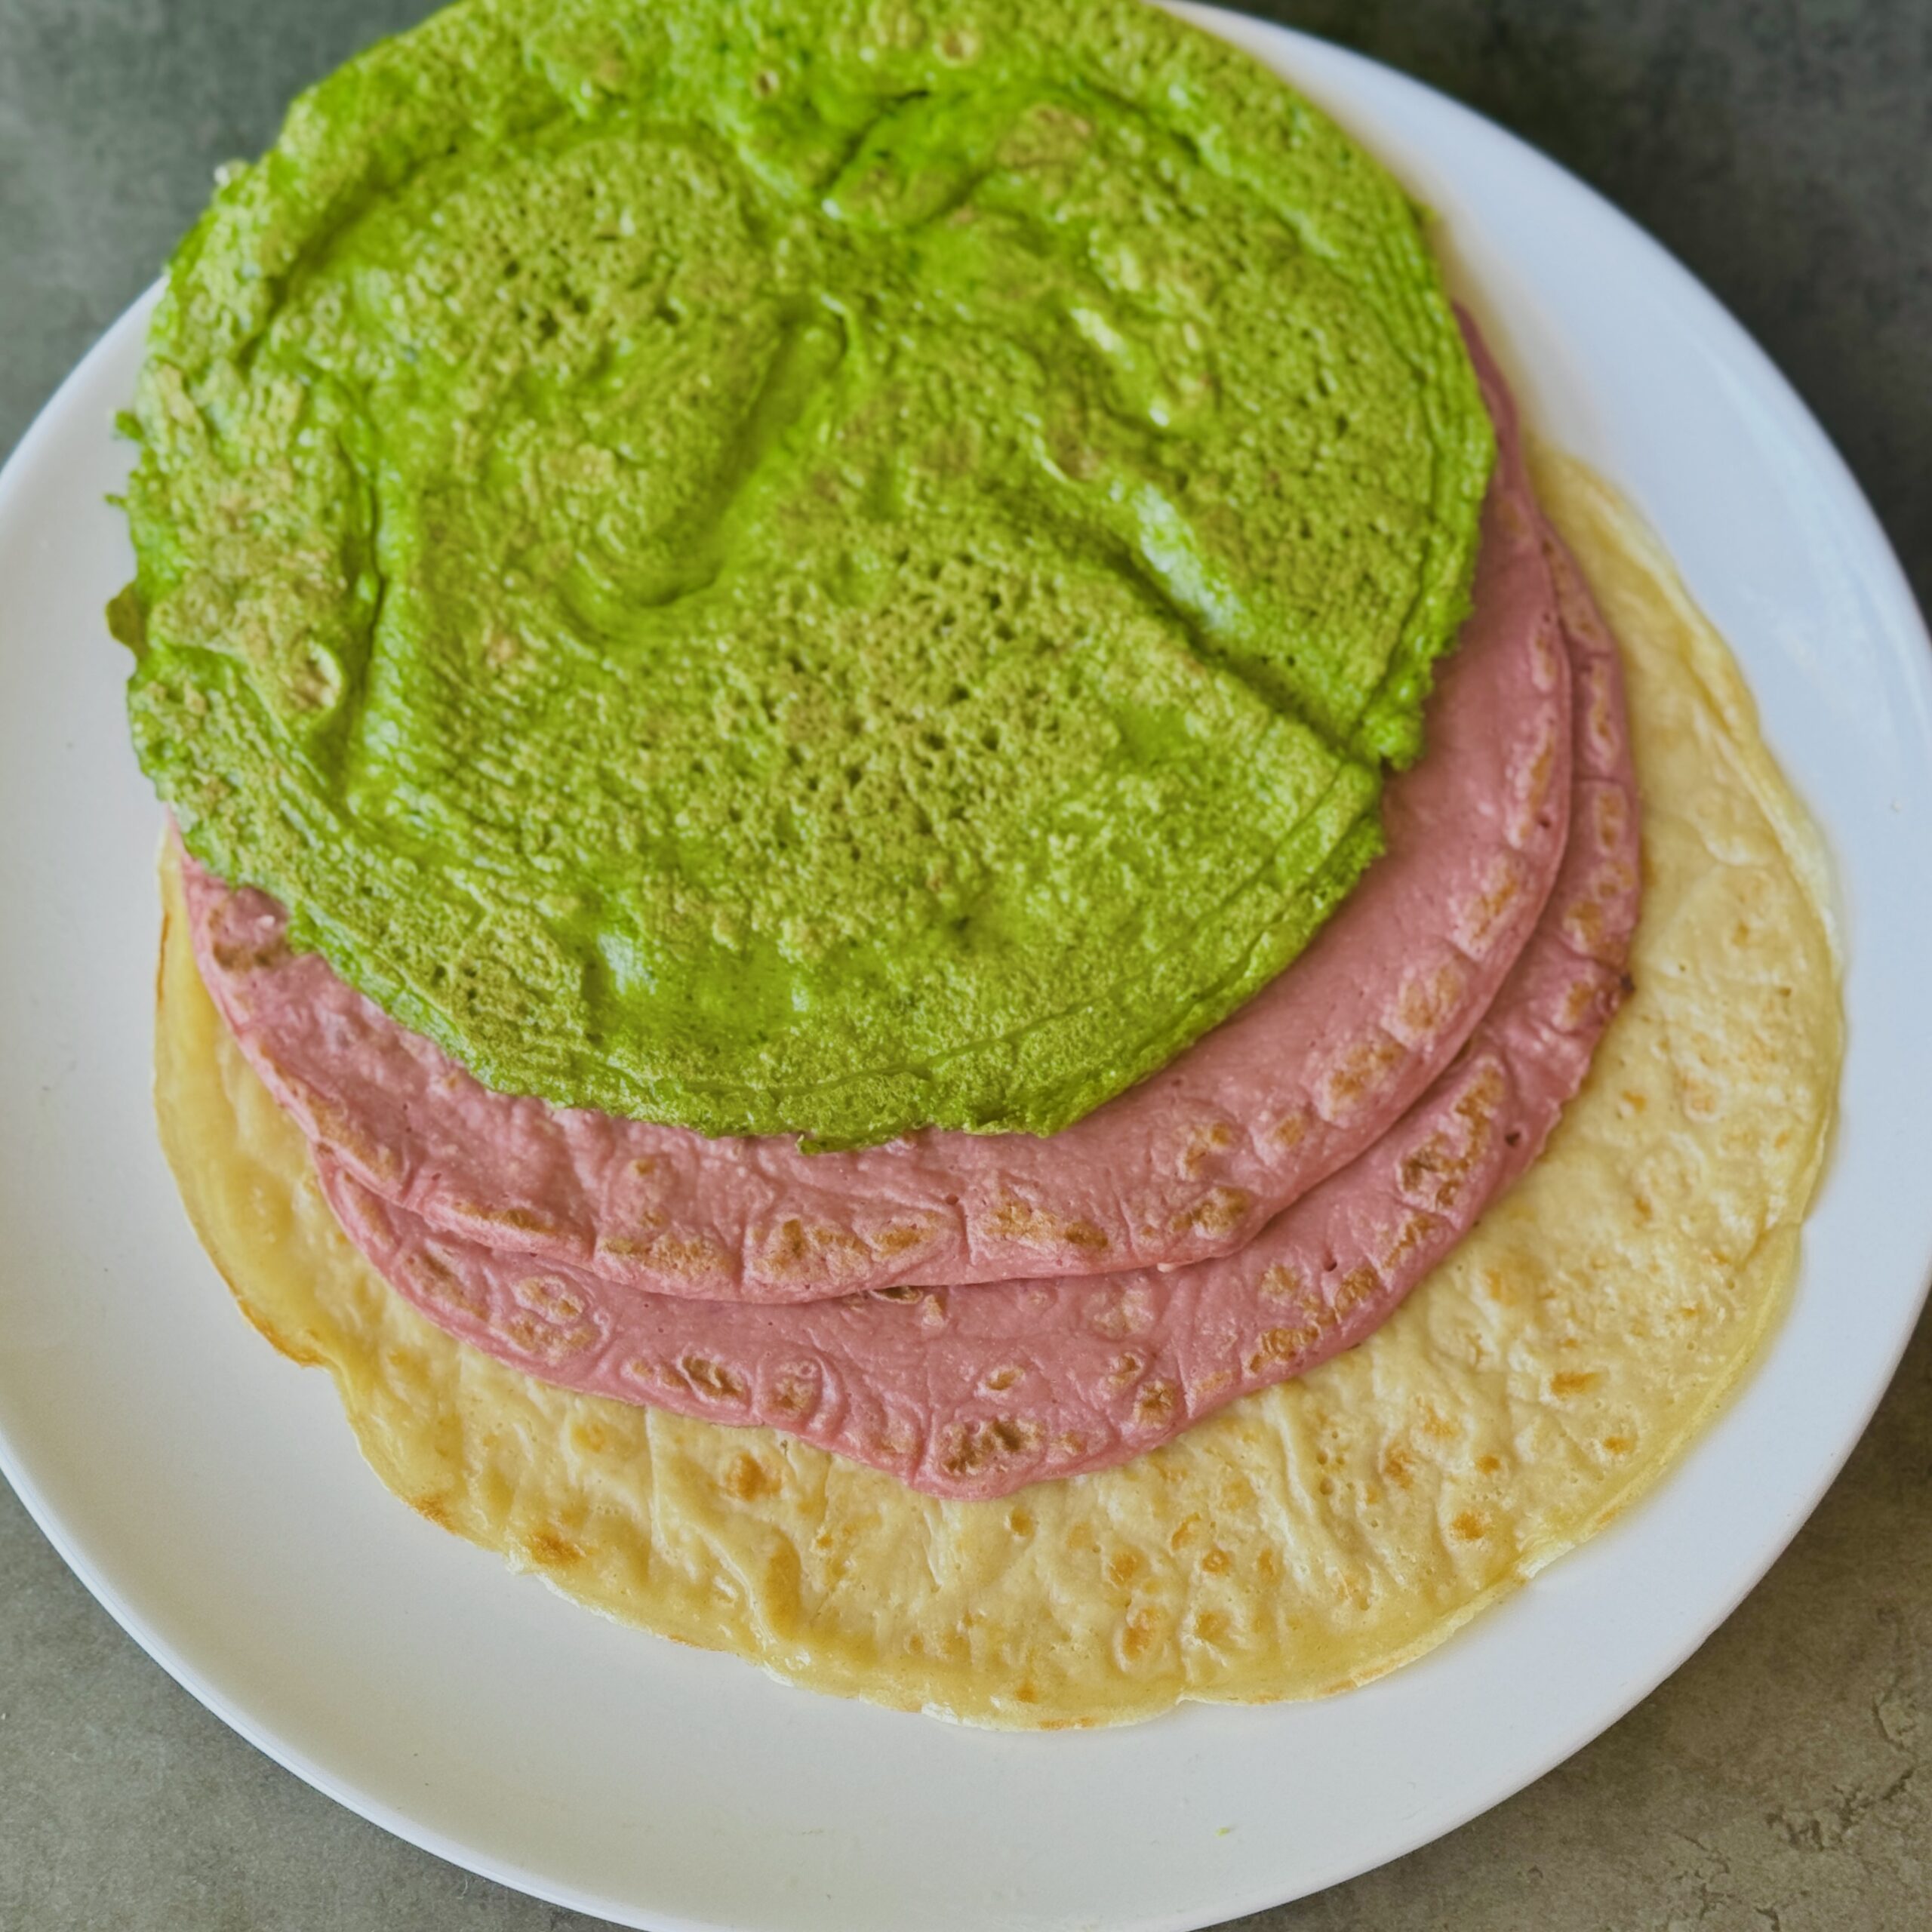
High-Protein Tofu Wraps 3 Ways
Takes 35 minutes
Serves 6
Ingredients
Base Dough:
- 300 g firm tofu drained and roughly chopped
- 300 g 2½ cups self-raising flour or gluten-free flour blend
- 1 tbsp olive oil
- 2 tbsp tamari or soy sauce
- ½ tsp salt
- ½ tsp garlic powder optional
- 560 ml water
For Colour Variations (choose one or divide base dough into thirds):
- Pink Beetroot: 1½ tsp beetroot powder or 1 cooked vacuum-packed beetroot
- Green Fresh Spinach: 30g (1 cup packed) fresh spinach leaves (add more for a brighter colour)
- Plain: No additional ingredients
Instructions
Blend the Dough:
- In a blender or food processor, combine the tofu, self-raising flour, olive oil, tamari, salt, garlic powder and water.
- Add one of the following, depending on your variation:
- For plain, add nothing else.
- For beetroot, add 1½ tsp beetroot powder or 1 cooked beetroot.
- For spinach, add 30g fresh spinach leaves.
- Blend until smooth. The batter should resemble a slightly runny pancake mix – not too thick or watery.
Cook the wraps:
- Heat a dry non-stick over medium heat. Once hot, pour in some batter as you would for pancakes. Cook for around 2 minutes on each side until lightly browned and cooked through.
Cool and Store:
- Place the cooked wrap on a clean tea towel and cover with another towel to keep them soft and warm. Serve straight away or allow to cool fully before storing in an airtight container.

Braised Pak Choi with Ginger & Pink Tahini Cream
Takes 20 minutes
Serves 2
Ingredients
For the braised pak choi:
- 2 heads pak choi approx. 400g
- 1 tbsp toasted sesame oil
- 2 cloves garlic approx. 6g
- 20 g fresh ginger
- 1 tbsp tamari or soy sauce
- 3 tbsp water
- 1 tsp maple syrup
For the pink tahini cream:
- 30 g tahini approx. 2 tbsp or ¼ cup
- 2 tbsp beetroot juice from cooked beetroot or a splash from grated raw beet
- 1 tbsp lemon juice
- 30 g yoghurt of choice approx. 2 tbsp or ⅛ cup – we used coconut
- 1 –2 tbsp cold water to loosen, as needed
- Pinch of sea salt
To serve:
- 1 tsp gomasio or toasted sesame seeds with sea salt
Instructions
Prepare the flavour base:
- Peel and finely grate the garlic and ginger. Slice the pak choi in half lengthways and rinse thoroughly, especially between the base stems.
Sear the pak choi:
- Heat the toasted sesame oil in a wide pan over medium-high heat. Once hot, place the pak choi cut-side down and sear for 2–3 minutes until golden and slightly charred.
Add aromatics and braise:
- Add the grated garlic and ginger to the pan and cook for 30 seconds until fragrant. Pour in the tamari, water, and maple syrup. Cover with a lid and let the pak choi braise gently for 4–5 minutes, until the stems are tender but still hold their shape.
Make the pink tahini cream:
- In a small bowl, whisk together the tahini, beetroot juice, lemon juice, yoghurt, and a pinch of sea salt. Add cold water gradually until smooth and creamy.
Plate and serve:
- Spread a generous swoosh of the pink tahini cream onto each plate. Arrange the braised pak choi on top and spoon over any remaining cooking juices. Finish with a sprinkle of gomasio or sesame seeds and sea salt.

Plantbased Wagon Wheel – Chocolate Marshmallow Jam Biscuit Sandwich
Takes 4 hours 30 minutes
Serves 12
Ingredients
For the Marshmallow
Aquafaba Whip
- 120 ml aquafaba liquid from a tin of unsalted chickpeas (½ cup)
- 1 tsp vanilla extract or peppermint, rose, or almond
- ¼ tsp cream of tartar optional, for stability
Syrup Base
- 100 ml water just under ½ cup
- 1½ tbsp agar flakes or 1½ tsp agar powder
- 200 g cane sugar or maple sugar 1 cup (or 180ml / ¾ cup + 1 tbsp agave syrup for a softer texture)
- Pinch of sea salt
For Assembly
- 300 g dark chocolate about 1¾ cups, chopped
- 300 g round biscuits approx. 5–6cm in diameter (about 2½ cups broken into pieces)
- 100 g raspberry jam about ⅓ cup
Instructions
Prepare the trays:
- Line two 20×20cm trays with greaseproof paper.
Whip the aquafaba:
- Using a stand mixer or electric whisk, whip the aquafaba with the cream of tartar (if using) on high speed for 8–10 minutes until stiff peaks form. Add the vanilla extract during the final minute.
Make the agar syrup:
- In a small saucepan, combine the water and agar flakes. Bring to a boil, then reduce to a simmer. Stir for 5–7 minutes until the agar is fully dissolved.
Add sugar and salt:
- Stir in the sugar and a pinch of sea salt. Continue cooking over medium heat, stirring constantly, for 3–5 minutes until it thickens to a honey-like consistency and bubbles steadily. Aim for 110–115°C (230–240°F) if using a thermometer.
Combine syrup with aquafaba:
- With the mixer on low speed, carefully pour the hot syrup into the whipped aquafaba in a thin stream. Once added, turn the mixer to high and whip for 8–10 minutes until the mixture is thick, glossy, and holds soft peaks. The mixing bowl should be warm, not hot.
Spread into trays:
- Quickly spoon the marshmallow mixture into the prepared trays, spreading it evenly to about ½ cm (0.2 in) thick. Work fast – the agar sets quickly as it cools.
Set and cut marshmallows:
- Leave to set at room temperature for 2–4 hours (or overnight). Once firm, use a round cutter (5–6cm / 2–2.4in) to cut 12 discs. Keep the offcuts for snacking or blending into hot chocolate!
Melt the chocolate:
- Place the dark chocolate in a heatproof bowl and melt gently over a bain-marie or in the microwave in short bursts, stirring between each.
Assemble the wagon wheels:
- Lay out 12 biscuits. Top each with a marshmallow disc and 1 tsp raspberry jam. Sandwich with another biscuit.
Coat in chocolate:
- Using two forks, dip each biscuit sandwich into the melted chocolate, coating it completely. Let the excess drip off and place on a greaseproof-lined tray.
Set and enjoy:
- Leave to set at room temperature or refrigerate to speed up the process. Once firm, dig in and enjoy your homemade plant-based wagon wheels!
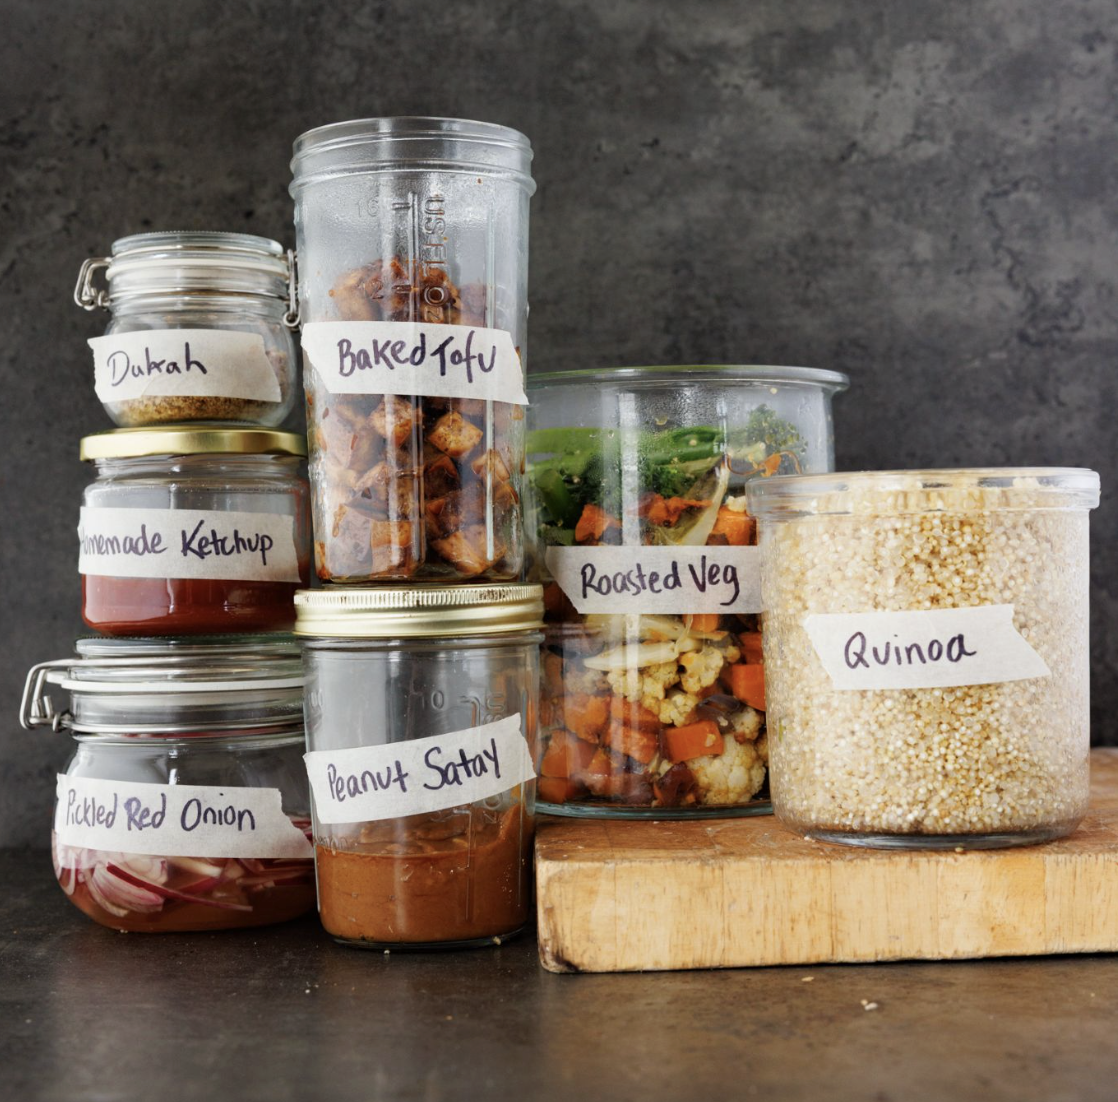
Meal Prep: Buddha Bowl, Satay Noodles & Black Bean Burger
Takes 1 hour 20 minutes
Serves 2
Ingredients
Roasted Vegetables (baked on 2 trays):
- 1 sweet potato
- 1 cauliflower
- 1 red onion sliced
- 2 tbsp olive oil
- Salt and pepper
Smoky Tofu:
- 300 g block tofu drained & cut into small 2cm cubes
Tofu Dressing:
- 1 tsp smoked paprika
- 2 tbsp tamari or soy sauce
- 1 tbsp maple syrup
- 1 tsp garlic powder
Quinoa & Broccoli:
- 250 g quinoa approx. 1½ cups
- 400 ml water approx. 1⅔ cups
- Pinch salt
- 1 medium head broccoli
Peanut Satay Sauce:
- 2 tbsp peanut butter
- 1 tbsp vinegar
- 2 tbsp tamari or soy sauce
- 1 tbsp coconut sugar or brown sugar
- 1 clove garlic
- 1 tsp sesame oil
- Juice of ½ lime
- ½ thumb-sized piece of ginger
- 2 tbsp warm water
Homemade Ketchup:
- 100 ml ½ cup tomato purée (unsweetened)
- 2 tbsp apple cider vinegar
- 2 tbsp maple syrup or date syrup/honey
- ½ tsp garlic powder
- ¼ tsp salt
Dukkah:
- 4 tbsp almonds or walnuts
- 2 tbsp sesame seeds
- 1 tbsp coriander seeds
- ½ tsp black peppercorns or ground black pepper
- ½ tsp sea salt
Pickled Red Onion:
- 1 red onion
- 75 ml vinegar approx. 5 tbsp
- 75 ml water approx. 5 tbsp
- Pinch salt
- 1 tsp maple syrup
Extras for Assembly:
- 3 burger buns
- 250 g noodles of choice
- 2 ripe avocados
- 1 x 400g tin of black beans
- 20 g coriander cilantro
Instructions
Make your Components
Roast the Veg:
- Roast at 200°C for 25–30 mins until golden.
Bake the Tofu:
- Mix the tofu dressing ingredients together and coat the tofu cubes. Bake at 200°C for 25 mins, tossing halfway through.
Cook the Quinoa & Broccoli:
- Cut the broccoli into small bite-sized pieces. Add the quinoa, water, and a pinch of salt to a saucepan and bring to the boil with the lid on. Once boiling, place the lid ajar to let out steam and reduce to a gentle simmer. Cook until about 2cm of water remains, then turn off the heat, add the broccoli, cover, and leave to steam for 10 mins.
Make the Peanut Satay Sauce:
- Peel and finely grate the garlic and ginger. In a bowl, combine warm water, peanut butter, vinegar, tamari, coconut sugar, grated garlic and ginger, sesame oil, and lime juice. Stir until smooth and well combined.
Make the Ketchup:
- Mix all ingredients together in a small bowl and season to taste.
Make the Dukkah:
- Roughly chop the almonds. Add to a dry frying pan with the sesame seeds, coriander seeds, pepper, and salt. Toast for about 5 mins, stirring regularly, until the seeds start to pop. Remove from heat and grind in a pestle and mortar or pulse in a blender.
Make the Pickled Red Onion:
- Peel and finely slice the red onion. Add to a glass or jar with the vinegar, water, salt, and maple syrup. Mix and let sit for 15 mins.
Assemble Your Dishes
Assemble the Buddha Bowl:
- Divide approx. 70g of cooked tofu between 2 bowls along with a generous handful of roasted veg. Add approx. 100g of cooked quinoa to each bowl, followed by 3 tbsp of pickled red onion. Cut 1 avocado in half, scoop out the flesh, slice, and divide between the bowls. Garnish with dukkah.
Assemble the Satay Noodles:
- Cook 200g of noodles and drain. In a large frying pan, add approx. 200g roasted veg, 100g tofu, some broccoli, satay sauce, and 2–4 tbsp water. Heat over medium heat until bubbling. Taste and adjust seasoning. Garnish with pickled red onion and fresh coriander.
Assemble the Black Bean Burger:
- Rinse and drain the black beans. In a large bowl, mash together with remaining quinoa, roasted veg, and tofu. Add 1 tbsp smoked paprika, 2 tbsp tamari, juice of 1 lime, and 15g chopped coriander. Mash with a potato masher (or pulse in a food processor) until combined.
- Too dry? Add 2 tbsp water.
- Too wet? Add 1–2 tbsp flour.
- Shape into 4–5 burgers. Fry in a non-stick pan with 1–2 tbsp oil until golden on both sides. Toast the buns. Spread mayo on one side and ketchup on the other. Slice the second avocado and add 2–3 slices per burger, then top with a burger patty and serve.

Fluffy Vegan Marshmallows (with Agar & Aquafaba)
Takes 4 hours 20 minutes
Serves 25
Ingredients
Aquafaba Whip
- 120 ml ½ cup aquafaba (liquid from a tin of unsalted chickpeas)
- 1 tsp vanilla extract or peppermint, rose, or almond for variation
- ¼ tsp cream of tartar optional, for stability
Syrup Base
- 100 ml just under ½ cup water
- 1½ tbsp agar flakes or 1½ tsp agar powder
- 200 g 1 cup cane sugar or maple sugar or 180ml / ¾ cup + 1 tbsp agave syrup for a softer result
- 1 Pinch of sea salt
For Dusting (optional but helpful for handling)
- 30 g ¼ cup arrowroot powder or cornflour
- 15 g 2 tbsp icing sugar or coconut sugar, sifted
Instructions
Prepare the tin:
- Line a 20x20cm tin with greaseproof paper and dust with 30g (¼ cup) arrowroot powder and 15g (2 tbsp) icing sugar to prevent sticking.
Whip the aquafaba:
- Using a stand or electric hand mixer, whip 120ml (½ cup) aquafaba with ¼ tsp cream of tartar (if using) on high speed for 8–10 minutes until stiff peaks form. Add 1 tsp vanilla extract near the end.
Make the agar syrup:
- In a small saucepan, combine 100ml (just under ½ cup) water and 1½ tbsp agar flakes. Bring to the boil, then reduce to a simmer for 5–7 minutes, stirring until fully dissolved.
Add the sugar and salt:
- Stir in 200g (1 cup) cane sugar and a pinch of sea salt. Continue cooking over medium heat for another 3–5 minutes, stirring continuously, until it thickens to a honey-like consistency and bubbles steadily. If you have a thermometer, aim for 110–115°C (230–240°F).
Combine quickly:
- With the mixer on low, slowly pour the hot syrup into the whipped aquafaba in a thin stream. Once fully added, increase speed to high and whip for another 8–10 minutes until thick, glossy, and holding soft peaks. The bowl should feel warm, not hot.
Transfer to tin:
- Immediately spoon the mixture into the prepared tin and smooth the top. Work quickly, as the agar sets fast once it cools.
Set and slice:
- Leave to set at room temperature for 2–4 hours (or overnight) until firm. Once set, lift out and slice into squares using a lightly oiled knife or one dusted in arrowroot.
Dust and store:
- Toss the marshmallows in more of the arrowroot and icing sugar mixture to coat and prevent sticking. Store in an airtight container for up to 5 days.
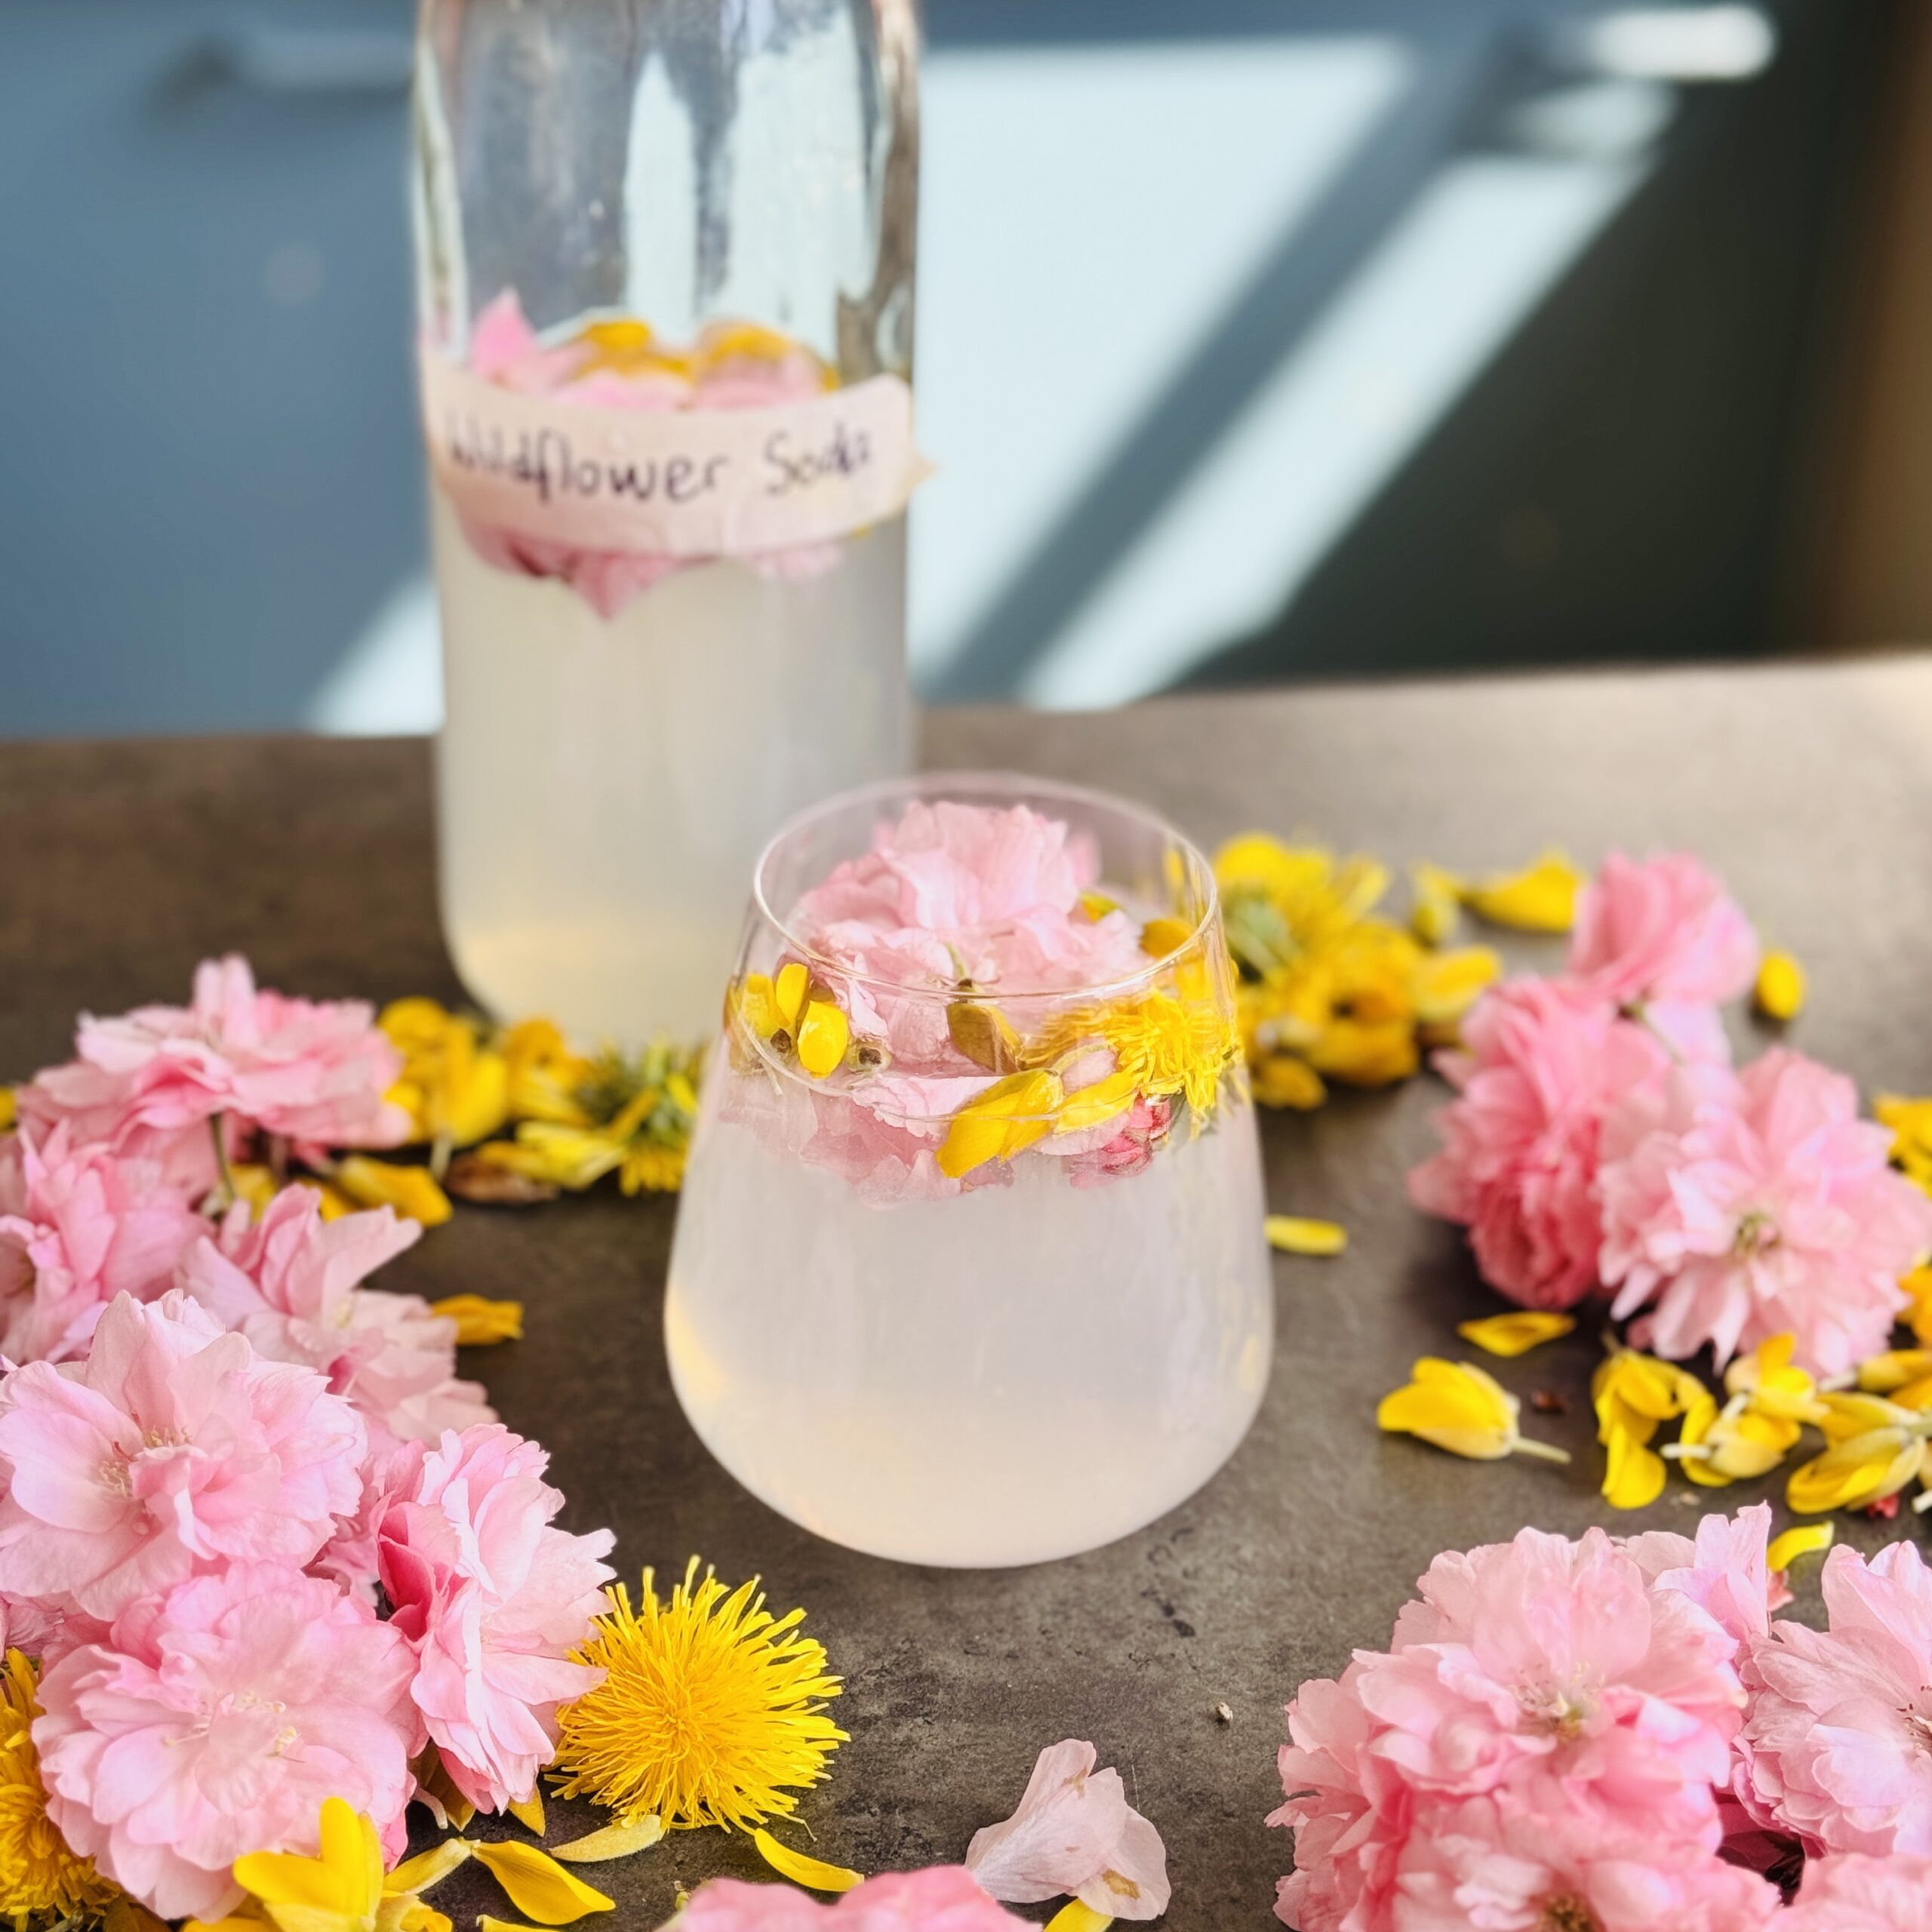
Wildflower Soda with Gorse, Dandelion & Cherry Blossom
Takes 6 days 20 minutes
Serves 8
Ingredients
- 4 litres water 16 cups
- 400 g organic granulated sugar approx. 10% of water weight
- 30 g fresh ginger chopped (skin on if organic)
- 15 g 1 cup fresh foraged gorse petals (yellow blossoms only)
- 15 g 1 cup fresh foraged dandelion petals (yellow parts only)
- 50 g approx. 1.75 oz fresh wild cherry blossom petals (no stems or leaves)
- 3 apples (organic, unwashed)
- 1 orange (organic, unwashed)
- 1 lemon (organic, unwashed)
Instructions
- Combine all ingredients in a clean fermentation jar: In a large glass jar (5L capacity), add 4 litres water, 400g sugar, 30g chopped ginger, 15g gorse petals, 15g dandelion petals, chopped apples and citrus fruit and 50g cherry blossom petals. Stir well until the sugar is completely dissolved.
- Cover and ferment at room temperature: Cover the jar with a clean cloth or a loose lid and leave at room temperature (18–22°C / 64–72°F) for 3–5 days. Stir once or twice daily to submerge the petals and prevent mould.
- Monitor fermentation: Look for bubbles, cloudiness, and a gently tangy taste — these are signs of active fermentation. Depending on room temperature, this may happen faster or slower.
- Strain and bottle: When the soda is pleasantly floral and slightly fizzy, strain out the solids using a fine sieve or cheesecloth. Pour the liquid into swing-top bottles, leaving about 2cm (0.8 in) headspace.
- Build carbonation: Seal the bottles and leave at room temperature for 1–2 days to naturally carbonate. Burp once daily to release any excess pressure.
- Chill and serve: Refrigerate once carbonation is to your liking. Serve chilled and open bottles with care — the soda will be beautifully fizzy, fragrant, and alive with springtime flavour.

Birch Catkin Granola – 5 Minute & High-Protein
Takes 5 minutes
Serves 6
Ingredients
Nuts, Seeds & Foraged Add-ins
- 40 g almonds approx. ⅓ cup
- 40 g walnuts approx. ⅓ cup
- 40 g desiccated coconut approx. ½ cup
- 30 g sunflower seeds approx. ¼ cup
- 80 g pumpkin seeds approx. ½ cup
- 30 g goji berries approx. ¼ cup
- 1 tbsp chia seeds
- 5 g wild birch catkins approx. 1 tbsp
Flavourings & Bindings
- Pinch of sea salt
- Pinch of ground cinnamon
- 2 tbsp coconut oil 35g / approx. 2 tbsp
- 35 ml maple syrup approx. 2 tbsp
- ½ tsp vanilla essence
Instructions
Prepare the dry mix:
- Roughly chop the almonds, walnuts, desiccated coconut, sunflower seeds, pumpkin seeds, and chia seeds until they resemble a coarse crumble texture. You can also pulse them briefly in a food processor if you prefer a more uniform texture.
Toast the chopped nuts and catkins:
- Add the chopped mix to a wide-based frying pan along with the birch catkins. Toast dry over medium heat for 3–4 minutes, stirring continuously, until the coconut begins to smell sweet and toasty, and the edges turn golden brown.
Add coconut oil, maple syrup, and vanilla:
- Turn off the heat and stir in the coconut oil, maple syrup, and vanilla essence. Mix thoroughly to ensure everything is evenly coated.
Cool and enjoy:
- Remove from the heat and allow to cool completely. Stir through the goji berries (and cacao nibs, if using). Once fully cooled, store in an airtight container for up to 4 weeks.
- Serve with your favourite yoghurt, plant-based milk, fresh fruit, or use as a crunchy topper on porridge or smoothie bowls.
Notes
🌳 Notes on Foraging & Substitutions
- Use young, freshly dried birch catkins for the best nutty aroma and flavour.

€1 Five Minute Dinner For Weight Loss
Takes
Serves 4
Ingredients
- 500 g pre cooked brown basmati rice – €1.30
- 1 bag of stir-fry veg I got a mix of beansprouts with broccoli, scallions, some red onion and grated carrot – €1.50
- 150 g mushrooms – €1.20
- 1 tin of bake beans – €0.29
- 3 tbsp tamari –
- 1-2 tbsp curry powder
- 1/2 tsp smoked paprika
- Chili flakes to serve
Instructions
- Slice your mushrooms into bitesize pieces.
- Drain and rinse the tomato sauce off you beans.
- Heat a non-stick pan on a high heat till it gets nice and hot.
- Reduce the heat to medium/hot temperature and add your mushrooms.
- Cook for 2 minutes, stirring a couple of times.
- Add the bag of stir-fry veg and cook for a couple of minutes, stirring regularly.
- Add the rice, ensure to break up any clumps of rice from the pack, and mix it all through.
- Heat for a minute.
- Add the curry powder, smoked paprika and a good pinch of chilli flakes and mix through. Serve & Enjoy!
Video

Low Fat BBQ Tofu Ribs Bowl
Takes 20 minutes
Serves 2
Ingredients
- 280 g firm tofu
- 170 g Tender stem broccoli
- 1 bok choi
- 1 red onion
- 250 g cooked rice or quinoa
- 100 g Sauerkraut
For The Marinade:
- 50 g Capers
- 3 tbsp Maple syrup
- 2 tbsp Tamari
- 2 tbsp Tomato puree
- 1 tsp Chinese 5 spice
- 2 tbsp water
Instructions
- Slice the tofu lengthwise into 1 cm slices. Cut them into diamonds so they are triangle shaped.
- Cook in air frier for 15 mins standing up so the air can really circulate to maximise the crispiness. If you dont have an air frier simply preheat your oven to 220 degrees C and bake for 15-20 mins until crispy on the outside.
- In a cup mix together the ingredients for the marinade. Remove the crispy tofu.
- Add the marinade to a wide bottomed saucepan and on low heat bring to the boil while stirring continuously. Once boiling add the tofu and cook for 1 min turing over and ensuring each triangle is well coated in the marinade. Turn off the heat and mix again to ensure they are well coated.
- Cook your rice as per the pak instructions. Par boil the broccoli and drain and rinse. Heat a griddle pan on high heat., Once hot add the broccoli and cook until it has char marks on each side, be careful not to move it too much to ensure you get nice char marks.. Remove from the heat, cut the bok choi in half lengthwise and add the griddle pan open face down. Peel the red onion and cut in half lengthwise and ad to the griddle pan face down. Leave to cook until both the bok choi and onion start to char.
- To plate up add the rice to the middle of both the bowls and divide up the charred broccoli, bok choi and red onion between the 2 bowl. Add the sauer kraut and caper and finally add the tofu ribs.
- Enjoy!
Video
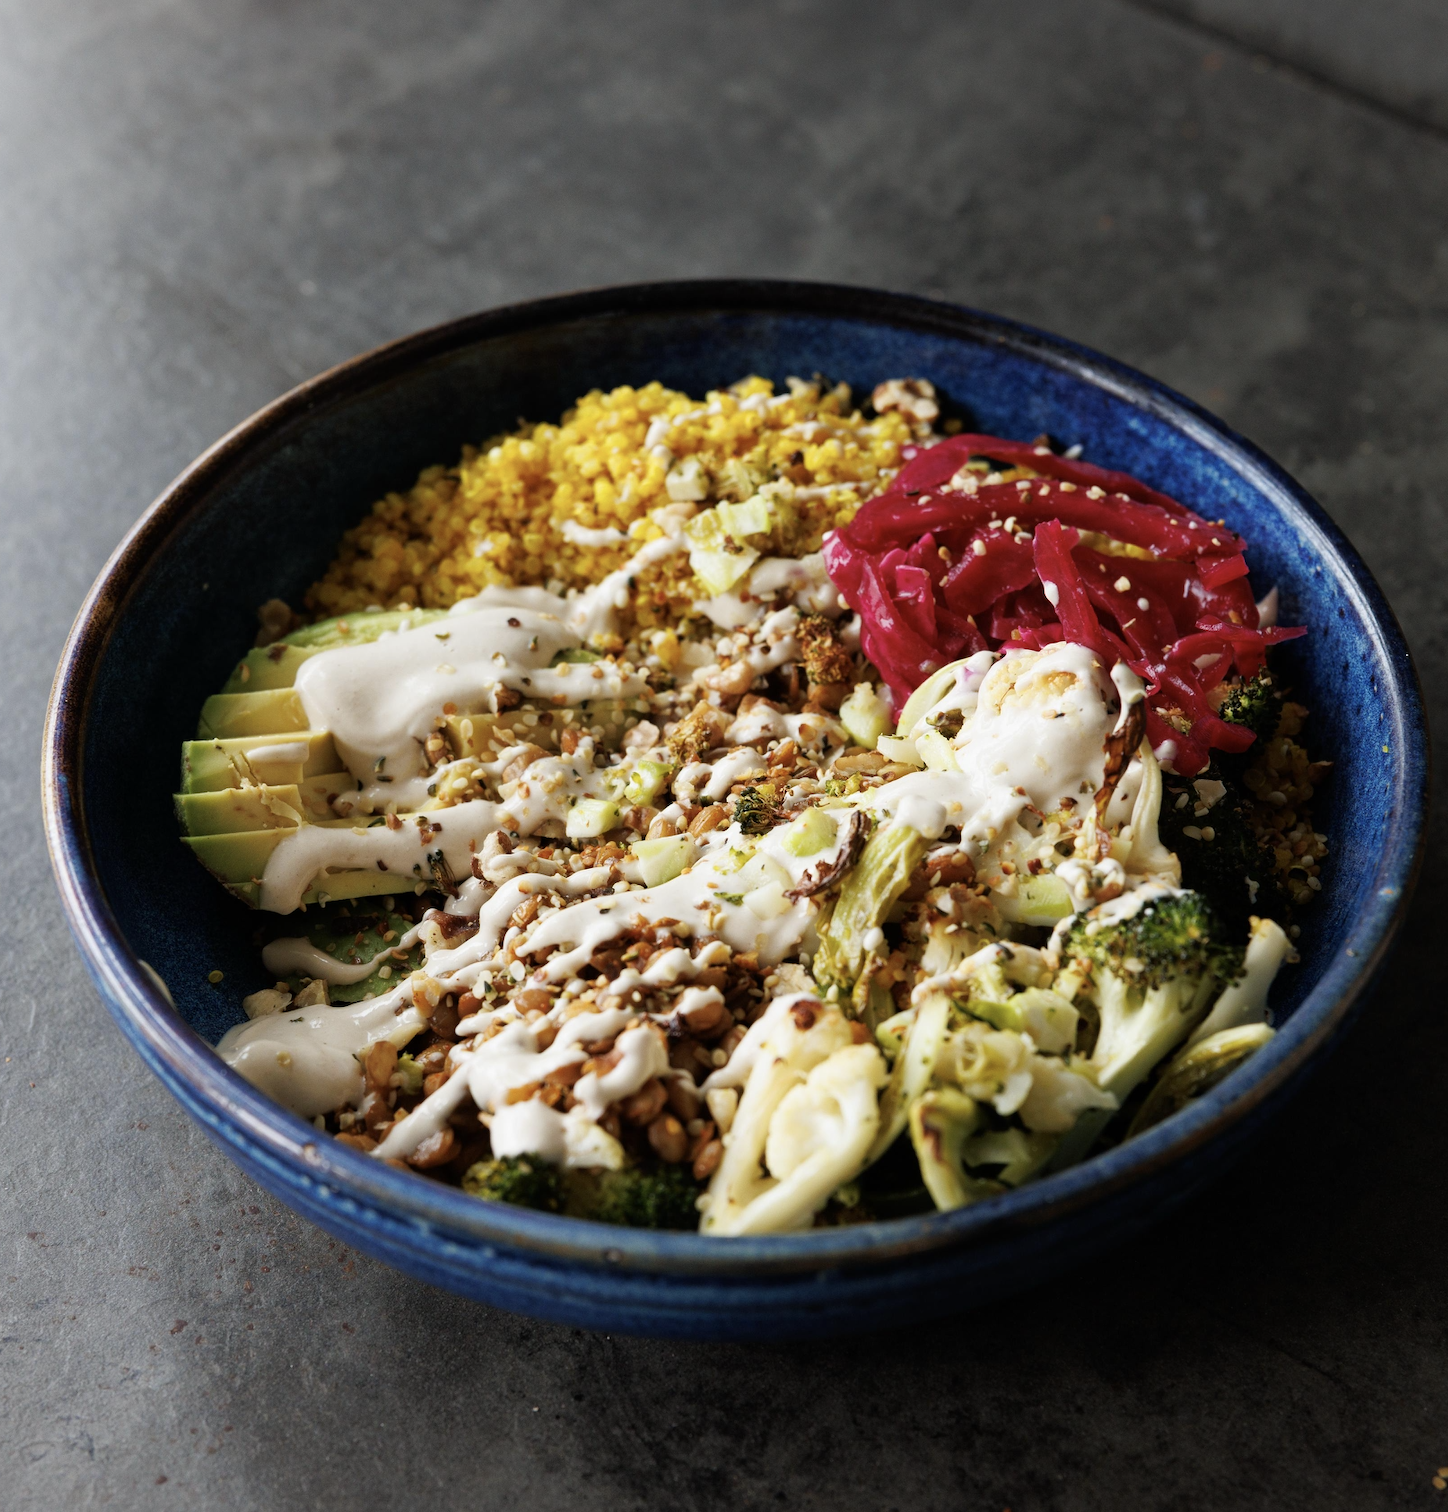
High Protein Nourish Bowl with Spiced Lentils & Golden Quinoa
Takes 40 minutes
Serves 3
Ingredients
Spiced Lentils
- 400 g tin cooked green or brown lentils 250g drained (1½ cups cooked)
- 3 garlic cloves
- 1½ tsp cumin seeds
- 1½ tsp smoked paprika
- 1 tbsp 15ml olive oil (optional)
- Salt & black pepper to taste
Golden Quinoa
- 400 g cooked quinoa ≈135g dry / ⅔ cup dry
- 1 tsp turmeric
- 600 ml water 2½ cups
- Pinch of salt
Roasted Vegetables
- 1 cauliflower approx. 300g (2½ cups chopped)
- 1 head broccoli approx. 300g (2½ cups chopped)
- 2 tbsp 30ml olive oil
- 1½ tsp smoked paprika
- Salt & pepper to taste
Walnut-Hemp Crumble
- 45 g walnuts ⅓ cup
- 45 g hemp seeds ¼ cup
- Pinch of sea salt
- Optional: 1½ tsp garlic powder or smoked paprika
Lemon Tahini Yoghurt Sauce
- 4 tbsp 90g tahini (¼ cup)
- 200 g plain soy yoghurt ¾ cup
- Juice of ½ lemon
- ½ tsp garlic powder
- 6 tbsp 90ml water (¼ cup + 2 tbsp)
- Salt to taste
To serve
- 1 avocado
- Fresh coriander or parsley
Instructions
Roast the vegetables:
- Preheat oven to 200°C (fan 180°C) / 390°F. Chop the cauliflower and broccoli into small, bite-sized florets. Toss with 2 tbsp olive oil, 1½ tsp smoked paprika, and a pinch of salt and pepper. Spread on a baking tray and roast for 25 minutes until golden and tender.
Cook the lentils:
- Drain and rinse the lentils. Finely chop the garlic. Heat olive oil in a pan over medium heat (if using), then sauté the garlic for 1 minute until fragrant. Add the lentils, cumin seeds, smoked paprika, salt, and pepper. Stir for 3–5 minutes until heated through and well seasoned.
Prepare the walnut-hemp crumble:
- Roughly chop the walnuts. Toast the walnuts and hemp seeds in a dry frying pan over high heat with a pinch of sea salt. Stir occasionally for 4–5 minutes until golden and fragrant. Optional: Add garlic powder or smoked paprika for extra flavour.
Make the tahini yoghurt sauce:
- In a bowl, whisk together tahini, soy yoghurt, lemon juice, garlic powder, and water until smooth and creamy. Season with salt to taste.
Assemble the bowls:
- Divide the cooked quinoa between three bowls. Top each with the spiced lentils and roasted veg. Sprinkle over the walnut-hemp crumble. Slice the avocado and divide between bowls. Drizzle with the tahini yoghurt sauce and finish with fresh parsley or coriander.
Sample Lesson: Sourdough Baking Course
It’s really easy to start your own sourdough mother, and it’s like growing your own pet that will require feeding and minding. It simply requires flour, water and time.
What flour to use?
You can start a mother (culture) with most flours, but make sure to choose a flour that is easy to come by, is not that expensive, as the mother will require regular feeding. We use a white flour-based mother culture in our bakery, and I also have a wholemeal spelt mother at home.
A white flour will have more sugars available and less fibre than a wholemeal flour, so the mother will grow quicker and therefore require more regular feeding. Wholemeal flour has a higher fibre content, so it will absorb more moisture and be slightly less active than white flour.
Method
In a 400-ml clean jam jar, add:
- 50g of flour of choice (we prefer 100% wholewheat or wholemeal spelt)
- 50 ml of water
Mix well until homogenous. Cover with a tea towel to stop flies from entering while still allowing air and natural yeast to enter.
Leave it to sit on the countertop for 3-5 days out of direct sunlight.
Once it smells yeasty and slightly beer-like or brewery-like and has small bubbles in it, it is ready to go and get its first feed. You now have your very own sourdough mother to love and look after, which will hopefully nourish you and your friends and family!
It is important to note that whatever flour your mother culture was created with is the flour you will always have to feed it, so for example, if you used wholemeal spelt flour, then your mother culture needs to always be fed wholemeal spelt flour. You can change the type of flour over time, but this is a gradual process.
Feeding your new mother culture
Your sourdough culture will now need to be fed daily. If you are going on holiday, either get a friend to feed it or simply put it in the fridge, and it will live for a week without feeding (when starting to bake from using your mother from the fridge, it will require 1 good feed before baking once out of the fridge to get it active for baking bread).
Pour out half of your mother culture into a bowl; this will be used to make bread. Now in the same jar, add:
- 50g flour (ensure it is the same flour as your mother culture was created with)
- 50 ml of water
Mix well, and leave.
How regularly should I feed my mother?
If your mother is living outside of the fridge, it will need to be fed daily. If it is in a warm environment, such as 20 degrees C, it might need to be fed twice daily. If your mother is living in the fridge, it will need to be fed weekly or, at a stretch, every second week.
If your mother is living in a cold environment, such as a kitchen in winter that is approx. 5 degrees C, it will need to be fed once per week, as this environment is similar to a fridge.
Sample Lesson: Gut Health – Why all health begins in the gut
In medicine we have known that gut health is crucial to overall health for a very long time. Over 2 thousand years ago, Hippocrates “the father of modern medicine”, taught his students that all health begins in the gut.
In 21st century we now recognise there was so much truth in that. We have learnt this through unlocking the secret world of the human gut microbiome.
When we are born, from our first human breath to our first human touch; the microbes in the environment populate our bodies and our digestive system.
They help us to digest our first meal, without them our intricate digestive system would not even develop properly, nor would our immune system.
By adulthood, this microbiome has grown to an impossibly complex ecosystem, found predominantly in our large bowel or colon. Made up of over 100 trillion microbes, bacteria, yeasts, viruses, and archaea. They have been described as a control centre for human biology. Interacting with the food we eat, each other, and the delicate lining of our digestive system.
The microbe that exist in us are descendants from the planets first inhabitants, they have been on the earth for thousands and thousands of years.
Your gut microbes outnumber the trees on planet earth, in fact they outnumber all the stars in the Milky Way! We are equal parts human and microbes, in fact our gut microbes contain far more genetic material than our human cells.
Our microbes produce dozens – if not hundreds of chemicals that interact with our body, enter our bloodstream, and help to determine our health. They truly are a control centre for human biology – with crucial roles in regulating our appetite, blood sugars, inflammatory processes, and metabolic health.
This is a perfect symbiosis – our gut microbes depend upon us and we depend upon them. They want us to be healthy! On the journey to better gut health and better overall health – they are our crucial allies.
Sample Lesson: Happy Menopause – Is HRT Right for Me?
HRT is also known as Hormone Therapy (HT) or Menopausal Hormone Therapy (MHT). It is the use of hormones, for managing perimenopausal and menopausal symptoms and to try and minimise some of the longer-term effects of menopause.
HRT can be very effective for and very helpful for many women especially when symptoms adversely affect quality of life.
HRT is useful for relief of menopausal symptoms including:
- Hot flushes
- Night sweats
- Vaginal dryness…
- And it can also help with mood and libido
HRT can also benefit women who are not suffering significant menopausal symptoms but wish to get the benefits of hormone therapy such as protection for their heart and bones, ideally starting it within ten years of menopause or before the age of 60.
However, do remember hormone therapy will not change life circumstances and stress perhaps due to other factors. In these situations, HRT may not be as helpful as one hoped.
Also not all women can or want to take hormone therapy and should be supported in their decision with appropriate evidence-based information.
That said, do remember HRT is safe for the vast majority of women with no real risks with breast cancer or clots with the current preparations
Before starting HRT, your doctor will take a thorough history from you and examine you appropriately. They should advise you on the preparations most suited for you as well as any risks and benefits specifically for you as well as discuss any concerns you may have. Do mention to your doctor any MEDICAL information including any known relevant family history.
HRT is available as tablets, skin patches, gels or nasal spray.
HRT provides low doses of oestrogen and progesterone. You don’t need progesterone if you have had your womb removed as it is used to protect your womb from developing uterine cancer if only oestrogen is used.
Sometimes testosterone is added to improve sex drive, libido, bone health and concentration.
I also tell my patients, whether you plan to use HRT or not, do try and follow a lifestyle and a diet that helps you with your menopausal symptoms and overall health and wellbeing.
There is a lot more written information on HRT that you can also access during the course.
Sample Lesson: The Happy Shape Food Pillars
Below are the 10 key Happy Shape Pillars that will help to ensure you achieve your goals and find your happy shape! We have explained each of them here and there is also a downloadable list, which you can print and put somewhere that you can see each day.
- Eat a whole food plant based diet – fruit, veg, beans, legumes, whole grains, nuts & seeds.
- Eat as much as you like, provided you are sticking to these food principles. All health score 5 recipes are suitable!
- Eat only wholegrain products – That means choosing brown carbs over white carbs, no white flour products etc.
- Ensure that packaged whole foods you eat with a label have a fat content below 10%.
- Don’t eat any refined or processed foods.
- Don’t eat any animal based foods – no meat, chicken or fish.
- Don’t eat any dairy products.
- Don’t eat any eggs.
- Don’t use any oil – this includes all oils: olive oil, sunflower, avocado, flax oil.
- Eat nuts, seeds and avocados sparingly.
1. Eat a whole food plant-based diet
This is a diet based 100% on whole foods, it is comprised of: fruit, veg, beans, legumes, whole grains and small amounts of nuts and seeds. The benefits of following this diet are:
- It’s high in fibre
- It’s naturally low in fat
- It does not contain dietary cholesterol
- It’s high in water
- It does not contain saturated or trans fats
- It’s packed with antioxidants and other phytonutrients which aid blood flow.
- It’s low in calories
2. Eat as much as you like, provided you stick to the guidelines
With this diet there is no calorie counting, no portion control (except for desserts!), so you can eat as much as you like, providing you are sticking to these 10 guidelines.
Here’s how this works:
A whole food plant based diet is naturally high in fibre:
- Fibre fills you up.
- It slows down the speed at which you eat.
- High-fibre foods take longer to eat as a result your body registers that you are filling up quicker and reduces your hunger.
- Fibre contains no calories.
- You only get fibre from whole plant foods.
Whole food plant-based foods are high in water:
- Water adds weight to your food
- Water has no calories
A whole food plant-based diet is naturally low in calories:
- By cutting out refined and processed foods, you can dramatically reduce overeating of ‘empty’ calories – refined foods that have no fibre and don’t fill you up or satisfy your hunger.
- By cutting out animal foods, we further reduce calories.
- By cutting out oil, we further cut the calories.
- The only recipes we have included portion control in this book are not surprisingly the dessert section, as they are more calorie-dense and contain less water.
3. Use only wholegrain products
Wholegrain products are the brown carbs : brown rice, wholemeal pasta, wholemeal couscous, wholemeal noodles, 100% wholemeal bread. On this challenge we want you to eat 100% of your grain-based foods from wholegrain/wholemeal sources.
At least 80% of the carbohydrates we eat in the UK and Ireland are white carbs. We want to replace these white carbs that are low in fibre and devoid of any real nutrition with 100% brown carbs.
Wholegrain products are:
- High in fibre
- Low in calories
- Packed with nutrition
4. Ensure the packaged whole foods that you eat with a label have a fat content below 10%
To find out the fat percentage content of a product, look at the back of the product’s packet, where you will find the nutritional information. Fat will be listed in weight per the size of the product and per 100g. Simply look at the fat content per 100g and this will give you the percentage fat. Anything above 10g per 100g is not suitable for the challenge.
5. Don’t eat any refined or processed foods
More than half of all the calories eaten in Ireland, the UK, and most of the first world come from refined and processed foods, so we really do understand how challenging giving up these foods is. We advise you to simply focus on the 4 weeks of this challenge and don’t be thinking beyond this. What is sustainable is joy, feeling good, having more energy, feeling happy and confident in your body so we suggest you focus on these!
By cutting out these refined and processed foods you are avoiding a lot of ‘empty’ calories that are devoid of nutrition and have other negative effects on your health.
Here are some facts about these foods:
- They have no fibre
- They are usually high sugar
- They are usually high in salt (80% of the salt we eat is not from the salt shaker but from refined and processed foods)
- They are usually high in fat, especially saturated fat, which has been linked to gaining weight
- They have the biggest effect on increasing cholesterol levels
- They are usually high in calories
- They are ‘empty’ calories meaning the have very little vitamins or minerals in them and will not fill you up either
By refined and processed foods, we mean chocolate bars, snack bars, crisps, processed cereals, cakes, croissants, fizzy drinks etc. This means saying goodbye to most packaged foods, as they are typically a combination of fat, sugar and salt, and are highly addictive.
6. Don’t eat any animal based foods – no meat, chicken or fish
You may think eating no animal based foods for 4 weeks sounds extreme but we think that the reality of 45% of people dying in Europe every year due to heart disease is even more extreme! By animal based foods we mean beef, lamb, chicken turkey, ham, salami, sausages, bacon and even fish too. That is red meat, white meat and fish – basically exclude any foods that had a face or a mother! Again, focus on the fact that this is a 4 week challenge, it is a limited time, you can take a rain check after the 4 weeks.
Why we exclude animal based foods:
- They have no fibre
- They are high in saturated fat
- They contain cholesterol
- They contain very little antioxidants (the only antioxidants they contain are from the plants the animals consumed)
- They are low in vitamins and minerals compared to plant-based foods
Animal foods contain only 2 of the 3 macro-nutrients: fat and protein. They are missing the number-one source of energy for your body: carbohydrates. Whole plant foods have 20-80% of their calories coming from carbohydrates, giving you a slow sustained energy release.
Animal foods are also high in saturated fat and contain trans fats, both of which are considered the ‘bad’ fats that can cause poor health outcomes. Whole plant foods only contain the ‘good fat’ such as polyunsaturated and monounsaturated fats.
7. Don’t eat any dairy products
This means cheese, milk, butter and yogurt made from dairy products. Dairy products are typically high in saturated fat, particularly cheese, which is the highest source of saturated fat in our diet. They also contain cholesterol and are low in vitamins and minerals when compared to whole plant foods.
Why we exclude dairy products:
- They are high in saturated fat
- They contain cholesterol
- They are often high in hormones
- They have no fibre
8. Don’t eat any eggs
Eggs are the most concentrated source of cholesterol in the common diet, one large egg has about 200 milligrams of dietary cholesterol in the yolk with the daily maximum limit of cholesterol in your diet being 300mg and only 200mg if you are at risk of heart disease.
9. Don’t use any oil, that includes all oils – olive oil, sunflower, avocado, flax oil
Bear with us, we know this sounds really harsh and extreme. However, in our experience of having tens of thousands of people reduce their risk of heart disease and improve their health in just 4 weeks, cutting out oil is highly beneficial. It effectively lowers cholesterol levels, improves blood flow, improves skin and assists in weight loss, and you won’t even taste the difference, the food is equally as delicious!
We are aware that this may come across as super contentious and that on top of all the other ‘DONTS’ on this list, excluding oil seems very extreme but bear with us! Oil is 100% fat and a refined fat too.
Oil is the most calorie dense substance on the plant at 8000/cal per litre, that is 120 calories/tablespoon. These are ‘empty’ calories as in they have no fibre and little to no nutrition. It is the ultimate refined food in that we extract it from the whole food, discarding the fibre and nearly all the vitamins and minerals leaving us with nothing but the fat.
We are not against fat entirely, but we recommend you get your fat from whole food sources such as small amounts of nuts, seeds, and avocados. Most people who start our challenges/courses think they could never cook without using oil but end up surprised by how easy it is and how quickly their palate adjusts to oil free cooking. It is also much easier to wash your pots and pans after cooking without oil!
10. Eat nuts, seeds and avocados sparingly
Here we are talking about raw nuts and seeds (exclude all salted or roasted nuts ). Raw nuts and seeds are super healthful and packed full of beneficial fats. However, we only need very little of them in order to get their benefits. Particularly with nuts, it is very easy to sit there and eat a full 100g while watching something on your phone, however, we only need very little to get the real benefit from them and going above this can cause inflammation and have a negative effect on our cardiovascular health.
Nuts
We ask you to limit your intake of nuts to about 30g a day which is about:
- 20 almonds
- 10 walnuts
- 10 brazil nuts
- 15 pecan nuts
The healthiest of all nuts in terms of the highest omega 3 and lowest saturated fat are walnuts. In terms of nut butters and tahini we ask you to cut them out for the 4 weeks of the challenge (unless they are included in one of our recipes which is okay). As a snack, they are just so tasty which makes them very difficult to stop eating, so best to just go cold turkey and exclude them for the 4 weeks.
Seeds
We have found people are much less likely to overeat seeds, however, they are also a concentrated source of calories (about 5000cals/kg) and average about 30% fat (but tend to be low in saturated fat). We definitely encourage you to eat seeds but not a full bag!
Try to limit your seed intake to a few tablespoons a day or approx 30g. Seeds are great sprinkled over your porridge in the morning or over a salad at lunch.
Avocados
Like seeds and nuts, avocados are super healthy for you. However, they are energy dense and high in fat, so we encourage you to limit your avocado intake to a maximum of half an avocado, every second day.
Sample Lesson: Plant-Based Cooking Course – Pasta Basics
Pasta is a staple in Italian food and is a much-loved food all around the world. The first reference to pasta dates back to the 12th century, on the Italian Island of Sicily.
Pasta is typically made from an unleavened dough of wheat flour (normally durum wheat) mixed with water and sometimes eggs and formed into various shapes, then cooked by boiling or baking.
In recent times, pasta is now being made with many other ingredients, such as black beans, rice flour, red lentils and other legumes, to make it gluten-free and high in protein.
We didn’t taste pasta until we were about 10 and we remember wondering what this strange food was! Of course, pasta is now so ubiquitous, widely available and an everyday food!
Types Of Pasta
There are approximately 310 specific forms of pasta in various shapes and sizes, with almost 1300 different names depending on the area in which they are consumed. Some of the more common forms of pasta include long and short shapes, tubes, flat shapes, sheets, miniature shapes for soup, those filled and stuffed and, lastly, decorative shapes
In Italy, pasta is served in 3 types of prepared dishes:
- pasta asciutta – cooked pasta served with a sauce or condiment
- pasta in brodo – pasta served as part of a soup-style dish or broth
- pasta al forno – pasta incorporated into a sauce or dish and baked in the oven.
In terms of nutrition, plain white pasta is generally made up of 31% carbohydrates / starch, 6% protein and is low in fat.
Pasta may also be enriched, which means that more vitamins and nutrients are added to it, or it can be made from wholegrain flour. Our preference, in terms of health, is to use wholemeal pasta or brown pasta, where available.
Wholemeal will be higher in fibre, so the sugars in the starch will be more slowly released into your bloodstream and deliver a more steady release of sugar. They will also fill you up more, as they are higher in fibre and have more nutrition when compared to white pasta. They won’t taste as indulgent or pleasurable as white pasta, but when served with a good sauce, most people won’t notice.
Pasta Shapes
The most common pasta shapes in our vegan world are:
Spaghetti – long and straight noodles. Also widely available in wholemeal varieties.
Linguine – a thinner, longer spaghetti. The extra surface area, when compared to spaghetti, makes lighter sauces stick better to it.
Tagliatelle – a flat, long spaghetti, normally dried in nests. It is often said that the best sauce for tagliatelle is Bolognese.
Penne – a small tube-like pasta with pointed ends, as they are cut at an angle. A very versatile pasta that holds its shape well in virtually all dishes. Widely available in wholemeal varieties.
Fusilli – thick, spiral-shaped, bite-sized pasta shapes. It is often suggested to serve this pasta with pesto, as it absorbs liquids and sauces easily.
Lasagne – the flat sheet that we tend to bake with a tomato sauce and top with a béchamel sauce.
Cannelloni – large pasta tubes that are filled and baked in a sauce.
Macaroni – famously served in a cheese sauce, these are small “elbow”-shaped pasta.
Farfalle – which means butterflies, aka bow-tie pastas. They hold sauces well and you can pair farfalle with a creamy or tomato sauce. They also go great in pasta salads.
Gluten-free pasta
Brown rice pasta – it cooks very easily, doesn’t really stick together and tastes great.
Legume-based pastas, such as red lentil pasta and black bean pasta, are generally higher in protein and do have a slight bean or legume-like flavour. They make a nice change but when compared to conventional pasta, they can taste a little strange.
Buckwheat pasta – we have found that this pasta tends to stick together. It has a really earthy taste.
The Basics For Boiling Pasta
Often seen as a simple task, it’s not if you know how! There are many myths and confusions about how to cook pasta. Having spent lots of time with his Italian friend, Pietro, in Rome, Steve has learned how to cook pasta Italian-style.
Here’s How:
Often, the ratio of pasta to water in Italian cookbooks is 1:10 so if you’re cooking 100g of pasta, you should cook it in 1 L of water.
- First, fill and boil the kettle and if you don’t have a kettle, fill a pot and boil the water.
- Choose a pot that is big enough to fit all the pasta you are cooking so that it will have enough room and not stick together. A simple rule of thumb is that the pot should be 2–3 times the size of the volume of pasta you are cooking.
- Next, add salt to the water. Ideally, the water should have the same salinity as seawater; this might sound like a crazy amount of salt but most of the salt will end up being washed down the drain but lots of it will season the pasta. It will also give more buoyancy to the water so the pasta is less likely to stick together.
- Don’t add oil to the pasta! The oil will simply coat the pasta as you drain it, form a layer between the pasta and the sauce and make the sauce less likely to stick to the pasta. The pasta itself is largely starch, so it will want to stick to most sauces but if there is oil on the surface of the pasta, this will act as a lubricant, making the sauce more likely to slide off the pasta.
- Cook the pasta how you like it. In Italy, pasta is always cooked “al dente”, which means “to the bite”. Meaning that it is always slightly undercooked and has a little bite to it. When you bite into the pasta, there should be a tiny, firm bit in the cross section. If the pasta requires 8 minutes to cook, cook for 7, taste and then drain and cool to stop it from cooking more.
If you are familiar with Italian cooking, it can be very rule-oriented in its approach to food, often seen as quite rigid in what goes with what and what doesn’t go with what. As this is a plant-based course and we tend to be a little rebellious in nature, please excuse our deviations from some of the Italian rules. If we are insulting your Italian Nonna’s famous recipes, it is not intentional. We need to bring flavours from different areas!
Sample Lesson: Vegan Baking Course – Fruit Scone Framework
These framework % are so you can understand at a macro perspective the core components – they don’t scale linearly like a mathematical equation but is indicative for understanding the relationship of the ingredients.
In the below framework we have 4 recipes for sweet fruit based scones. Scones are a wonderful medium which you can flavour and season in infinite ways. Here are 4 of our favourite ways.


The basic fruit scones – leave out the raisins if you prefer a beautiful white scone or else change them to your favourite dried fruit (just make sure that the dried fruit is in small bite sized pieces).
Blueberry and almond – the blueberries when baked go wonderfully purple and give these scones a lovely juiciness. Use frozen blueberries for a more intense purple colour.
Walnut & date – A wonderful chef who worked with us Claire used to make these and they were always one of our favourites.

Method
- Preheat the oven to 180℃ fan.
- To prepare the flax egg, mix the ground flax with water and mix well together, then set aside to thicken and coagulate to make the binder.
- In a food processor blend the solid coconut oil with the flour, sugar, baking powder and baking soda, salt and spice (if using any spice). Pulse it until the coconut oil is just blended through the dry ingredients evenly and it resembles a breadcrumb like texture. Take care here not to over mix the dough. If you don’t have a food processor just mix by hand ensuring to use the heat of your hands to melt the coconut oil and mix it well with the flour, sugar, salt. It should reach an almost bread crumb like consistency and have no lumps of coconut oil.
- Transfer this to a large mixing bowl.
- Next add the flavour component if using, (sultanas/raisins, blueberries, chopped dates, walnuts, orange zest etc) .
- Make a slight well in the centre.
- Mix the alternative milk and flax egg together, add to the well in the dry ingredients and with clean hands mix together gently until the dough just comes together, ensure to be light and gentle with your fingers and hands, ensuring you do not over mix the dough (as you don’t want to develop any gluten).
- Tip the dough out onto a floured surface and pat down with floured hands and shape roughly into a round shape, the height of your scone cutter. Lightly flour your scone cutter and cut out your scones, they should weigh roughly 150g each, this will give you 6-7 scones based on the above framework.
- Put the scones in a container to protect their shape and place in the freezer for 20 minutes. This may seem a little unusual, but this is the magic step that will help your vegan scone rise and disperse the coconut oil evenly while baking, giving you the perfect vegan scone.
- Transfer the chilled scones to a parchment lined baking tray (ensuring to leave a few inches around each scone to allow them room to expand when baking)
- Use a pastry brush to wash each scone with some plant milk, this will help them go a lovely golden brown while baking.
- Bake at 180℃ fan for 30 minutes on the upper rack of your oven, rotating the tray half way through cooking time.
- In the case of the blueberry and almond scones, half way through baking sprinkle over the flaked almond and leave in. The reason why we add them mid way is because otherwise they burn.
- Remove from the oven and let the scones cool for 5 minutes, otherwise you’re likely to burn your mouth!
- Enjoy!
Sample Lesson: Fermentation Course – Quick Pickling -VS- Natural Fermentation
Today, we’ll explore two popular methods for preserving and enhancing the flavour of your vegetables: quick pickling and natural fermentation. While both techniques can transform ordinary produce into tangy, acidic, delicious treats; they differ significantly in process, time, and health benefits. This lesson is quite dense so do take your time with it & if you have any queries at all, pop a question up in Tribe and we’ll get back to you ASAP!
Basics of pickling
Pickling & fermentation are a favourite hobby of Steve’s, he always has many different experiments on the go!
Pickling has been done for centuries. It is the process of preserving food by either anaerobic fermentation in a brine solution or immersion in a vinegar solution,
Pickled food via natural fermentation is a super-healthy, cheap and delicious way to enjoy the taste of fresh food throughout the year. Also there is something wonderful about making your own pickled food at home and checking on how it develops to find the perfect recipe and process!
There are 2 main methods of pickling:
– Vinegar brine method (Quick pickling)
– Natural fermentation
Both of these methods work, however, we generally use the natural fermentation process as we want to develop good gut bacteria for a healthier digestion and overall health.
What is the difference between vinegar brine pickling (quick picking) and natural fermentation pickling?
They are kind of opposites, with different advantages and disadvantages.
Vinegar brine picking (quick pickling), such as pickled red onions in vinegar, kill the good bacteria (commonly referred to as probiotic bacteria) that are necessary for fermentation, as well as the bad bacteria.
Natural fermentation pickling is a traditional method that relies on naturally occurring lactic acid bacteria. Lactic acid bacteria are naturally present on everything that grows. By creating the right selective environment for these bacteria, through natural fermentation, you allow them to feast on the sugars that are naturally present in veggies. Through this process, the probiotic bacteria that are so good for everything from digestion to immunity, grow and breed!
Quick Pickling (Vinegar Brine Pickling):
Quick pickling is a fast and easy method of preservation that involves soaking vegetables in a vinegar-based brine. This method is great for those who want immediate results and enjoy a sharp, tangy flavour in their pickles.
- Process: Quick pickling involves a mixture of vinegar, water, salt, and often sugar, then pouring it over the prepared vegetables. The jars are sealed and sometimes refrigerated, where they can be enjoyed after a few minutes, sometimes a few hours or even a few days.
- Time: Because quick pickling uses vinegar, it takes significantly less time—typically just a few minutes to a few hours to a couple of days.
- Flavour: The resulting pickles are tangy and crisp, with the vinegar providing a sharp, distinct taste.
- Shelf Life: Quick pickles need to be stored in the refrigerator and have a shorter shelf life compared to fermented pickles. The vinegar tends to break down the vegetable and when left for a long time (a few weeks) the vegetables typically start to dissolve.
Natural Fermentation:
Natural fermentation is a traditional method that relies on naturally occurring lactic acid bacteria to preserve vegetables. This method requires patience but rewards you with complex flavours and numerous health benefits.
- Process: Natural fermentation involves submerging vegetables in a saltwater brine, creating an anaerobic environment that encourages the growth of beneficial lactic acid bacteria. These bacteria convert sugars in the vegetables into lactic acid, which acts as a natural preservative. We apply a 2% salt solution method whereby you simply weight the weight of what ever fruit or vegetable you are fermenting and multiply that weight by 2% or 0.02 to get the amount of salt to add. Mix the salt with the prepared fruit or veg and add to a fermentation jar and cover with water and allow to ferment.
- Time: Fermentation takes longer than quick pickling, often several days to a few weeks, depending on the temperature and the desired level of tanginess. The longer you ferment for the more acidic your fruit or veg will become and the warmer the temperature the quicker the fermentation process will be. Similarly if it is fermenting in a cold environment fermentation will be much slower than a warm environment.
- Flavour: Fermented vegetables develop a more complex, tangy flavour that deepens over time. The process also results in a probiotic-rich food that supports gut health.
- Shelf Life: Fermented pickles can be stored at room temperature (before opening) or in the refrigerator (after opening) and often last much longer than quick pickles due to the preservation effects of lactic acid.
Comparing the Two Methods:
- Speed: Quick pickling is fast and convenient, while natural fermentation requires more time and patience.
- Health Benefits: Natural fermentation provides probiotics and enzymes that are beneficial for digestion, these natural probiotics are absent in quick pickles.
- Flavour Complexity: Fermented pickles offer a deeper, more complex flavour profile compared to the sharp tang of quick pickles.
- Storage: Quick pickles often require refrigeration, whereas fermented pickles can be stored at room temperature before opening.
Quick pickling troubleshooting
- Surface mould – Oh no! You did not submerge your veggies enough, or maybe some bits of veg floated to the surface. Best to discard and start a new batch ensuring to submerge better or get something to ensure the veg stay under water.
- The brine is cloudy – This is a good thing! Don’t worry, you didn’t use the wrong kind of salt! Fermented brine gets cloudy because it is loaded with good stuff, like lactic acid bacteria. Cloudy means it has worked. When you are done with your pickles, you can drink that stuff or add it to cold soups for probiotic punch or bread dough for flavour and salt.
Sample Lesson: Vegan Baking Course – Fruit Scone Framework
These framework % are so you can understand at a macro perspective the core components – they don’t scale linearly like a mathematical equation but is indicative for understanding the relationship of the ingredients.
In the below framework we have 4 recipes for sweet fruit based scones. Scones are a wonderful medium which you can flavour and season in infinite ways. Here are 4 of our favourite ways.
The basic fruit scones – leave out the raisins if you prefer a beautiful white scone or else change them to your favourite dried fruit (just make sure that the dried fruit is in small bite sized pieces).
Blueberry and almond – the blueberries when baked go wonderfully purple and give these scones a lovely juiciness. Use frozen blueberries for a more intense purple colour.
Walnut & date – A wonderful chef who worked with us Claire used to make these and they were always one of our favourites.
Method
- Preheat the oven to 180℃ fan.
- To prepare the flax egg, mix the ground flax with water and mix well together, then set aside to thicken and coagulate to make the binder.
- In a food processor blend the solid coconut oil with the flour, sugar, baking powder and baking soda, salt and spice (if using any spice). Pulse it until the coconut oil is just blended through the dry ingredients evenly and it resembles a breadcrumb like texture. Take care here not to over mix the dough. If you don’t have a food processor just mix by hand ensuring to use the heat of your hands to melt the coconut oil and mix it well with the flour, sugar, salt. It should reach an almost bread crumb like consistency and have no lumps of coconut oil.
- Transfer this to a large mixing bowl.
- Next add the flavour component if using, (sultanas/raisins, blueberries, chopped dates, walnuts, orange zest etc) .
- Make a slight well in the centre.
- Mix the alternative milk and flax egg together, add to the well in the dry ingredients and with clean hands mix together gently until the dough just comes together, ensure to be light and gentle with your fingers and hands, ensuring you do not over mix the dough (as you don’t want to develop any gluten).
- Tip the dough out onto a floured surface and pat down with floured hands and shape roughly into a round shape, the height of your scone cutter. Lightly flour your scone cutter and cut out your scones, they should weigh roughly 150g each, this will give you 6-7 scones based on the above framework.
- Put the scones in a container to protect their shape and place in the freezer for 20 minutes. This may seem a little unusual, but this is the magic step that will help your vegan scone rise and disperse the coconut oil evenly while baking, giving you the perfect vegan scone.
- Transfer the chilled scones to a parchment lined baking tray (ensuring to leave a few inches around each scone to allow them room to expand when baking)
- Use a pastry brush to wash each scone with some plant milk, this will help them go a lovely golden brown while baking.
- Bake at 180℃ fan for 30 minutes on the upper rack of your oven, rotating the tray half way through cooking time.
- In the case of the blueberry and almond scones, half way through baking sprinkle over the flaked almond and leave in. The reason why we add them mid way is because otherwise they burn.
- Remove from the oven and let the scones cool for 5 minutes, otherwise you’re likely to burn your mouth!
- Enjoy!
Sample Lesson: Plant-Based Cooking Course – Pasta Basics
Pasta is a staple in Italian food and is a much-loved food all around the world. The first reference to pasta dates back to the 12th century, on the Italian Island of Sicily.
Pasta is typically made from an unleavened dough of wheat flour (normally durum wheat) mixed with water and sometimes eggs and formed into various shapes, then cooked by boiling or baking.
In recent times, pasta is now being made with many other ingredients, such as black beans, rice flour, red lentils and other legumes, to make it gluten-free and high in protein.
We didn’t taste pasta until we were about 10 and we remember wondering what this strange food was! Of course, pasta is now so ubiquitous, widely available and an everyday food!
Types of pasta
There are approximately 310 specific forms of pasta in various shapes and sizes, with almost 1300 different names depending on the area in which they are consumed. Some of the more common forms of pasta include long and short shapes, tubes, flat shapes, sheets, miniature shapes for soup, those filled and stuffed and, lastly, decorative shapes
In Italy, pasta is served in 3 types of prepared dishes:
- pasta asciutta – cooked pasta served with a sauce or condiment
- pasta in brodo – pasta served as part of a soup-style dish or broth
- pasta al forno – pasta incorporated into a sauce or dish and baked in the oven.
In terms of nutrition, plain white pasta is generally made up of 31% carbohydrates / starch, 6% protein and is low in fat.
Pasta may also be enriched, which means that more vitamins and nutrients are added to it, or it can be made from wholegrain flour. Our preference, in terms of health, is to use wholemeal pasta or brown pasta, where available.
Wholemeal will be higher in fibre, so the sugars in the starch will be more slowly released into your bloodstream and deliver a more steady release of sugar. They will also fill you up more, as they are higher in fibre and have more nutrition when compared to white pasta. They won’t taste as indulgent or pleasurable as white pasta, but when served with a good sauce, most people won’t notice.
Pasta Shapes
The most common pasta shapes in our vegan world are:
Spaghetti – long and straight noodles. Also widely available in wholemeal varieties.
Linguine – a thinner, longer spaghetti. The extra surface area, when compared to spaghetti, makes lighter sauces stick better to it.
Tagliatelle – a flat, long spaghetti, normally dried in nests. It is often said that the best sauce for tagliatelle is Bolognese.
Penne – a small tube-like pasta with pointed ends, as they are cut at an angle. A very versatile pasta that holds its shape well in virtually all dishes. Widely available in wholemeal varieties.
Fusilli – thick, spiral-shaped, bite-sized pasta shapes. It is often suggested to serve this pasta with pesto, as it absorbs liquids and sauces easily.
Lasagne – the flat sheet that we tend to bake with a tomato sauce and top with a béchamel sauce.
Cannelloni – large pasta tubes that are filled and baked in a sauce.
Macaroni – famously served in a cheese sauce, these are small “elbow”-shaped pasta.
Farfalle – which means butterflies, aka bow-tie pastas. They hold sauces well and you can pair farfalle with a creamy or tomato sauce. They also go great in pasta salads.
Gluten-free pasta
Brown rice pasta – it cooks very easily, doesn’t really stick together and tastes great.
Legume-based pastas, such as red lentil pasta and black bean pasta, are generally higher in protein and do have a slight bean or legume-like flavour. They make a nice change but when compared to conventional pasta, they can taste a little strange.
Buckwheat pasta – we have found that this pasta tends to stick together. It has a really earthy taste.
The basics for boiling pasta
Often seen as a simple task, it’s not if you know how! There are many myths and confusions about how to cook pasta. Having spent lots of time with his Italian friend, Pietro, in Rome, Steve has learned how to cook pasta Italian-style.
Here’s How:
Often, the ratio of pasta to water in Italian cookbooks is 1:10 so if you’re cooking 100g of pasta, you should cook it in 1 L of water.
- First, fill and boil the kettle and if you don’t have a kettle, fill a pot and boil the water.
- Choose a pot that is big enough to fit all the pasta you are cooking so that it will have enough room and not stick together. A simple rule of thumb is that the pot should be 2–3 times the size of the volume of pasta you are cooking.
- Next, add salt to the water. Ideally, the water should have the same salinity as seawater; this might sound like a crazy amount of salt but most of the salt will end up being washed down the drain but lots of it will season the pasta. It will also give more buoyancy to the water so the pasta is less likely to stick together.
- Don’t add oil to the pasta! The oil will simply coat the pasta as you drain it, form a layer between the pasta and the sauce and make the sauce less likely to stick to the pasta. The pasta itself is largely starch, so it will want to stick to most sauces but if there is oil on the surface of the pasta, this will act as a lubricant, making the sauce more likely to slide off the pasta.
- Cook the pasta how you like it. In Italy, pasta is always cooked “al dente”, which means “to the bite”. Meaning that it is always slightly undercooked and has a little bite to it. When you bite into the pasta, there should be a tiny, firm bit in the cross section. If the pasta requires 8 minutes to cook, cook for 7, taste and then drain and cool to stop it from cooking more.
If you are familiar with Italian cooking, it can be very rule-oriented in its approach to food, often seen as quite rigid in what goes with what and what doesn’t go with what. As this is a plant-based course and we tend to be a little rebellious in nature, please excuse our deviations from some of the Italian rules. If we are insulting your Italian Nonna’s famous recipes, it is not intentional. We need to bring flavours from different areas!
Sample Lesson: The Happy Shape Food Pillars
Below are the 10 key Happy Shape Pillars that will help to ensure you achieve your goals and find your happy shape! We have explained each of them here and there is also a downloadable list, which you can print and put somewhere that you can see each day.
- Eat a whole food plant based diet – fruit, veg, beans, legumes, whole grains, nuts & seeds.
- Eat as much as you like, provided you are sticking to these food principles. All health score 5 recipes are suitable!
- Eat only wholegrain products – That means choosing brown carbs over white carbs, no white flour products etc.
- Ensure that packaged whole foods you eat with a label have a fat content below 10%.
- Don’t eat any refined or processed foods.
- Don’t eat any animal based foods – no meat, chicken or fish.
- Don’t eat any dairy products.
- Don’t eat any eggs.
- Don’t use any oil – this includes all oils: olive oil, sunflower, avocado, flax oil.
- Eat nuts, seeds and avocados sparingly.
1. Eat a whole food plant-based diet
This is a diet based 100% on whole foods, it is comprised of: fruit, veg, beans, legumes, whole grains and small amounts of nuts and seeds. The benefits of following this diet are:
- It’s high in fibre
- It’s naturally low in fat
- It does not contain dietary cholesterol
- It’s high in water
- It does not contain saturated or trans fats
- It’s packed with antioxidants and other phytonutrients which aid blood flow.
- It’s low in calories
2. Eat as much as you like, provided you stick to the guidelines
With this diet there is no calorie counting, no portion control (except for desserts!), so you can eat as much as you like, providing you are sticking to these 10 guidelines.
Here’s how this works:
A whole food plant based diet is naturally high in fibre:
- Fibre fills you up.
- It slows down the speed at which you eat.
- High-fibre foods take longer to eat as a result your body registers that you are filling up quicker and reduces your hunger.
- Fibre contains no calories.
- You only get fibre from whole plant foods.
Whole food plant-based foods are high in water:
- Water adds weight to your food
- Water has no calories
A whole food plant-based diet is naturally low in calories:
- By cutting out refined and processed foods, you can dramatically reduce overeating of ‘empty’ calories – refined foods that have no fibre and don’t fill you up or satisfy your hunger.
- By cutting out animal foods, we further reduce calories.
- By cutting out oil, we further cut the calories.
- The only recipes we have included portion control in this book are not surprisingly the dessert section, as they are more calorie-dense and contain less water.
3. Use only wholegrain products
Wholegrain products are the brown carbs : brown rice, wholemeal pasta, wholemeal couscous, wholemeal noodles, 100% wholemeal bread. On this challenge we want you to eat 100% of your grain-based foods from wholegrain/wholemeal sources.
At least 80% of the carbohydrates we eat in the UK and Ireland are white carbs. We want to replace these white carbs that are low in fibre and devoid of any real nutrition with 100% brown carbs.
Wholegrain products are:
- High in fibre
- Low in calories
- Packed with nutrition
4. Ensure the packaged whole foods that you eat with a label have a fat content below 10%
To find out the fat percentage content of a product, look at the back of the product’s packet, where you will find the nutritional information. Fat will be listed in weight per the size of the product and per 100g. Simply look at the fat content per 100g and this will give you the percentage fat. Anything above 10g per 100g is not suitable for the challenge.
5. Don’t eat any refined or processed foods
More than half of all the calories eaten in Ireland, the UK, and most of the first world come from refined and processed foods, so we really do understand how challenging giving up these foods is. We advise you to simply focus on the 4 weeks of this challenge and don’t be thinking beyond this. What is sustainable is joy, feeling good, having more energy, feeling happy and confident in your body so we suggest you focus on these!
By cutting out these refined and processed foods you are avoiding a lot of ‘empty’ calories that are devoid of nutrition and have other negative effects on your health.
Here are some facts about these foods:
- They have no fibre
- They are usually high sugar
- They are usually high in salt (80% of the salt we eat is not from the salt shaker but from refined and processed foods)
- They are usually high in fat, especially saturated fat, which has been linked to gaining weight
- They have the biggest effect on increasing cholesterol levels
- They are usually high in calories
- They are ‘empty’ calories meaning the have very little vitamins or minerals in them and will not fill you up either
By refined and processed foods, we mean chocolate bars, snack bars, crisps, processed cereals, cakes, croissants, fizzy drinks etc. This means saying goodbye to most packaged foods, as they are typically a combination of fat, sugar and salt, and are highly addictive.
6. Don’t eat any animal based foods – no meat, chicken or fish
You may think eating no animal based foods for 4 weeks sounds extreme but we think that the reality of 45% of people dying in Europe every year due to heart disease is even more extreme! By animal based foods we mean beef, lamb, chicken turkey, ham, salami, sausages, bacon and even fish too. That is red meat, white meat and fish – basically exclude any foods that had a face or a mother! Again, focus on the fact that this is a 4 week challenge, it is a limited time, you can take a rain check after the 4 weeks.
Why we exclude animal based foods:
- They have no fibre
- They are high in saturated fat
- They contain cholesterol
- They contain very little antioxidants (the only antioxidants they contain are from the plants the animals consumed)
- They are low in vitamins and minerals compared to plant-based foods
Animal foods contain only 2 of the 3 macro-nutrients: fat and protein. They are missing the number-one source of energy for your body: carbohydrates. Whole plant foods have 20-80% of their calories coming from carbohydrates, giving you a slow sustained energy release.
Animal foods are also high in saturated fat and contain trans fats, both of which are considered the ‘bad’ fats that can cause poor health outcomes. Whole plant foods only contain the ‘good fat’ such as polyunsaturated and monounsaturated fats.
7. Don’t eat any dairy products
This means cheese, milk, butter and yogurt made from dairy products. Dairy products are typically high in saturated fat, particularly cheese, which is the highest source of saturated fat in our diet. They also contain cholesterol and are low in vitamins and minerals when compared to whole plant foods.
Why we exclude dairy products:
- They are high in saturated fat
- They contain cholesterol
- They are often high in hormones
- They have no fibre
8. Don’t eat any eggs
Eggs are the most concentrated source of cholesterol in the common diet, one large egg has about 200 milligrams of dietary cholesterol in the yolk with the daily maximum limit of cholesterol in your diet being 300mg and only 200mg if you are at risk of heart disease.
9. Don’t use any oil, that includes all oils – olive oil, sunflower, avocado, flax oil
Bear with us, we know this sounds really harsh and extreme. However, in our experience of having tens of thousands of people reduce their risk of heart disease and improve their health in just 4 weeks, cutting out oil is highly beneficial. It effectively lowers cholesterol levels, improves blood flow, improves skin and assists in weight loss, and you won’t even taste the difference, the food is equally as delicious!
We are aware that this may come across as super contentious and that on top of all the other ‘DONTS’ on this list, excluding oil seems very extreme but bear with us! Oil is 100% fat and a refined fat too.
Oil is the most calorie dense substance on the plant at 8000/cal per litre, that is 120 calories/tablespoon. These are ‘empty’ calories as in they have no fibre and little to no nutrition. It is the ultimate refined food in that we extract it from the whole food, discarding the fibre and nearly all the vitamins and minerals leaving us with nothing but the fat.
We are not against fat entirely, but we recommend you get your fat from whole food sources such as small amounts of nuts, seeds, and avocados. Most people who start our challenges/courses think they could never cook without using oil but end up surprised by how easy it is and how quickly their palate adjusts to oil free cooking. It is also much easier to wash your pots and pans after cooking without oil!
10. Eat nuts, seeds and avocados sparingly
Here we are talking about raw nuts and seeds (exclude all salted or roasted nuts ). Raw nuts and seeds are super healthful and packed full of beneficial fats. However, we only need very little of them in order to get their benefits. Particularly with nuts, it is very easy to sit there and eat a full 100g while watching something on your phone, however, we only need very little to get the real benefit from them and going above this can cause inflammation and have a negative effect on our cardiovascular health.
Nuts
We ask you to limit your intake of nuts to about 30g a day which is about:
- 20 almonds
- 10 walnuts
- 10 brazil nuts
- 15 pecan nuts
The healthiest of all nuts in terms of the highest omega 3 and lowest saturated fat are walnuts. In terms of nut butters and tahini we ask you to cut them out for the 4 weeks of the challenge (unless they are included in one of our recipes which is okay). As a snack, they are just so tasty which makes them very difficult to stop eating, so best to just go cold turkey and exclude them for the 4 weeks.
Seeds
We have found people are much less likely to overeat seeds, however, they are also a concentrated source of calories (about 5000cals/kg) and average about 30% fat (but tend to be low in saturated fat). We definitely encourage you to eat seeds but not a full bag!
Try to limit your seed intake to a few tablespoons a day or approx 30g. Seeds are great sprinkled over your porridge in the morning or over a salad at lunch.
Avocados
Like seeds and nuts, avocados are super healthy for you. However, they are energy dense and high in fat, so we encourage you to limit your avocado intake to a maximum of half an avocado, every second day.