
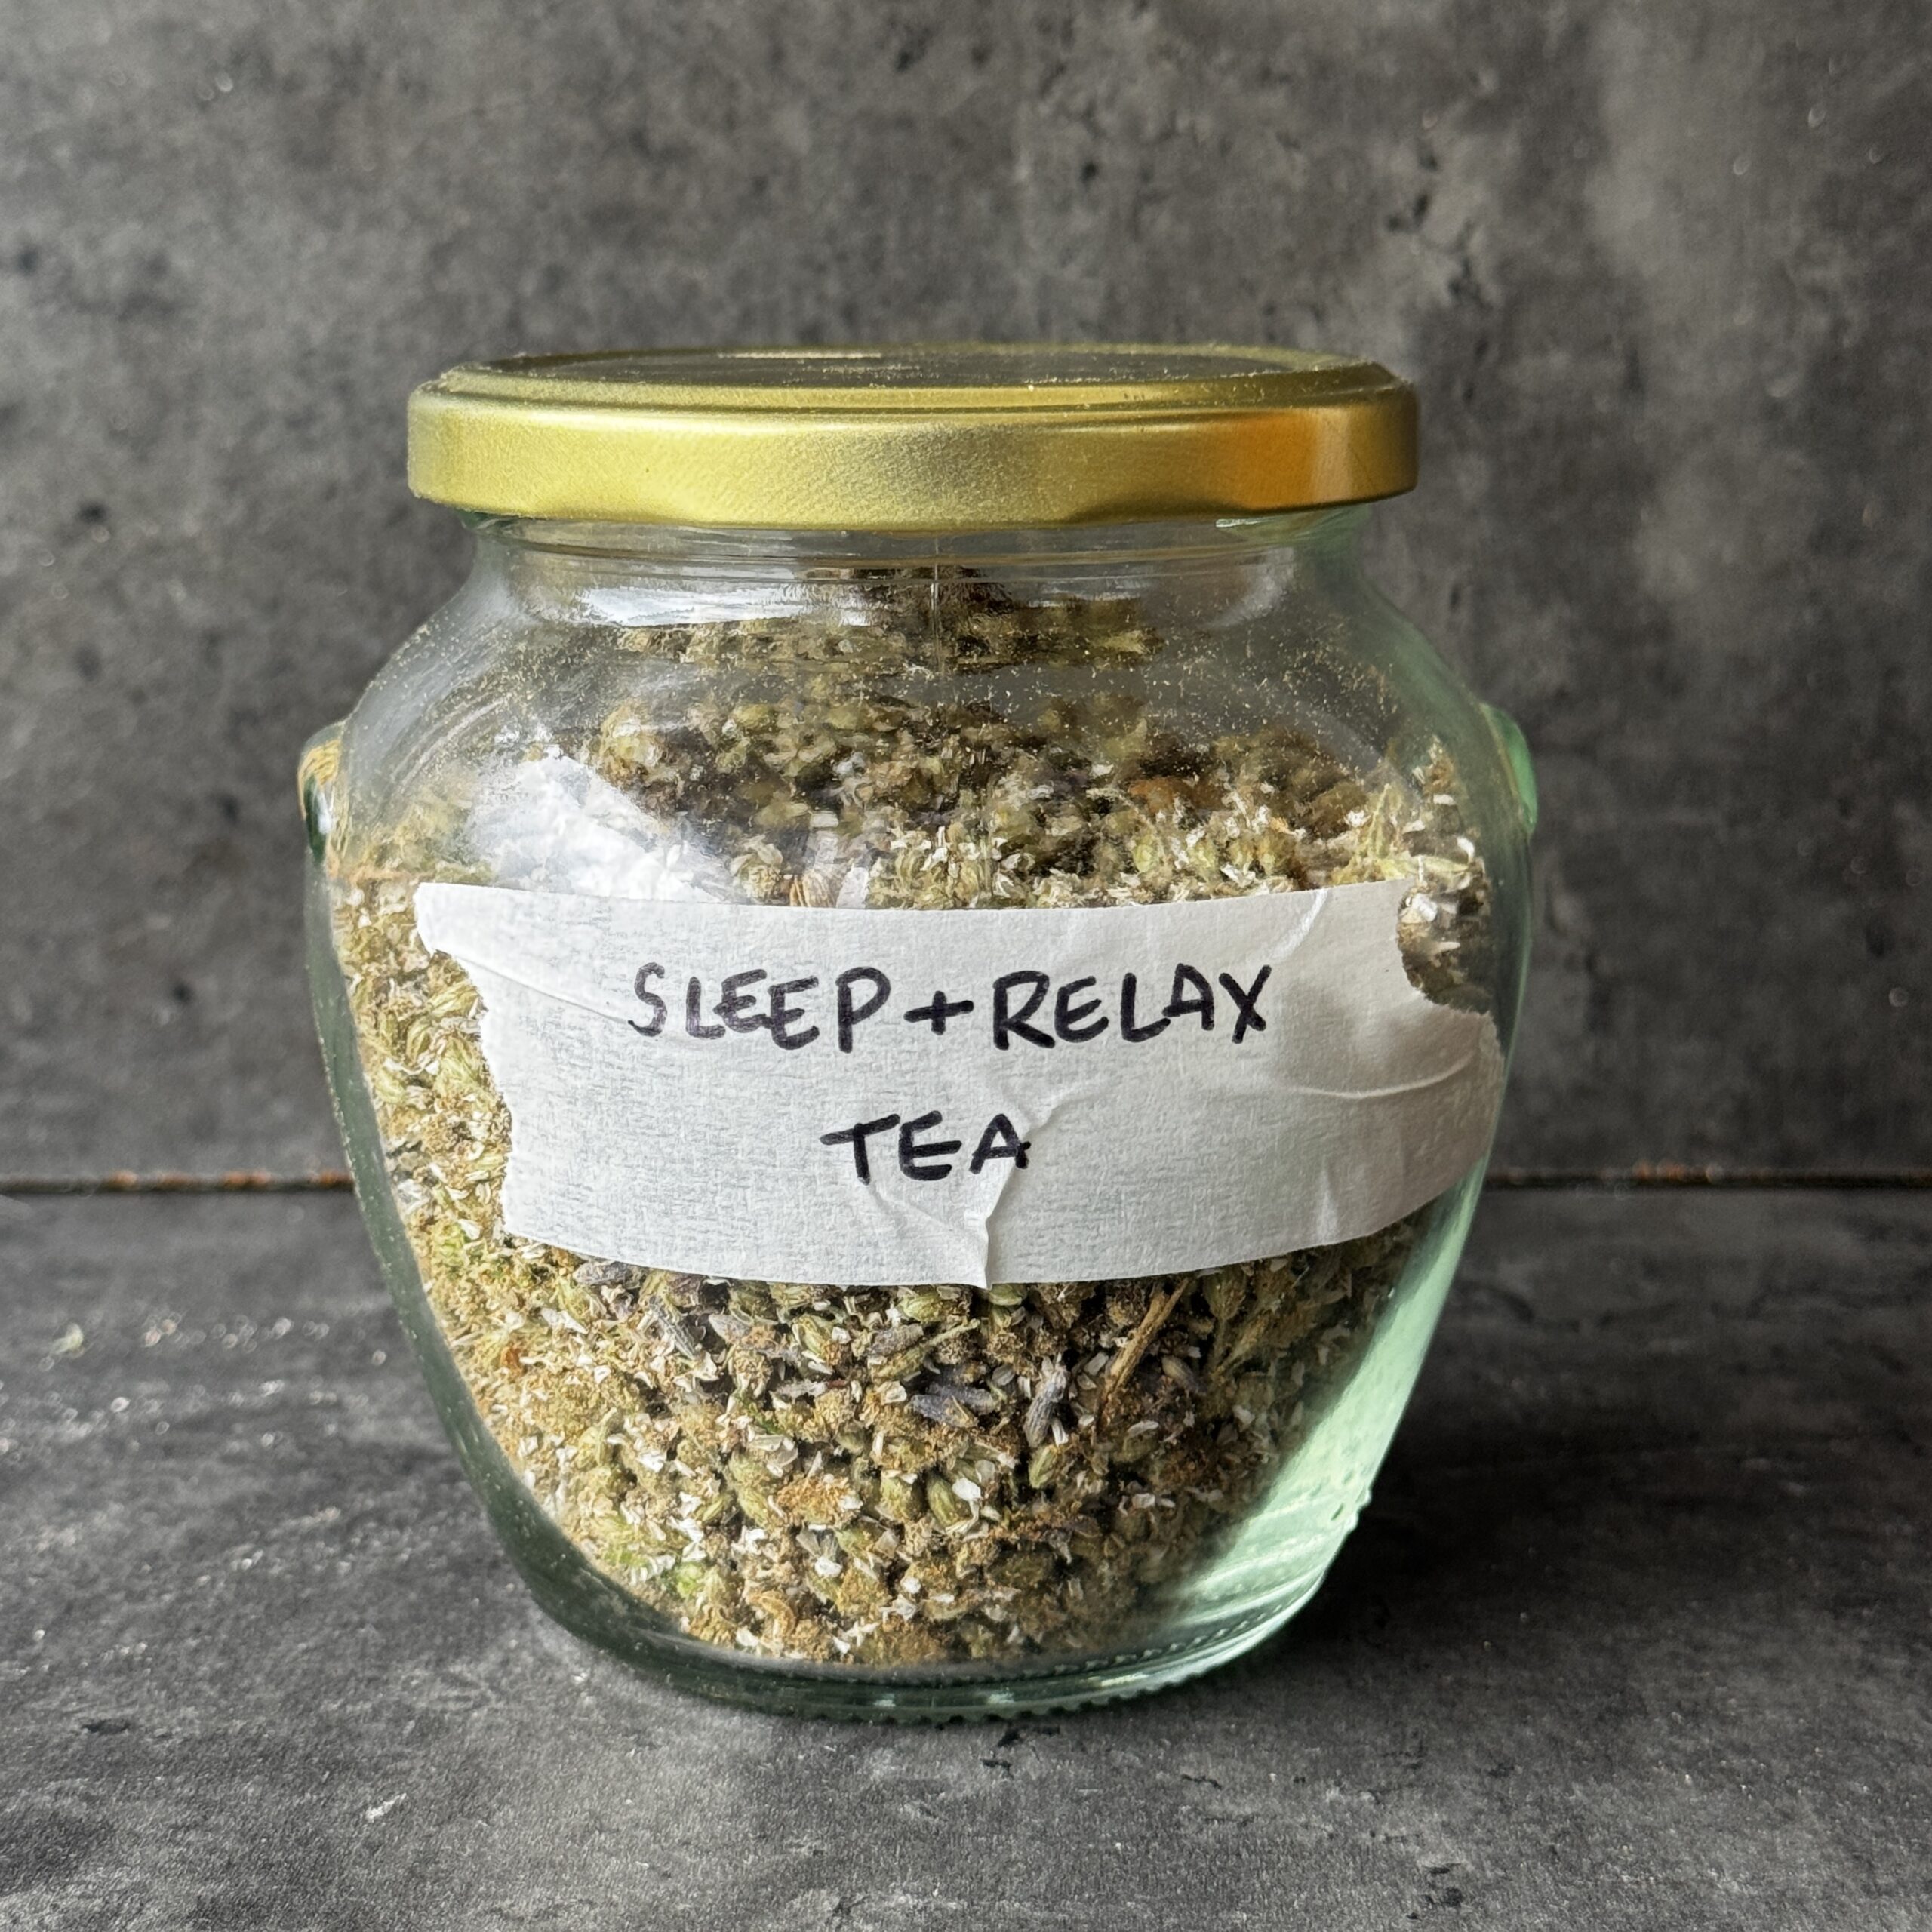
Wild Foraged Sleep & Relaxation Tea
Takes 2 days 15 minutes
Serves 20
Ingredients
- 10 –15 dried yarrow flower heads
- 5 dried lavender flower heads
- 50 dried wild chamomile flower heads
- 1 tbsp fennel seeds
- 1 tbsp whole cloves
- 1 tbsp cardamom pods
- 1 tbsp ground ginger
Instructions
- Dry the foraged flowers: After foraging, gently check your yarrow, chamomile and lavender, removing any unwanted leaves or debris. Spread the flowers out in a single layer and leave them to dry for a few days in indirect sunlight, somewhere warm, dry and well ventilated, until completely dry.
- Prepare the flowers: Once dried, use your fingers to gently pull the individual yarrow flowers from their stems. For the pineapple weed, gently pull the individual flower buds from their stems using your fingers. Do the same with the lavender flowers.
- Make the blend: Add the dried yarrow, pineapple weed and lavender flowers to a bowl along with the fennel seeds, cloves, cardamom pods and ground ginger.
- Mix gently: Gently combine everything with your hands or a spoon, being careful not to crush the delicate flowers too much.
- Store: Transfer the tea blend to a clean, dry airtight jar. Store somewhere cool and dry, away from direct sunlight.
- To Serve: Add 1–2 teaspoons of the tea blend per mug to a tea strainer or infuser. Place in your mug and pour over freshly boiled water. Allow to steep for 5–10 minutes, depending on how strong you like it. Remove the strainer, let it cool slightly and enjoy as part of your evening wind-down.
Notes
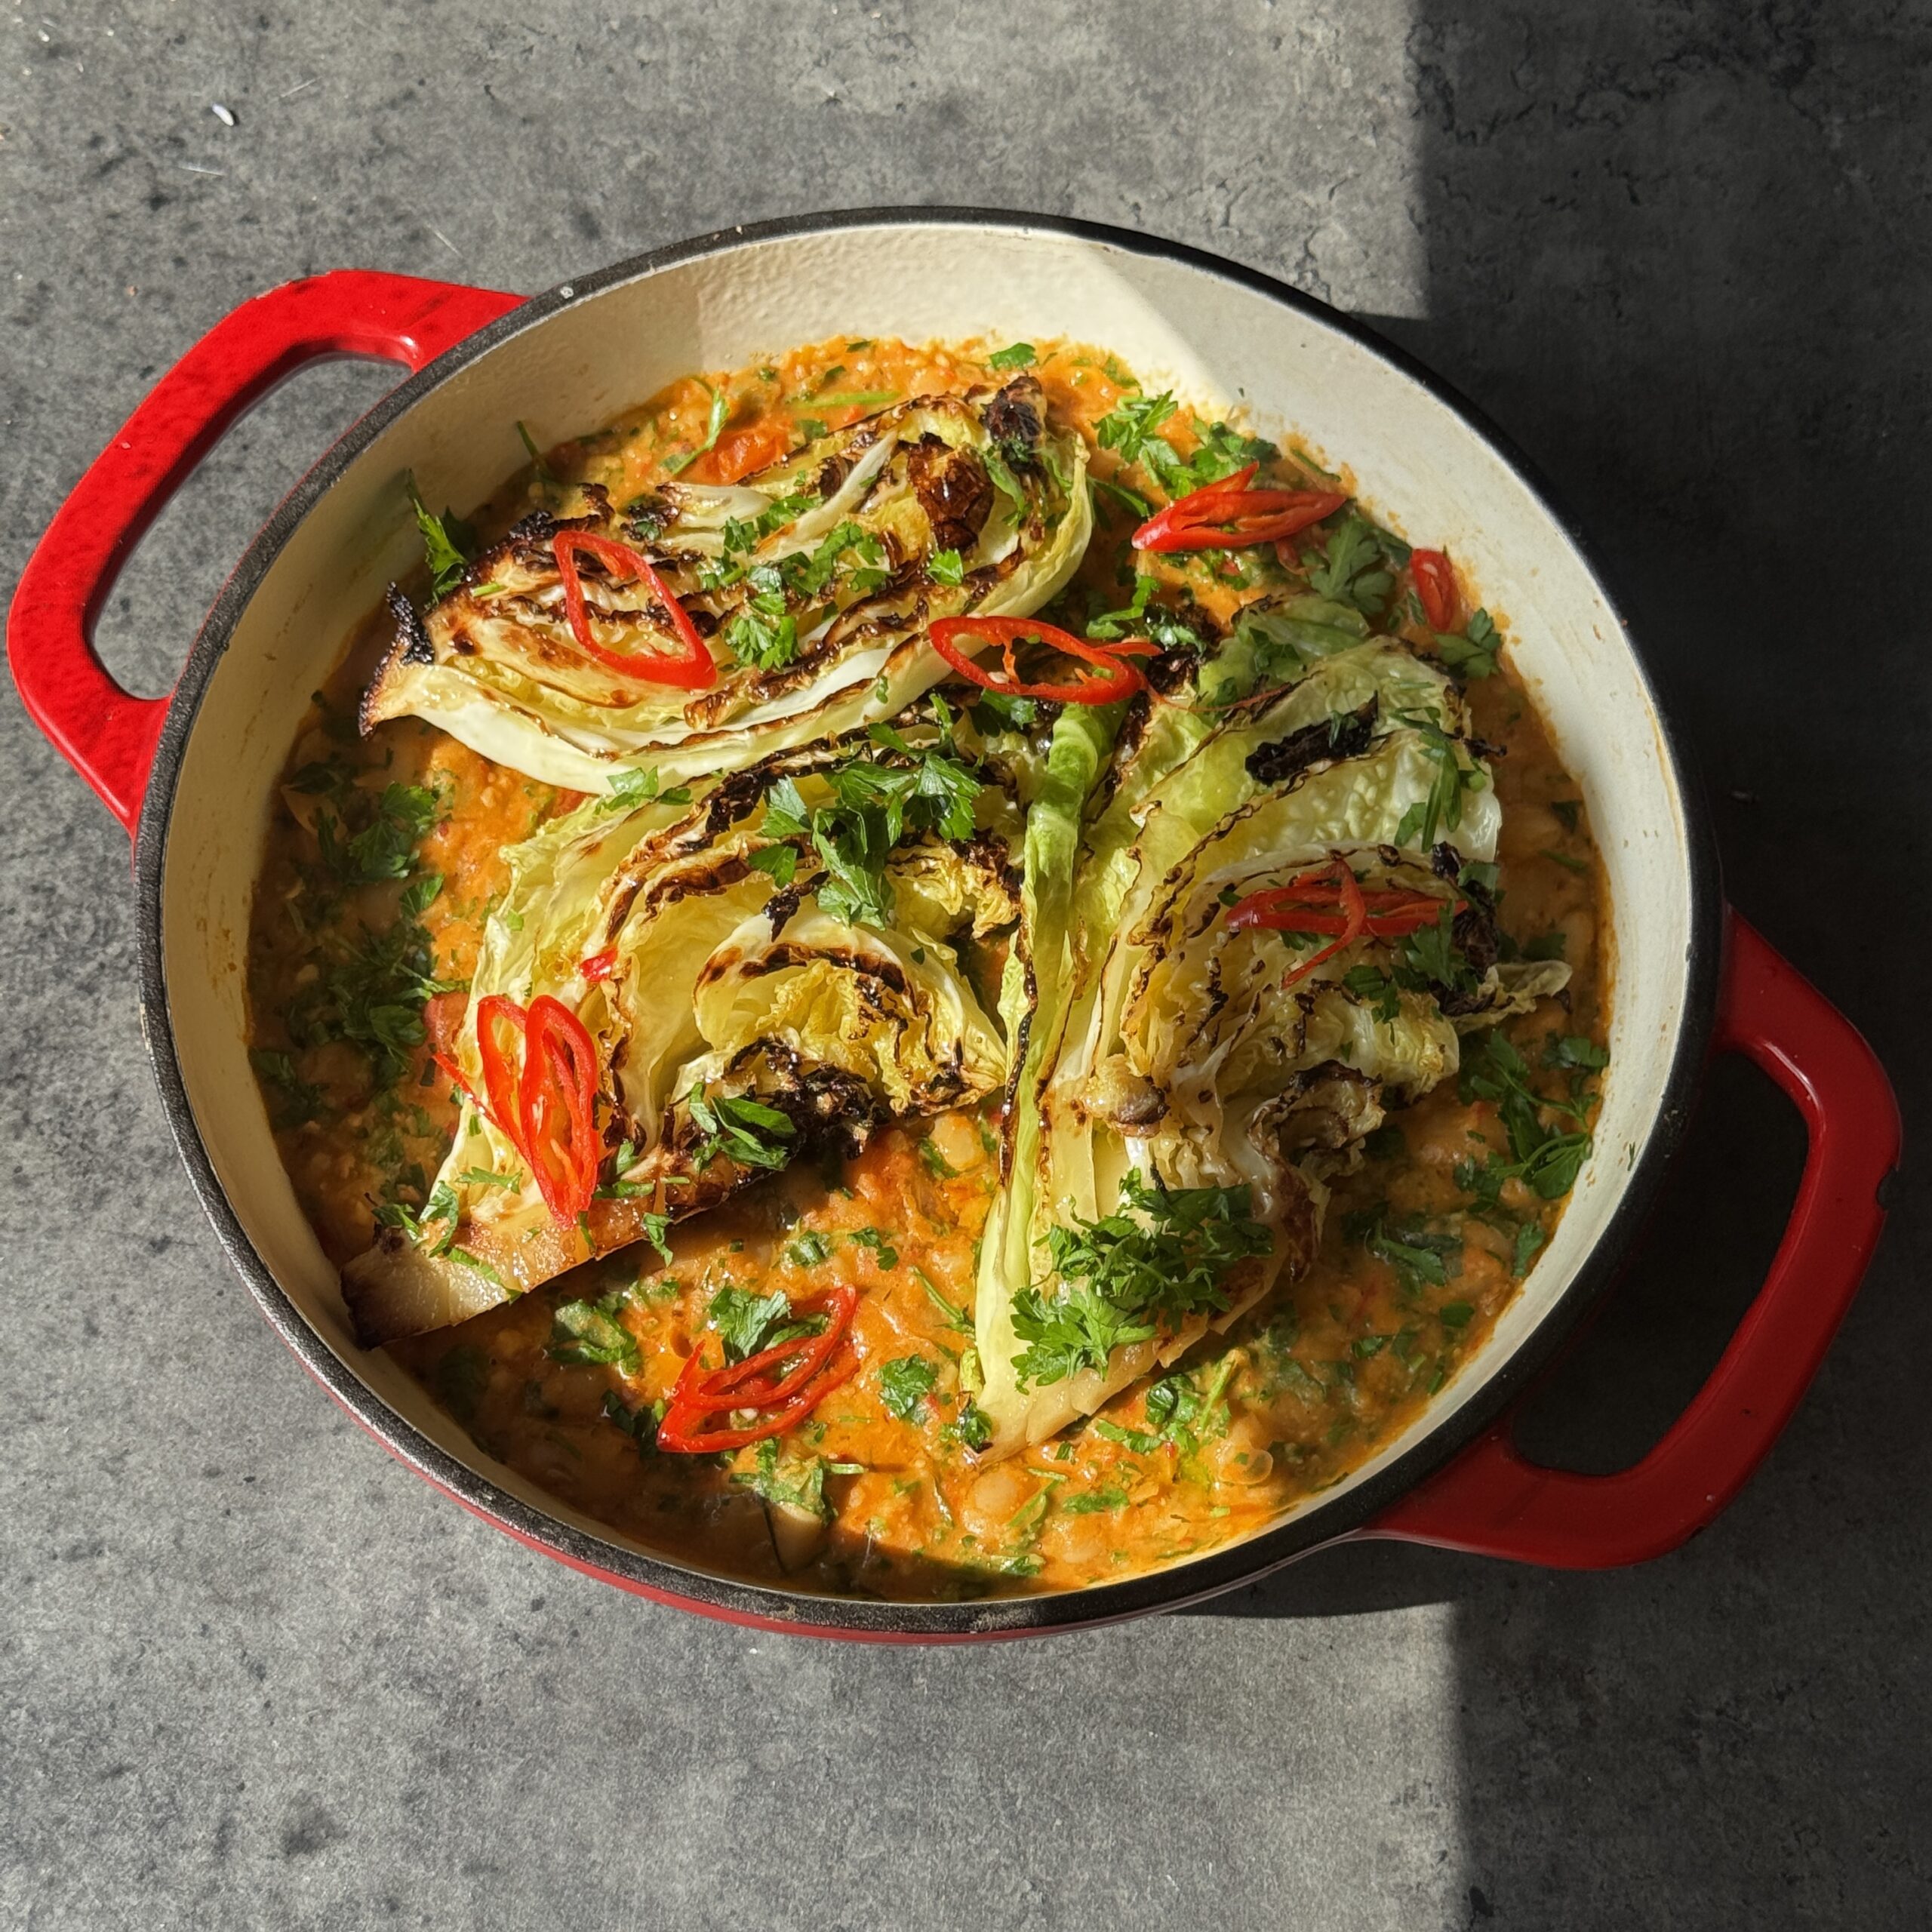
15-Minute Charred Cabbage with Spicy Red Pepper Butter Beans
Takes 15 minutes
Serves 2
Ingredients
- ½ head Savoy Pointed, or Sweetheart Cabbage (cut into 2 thick wedges, core left intact)
- 2 tins x 400g Butter Beans or Cannellini Beans (drained)
- 150 g Farm fresh cherry tomatoes
- 3 – 4 tbsp The Happy Pear Spicy Red Pepper Pesto
- 1 tbsp Extra virgin olive oil
- 100 ml oat milk or milk of choice
- 1 small handful Fresh farm coriander coarsely chopped
- ½ Fresh lemon
Instructions
- Sear the Cabbage (3–4 mins): Heat 1 tbsp of olive oil in a wide frying pan over medium-high heat. Season the cabbage wedges with a pinch of salt. Place them cut-side down, press firmly with a spatula, and sear for 3–4 minutes on both open side until deeply charred and caramelized on the bottom.
- Steam to Tender Core (3–4 mins): Flip the cabbage wedges so they are on their back (the outside facing part). Immediately pour 4 tablespoons (approx. 60ml) of water directly into the hot pan around the cabbage. Cover immediately with a tight-fitting lid or baking tray to trap the steam. Lower the heat to medium and steam for 3–4 minutes until a knife slides effortlessly through the core.
- Rest & Glaze: Remove the cabbage transfer them to a warm plate, and set aside while you build the beans.
- Deglaze & Cook the Beans (3 mins): Keep the pan on medium heat. Toss in the cherry tomatoes and let them blister in the pan juices for 1 minute. Add 3 tbsp of Spicy Red Pepper Pesto, the drained butter beans, 100ml of oat milk), and a fresh squeeze of lemon juice. Use a wooden spoon to scrape up all the rich, caramelized cabbage drippings stuck to the bottom of the pan.
- Simmer & Assemble: Simmer for 2 minutes, gently mashing a few butter beans with your spoon to thicken the sauce into a rich, glossy gravy. Taste and season this sauce so it is to your liking.
- Serve and enjoy – Spoon the creamy beans and blistered tomatoes into shallow serving bowls, nestle the warm charred cabbage wedge on top, and finish with a generous scatter of fresh farm coriander.

Healthier Twix Bars
Takes 1 hour 15 minutes
Serves 8
Ingredients
Almond Shortbread Base
- 180 g ground almonds almond flour
- 70 g coconut oil melted
- 70 maple syrup
- ½ tsp vanilla extract
- Pinch sea salt
Peanut Caramel
- 150 g smooth peanut butter
- 120 ml maple syrup
- 1 tsp vanilla extract
- Pinch sea salt
Chocolate Topping
- 200 g dark chocolate 70–85%
Instructions
Make the Almond Shortbread
- In a bowl, mix all ingredients until a sticky, moldable dough forms. Press evenly into a lined small square or loaf tin. Place in the freezer or fridge for 15–20 minutes to firm up.
Make the Peanut Caramel
- Mix everything together in a bowl until smooth and glossy and caramel like.
Assemble
- Carefully blob spoonfuls of the peanut butter caramel evenly over the cooled almond base. Spread it out ensuring that the almond base stays intact. Place in the freezer for 20 minutes to firm up. Melt the dark chocolate. Pour over the caramel layer and spread evenly. Chill in the fridge for 30 minutes until set.
To Serve
- Slice into bars or fingers to mimic the shape of a Twix bar. Store in the fridge for up to 1 week (or freeze for longer).
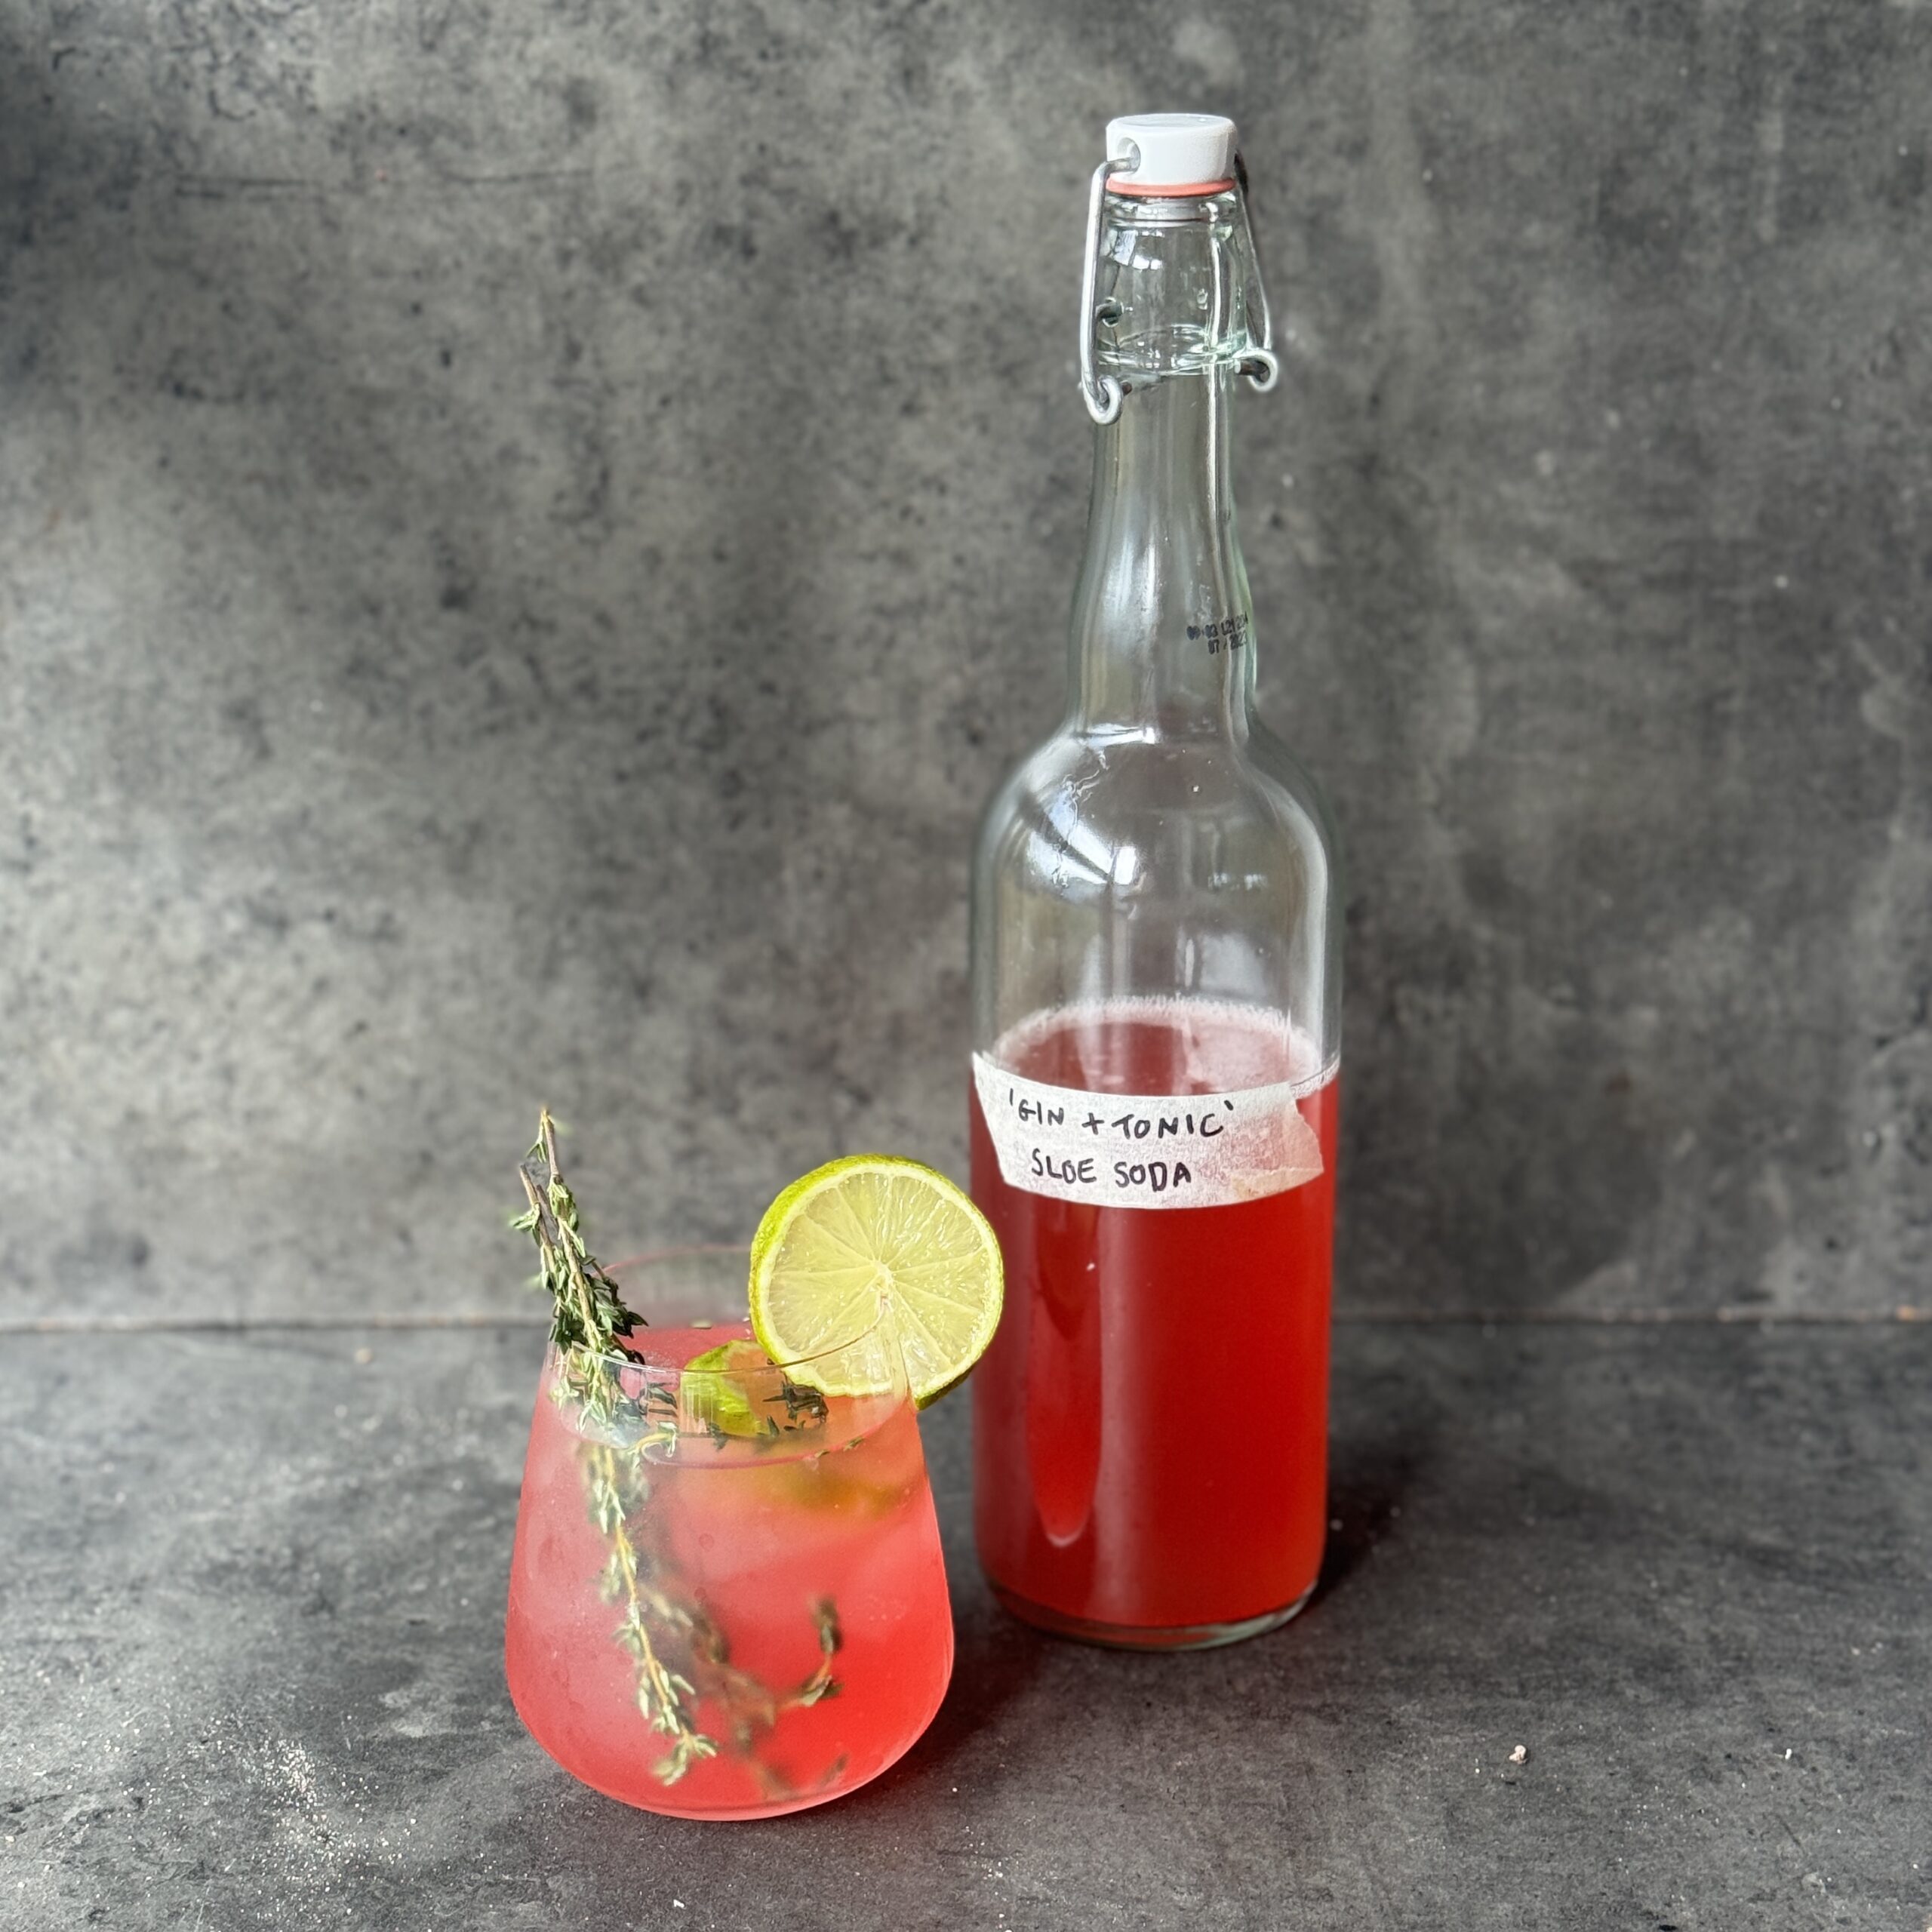
Wild-Fermented Sloe Soda (non-alcoholic gin & tonic)
Takes 3 days 10 minutes
Serves 8
Ingredients
- 1.8 litres 7½ cups filtered or spring water
- 200 g 1½ cups fresh sloe berries, pricked all over with a needle or lightly crushed
- 120 g ½ cup + 1 tbsp unrefined sugar or raw honey
- 15 g 2 tbsp dried juniper berries, lightly crushed
- 3 g 1 tsp coriander seeds, lightly crushed
- 1 sprig fresh rosemary
- Peel and juice of 2 organic unwashed lemons
- 1 pinch sea salt
Instructions
- Add 1 litre (4 cups) of the water to a large saucepan along with the sloe berries, juniper berries, coriander seeds, rosemary and sugar.
- Bring to the boil, then reduce the heat and gently simmer for 15 minutes.
- Remove from the heat, stir through the sea salt and add the remaining 800ml (3⅓ cups) cold water. Leave to cool to room temperature.
- Once completely cool, strain the liquid through a sieve into a clean glass jar or demijohn. Make sure the liquid is below 25°C before adding the lemon, as higher temperatures can kill the wild yeast.
- Add the fresh lemon juice and strips of lemon peel. Stir vigorously for about 1 minute to incorporate some oxygen.
- Cover the jar with a clean cloth or coffee filter and secure with a rubber band. Leave somewhere warm, ideally around 20–24°C, for 24–48 hours, stirring twice a day.
- Once you see small bubbles forming around the edges and hear a gentle fizzing sound, the fermentation is active. Strain out the lemon peel and pour the soda into clean, airtight swing-top bottles, leaving around 2.5cm (1 inch) of headspace.
- Leave the sealed bottles at room temperature for a further 24–36 hours to build carbonation. If using plastic bottles, they should feel firm when carbonated. If using glass bottles, open one carefully to check the level of fizz.
- Once nicely carbonated, transfer the bottles straight to the fridge and chill for at least 12 hours before serving.
- Serve ice cold over ice with a squeeze of fresh lemon and a twist of lemon peel or a sprig of rosemary.
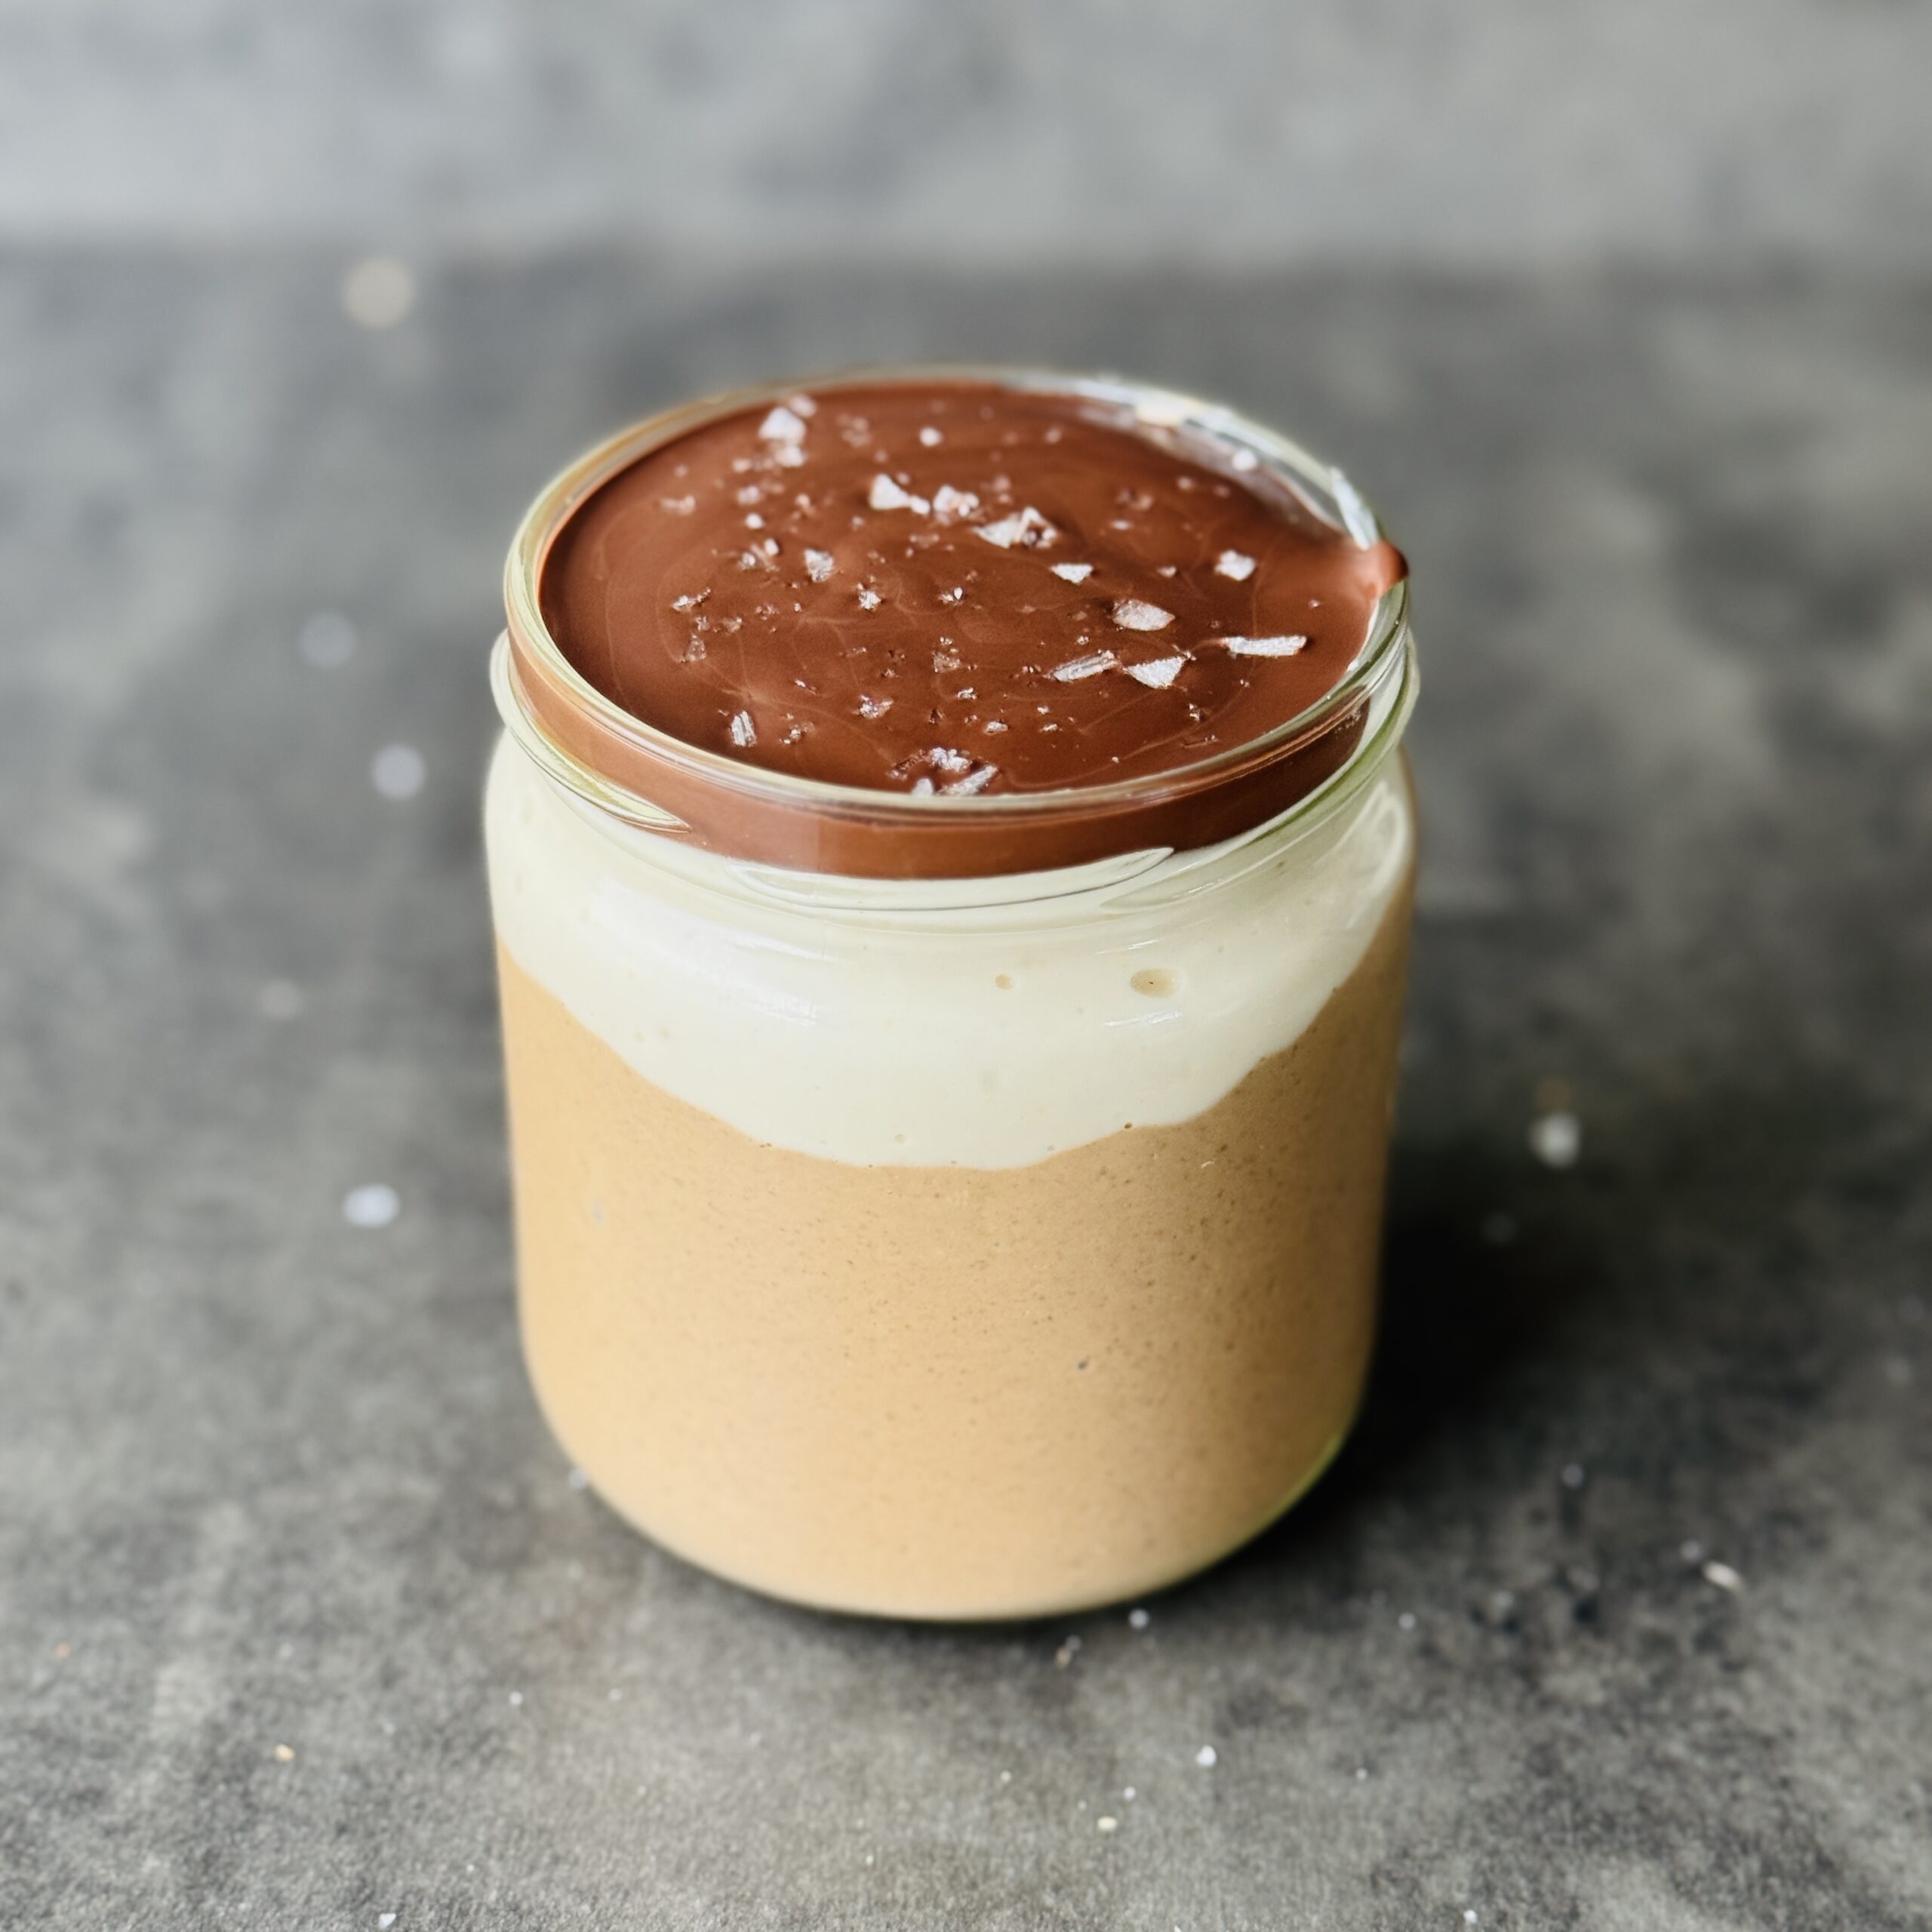
High-Protein Tiramisu Blended Oats
Takes 20 minutes
Serves 4
Ingredients
The Blended Oat & Coffee Base
- 150 g Rolled oats
- 50 g Defatted peanut flour
- 24 g 2 tbsp Chia seeds
- 1 tbsp Cocoa powder
- 200 ml Plant-based milk
- 225 ml Strong black coffee cooled
- 50 ml approx. 3–4 tbsp Maple syrup (to taste)
- 1 tsp Vanilla extract
- Pinch of salt
The High-Protein Cream Layer
- 350 g Plain coconut yogurt
- 40 g Vanilla pea protein powder or unflavored pea protein + an extra splash of maple syrup
- 1 –2 tbsp Plant milk only if needed to smooth out the protein powder
The Crisp Chocolate Shell
- 50 g Dark chocolate 70% or higher
- 1 tsp Coconut oil
Instructions
Blend the oat base
- Process the oats, peanut flour, chia seeds, cocoa, coffee, and milk until smooth. In a high-speed blender, combine the 150g oats, 50g peanut flour, 24g chia seeds, 1 tbsp cocoa powder, 250ml plant milk, 225ml cooled coffee, maple syrup, vanilla extract, and a pinch of salt. Blend on high for 45–60 seconds until completely smooth and pourable, then divide equally among 4 jars or glasses.
Fortify the coconut yogurt
- Whisk the pea protein powder directly into the coconut yogurt until velvety. In a medium bowl, combine the 400g coconut yogurt and 40g pea protein powder. Whisk vigorously until the protein powder is completely integrated and no dry lumps remain. If the mixture becomes too thick or chalky, whisk in 1–2 tablespoons of plant milk until it reaches a smooth, spreadable custard consistency.
Layer the cream
- Spoon the protein-packed vanilla yogurt over the mocha oat base. Gently divide the fortified coconut yogurt mixture among the 4 glasses, smoothing it out with the back of a spoon to create a flat, distinct white layer on top of the blended oats.
Melt the chocolate topping
- Melt the dark chocolate with coconut oil in short microwave bursts. Break the 50g dark chocolate into a small microwave-safe bowl and stir in 1 tsp of coconut oil. Microwave in 20-second intervals, stirring thoroughly between each burst, until the chocolate is completely melted, glossy, and liquid.
Seal and set
- Spread a thin layer of melted chocolate over each jar and chill until firm. Pour the melted chocolate evenly over the yogurt layer in each of the 4 glasses, tilting the jars to ensure the chocolate coats the surface completely to the edges. Place the jars in the fridge for 10 minutes to let the chocolate shell harden into a satisfying snap, or store them overnight for a quick morning breakfast.

Chocolate Yoghurt Berry Bites
Takes 19 minutes
Serves 8
Ingredients
- 8 ice cubes
- 150 g dark chocolate
- 120 g coconut yoghurt
- 100 g fresh berries such as raspberries, blueberries or strawberries
- Optional: a little maple syrup or vanilla to sweeten the yoghurt
Instructions
Melt the chocolate
- Break the dark chocolate into a bowl and gently melt over a bain-marie or in short bursts in the microwave, stirring until completely smooth.
Create the chocolate cubes
- Place the 8 ice cubes on a wire cooling rack with a baking sheet underneath to catch any excess chocolate. Pour the melted chocolate generously over each ice cube, making sure the chocolate coats the sides and forms a little cube-shaped shell.
Let them set
- Leave the chocolate-covered ice cubes for a few minutes until the chocolate has completely hardened. You can pop them into the fridge to speed this up.
Remove the ice cubes
- Once the chocolate is set, gently lift each chocolate shell from the ice cube. You should be left with little hollow chocolate cube shapes.
Fill them up
- Spoon coconut yoghurt into each chocolate shell and top with fresh berries.
Enjoy!
- Eat straight away while the chocolate is crisp and the yoghurt is creamy.
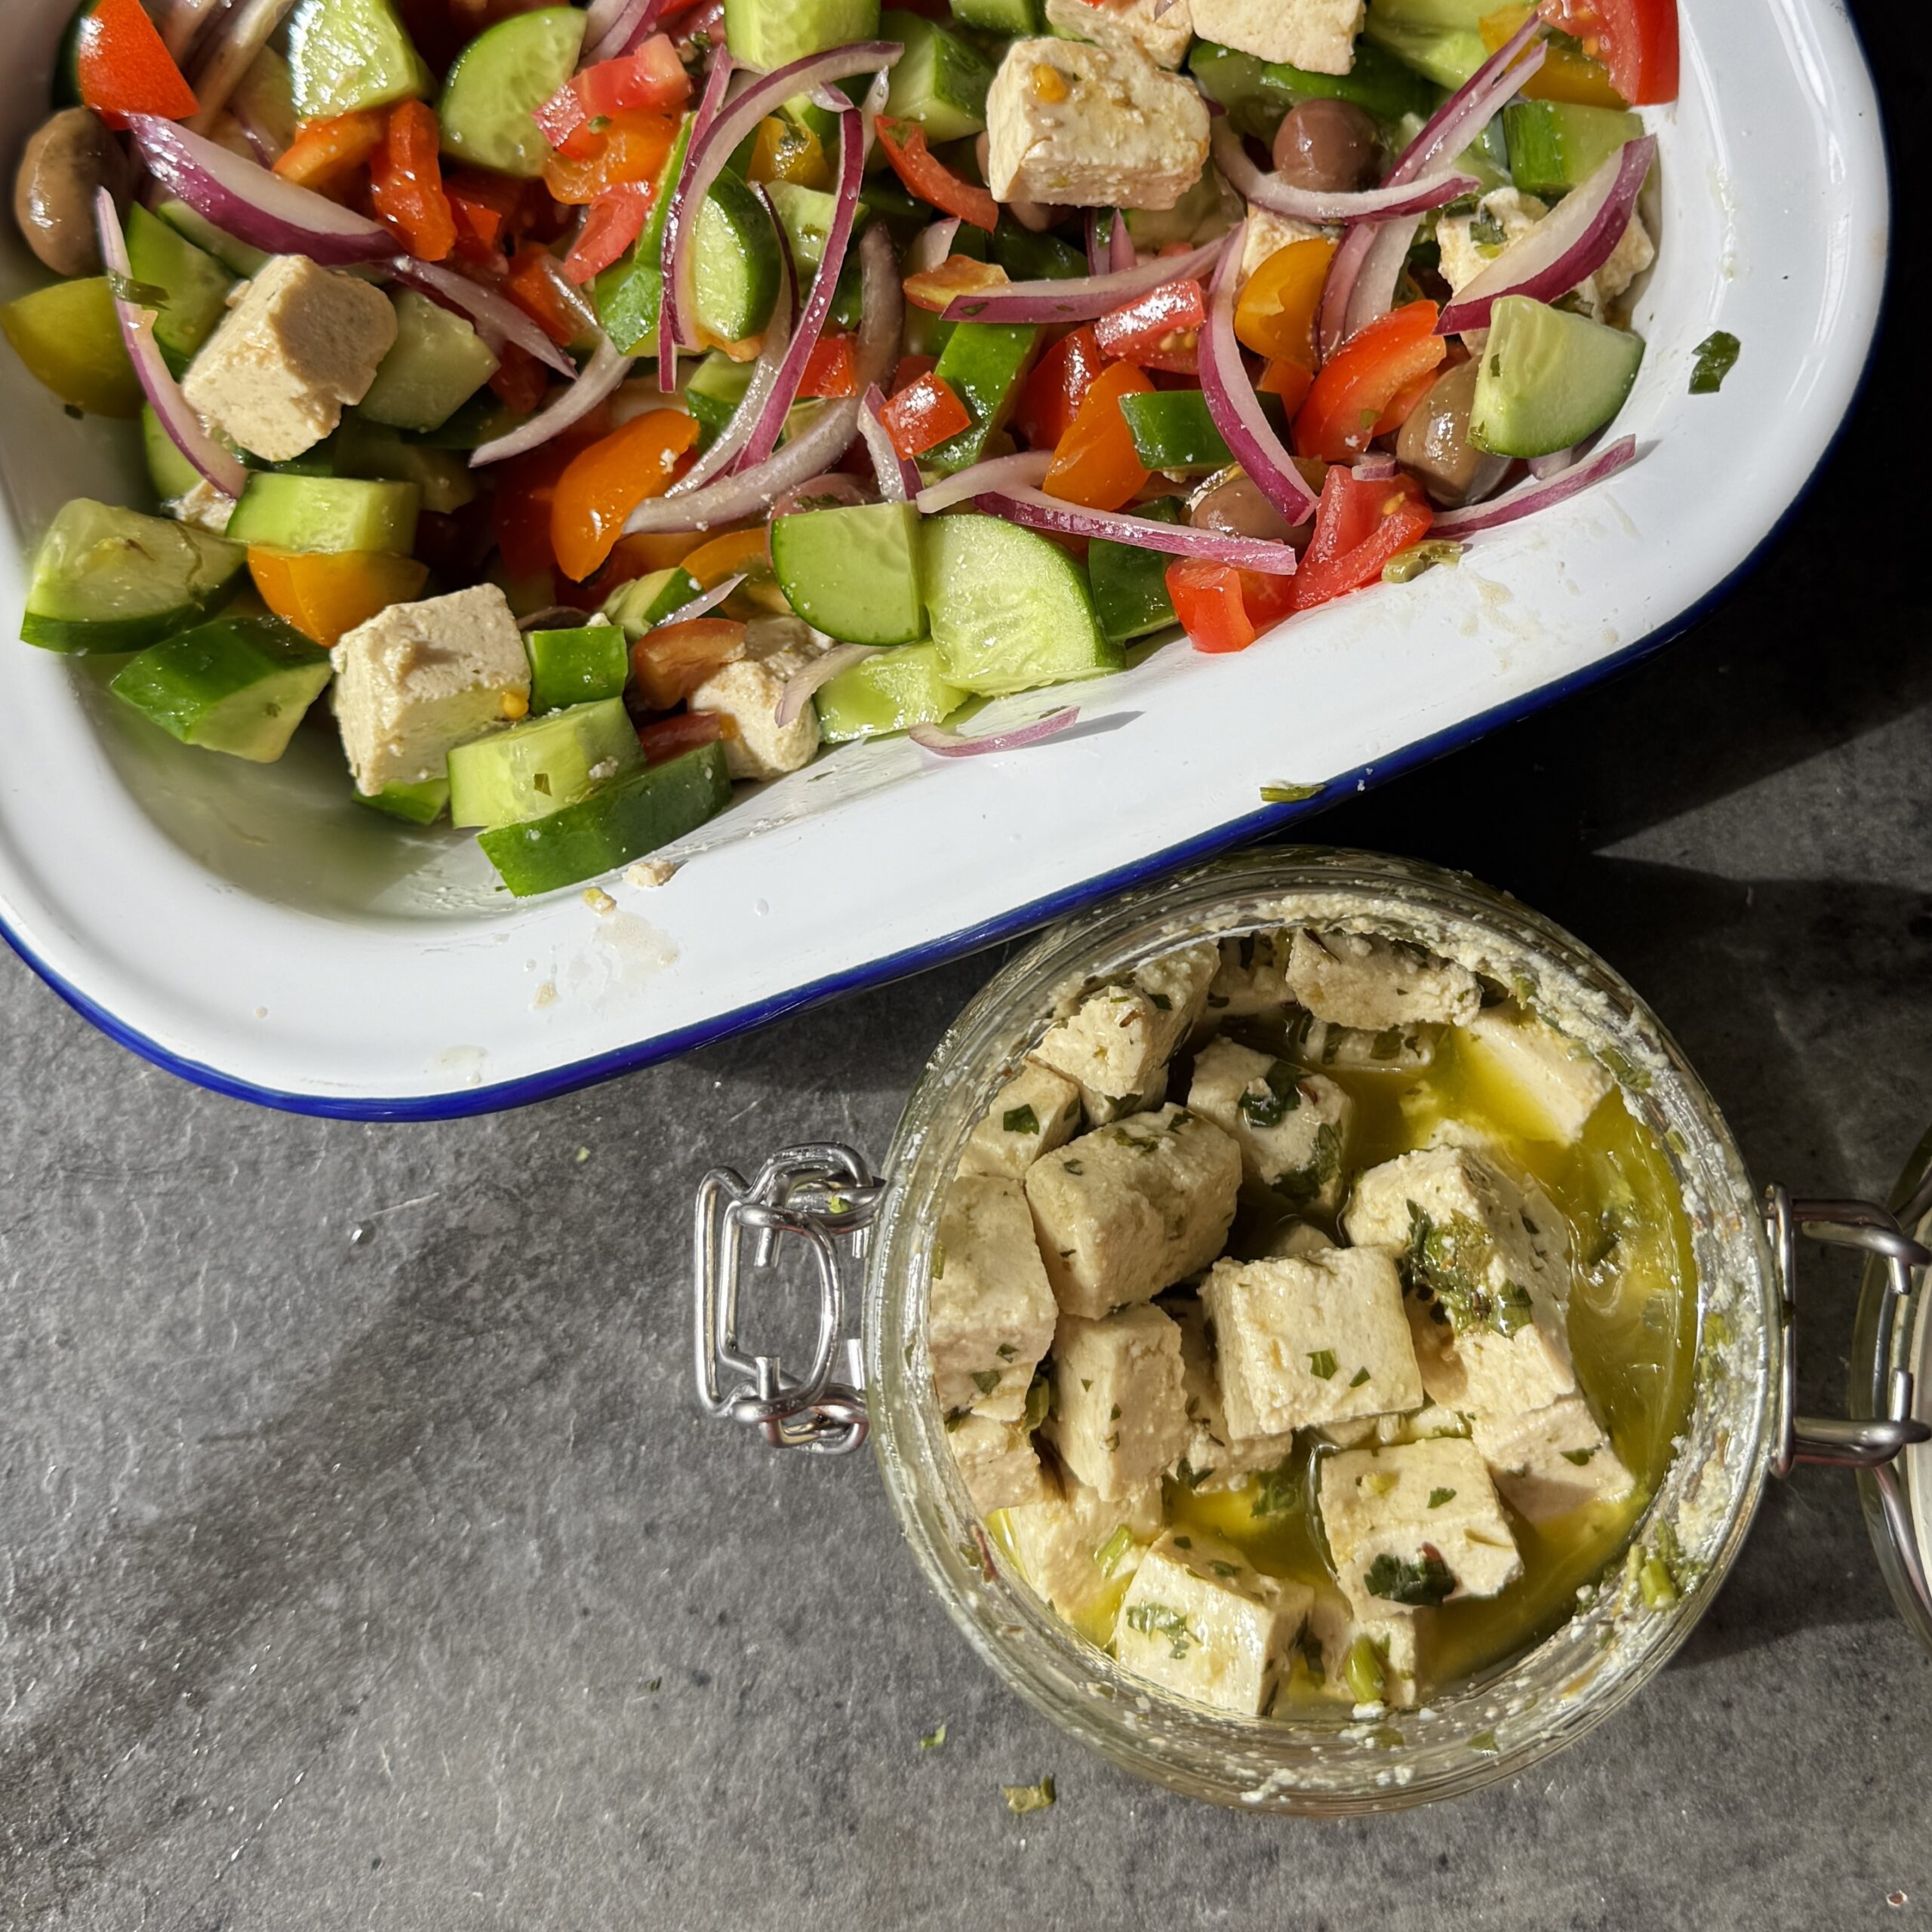
Marinated Tofu Feta
Takes 4 hours 10 minutes
Serves 4
Ingredients
- 200 g 1½ cups diced firm tofu, pressed
- Juice of 1 lemon 3 tbsp
- 30 ml 2 tbsp extra virgin olive oil
- 15 ml 1 tbsp apple cider vinegar or white wine vinegar
- 1 tsp dried oregano/ dried thyme
- ½ tsp garlic powder
- 10 g 2 tbsp nutritional yeast
- 1½ tsp sea salt
- 1 tsp fresh dill finely chopped
Instructions
- Drain the tofu and remove any moisture, slice into cubes that are approx 1cm thick
- In a jar or bowl, whisk together the lemon juice, olive oil, vinegar, oregano, garlic powder, nutritional yeast, salt and fresh dill until well combined.
- Add the tofu cubes and gently toss to coat every piece in the marinade.
- Cover and refrigerate for at least 3–4 hours, or ideally overnight. The longer it marinates, the more flavour it absorbs.
- Give the jar a gentle shake before serving.

Our delicious hummus topped with our equally delicious sundried tomato pesto makes an excellent addition to any meal or is perfect for a snack with some tortilla chips or carrot sticks.
INGREDIENTS
Hummus (91%) [Chickpeas (44%) (Chickpeas, Water), Rapeseed Oil, Tahini (13%) (SESAME SEEDS), Water, Lemon Juice Concentrate, Garlic, Salt, Cumin, Preservative: Potassium Sorbate, Cayenne], Sundried Tomato Pesto Topping (7%) [Olive Oil, Rapeseed Oil, Water, Sundried Tomatoes (1%) (Sundried Tomatoes, Salt), ALMONDS (NUTS), Basil, Balsamic Vinegar, Garlic, Sea Salt, Cayenne], Rapeseed Oil, Smoked Paprika, Black SESAME SEEDS
ALLERGEN INFORMATION
For allergens, see ingredients highlighted.
Contains Sesame Seeds, Nuts, Almonds
May contain traces of Pecan Nut, Pistachio Nut, Walnut, Hazelnut, Macadamia Nut / Queensland Nut, Cashew Nut, Brazil Nut
Gluten Free
NUTRITIONAL INFORMATION
| per 100g | |
|---|---|
| Energy | 1450kJ / 351 kcal |
| Fat | 31g |
| Of which Saturates | 2.9g |
| Carbohydrates | 8.8g |
| Of which Sugars | 0.9g |
| Fibre | 3.7g |
| Protein | 7.3g |
| Salt | 0.75g |
| Keep refrigerated 0-5℃. Use within 3 days of opening. Use by see lid. |
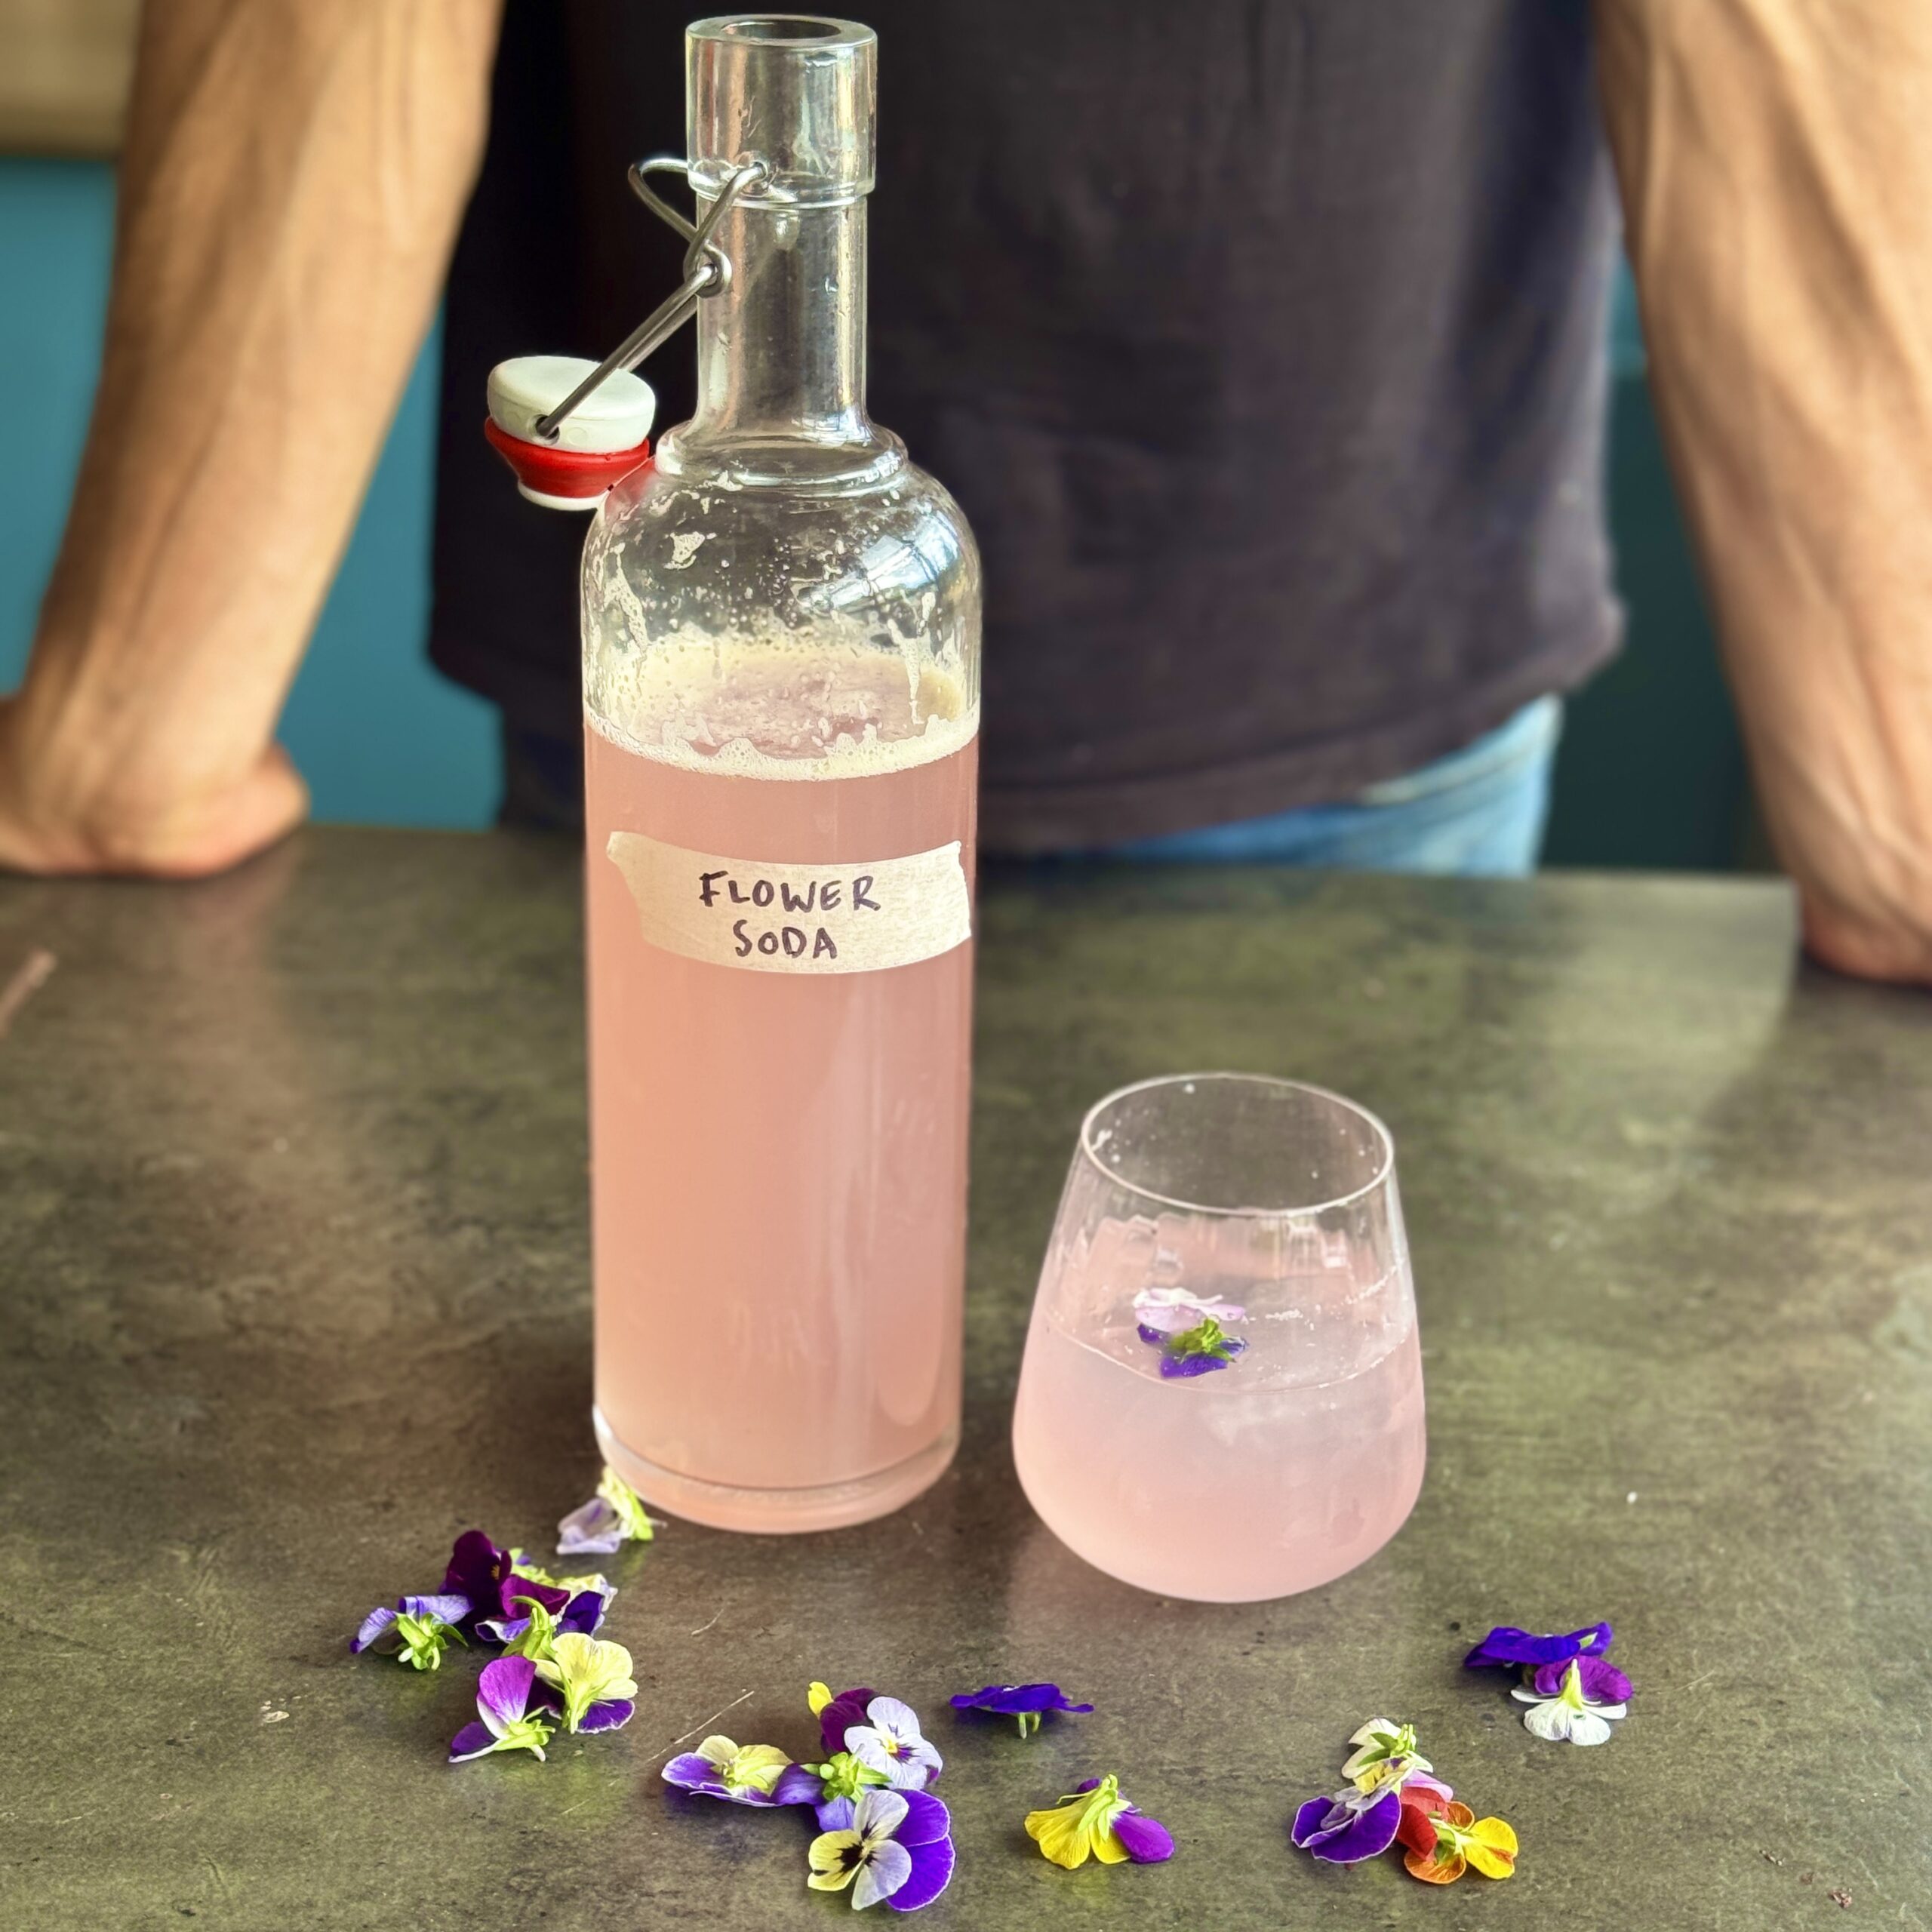
Summer Flower Soda
Takes 6 days 20 minutes
Serves 8
Ingredients
- 2 litres water 16 cups
- 200 g organic granulated sugar approx. 10% of water weight
- 1 orange sliced into quarters
- 1 lime sliced into quarters
- 20 g fresh ginger chopped (skin on if organic)
- 20 g 1 cup edible summer flowers
Instructions
- Combine all ingredients in a clean fermentation jar: In a large glass jar (2L capacity), add 2 litres water, 200g sugar, and mix well using a whisk until the sugar is completely dissolved.
- Next add the sliced oranges and lemons followed by the 20g chopped ginger, 20g of edible flowers and mix.
- Cover and ferment at room temperature: Cover the jar with a clean cloth or a loose lid and leave at room temperature (18–22°C / 64–72°F) for 3–5 days. Stir once or twice daily to submerge the petals and prevent mould.
- Monitor fermentation: Look for bubbles, cloudiness, and a gently tangy taste — these are signs of active fermentation. Depending on room temperature, this may happen faster or slower.
- Strain and bottle: When the soda is pleasantly floral and slightly fizzy, strain out the solids using a fine sieve or cheesecloth. Pour the liquid into swing-top bottles, leaving about 2cm (0.8 in) headspace.
- Build carbonation: Seal the bottles and leave at room temperature for 1–2 days to naturally carbonate. Burp once daily to release any excess pressure.
- Chill and serve: Refrigerate once carbonation is to your liking. Serve chilled and open bottles with care — the soda will be beautifully fizzy, fragrant, and alive with springtime flavour.
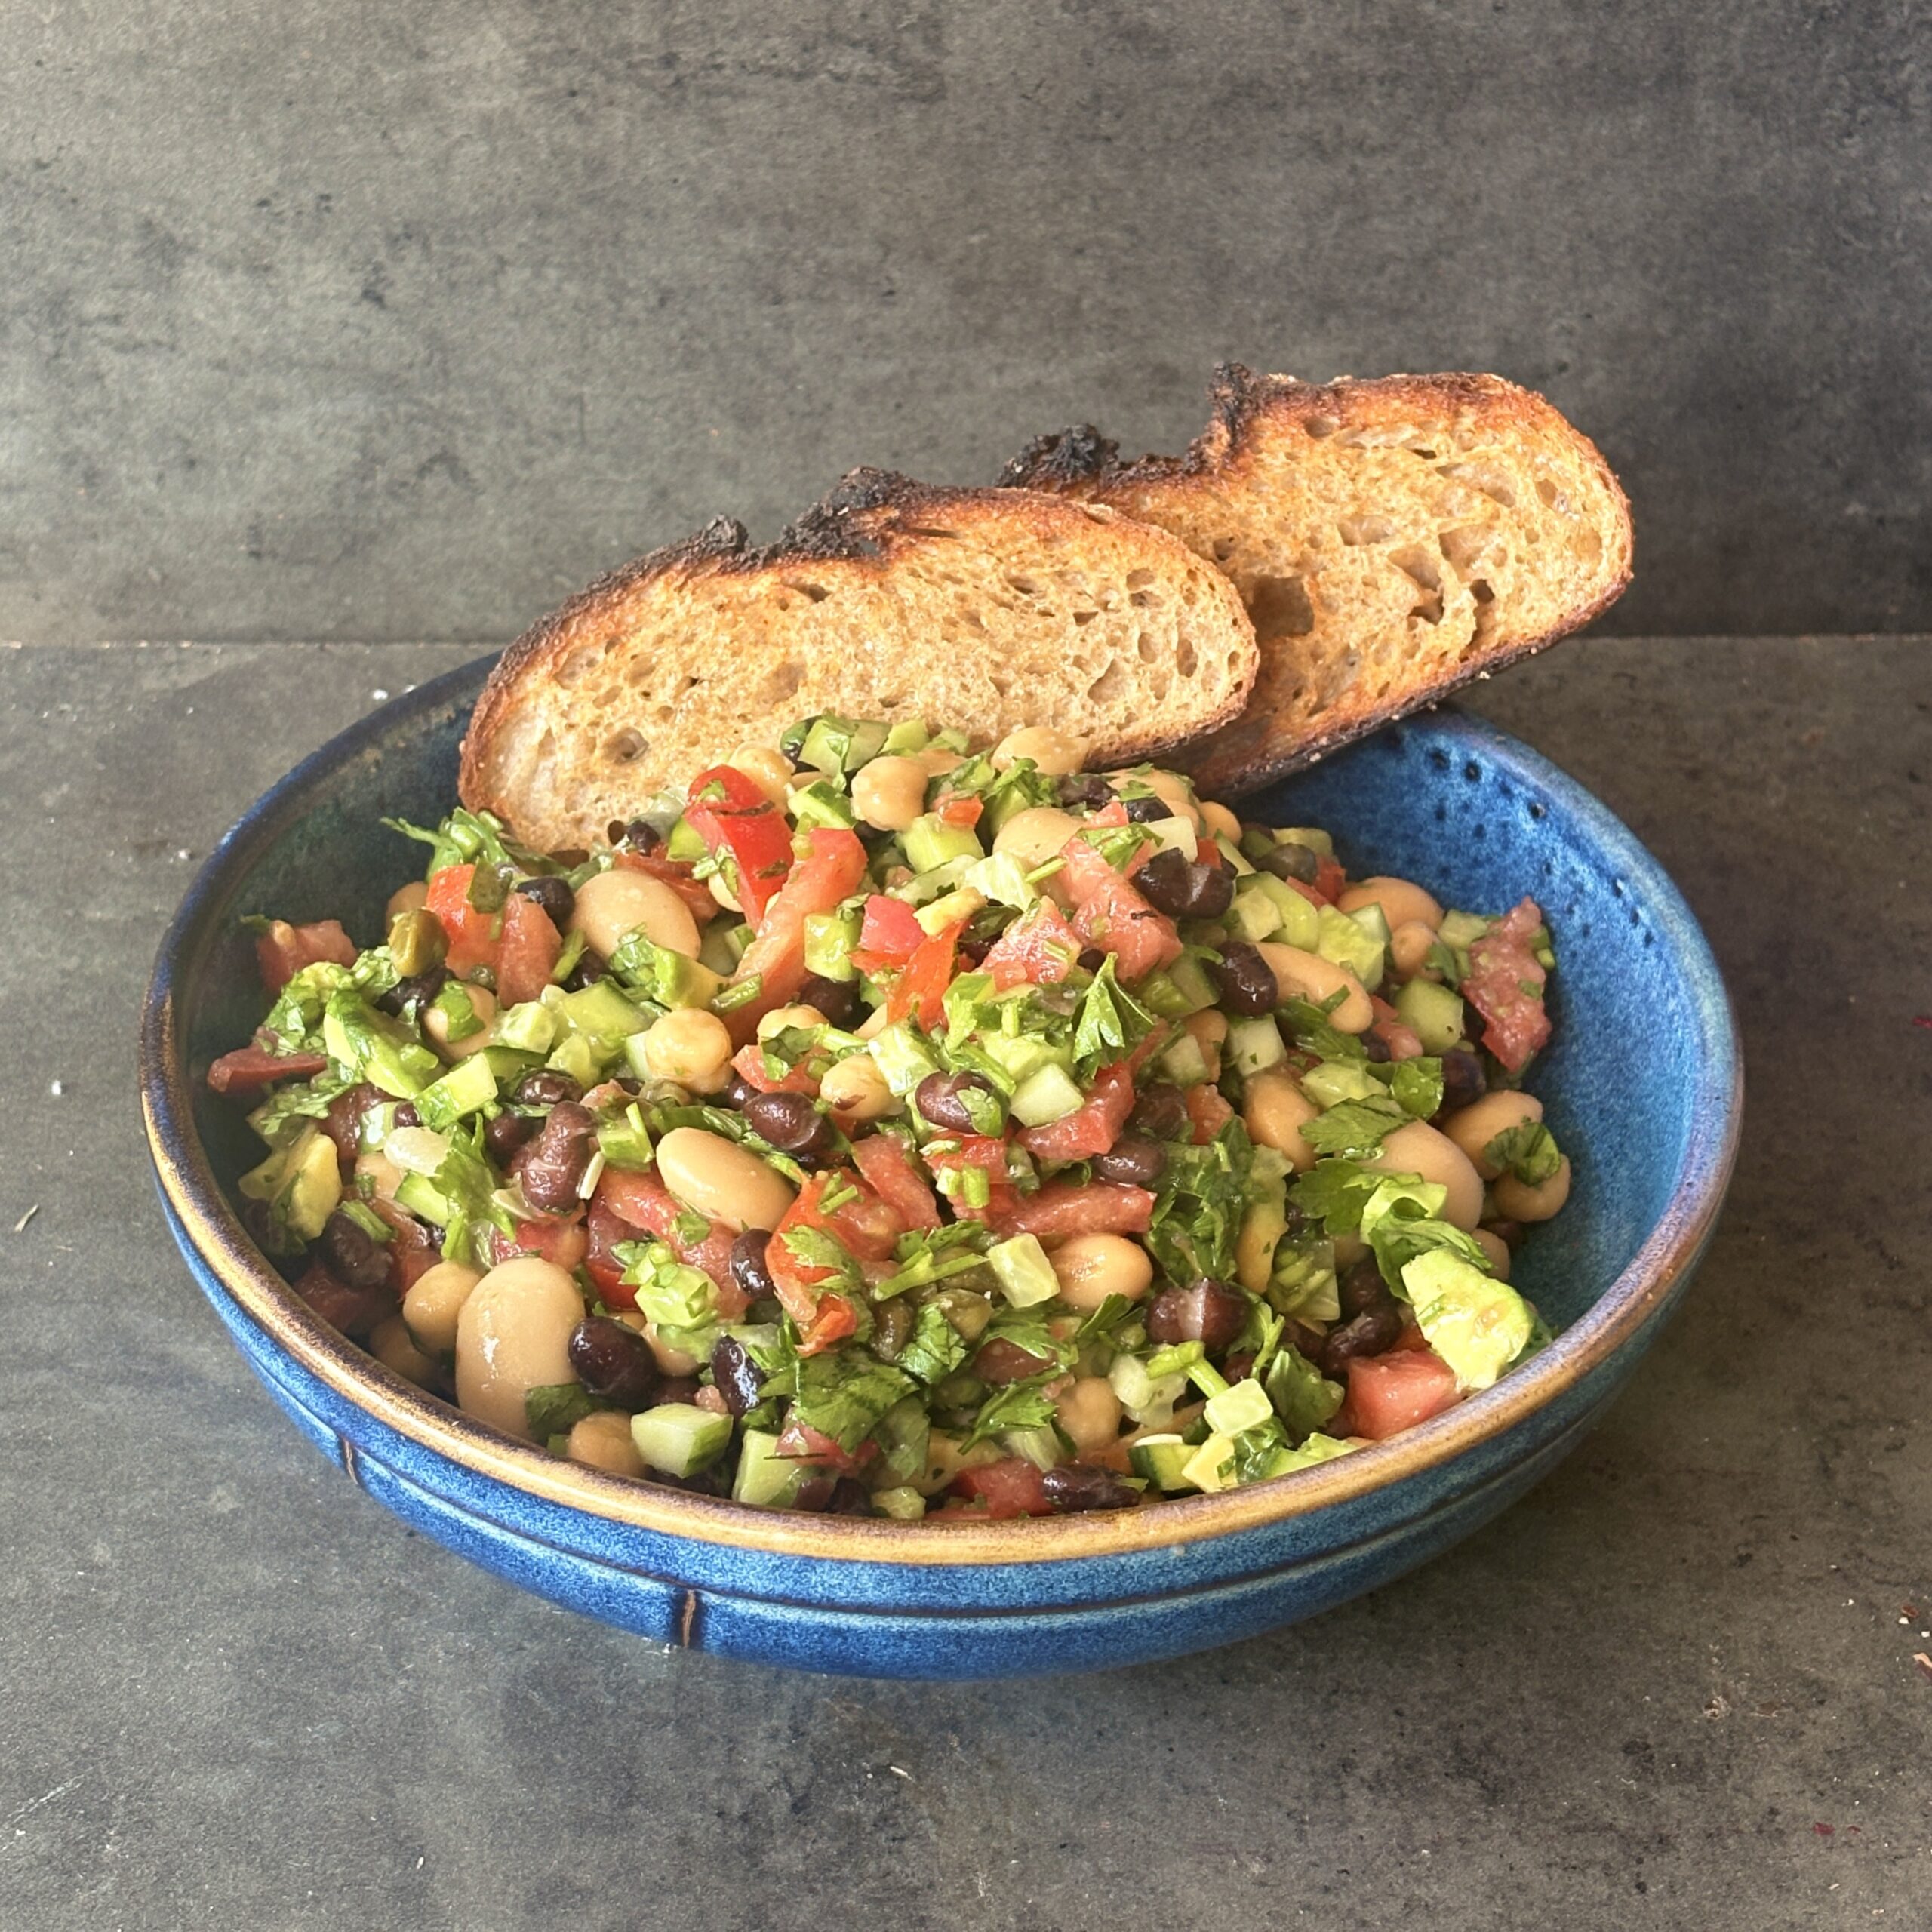
High Protein Bean Salad
Takes 15 minutes
Serves 6
Ingredients
For the salad
- 1 x 400g tin chickpeas drained and rinsed (240g drained weight)
- 1 x 400g tin black beans drained and rinsed (240g drained weight)
- 1 x 400g tin butter beans drained and rinsed (240g drained weight)
- 2 cucumbers approx. 600g, diced
- 4 ripe tomatoes approx. 500g, diced
- 1 ripe avocado diced
- 60 g capers drained (about ⅓ cup)
- 20 g fresh parsley roughly chopped (about 1 cup loosely packed)
- 20 g fresh coriander roughly chopped (about 1 cup loosely packed)
For the lemon vinaigrette
- 60 ml ¼ cup extra virgin olive oil
- 30 ml 2 tbsp fresh lemon juice
- 1 tbsp caper brine
- 1 tsp Dijon mustard
- 1 small garlic clove finely grated
- ½ tsp maple syrup or honey optional
- ½ tsp sea salt
- ¼ tsp freshly ground black pepper
Instructions
- Whisk together the olive oil, lemon juice, caper brine, Dijon mustard, garlic, maple syrup (if using), salt and pepper until well combined.
- Add the chickpeas, black beans, butter beans, cucumber, tomatoes, capers, parsley and coriander to a large bowl. Pour over the dressing and toss until everything is evenly coated.
- Gently fold through the avocado just before serving to keep it intact.
- Taste and adjust with more lemon juice, salt or pepper if needed. Leave to sit for 10 minutes before serving to allow the flavours to develop.

High protein granola
This granola is high in protein and fibre and low in sugar. Protein contributes to the maintenance of normal bones.
We love ours topped with fresh fruit, our favourite yoghurt and a drizzle of maple syrup. We hope you’ll enjoy it!
INGREDIENTS
OATS (41%), PEANUT Butter (12.5%), PEANUTS (12%), Chicory Root Fibre, Soy Protein Crisp (10%) [SOYA Protein Isolate, Tapioca Starch, Salt], PEANUT Flour, Olive Oil, Chia Seeds (Salvia hispanica) (2%), Natural Flavouring, Salt
ALLERGEN INFORMATION
For allergens, including Cereals containing Gluten, see highlighted ingredients.
Contains Peanuts, Oats, Soya
May also contain traces of Milk, Nuts, Cereals containing Gluten
Contains Chicory Root Fibre – excessive consumption may cause laxative effects. Made in an environment that handles some non-vegan materials.
Free from artificial colours, flavours and preservatives
Warning: Extra care has been taken to remove shell, although some may remain. Please remember small children can choke on nuts.
NUTRITIONAL INFORMATION
| Typical | per 100g |
|---|---|
| Energy | 2005kJ | 480kcal |
| Fat | 24g |
| Of which: | |
| Saturates | 3.5g |
| Carbohydrate | 35g |
| Of which: | |
| Sugars | 3g |
| Fibre | 10g |
| Protein | 26g |
| Salt | 0.47g |
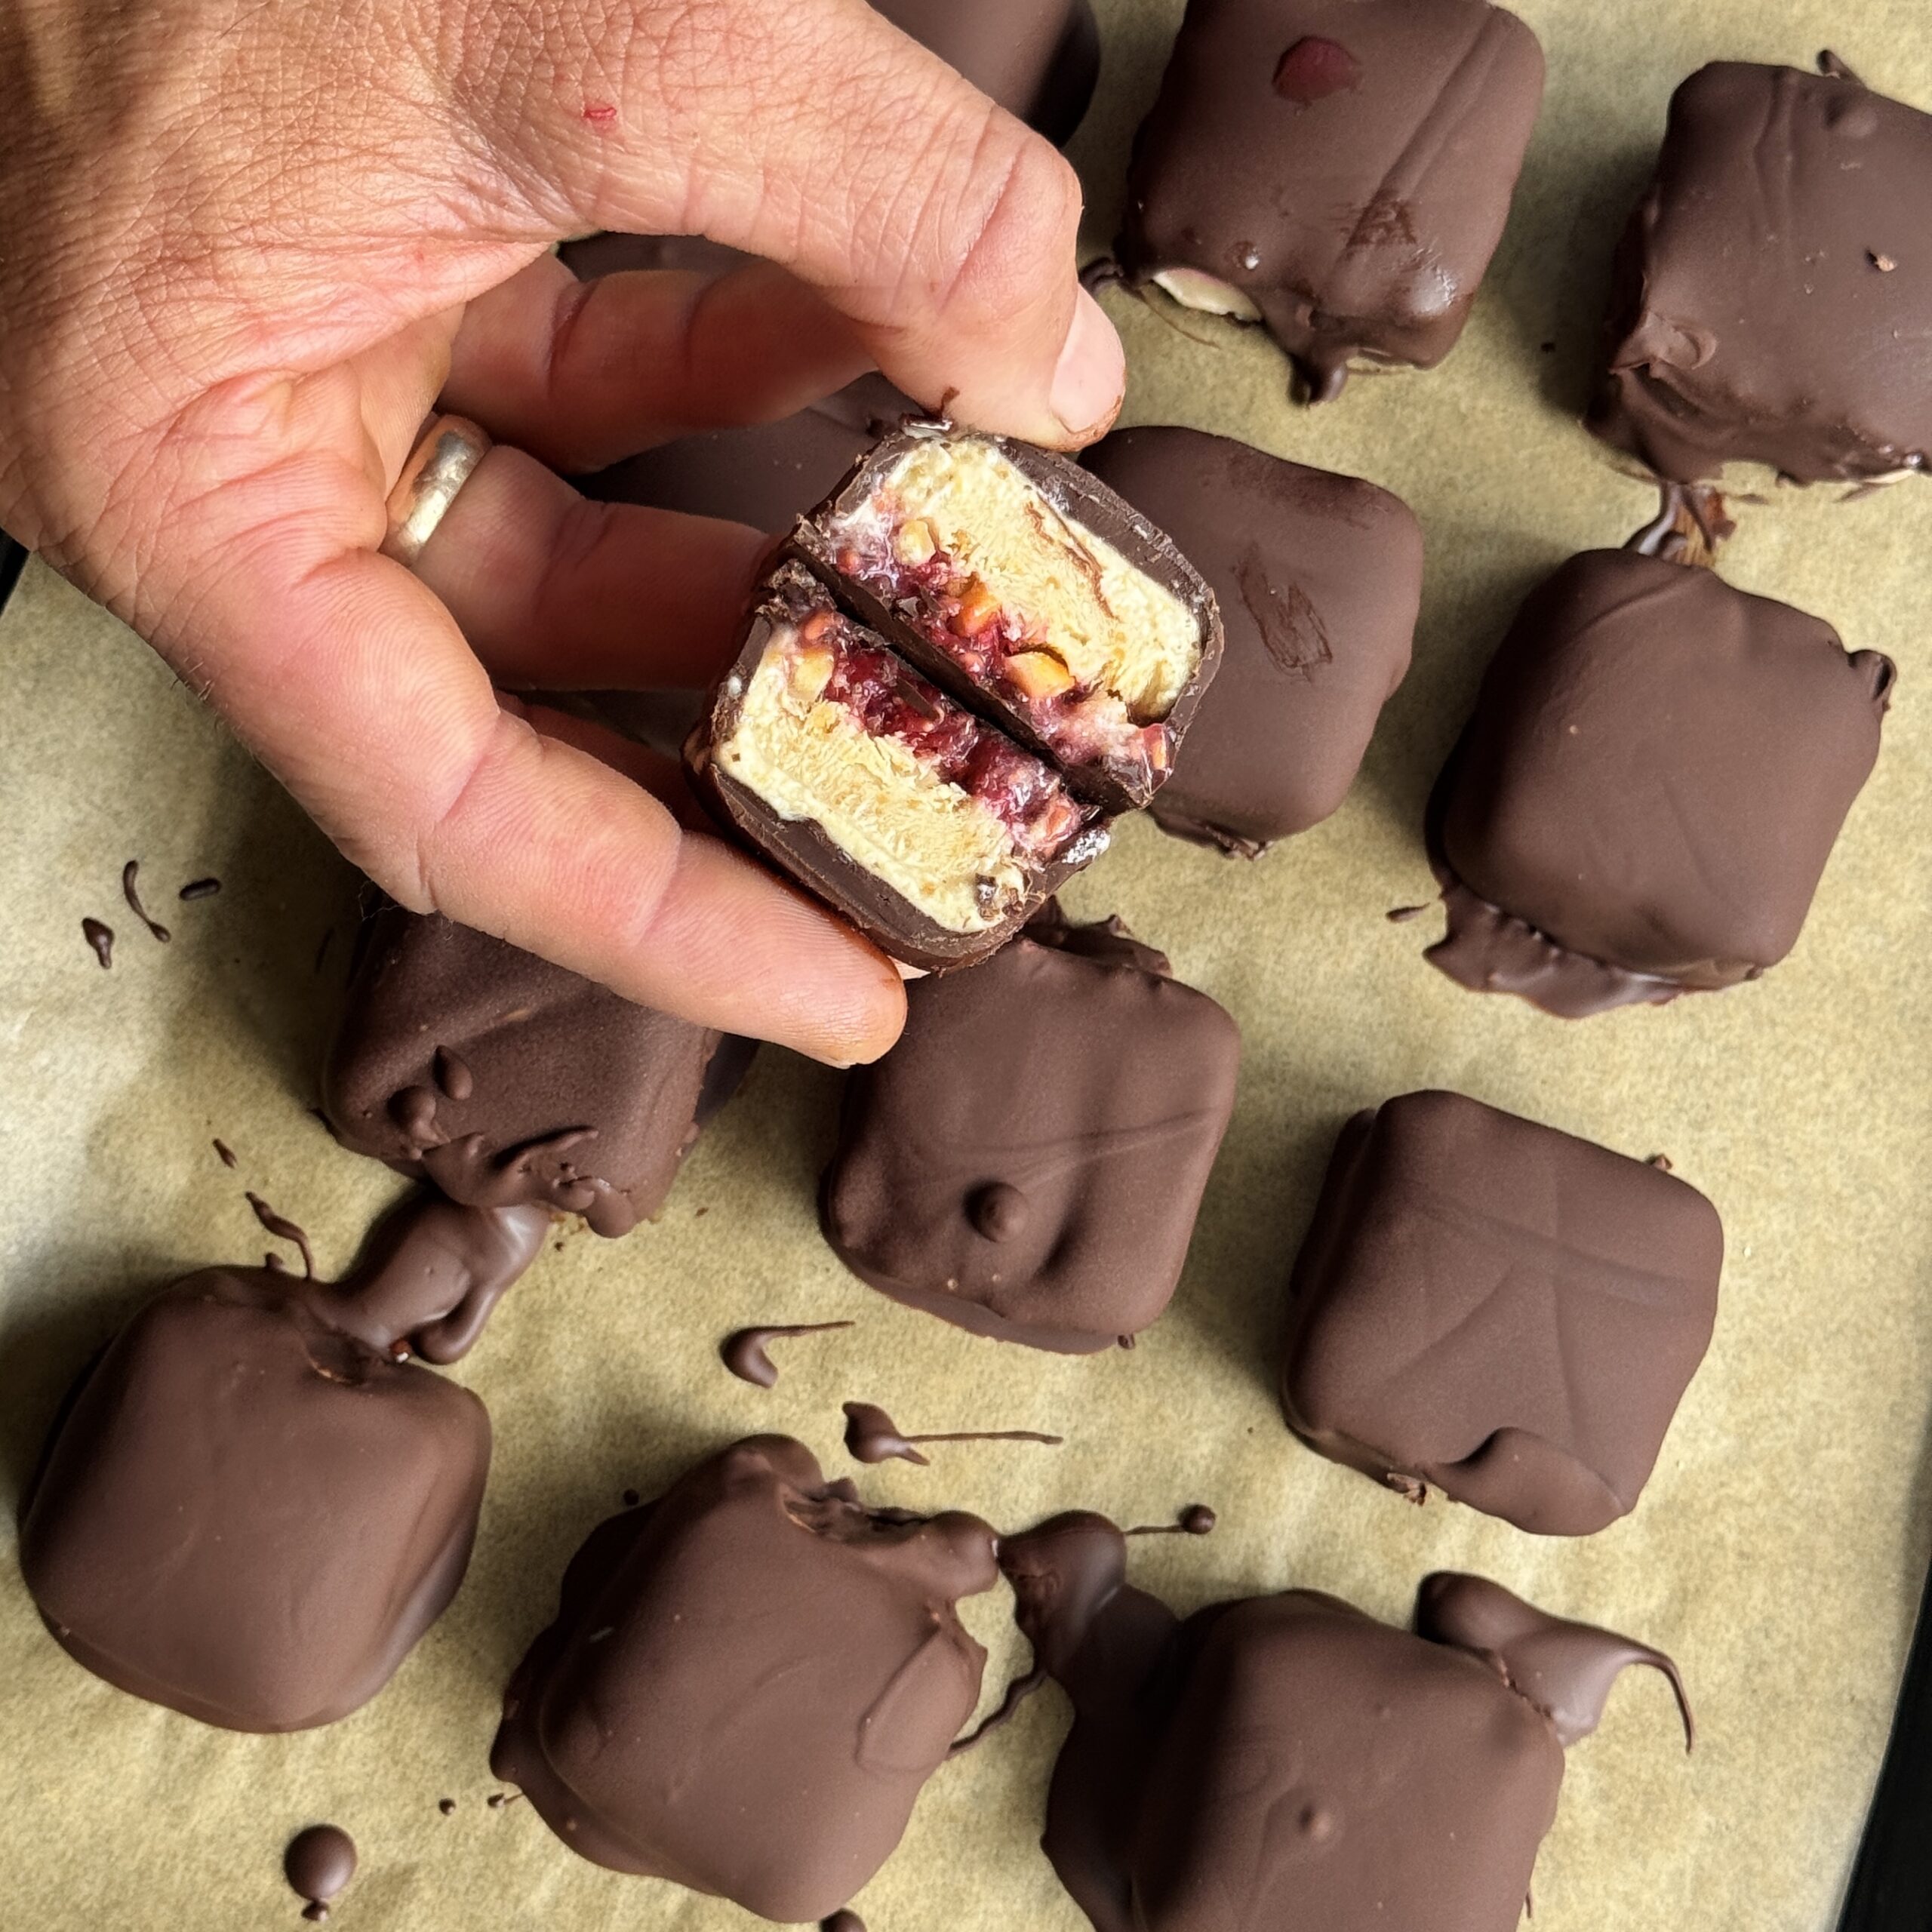
PB&J Frozen Yoghurt Bites
Takes 2 hours 15 minutes
Serves 12
Ingredients
For the yoghurt layer
- 300 g coconut yoghurt 1¼ cups
- 6 tbsp natural peanut butter
- 4 tbsp maple syrup
- 1 tsp Vanilla essence
- 40 g roasted peanuts roughly chopped (⅓ cup)
For the filling
- 250 g raspberries fresh or frozen
- 3 tbsp chia seeds
- 3 tbsp maple syrup
- For the chocolate coating
- 200 g dark chocolate 1¼ cups chopped
- 1 tsp coconut oil optional, for a smoother coating
Decoration:
- Freeze dried raspberries
- Flakey sea salt
Instructions
Make the yoghurt mixture
- In a bowl, mix together the coconut yoghurt, peanut butter, and maple syrup until smooth and creamy.
Layer the bites
- Spoon a little of the yoghurt mixture into each cavity of an ice cube tray or silicone mould.
- Add a few frozen raspberries and a sprinkle of chopped peanuts.
- Top with the remaining yoghurt mixture, ensuring the raspberries are mostly covered.
- Tap the tray gently on the counter to remove any air pockets.
Freeze
- Place in the freezer for at least 4 hours, or until completely solid.
Prepare the chocolate
- Melt the dark chocolate and coconut oil together in a heatproof bowl set over simmering water, or microwave in short bursts, stirring between each burst.
Coat the bites
- Remove the frozen bites from the mould.
- Using two forks, quickly dip each bite into the melted chocolate, allowing any excess chocolate to drip off.
- Place onto a lined tray or plate.
Set and serve
- The chocolate should harden almost instantly thanks to the frozen centres.
- Enjoy immediately or store in an airtight container in the freezer for up to 1 month.
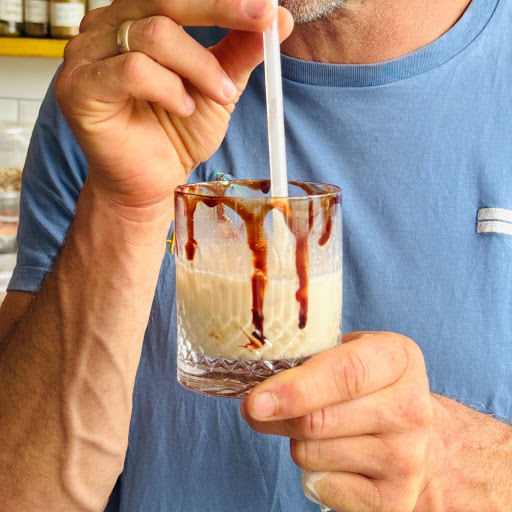
Viral Date Iced Coffee
Takes 3 minutes
Serves 2
Ingredients
- 200 g Medjool dates stones removed (approximately 1 cup packed)
- 300 ml strong freshly brewed coffee 1¼ cups
- 700 ml oat milk 3 cups
- 400 g ice cubes approximately 4 cups
Instructions
Make the Date Coffee Caramel
- Remove the stones from the dates and place the dates in a heatproof bowl or jug.
- Pour the hot freshly brewed coffee over the dates and leave to soak for 3 minutes to soften.
- Transfer the coffee and dates to a blender or food processor and blend until completely smooth and creamy. This may take 1–2 minutes depending on the strength of your blender.
Assemble the Drinks
- Divide the ice between two 400ml glasses.
- Pour the oat milk into each glass, filling them about three-quarters full.
- Divide the date coffee caramel mixture evenly between the glasses.
- Stir well until fully combined and serve immediately.
Tips
- For an extra cold and creamy drink, chill the oat milk before using.
- Any leftover date coffee caramel can be stored in an airtight container in the fridge for up to 3 days and stirred into porridge, smoothies or more iced coffee.
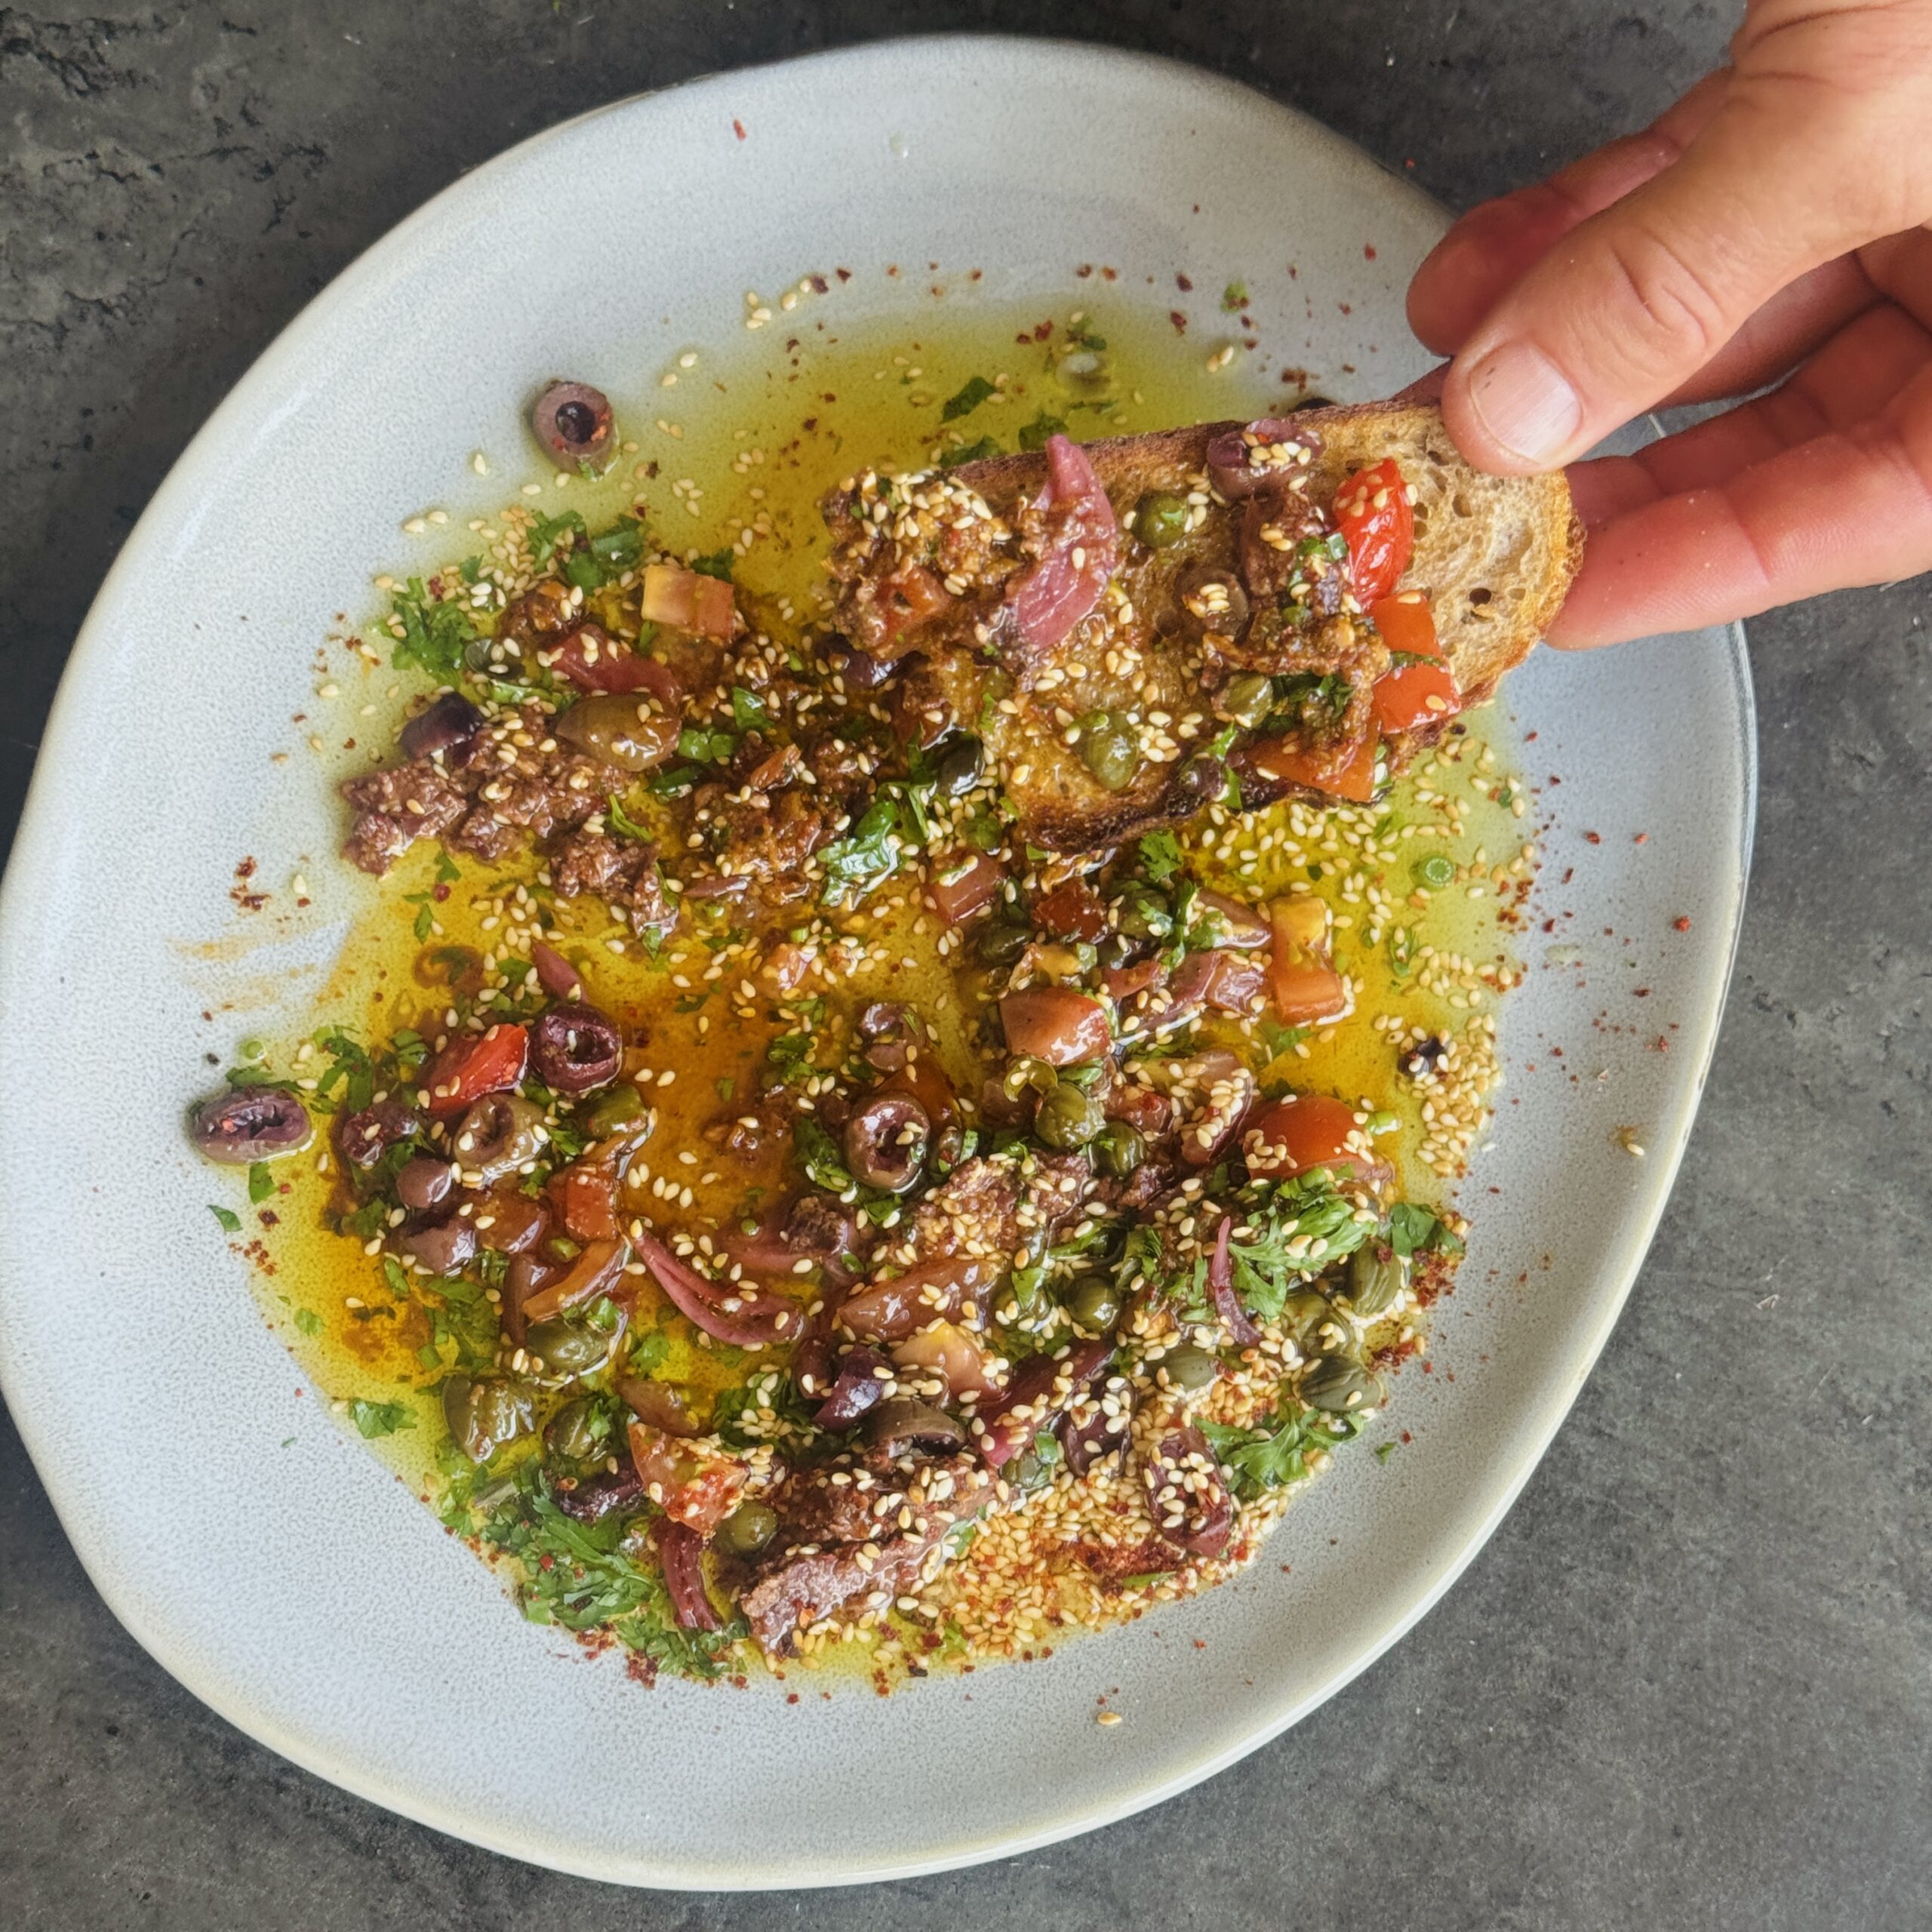
Loaded Olive Oil Dip with Herbs, Pesto, Tapenade & Capers
Takes 12 minutes
Serves 4
Ingredients
- 120 ml ½ cup extra virgin olive oil
- 2 tbsp finely chopped fresh parsley
- 3 tbsp The Happy Pear Black Olive Tapenade
- 3 tbsp The Happy Pear Sundried Tomato Pesto
- 1 large ripe tomato finely diced (or 200g cherry tomatoes, quartered)
- 1 tbsp capers drained and roughly chopped
- 1 tbsp toasted sesame seeds
- ½ tsp chilli flakes or more to taste
- 1 small garlic clove finely grated (optional)
- Zest of ½ lemon
- 1 tsp lemon juice
- A pinch of flaky sea salt
- Freshly ground black pepper
Instructions
- Toast the sesame seeds in a dry pan over medium heat for 2–3 minutes until lightly golden and fragrant. Allow to cool.
- Add the olive oil, parsley, tomatoes, pesto, tapenade, capers, sesame seeds, chilli flakes, garlic (if using), lemon zest and lemon juice to a shallow serving bowl.
- Stir gently to combine. Taste and season with flaky sea salt and plenty of black pepper. You may not need much salt as the tapenade and capers are already quite salty.
- Leave to sit for 10–15 minutes before serving to allow the flavours to mingle.
- Serve with warm sourdough, focaccia, grilled vegetables, or use as a dressing for roasted potatoes or beans.
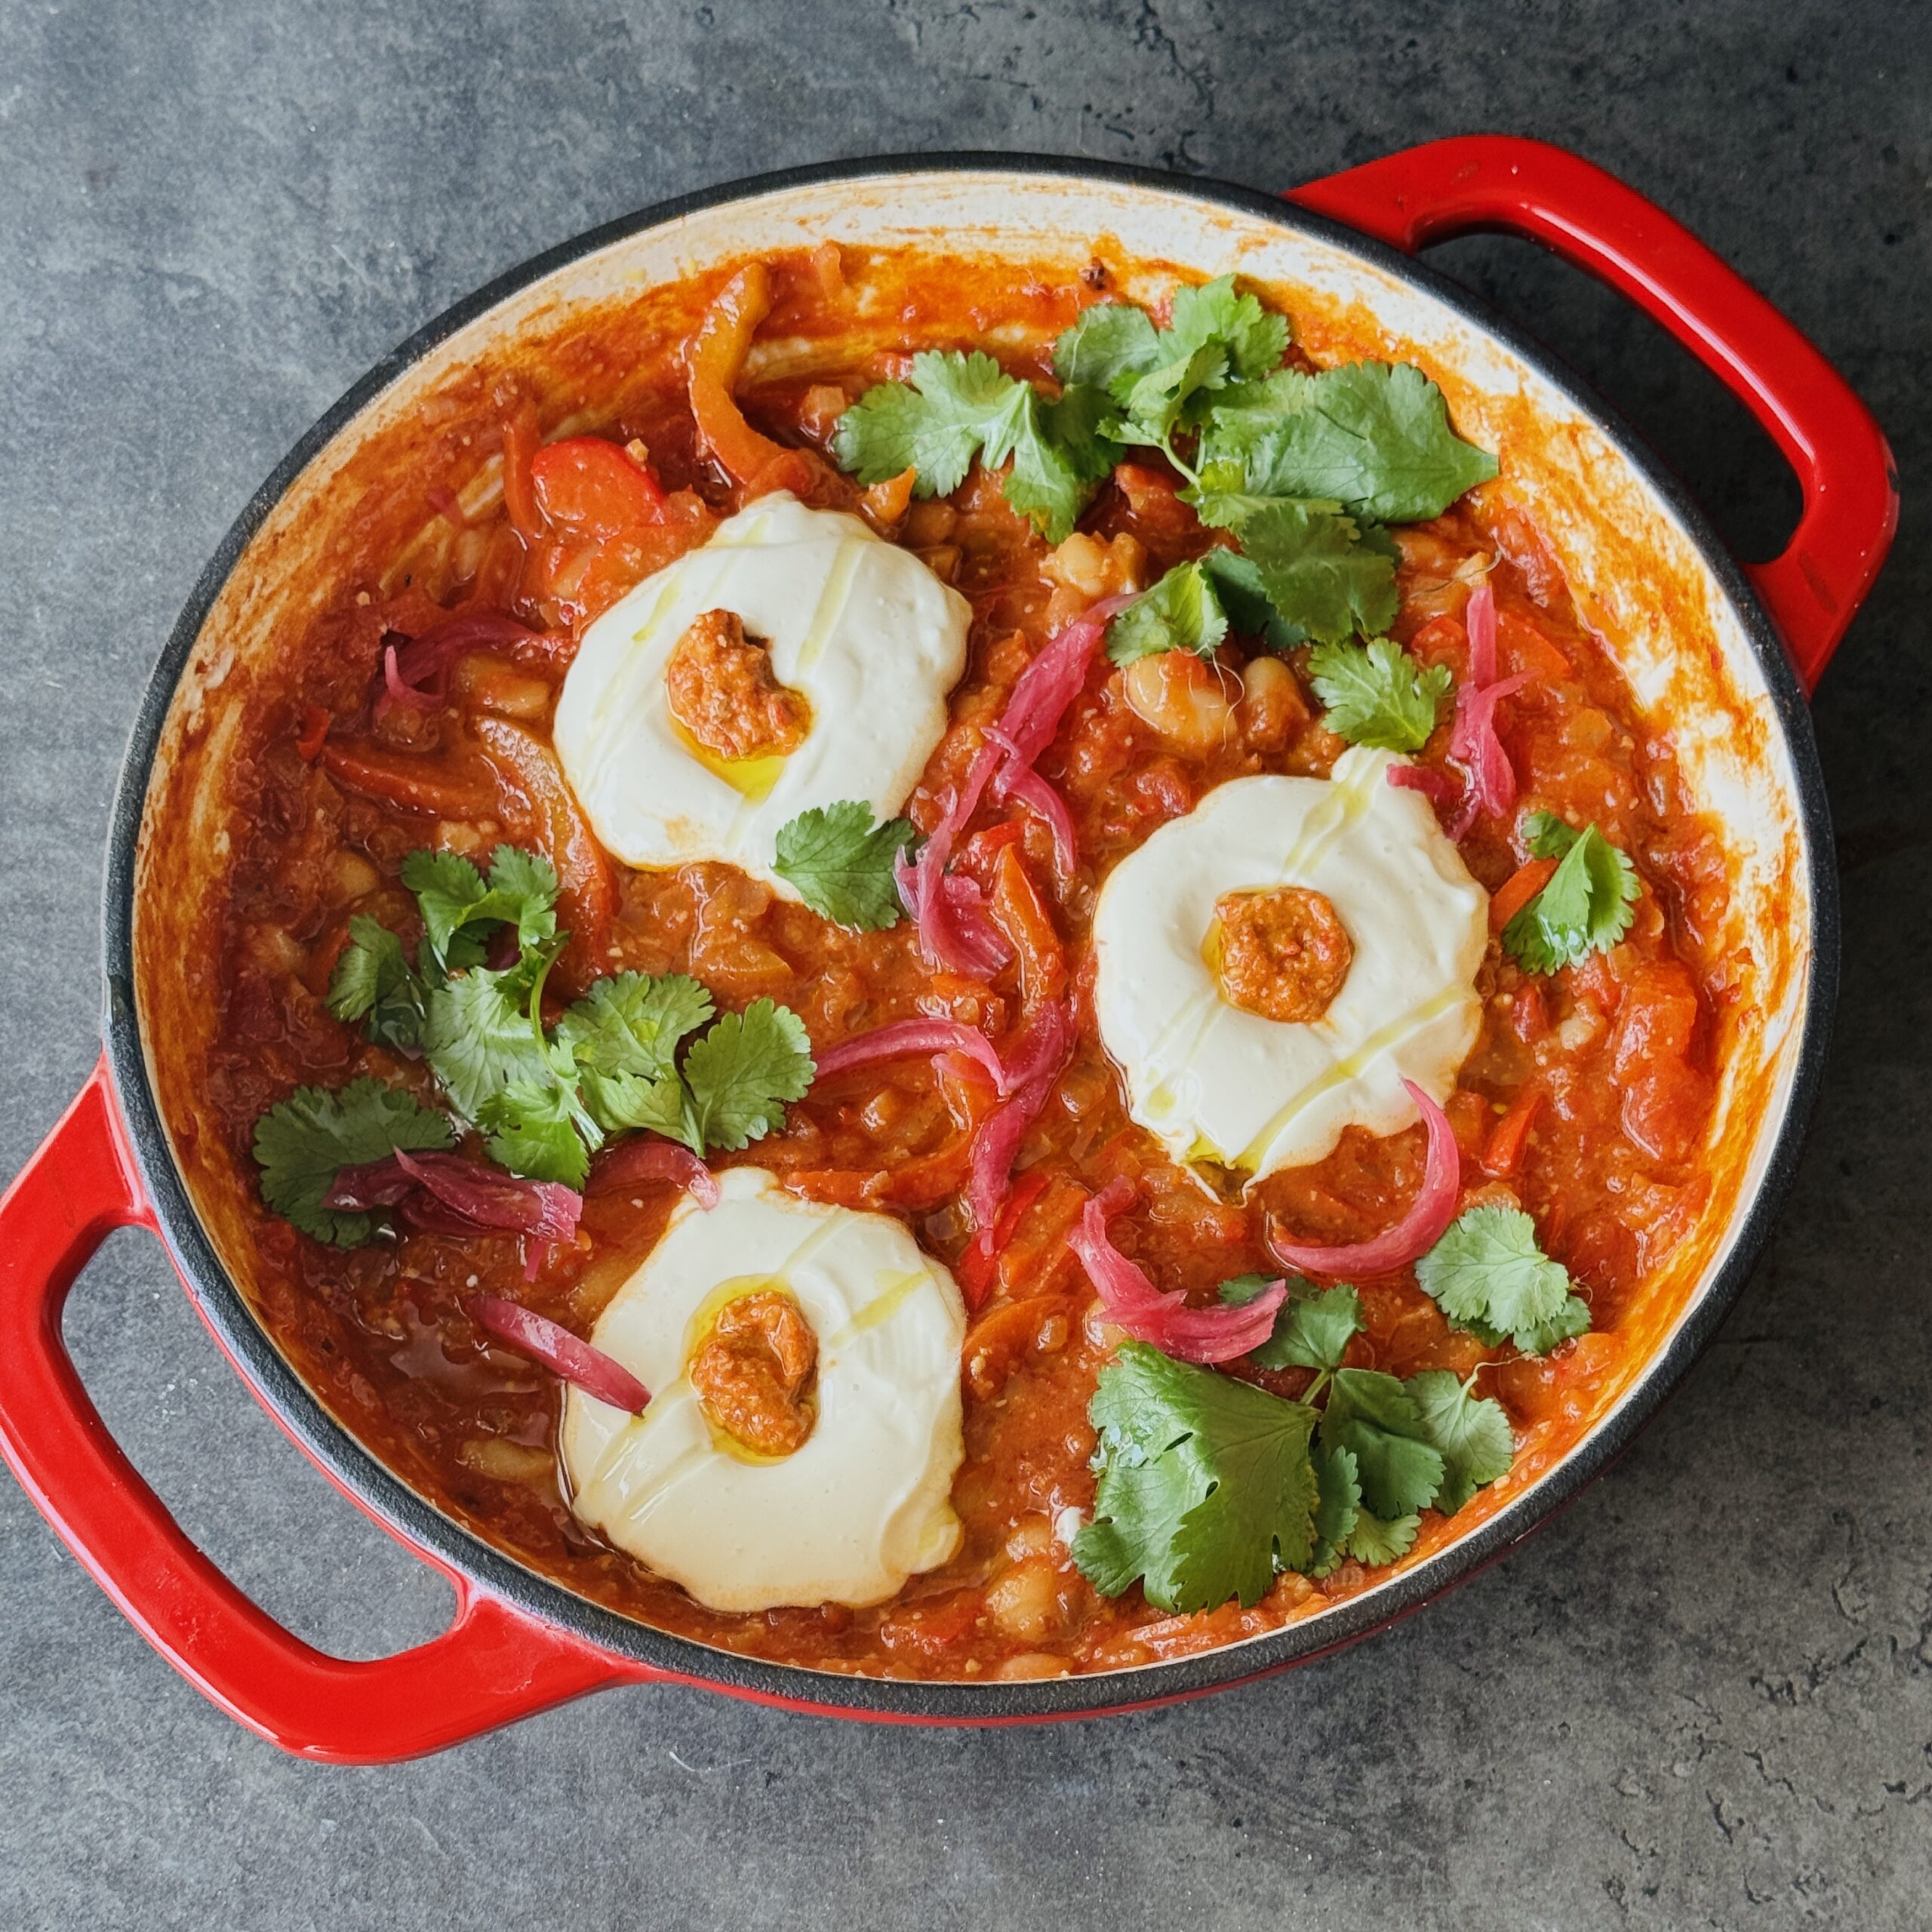
High-Protein Red Pepper Pesto Shakshuka with Whipped Tofu Eggs
Takes 20 minutes
Serves
Ingredients
- Olive oil
- 1 onion finely chopped
- 2 garlic cloves minced
- 1 –2 peppers or courgette diced (optional)
- 2 handfuls spinach
- 1 tin chopped tomatoes
- 1 tsp smoked paprika
- Salt & pepper
- Optional: cherry tomatoes or mushrooms
Egg-style tofu topping
- 1 block silken or soft tofu
- Pinch of salt
- 1 –2 tsp olive oil optional, for richness
To finish
- 2 tsp pesto or more to taste
Instructions
Build the base (one pan):
- Heat olive oil in a wide pan over medium heat. Add onion and cook for 5–6 minutes until soft and sweet. Stir in garlic, tinned tomatoes and your chosen veg, cooking until tender. Season with salt, pepper, and smoked paprika. Fold in spinach at the end until just wilted.
Blend the “eggs”:
- Add the tofu to a jug or bowl with a pinch of salt and a drizzle of olive oil. Use an immersion blender to whizz until completely smooth, thick, and creamy.
Assemble:
- Spoon or gently spread the blended tofu over the warm veg in the pan so it sits like a soft “egg white” layer.
Create the yolk:
- Make a small well in the centre of each serving and spoon in a teaspoon of pesto to mimic an egg yolk.
Serve immediately:
- Enjoy warm straight from the pan, it’s perfect with sourdough toast or roasted potatoes for a hearty weekend brunch.

Our Cool Jim’s Granola is a delicious mix of oats, seeds, sultanas, coconut, goji berries and cashews. It’s perfect paired with milk, yoghurt or porridge, or even just straight out of the tub. Made with real ingredients and free from artificial preservatives, this granola makes a tasty high fibre brekkie or snack. Dave & Steve X
INGREDIENTS
Oats (56%), Seeds (11.5%) [Yellow Flaxseed, Pumpkin], Sultanas [Sultanas, Sunflower Oil], Agave Syrup, Dessicated Coconut, Olive Oil, Coconut Oil, Dried Goji Berries, Molasses, Rice Flour, Cashew Nut Pieces, Sea Salt.
ALLERGEN INFORMATION
For allergens, including Cereals containing Gluten, see highlighted ingredients.
May also contain traces of Peanuts, Nuts, Sesame and Soya.
NUTRITIONAL INFORMATION
| Typical | per 100g |
|---|---|
| Energy | 1851kJ | 442kcal |
| Fat | 17g |
| Of which: | |
| Saturates | 6.5g |
| Carbohydrate | 54g |
| Of which: | |
| Sugars | 15g |
| Fibre | 10g |
| Protein | 12g |
| Salt | 0.15g |
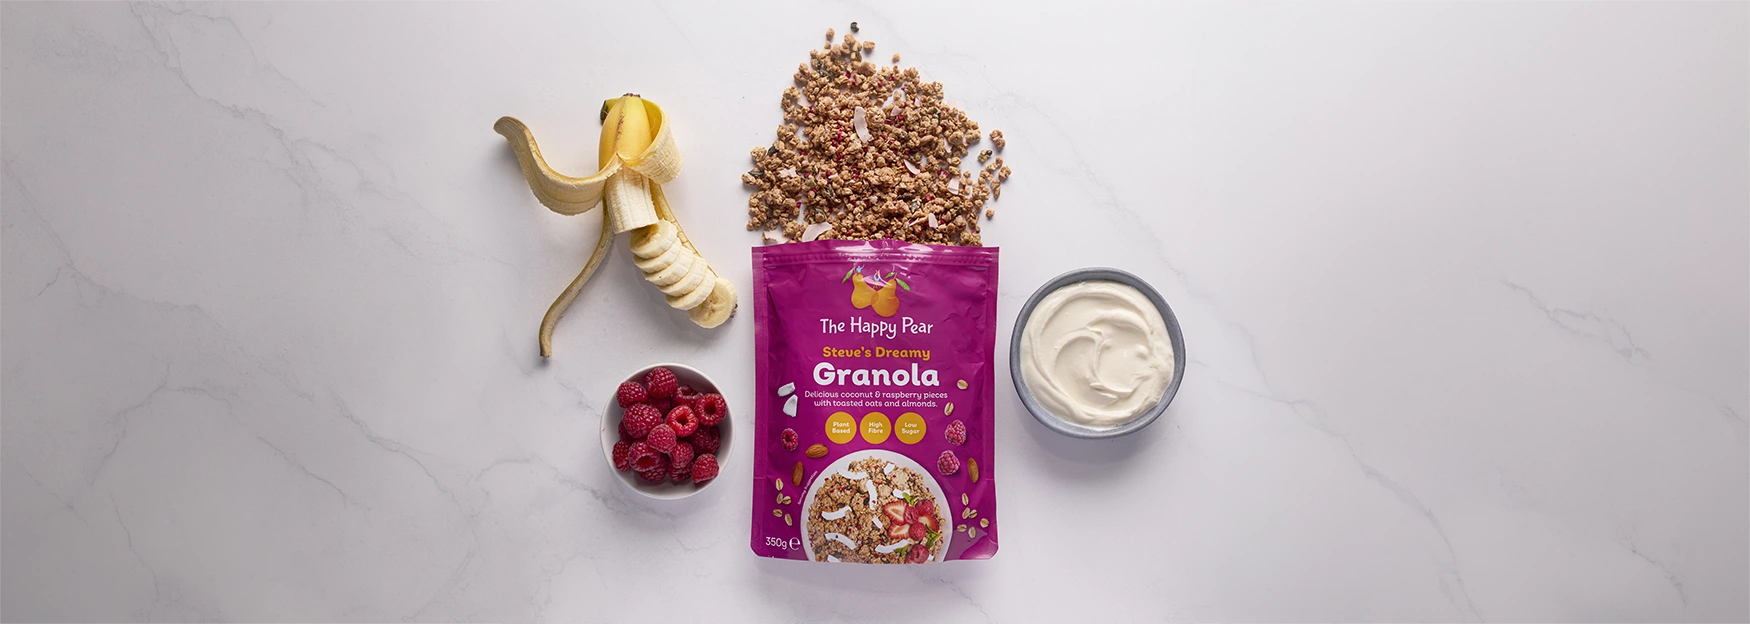
Steve’s Dreamy Granola is made with oats, seeds, nuts, coconut, and raspberries and is his delicious high fibre, low sugar version of granola Nirvana! This gorgeous granola makes a perfect brekkie with milk, yogurt, porridge or it can be enjoyed by itself as a tasty snack. Dave & Steve X
INGREDIENTS
Oats (46.5%), Chicory Root Fibre, Seeds (8.4%) [Pumpkin, Flaxseed], Coconut (6.5%) [Desiccated Coconut, Coconut Flakes], Coconut Oil, Olive Oil, Almonds (Nuts), Rice Flour, Freeze Dried Raspberries (0.85%), Sea Salt.
ALLERGEN INFORMATION
For allergens, including Cereals containing Gluten, see highlighted ingredients.
May also contain traces of Peanuts, Nuts, Sesame and Soya.
NUTRITIONAL INFORMATION
| Typical | per 100g |
|---|---|
| Energy | 1978kJ | 472kcal |
| Fat | 21 g |
| Of which: | |
| Saturates | 8.6g |
| Carbohydrate | 57g |
| Of which: | |
| Sugars | 3.7g |
| Fibre | 6.9g |
| Protein | 12g |
| Salt | 0.46g |
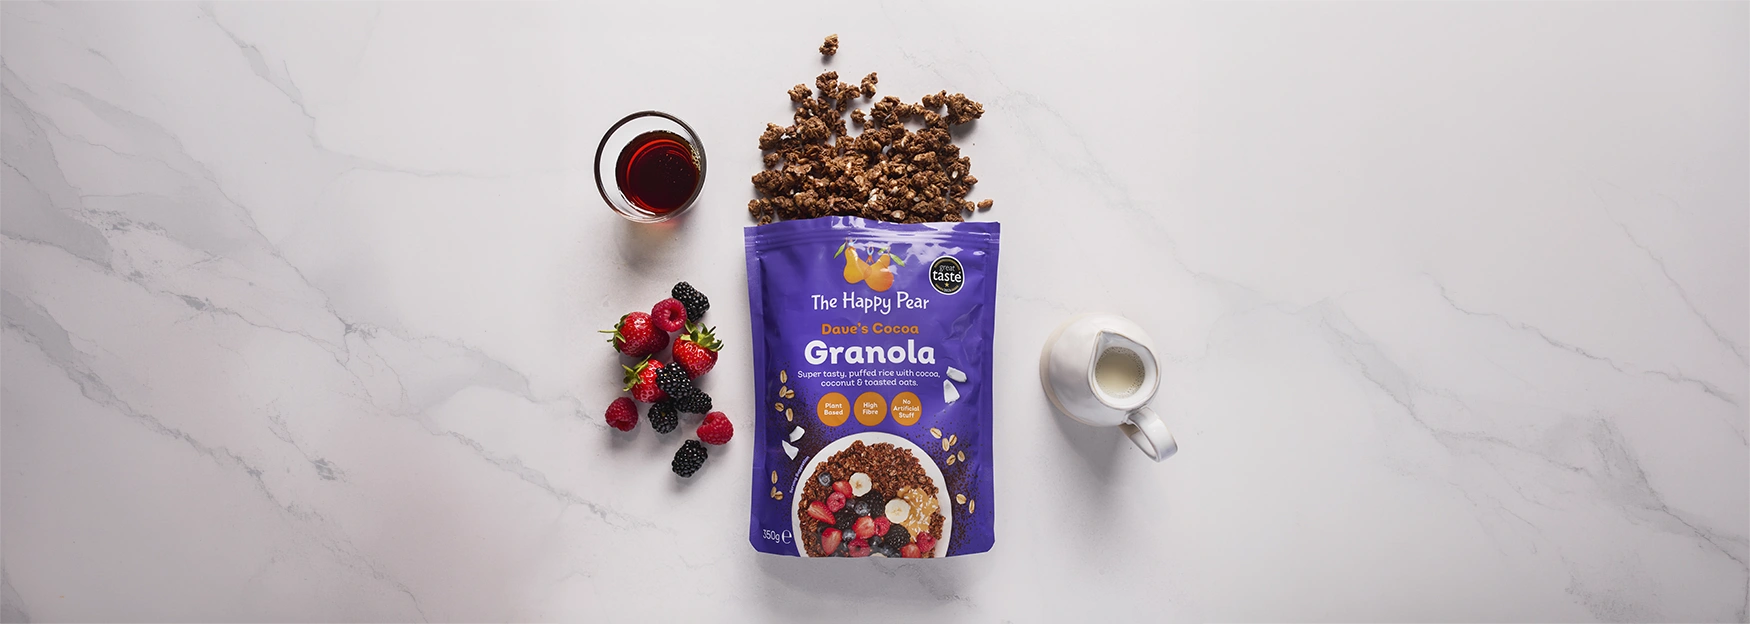
Dave’s Cocoa Crunch is a delicious mix of oats, sunflower seeds, coconut and cocoa powder. It makes a perfect brekkie with milk, porridge or fruit, and it’s free from refined sugars and artificial colours. This crunchy creation is a great source of fibre and it can be enjoyed straight from the tub, as a tasty snack! Dave & Steve X
INGREDIENTS
Oats (50%), Date Syrup, Olive Oil, Coconut Oil, Puffed Brown Rice (4.6%), Dessicated Coconut (3.5%), Rice Flour, Fat Reduced Cocoa Powder (1.1%), Sea Salt.
ALLERGEN INFORMATION
For allergens, including Cereals containing Gluten, see highlighted ingredients.
May also contain traces of Peanuts, Nuts, Sesame and Soya.
NUTRITIONAL INFORMATION
| Typical | per 100g |
|---|---|
| Energy | 1875kJ | 447kcal |
| Fat | 17g |
| Of which: | |
| Saturates | 7.3g |
| Carbohydrate | 60g |
| Of which: | |
| Sugars | 23g |
| Fibre | 8.5g |
| Protein | 9.1g |
| Salt | 0.60g |
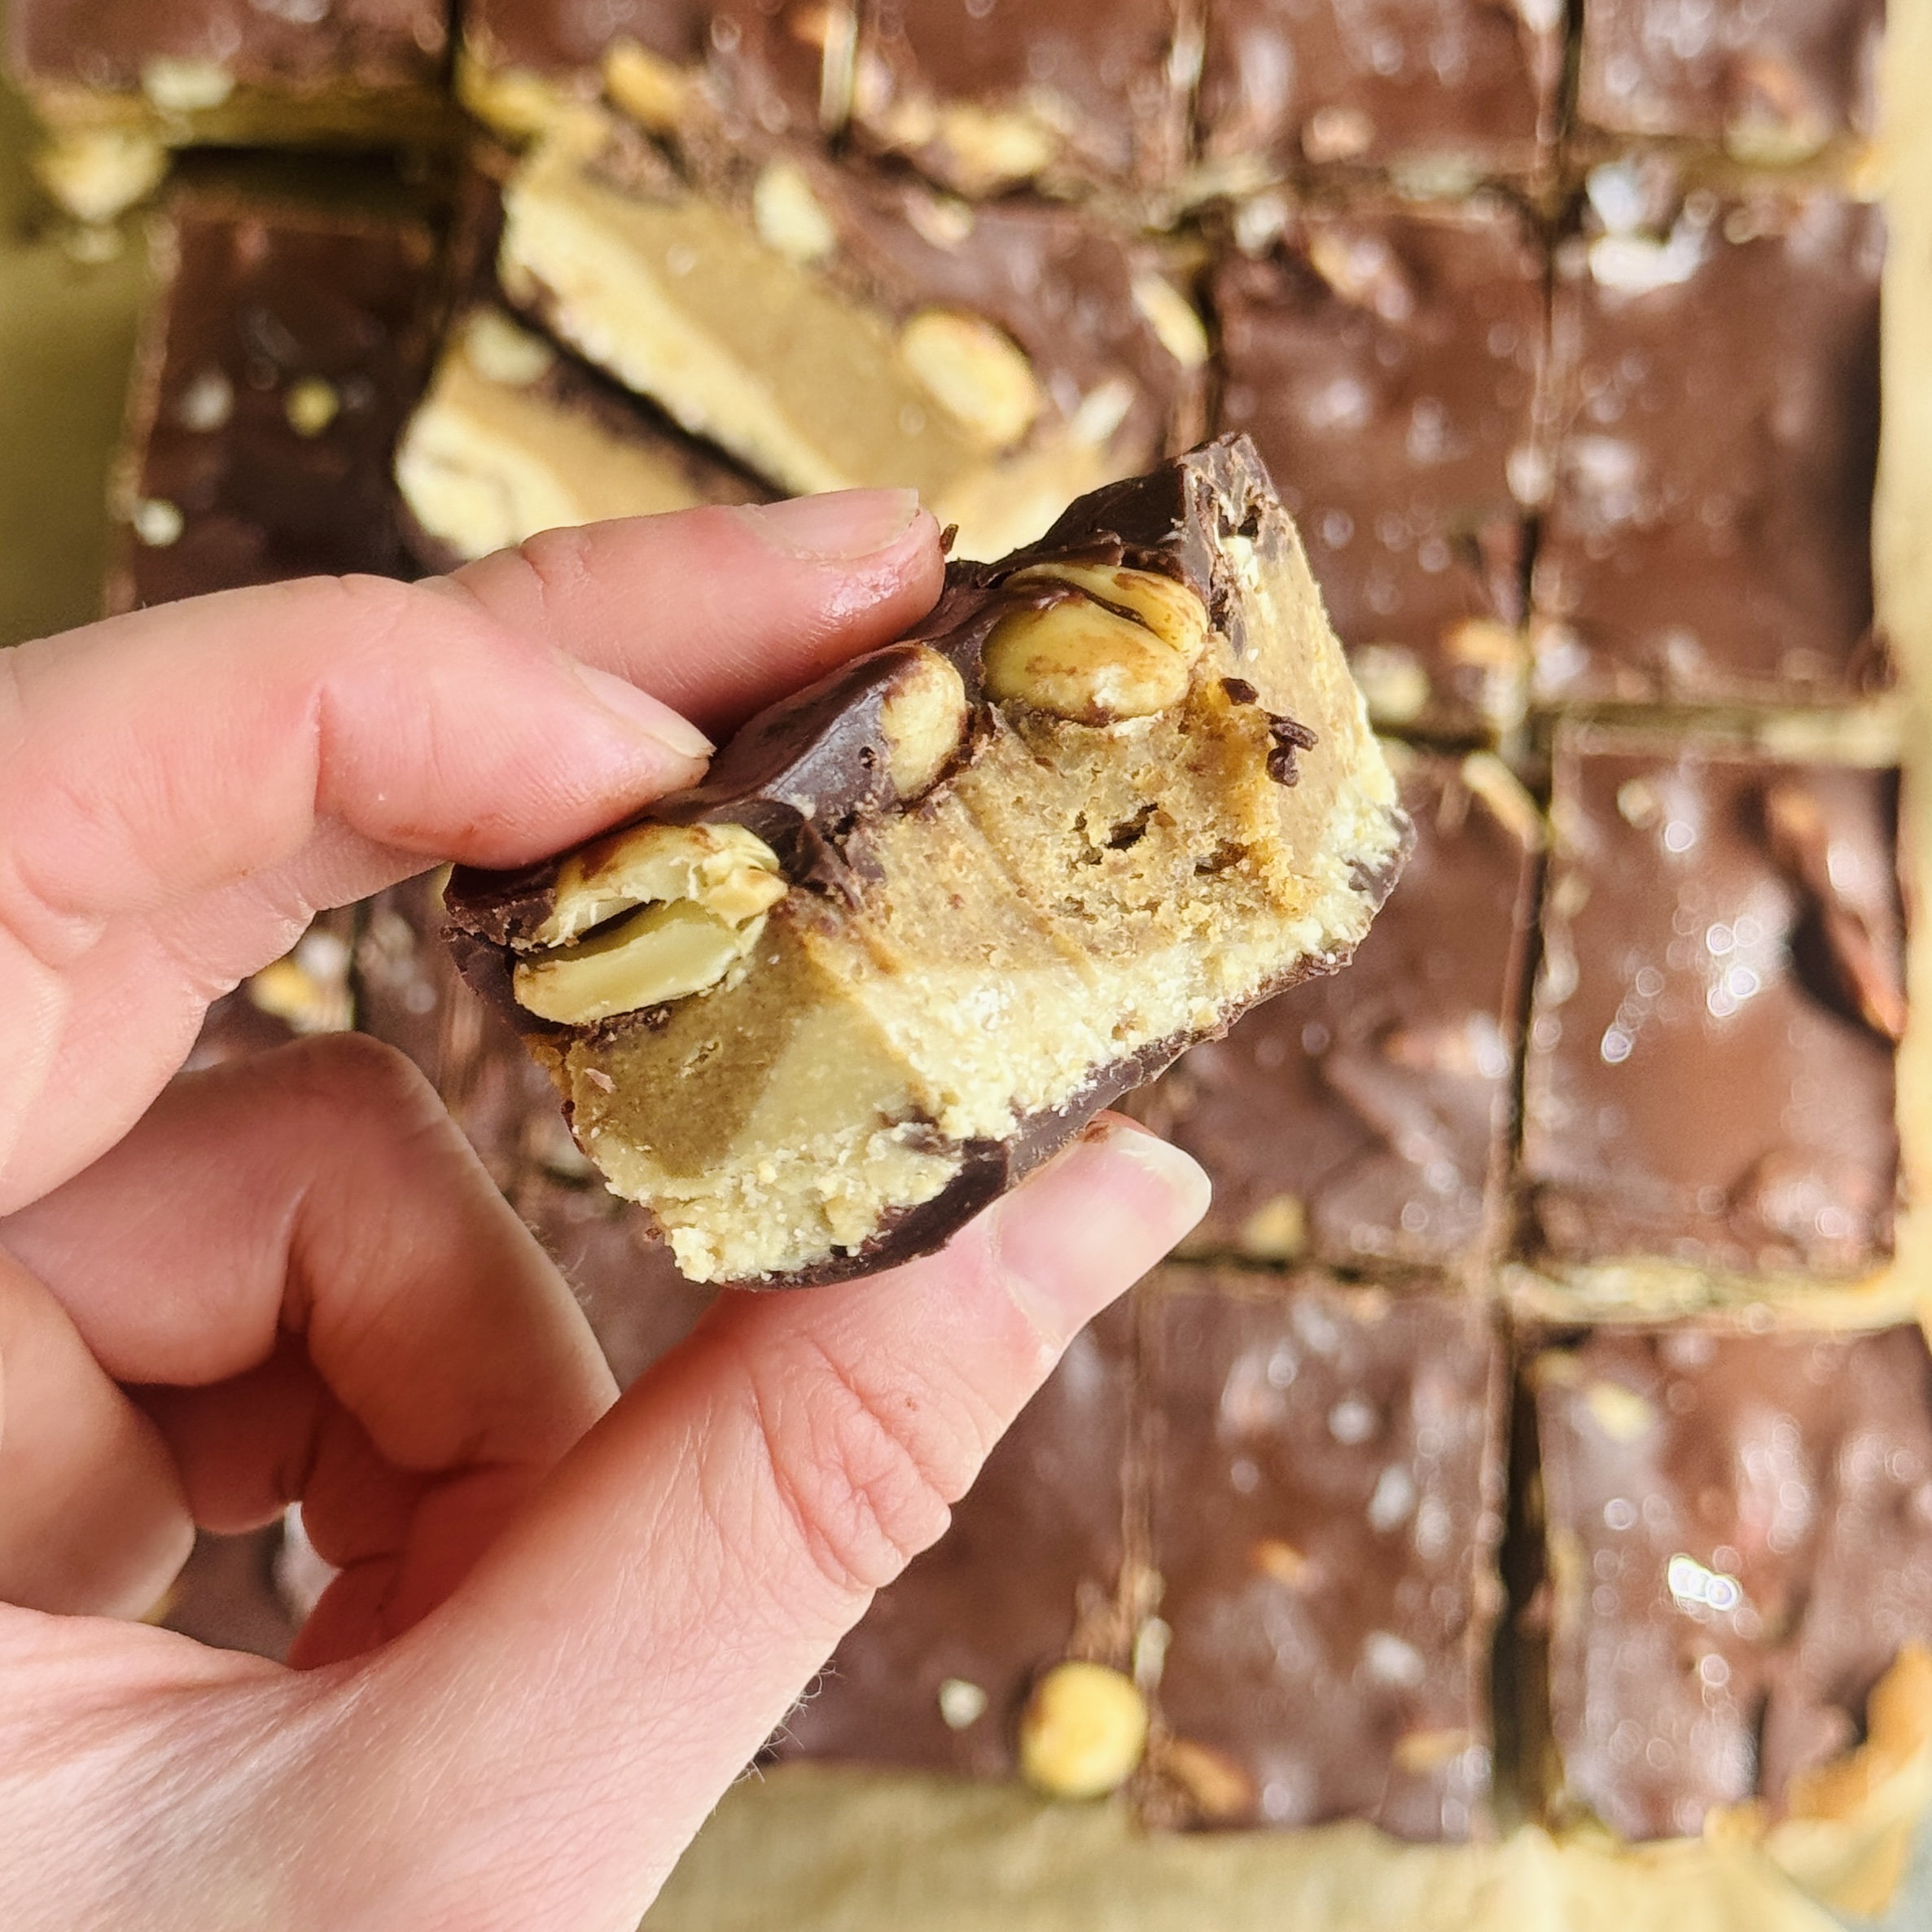
Healthier Snickers Ice Cream Bars
Takes 2 hours 20 minutes
Serves 24
Ingredients
The Vanilla Ice Cream Base
- 240 g roasted salted cashews (approx. 1½ cups)
- 60 ml maple syrup ¼ cup
- Pinch of salt
The Gooey Peanut Butter Salted Caramel Layer
- 240 g dates pitted (approx. 1½ cups / 10 large dates)
- 100 g roasted cashew nuts approx. ⅔ cup
- A big pinch of sea salt
- 10 tbsp warm water 150ml / just over ½ cup
- 150 g smooth peanut butter approx. ½ cup + 2 tbsp
- 1 tsp vanilla extract
The Crunch & Chocolate Shell
- 70 g roasted salted peanuts (approx. ½ cup)
- 250 g high-quality dark chocolate 70% or higher (approx. 1½ cups chopped)
- 1 tsp coconut oil
Instructions
Blend the ice cream base
- In a food processor, combine the 240g of roasted salted cashews, 60ml of maple syrup, 1 tsp of coconut oil, and a pinch of salt. Blend on high for 60 to 90 seconds until the mixture is a nut butter consistency.
Freeze the first layer
- Pour the creamy mixture into a lined pan to create the base layer. Line a standard loaf tin or a square baking dish with parchment paper, leaving some overhang on the sides to use as handles later. Pour the blended ice cream base into the tin and place it flat in the freezer for 1 to 2 hours until it is firm to the touch.
Make the date caramel
- In a small saucepan, add the 240g of pitted dates and 100g of roasted cashews. Pour in the 10 tbsp of warm water and bring to a gentle simmer for a few minutes on the stove to soften the dates. Strain the water out of the saucepan into a bowl (saving the liquid). Put the softened dates and cashews into the food processor. Add the 150g of smooth peanut butter, 1 tsp of vanilla extract, a big pinch of sea salt, and a splash of the saved date water. Blend until it forms a thick, ultra-sticky, glossy caramel paste. If it's too thick to spread, add an extra tablespoon of warm water.
Layer the caramel and nuts
- Spread the caramel over the frozen base and press the remaining nuts into it. Take the frozen ice cream base out of the freezer. Gently spread the salted date caramel evenly across the surface. Take the 70g of peanuts, chop them roughly, and scatter them over the caramel. Press down firmly with your hands so the nuts get locked into the caramel layer. Return to the freezer for 30 minutes.
Slice into bars
- Lift the mixture out using the parchment paper and cut into uniform bars. Once the caramel and nut layer is set, lift the block out of the tin using the parchment handles. Place it on a chopping board and use a sharp knife to slice it into 6 to 8 rectangular bars. Place the bars back on a lined tray in the freezer while you melt your chocolate.
Coat in dark chocolate
- Dip the frozen bars into melted chocolate to seal the layers. Melt the 250g of dark chocolate with 1 tsp of coconut oil in the microwave in 30-second bursts. Pour the melted chocolate into a tall glass. Take each frozen bar and dip it completely into the chocolate, letting any excess drip off. Because the bars are freezing cold, the chocolate will harden into a crisp shell almost instantly.
Storage
- Store your finished bars in an airtight container in the freezer. When you are ready to enjoy one, let it sit on the counter for 3 to 5 minutes. This allows the date caramel to become perfectly gooey and the cashew base to soften into a premium ice cream texture!
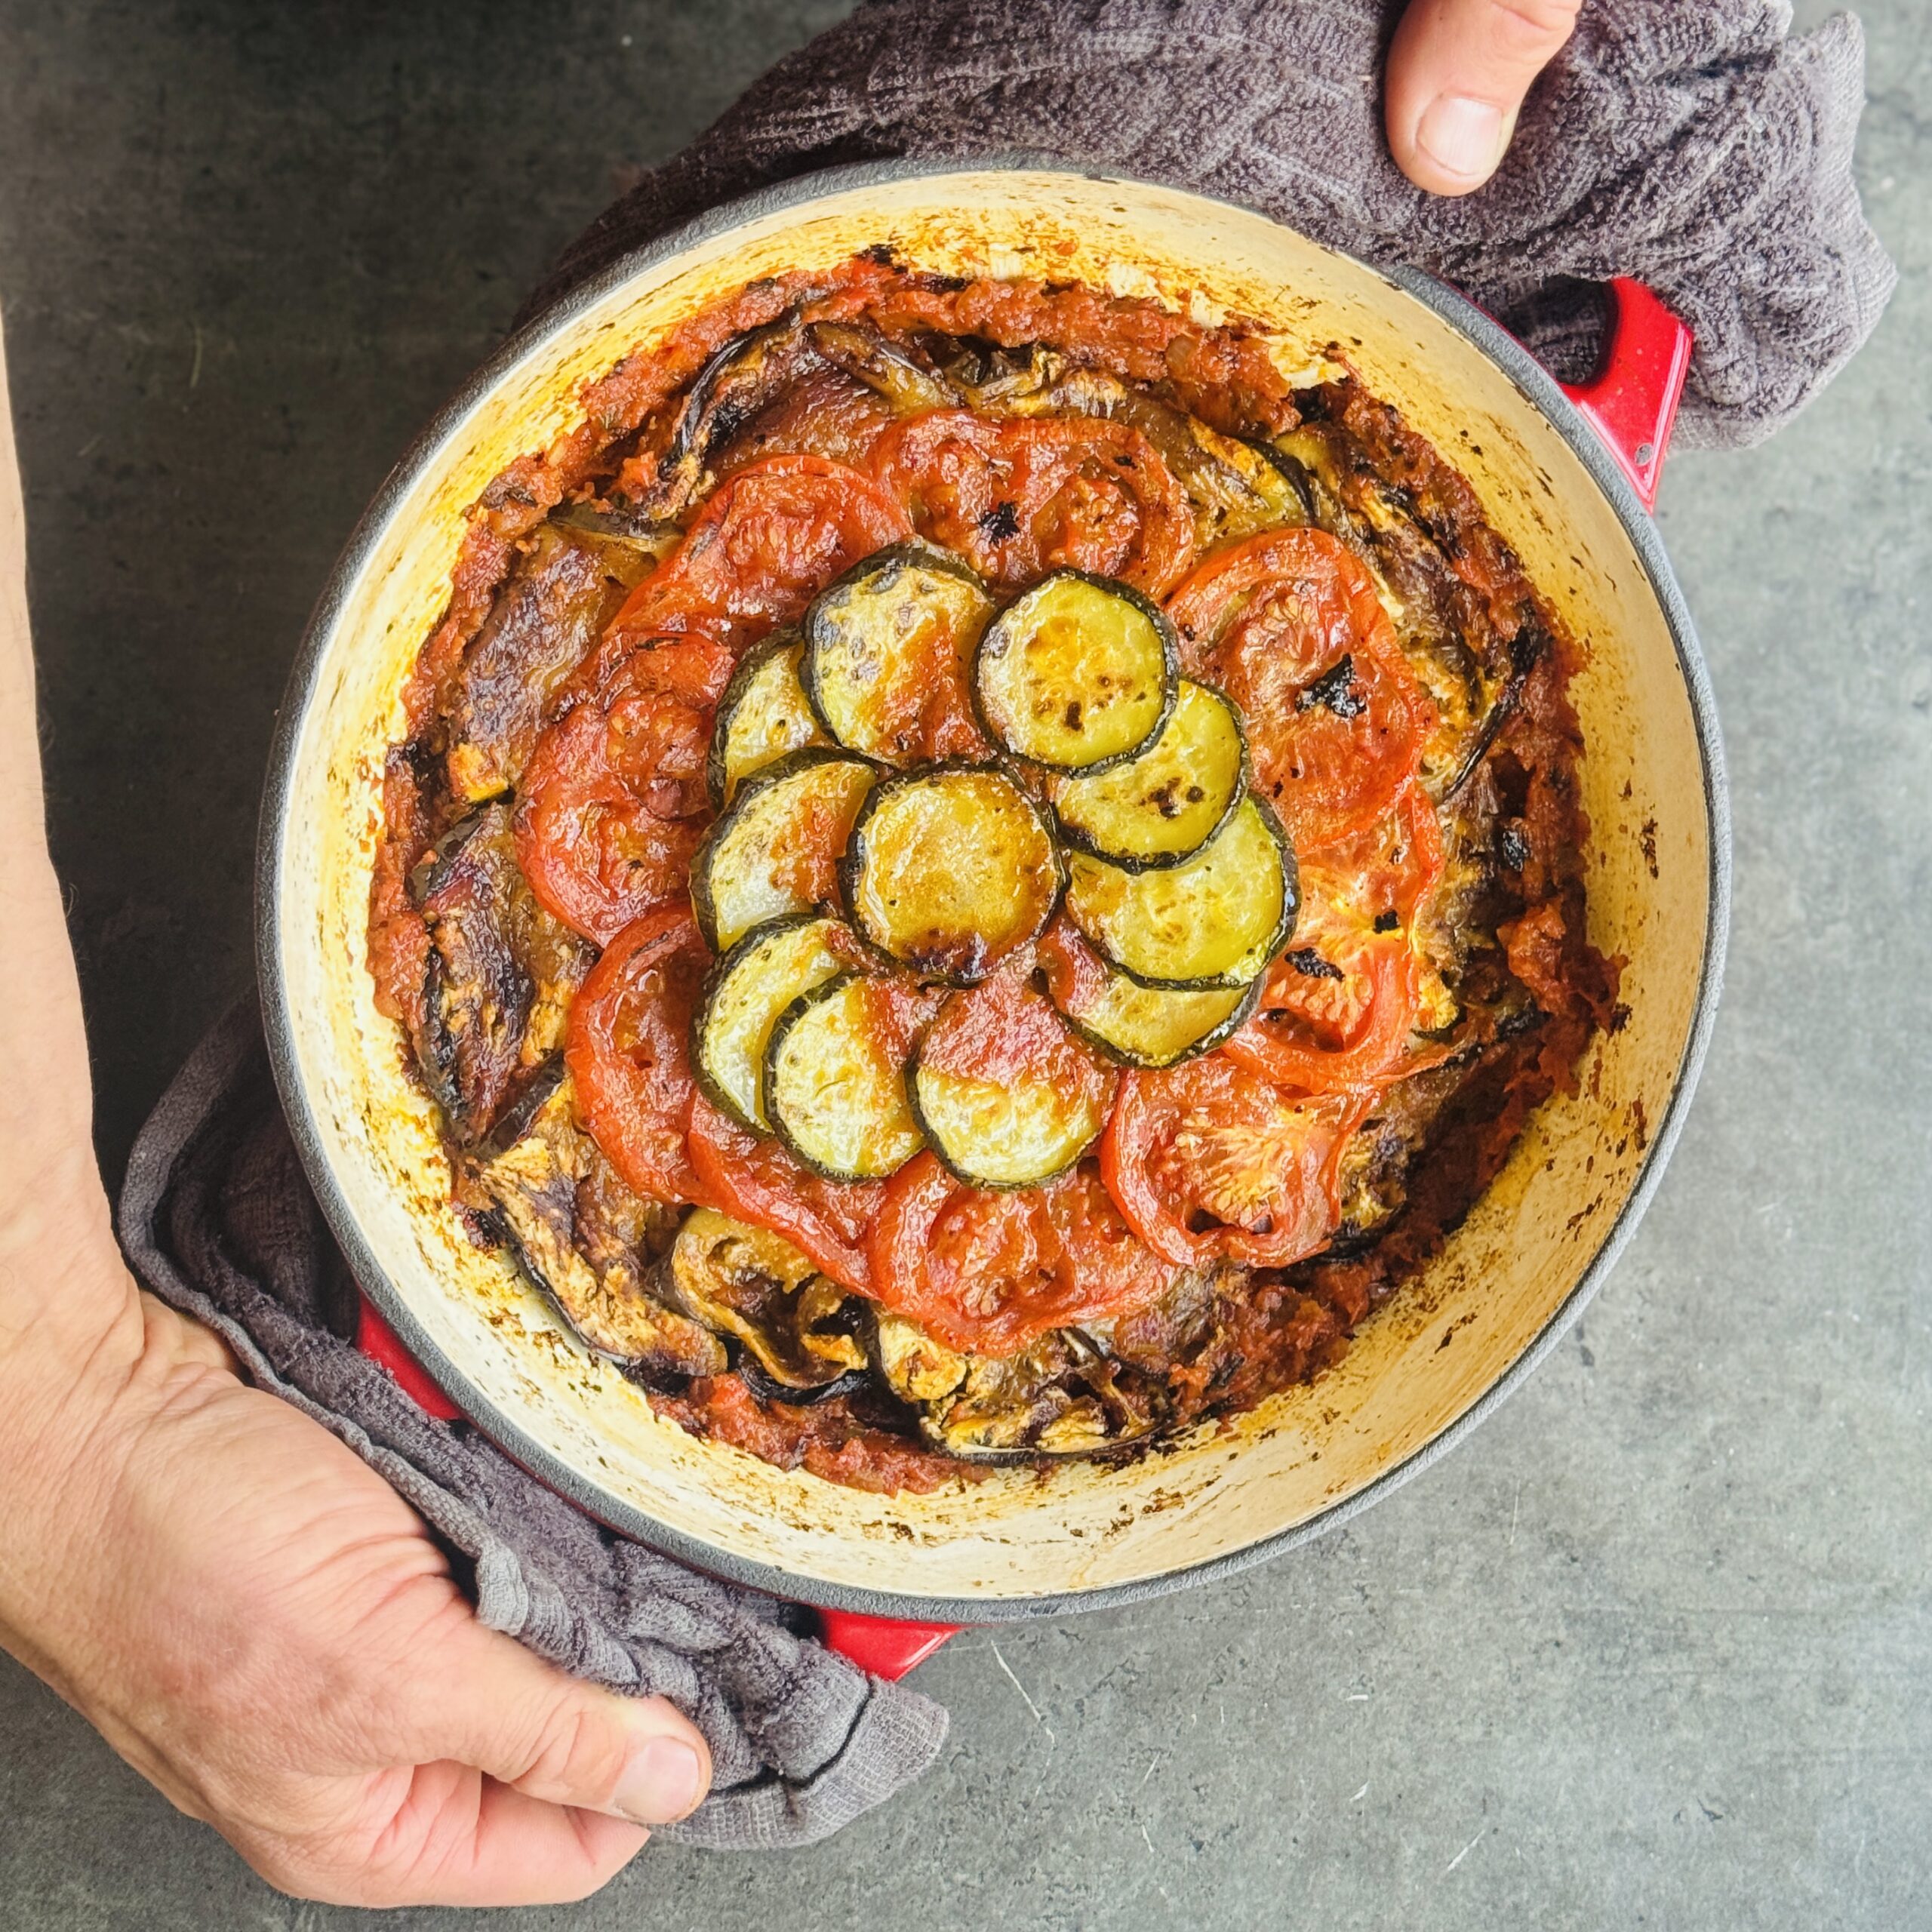
Elegant Summer Ratatouille
Takes 1 hour
Serves 4
Ingredients
For the smooth tomato & pepper base
- 30 ml olive oil 2 tbsp, plus extra for drizzling
- 300 g onions 2 medium, diced
- 3 cloves garlic minced
- 1 jar roasted red peppers drained and roughly chopped (200–250g drained weight)
- 1 x 400g tin chopped tomatoes
- 15 ml maple syrup 1 tbsp
- Salt and black pepper to taste
For the vegetable layer & garnish
- 2 aubergines approx. 500g total
- 2 courgettes approx. 400g total
- 2 large vine tomatoes approx. 300g
- 20 g fresh basil
Instructions
Cook the aromatics
- Preheat the oven to 200°C fan.
- Heat a large ovenproof pan or shallow casserole dish over medium heat and add the olive oil. Add the diced onions and cook for 4–5 minutes until soft and translucent. Stir in the garlic and cook for another 1–2 minutes until fragrant.
Make the sauce
- Add the roasted peppers, chopped tomatoes, maple syrup, and a generous pinch of salt and pepper. Simmer gently for 3–4 minutes.
- Using a hand blender, blend the sauce directly in the pan until smooth and velvety. Taste and adjust the seasoning if needed.
Slice the vegetables
- Slice the aubergines, courgettes, and tomatoes into thin rounds, roughly ½–1cm thick. Try to keep the slices as even as possible so they cook uniformly.
Arrange the vegetables
- Arrange the sliced vegetables upright in concentric circles over the sauce, alternating aubergine, courgette, and tomato as you go. Pack them fairly tightly together so they hold their shape while baking.
Bake
- Drizzle generously with olive oil and season with a little extra salt and pepper.
- Cover with a lid or foil and bake for 25 minutes. Remove the cover and bake for a further 10 minutes until the vegetables are tender and lightly golden around the edges.
Finish and serve
- Scatter over the fresh basil just before serving. The heat from the vegetables will gently release the basil’s aroma and bring the whole dish to life.
- Serve warm with crusty bread, grains, or a simple leafy salad.
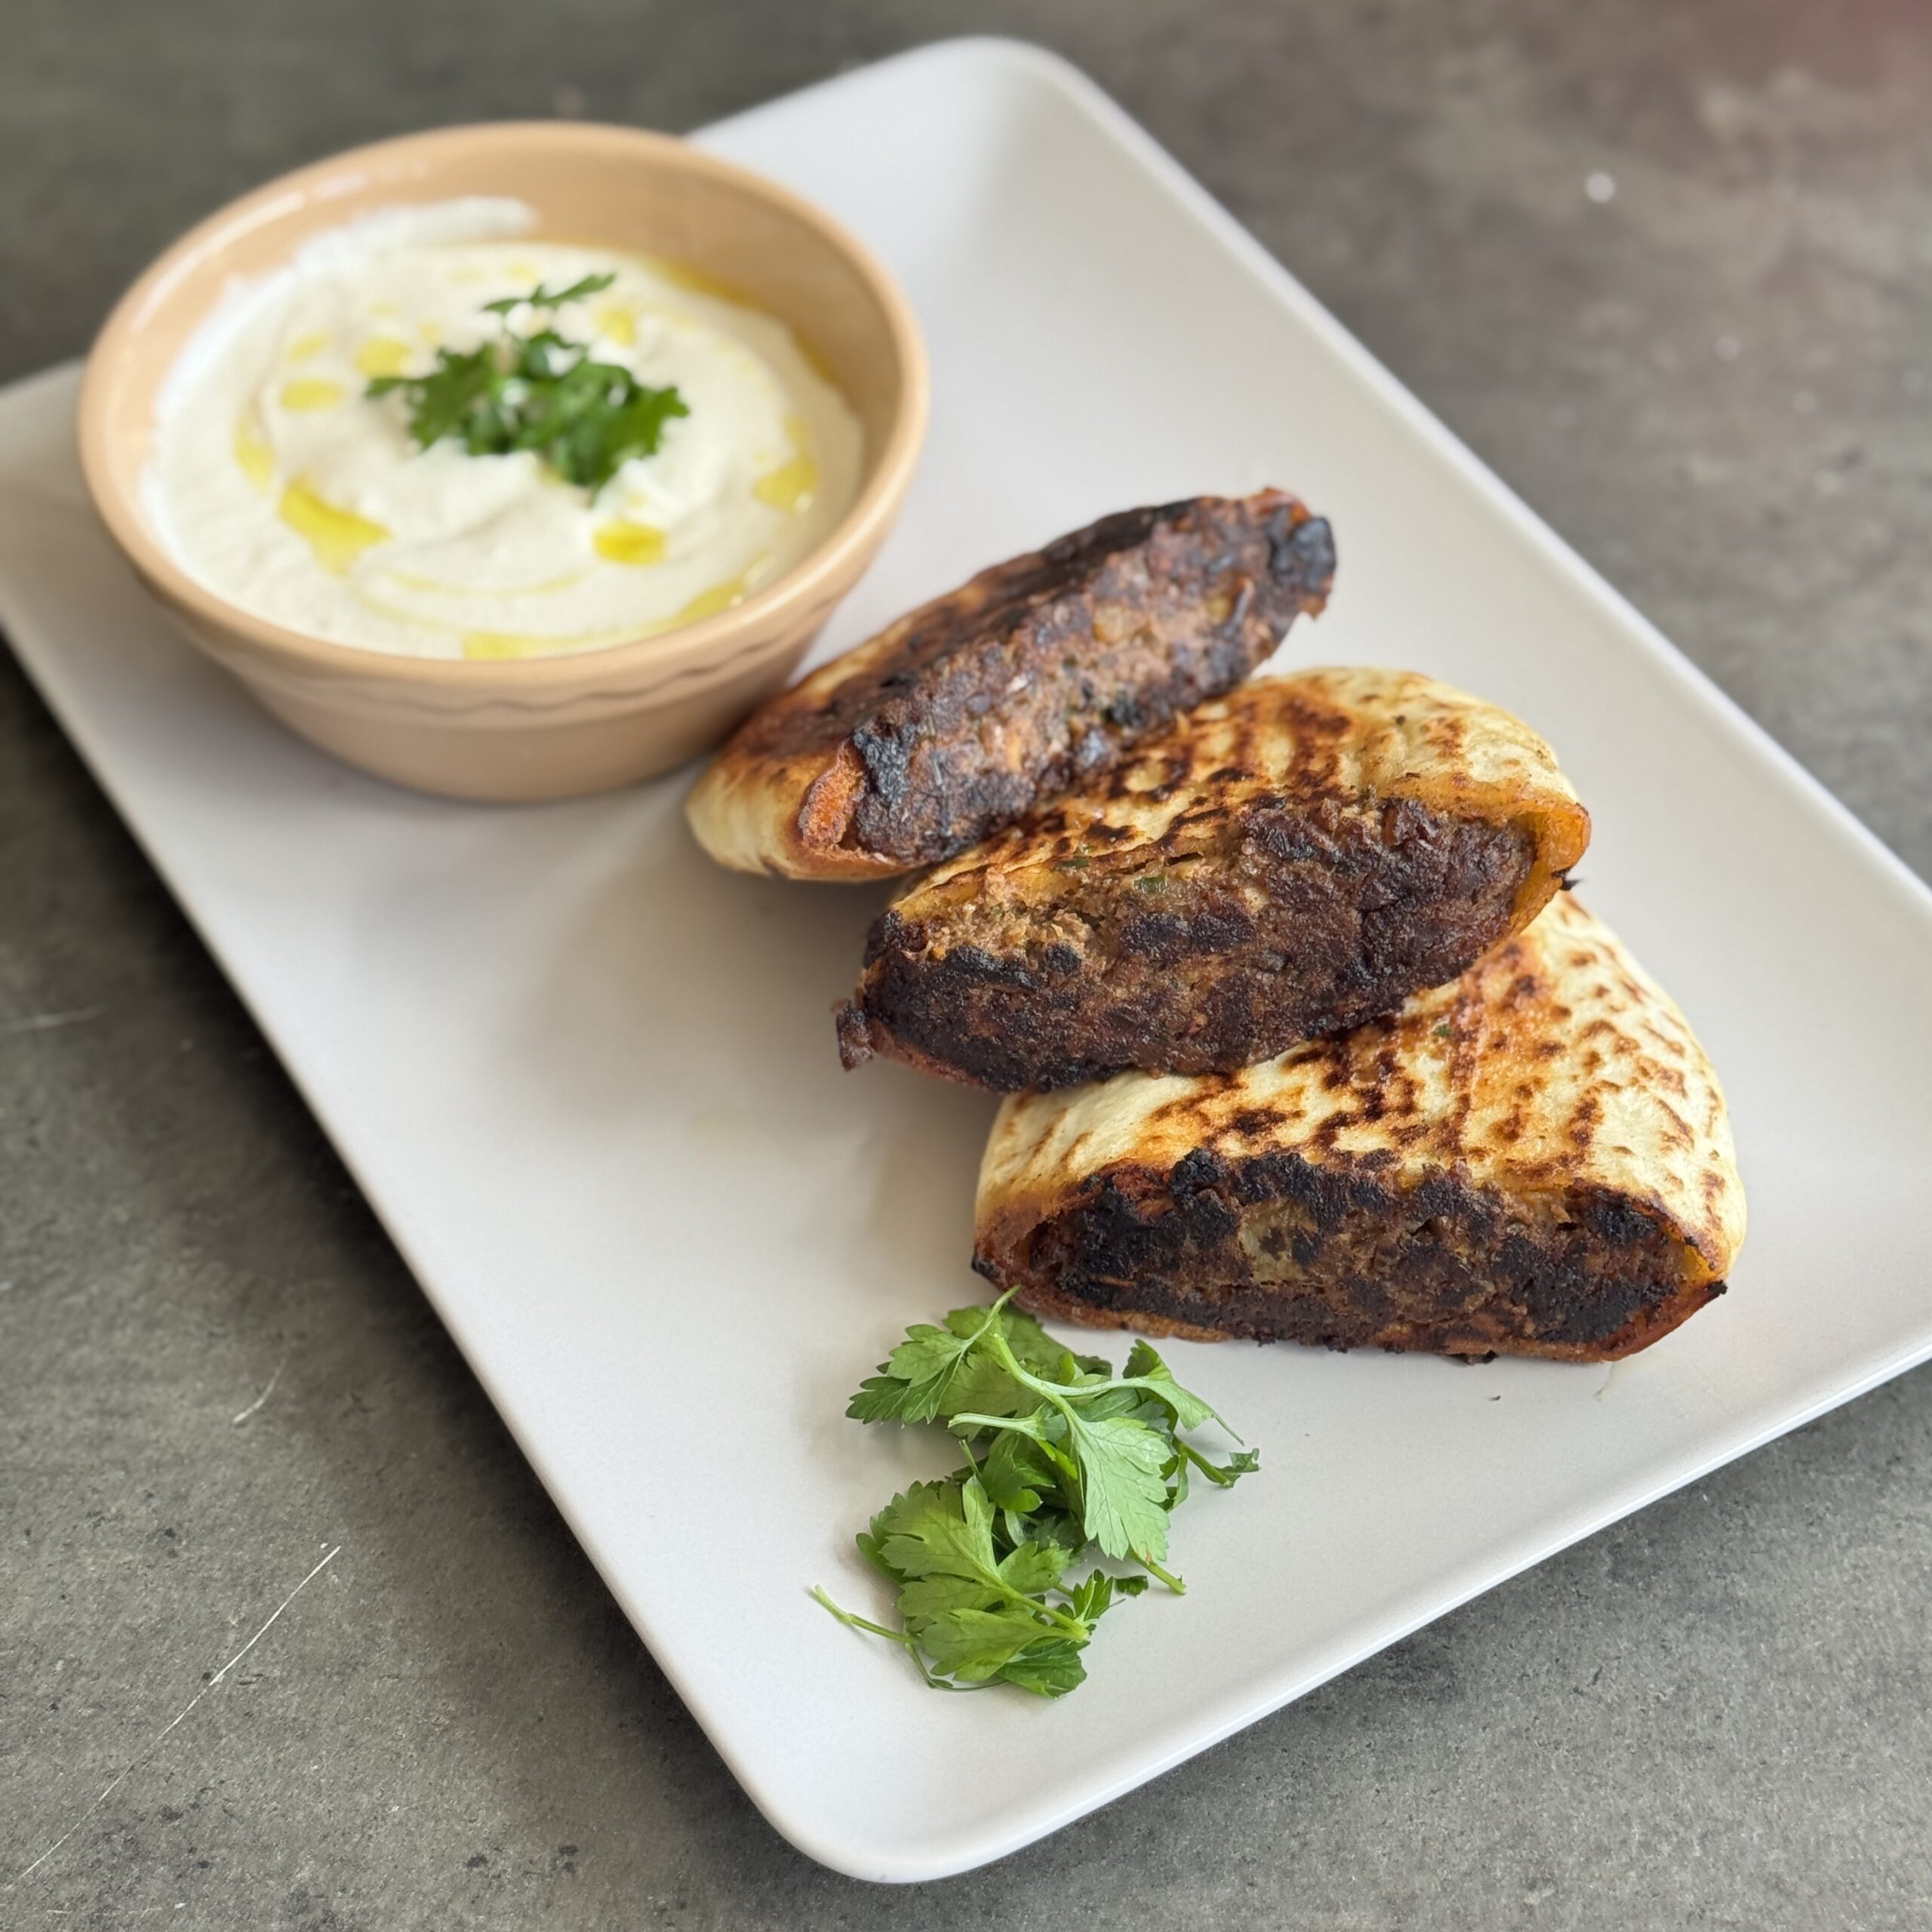
Plant-Based “Meaty” Arayes
Takes 25 minutes
Serves 3
Ingredients
The Filling
- 250 g mushrooms
- 240 g cooked brown lentils drained well (1½ cups)
- 60 g walnuts/pecans ½ cup
- 100 g small onion 1 small onion
- 2 cloves garlic
- 15 g tomato paste 1 tbsp
- 8 g cumin 1 tbsp
- 2 g smoked paprika 1 tsp
- 1 g cinnamon ½ tsp
- 15 ml pomegranate molasses 1 tbsp, optional but recommended
- 30 ml tamari/soy sauce 2 tbsp
- Salt and black pepper to taste
The Build
- 4 large thick pita breads (standard or wholemeal)
- 30 ml extra virgin olive oil 2 tbsp, for brushing
- Lemon-Tahini Dip
- 60 g tahini ¼ cup
- Juice of ½ lemon
- 1 g garlic powder ½ tsp
- 60 g yogurt of choice ¼ cup
- 30 –45ml warm water 2–3 tbsp, to thin
- Salt to taste
Instructions
Prepare the filling
- Peel the onion and garlic and roughly chop. Roughly chop the mushrooms and walnuts/pecans. Drain and rinse the lentils. Into a food processor add all the ingredients and blend until cohesive but still with a little texture. It should feel like a thick paste.
Cook the filling to evaporate some water
- Into a large pan add 30ml (2 tbsp) of oil and fry the filling for 3–4 mins, stirring regularly to brown and cook off some of the water in order to concentrate the flavours and texture.
Stuff the pita
- Quarter the pitas if large and if smaller cut in half and spread the filling evenly into each pocket. Carefully open the pockets and spread about 30g (2 tbsp) of the filling into each. Use the back of a spoon to flatten the filling so it reaches the very edges of the pita.
Crisp the sides
- Brush with olive oil and fry each side until golden and shattering. Lay the pitas flat in the pan. Brush the top side with olive oil, then flip. Brush the other side. Cook for 3–4 minutes per side, pressing down with a spatula, until the bread is dark golden and very crispy.
Sear the open edge
- Cook the “meat” side first to seal the filling and create a crust. Heat a large non-stick pan over medium-high heat with a splash of oil. Place the pita quarters in the pan upright, with the exposed filling touching the pan. Press down gently for 2 minutes until the filling is browned and “sealed.”
Make the dip and serve
- Whisk the tahini sauce until creamy and serve alongside the hot pitas. Whisk the tahini, lemon juice, yoghurt and garlic powder. Gradually add warm water one tablespoon at a time until it reaches a smooth, drizzling consistency. Serve the Arayes hot, dipped straight into the tahini sauce.
Serving Suggestion
- The Fresh Balance: Serve these with a side of fresh parsley and red onion salad tossed in sumac. The acidity of the salad perfectly balances the rich, nutty flavor of the walnut and mushroom filling.
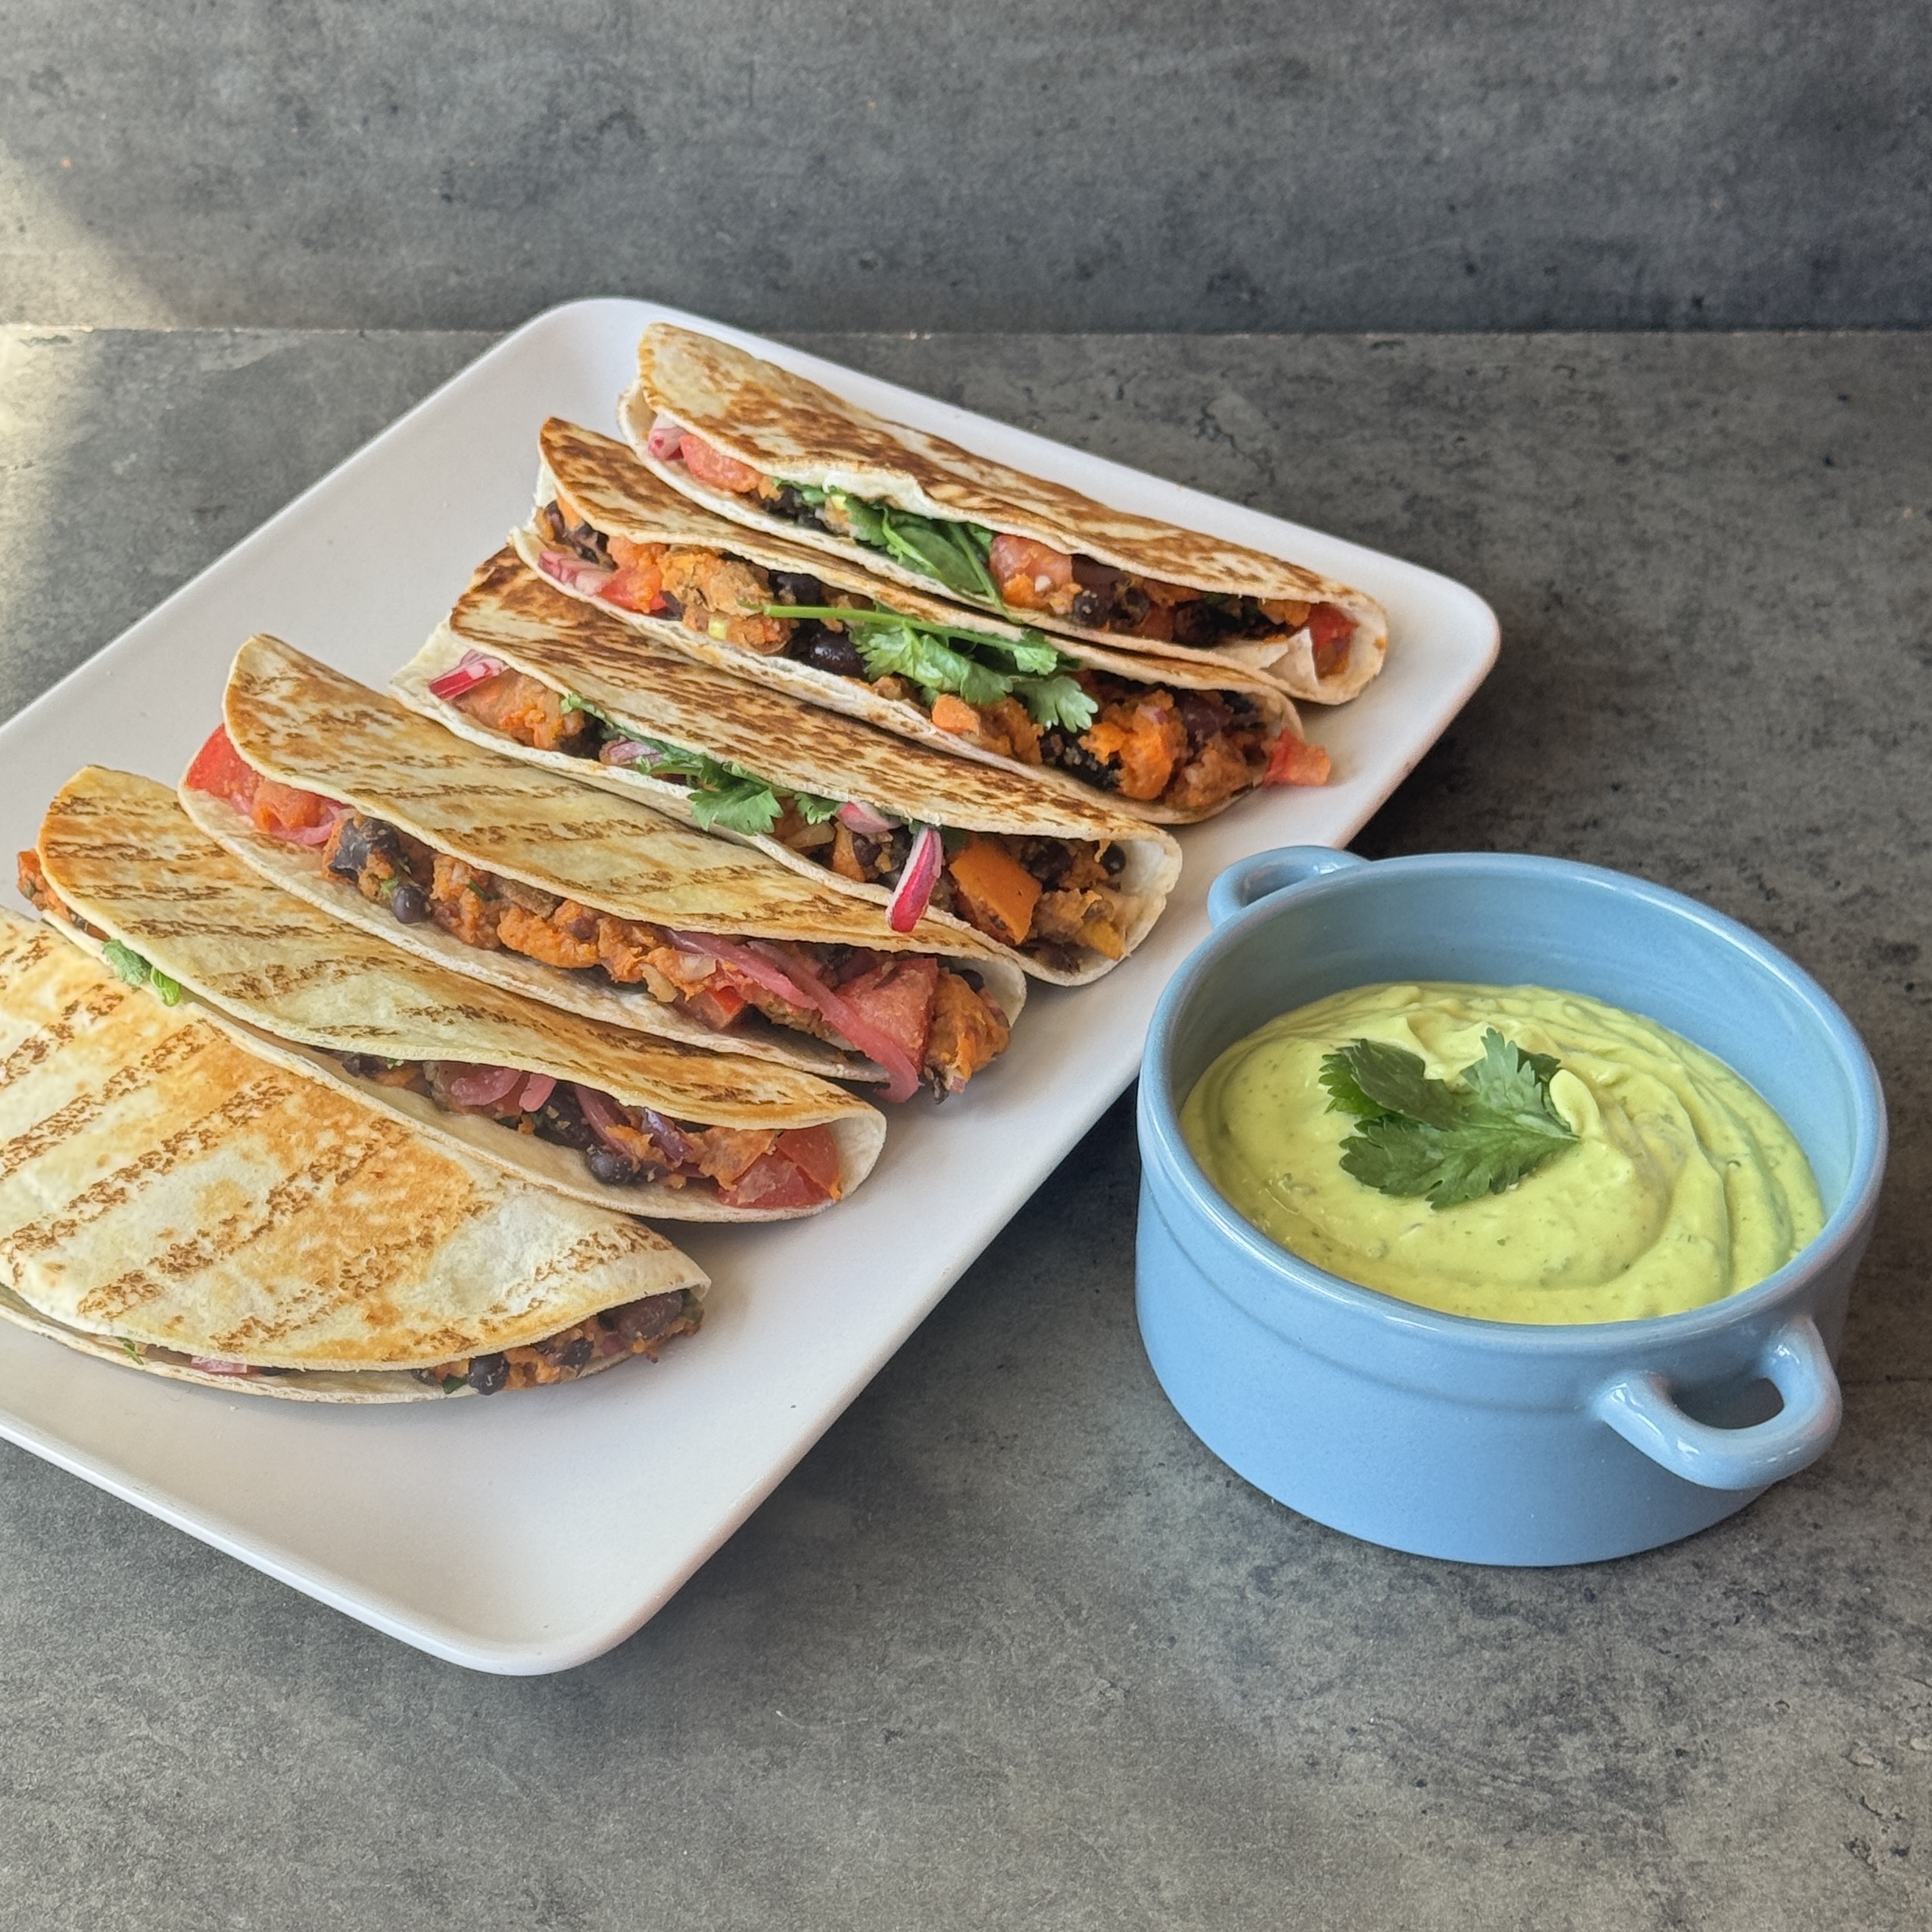
Sweet Potato & Black Bean Tacos with a Guacamole Cream
Takes 18 minutes
Serves 4
Ingredients
Sweet Potato & Black Bean Filling
- 500 g sweet potatoes
- 30 ml olive oil 2 tbsp
- 2 ripe tomatoes
- 1 x 400g tin black beans approx. 240g drained / 1½ cups
- 15 g fresh coriander approx. ½ cup chopped
- 6 corn or wheat tacos of choice
- Juice of ½ lime approx. 1 tbsp
- 1 tbsp ground coriander
- 1 tbsp ground cumin
- 1 tsp smoked paprika
- Salt and black pepper to taste
Guacamole Cream
- 2 ripe avocados approx. 300g flesh / 2 cups
- 200 g yoghurt of choice approx. ¾ cup
- 10 g fresh coriander approx. ⅓ cup
- 30 g finely diced red onion 2 tbsp
- Juice of ½ lime approx. 1 tbsp
- 1 tsp garlic powder
- Salt to taste
To Serve
- Pickled red onions
- Fresh coriander
Instructions
Prepare & Roast the Sweet Potatoes
- Preheat the oven or air fryer to 200°C.
- Cut the sweet potatoes into small bite-sized cubes, then toss with the olive oil and a generous pinch of salt.
- Roast for 25 minutes, until soft and slightly charred around the edges.
Make the Sweet Potato & Black Bean Filling
- Drain and rinse the black beans until the water runs clear, then add to a large bowl.
- Dice the tomatoes and finely chop the coriander. Add both to the bowl with a pinch of salt.
- Add the roasted sweet potatoes, ground cumin, ground coriander, smoked paprika and lime juice. Roughly mash everything together.
- Taste and adjust the seasoning with more salt, pepper, lime juice or chilli if desired.
Make the Guacamole Cream
- Add the avocado flesh, yoghurt, coriander, red onion, lime juice, garlic powder and salt to a blender.
- Blend until smooth and creamy. Taste and adjust with more salt, lime juice, chilli powder or black pepper if needed.
Fill & Fry the Tacos
- Fill each taco with the sweet potato and black bean mixture. Top with pickled red onions and fresh coriander.
- Fold over and cook in a hot pan until golden on both sides.
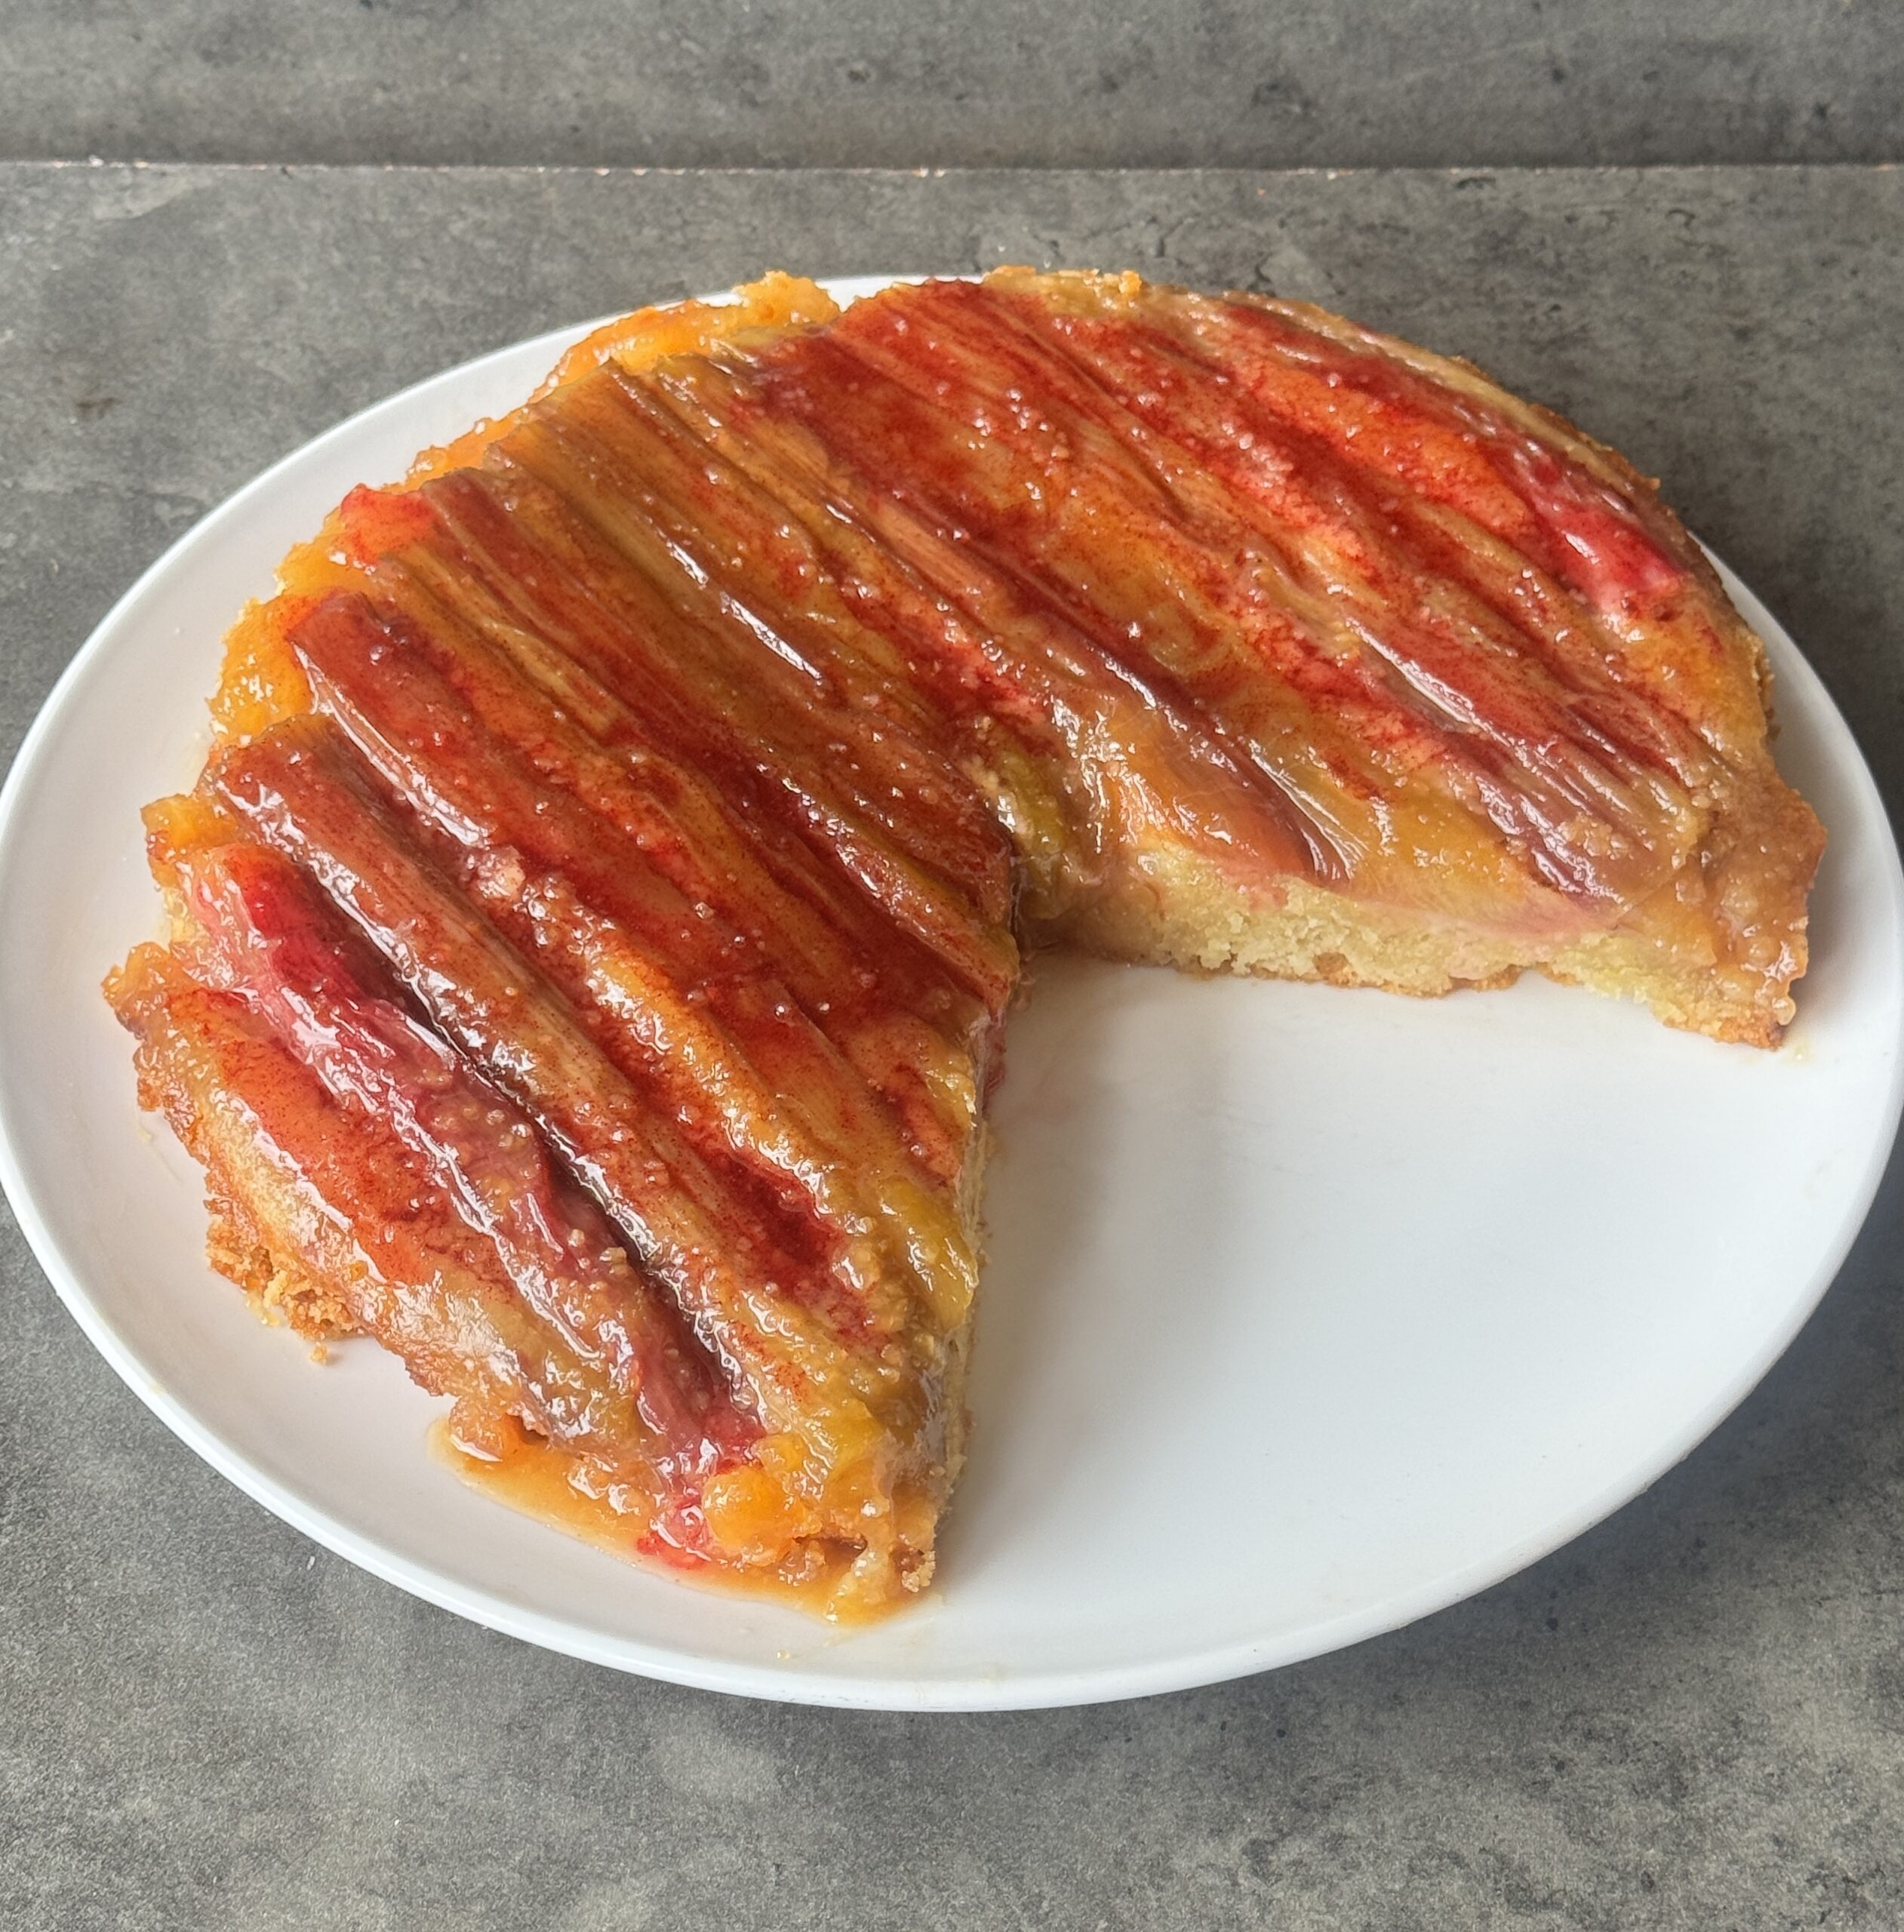
Upside-Down Rhubarb & Frangipane Cake
Takes 1 hour
Serves 8
Ingredients
The Rhubarb Base
- 400 g rhubarb trimmed and cut into 5cm lengths (about 4 cups)
- 50 g plant-based butter ¼ cup
- 100 g caster sugar ½ cup
- 25 g flaked almonds ¼ cup
The Frangipane Sponge
- 200 g ground almonds 2 cups
- 175 g caster sugar ¾ cup + 2 tbsp
- 125 g self-raising flour sieved (1 cup)
- 150 g plant-based butter melted (⅔ cup)
- 120 ml water ½ cup
- 1 tsp almond extract
- Pinch of salt
Instructions
Prepare the tin and rhubarb
- Preheat the oven to 180°C (160°C fan). Grease a 20cm round cake tin (or use an ovenproof skillet). Melt the butter with the sugar in a pan and simmer for about 2 minutes, until slightly thickened and lightly pink. Pour this syrup into the base of the tin. Scatter over the flaked almonds, then arrange the rhubarb pieces neatly on top, fitting them snugly together.
Combine the dry ingredients
- In a large bowl, whisk together the ground almonds, sieved flour, caster sugar and a pinch of salt. Whisking helps break up any clumps and keeps the sponge light rather than dense.
Mix the wet ingredients
- In a separate jug, combine the melted butter, water and almond extract. Stir well until fully mixed.
Form the batter
- Pour the wet mixture into the dry ingredients and fold together using a spatula until smooth, thick and glossy. The batter should be scoopable, with no streaks of flour remaining.
Bake and turn out
- Gently spoon the batter over the rhubarb, smoothing the top without disturbing the fruit. Bake for 35–40 minutes, or until a skewer inserted into the centre comes out clean. Allow the cake to rest in the tin for 5–10 minutes, then run a knife around the edge and carefully turn it out onto a serving plate.
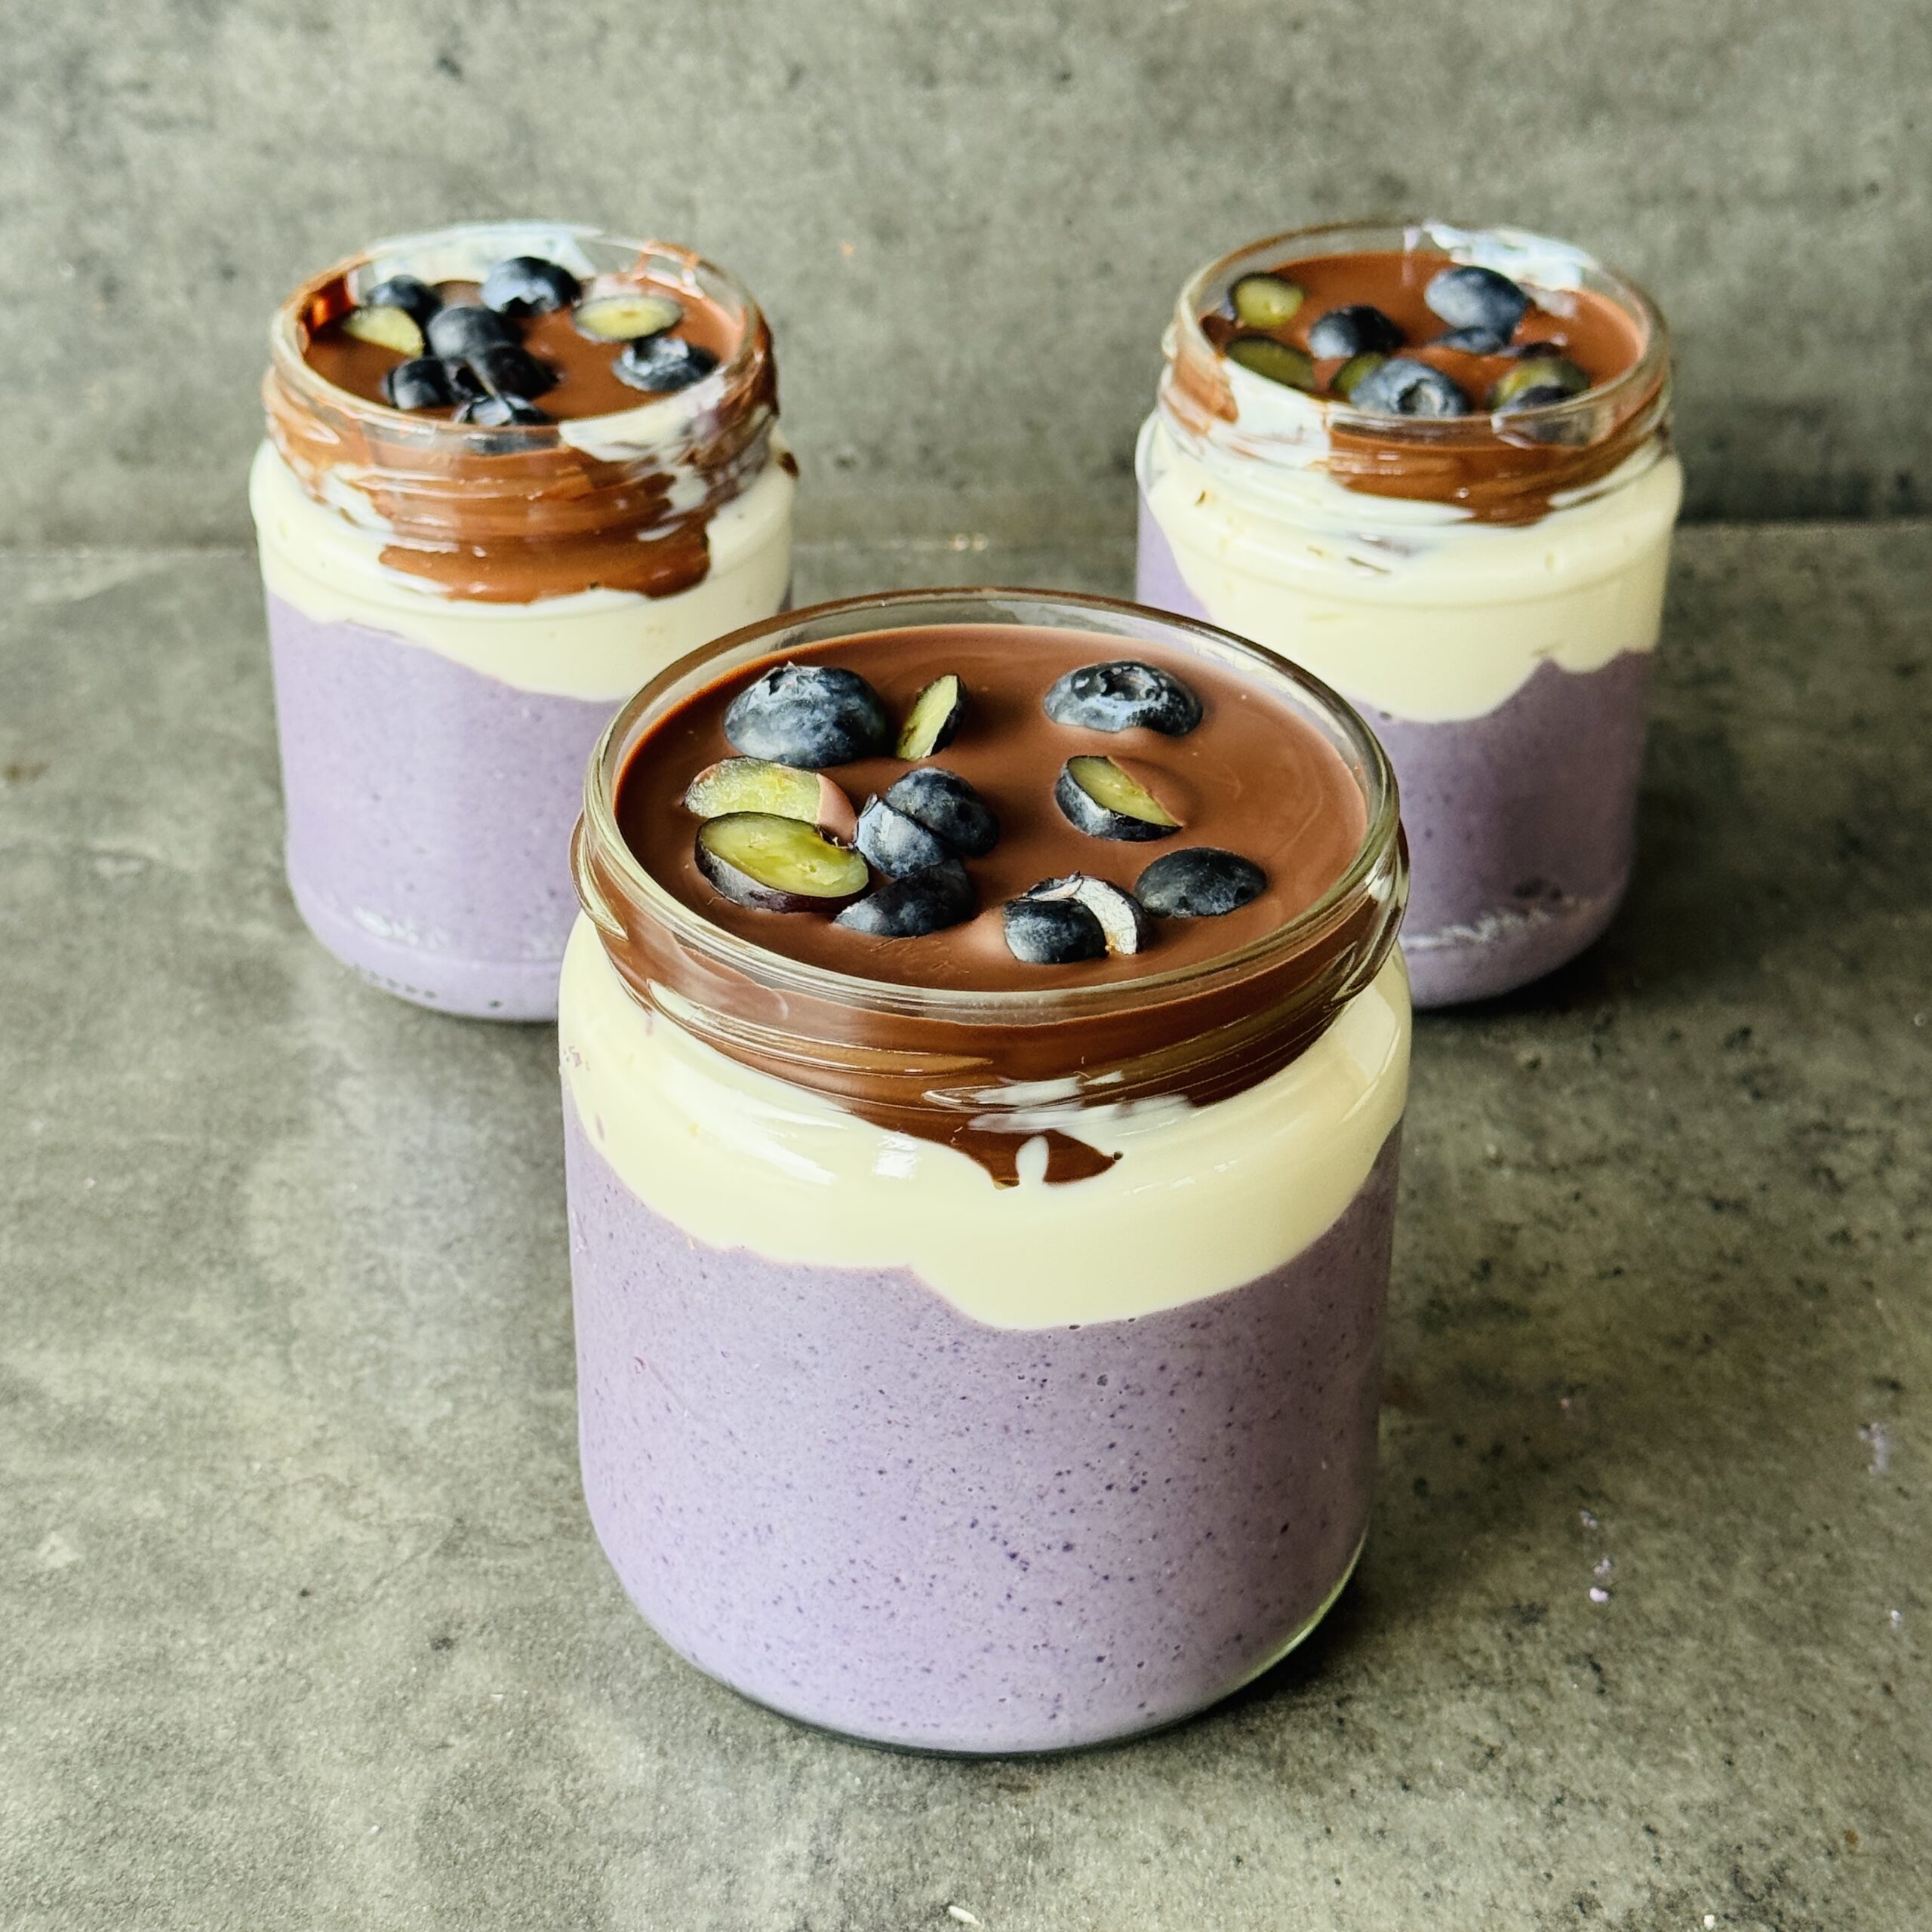
Blended Blueberry Chia Overnight Oats
Takes 4 hours 5 minutes
Serves 4
Ingredients
- 200 g 2 cups rolled oats
- 2 tbsp chia seeds
- 360 ml/ 1½ cups plant-based milk
- 245 g / 1 cup plant-based yogurt
- 225 g 1½ cups blueberries (fresh or frozen)
- 50 ml/ 2–3 tbsp maple syrup to taste
- 1 tsp vanilla extract optional
- Pinch of salt
Chocolate topping:
- 80 –100g dark chocolate
- 1 tsp coconut oil optional, helps it snap nicely
Instructions
Blend:
- Add all oat ingredients to a blender and blend until smooth and creamy.
Chill:
- Pour evenly into 2 jars or containers. Cover and refrigerate for at least 4 hours or overnight. It will thicken up nicely.
Make the chocolate shell:
- Melt the chocolate gently (microwave in short bursts or over a bain-marie).
- Stir in the coconut oil if using.
- Let it cool slightly (so it’s not piping hot).
Create the shell:
- Pour a thin layer of melted chocolate over each jar.
- Tilt or swirl to spread evenly across the top.
- Place in the fridge for ~10 minutes until it hardens into a shell.
To serve:
- Crack the chocolate layer with a spoon and dig in
Tips to level it up:
- Add a layer of nut butter under the chocolate for a “snickers” vibe
- Sprinkle a pinch of flaky sea salt on the chocolate before it sets
- Stir in some protein powder or hemp seeds for extra fuel
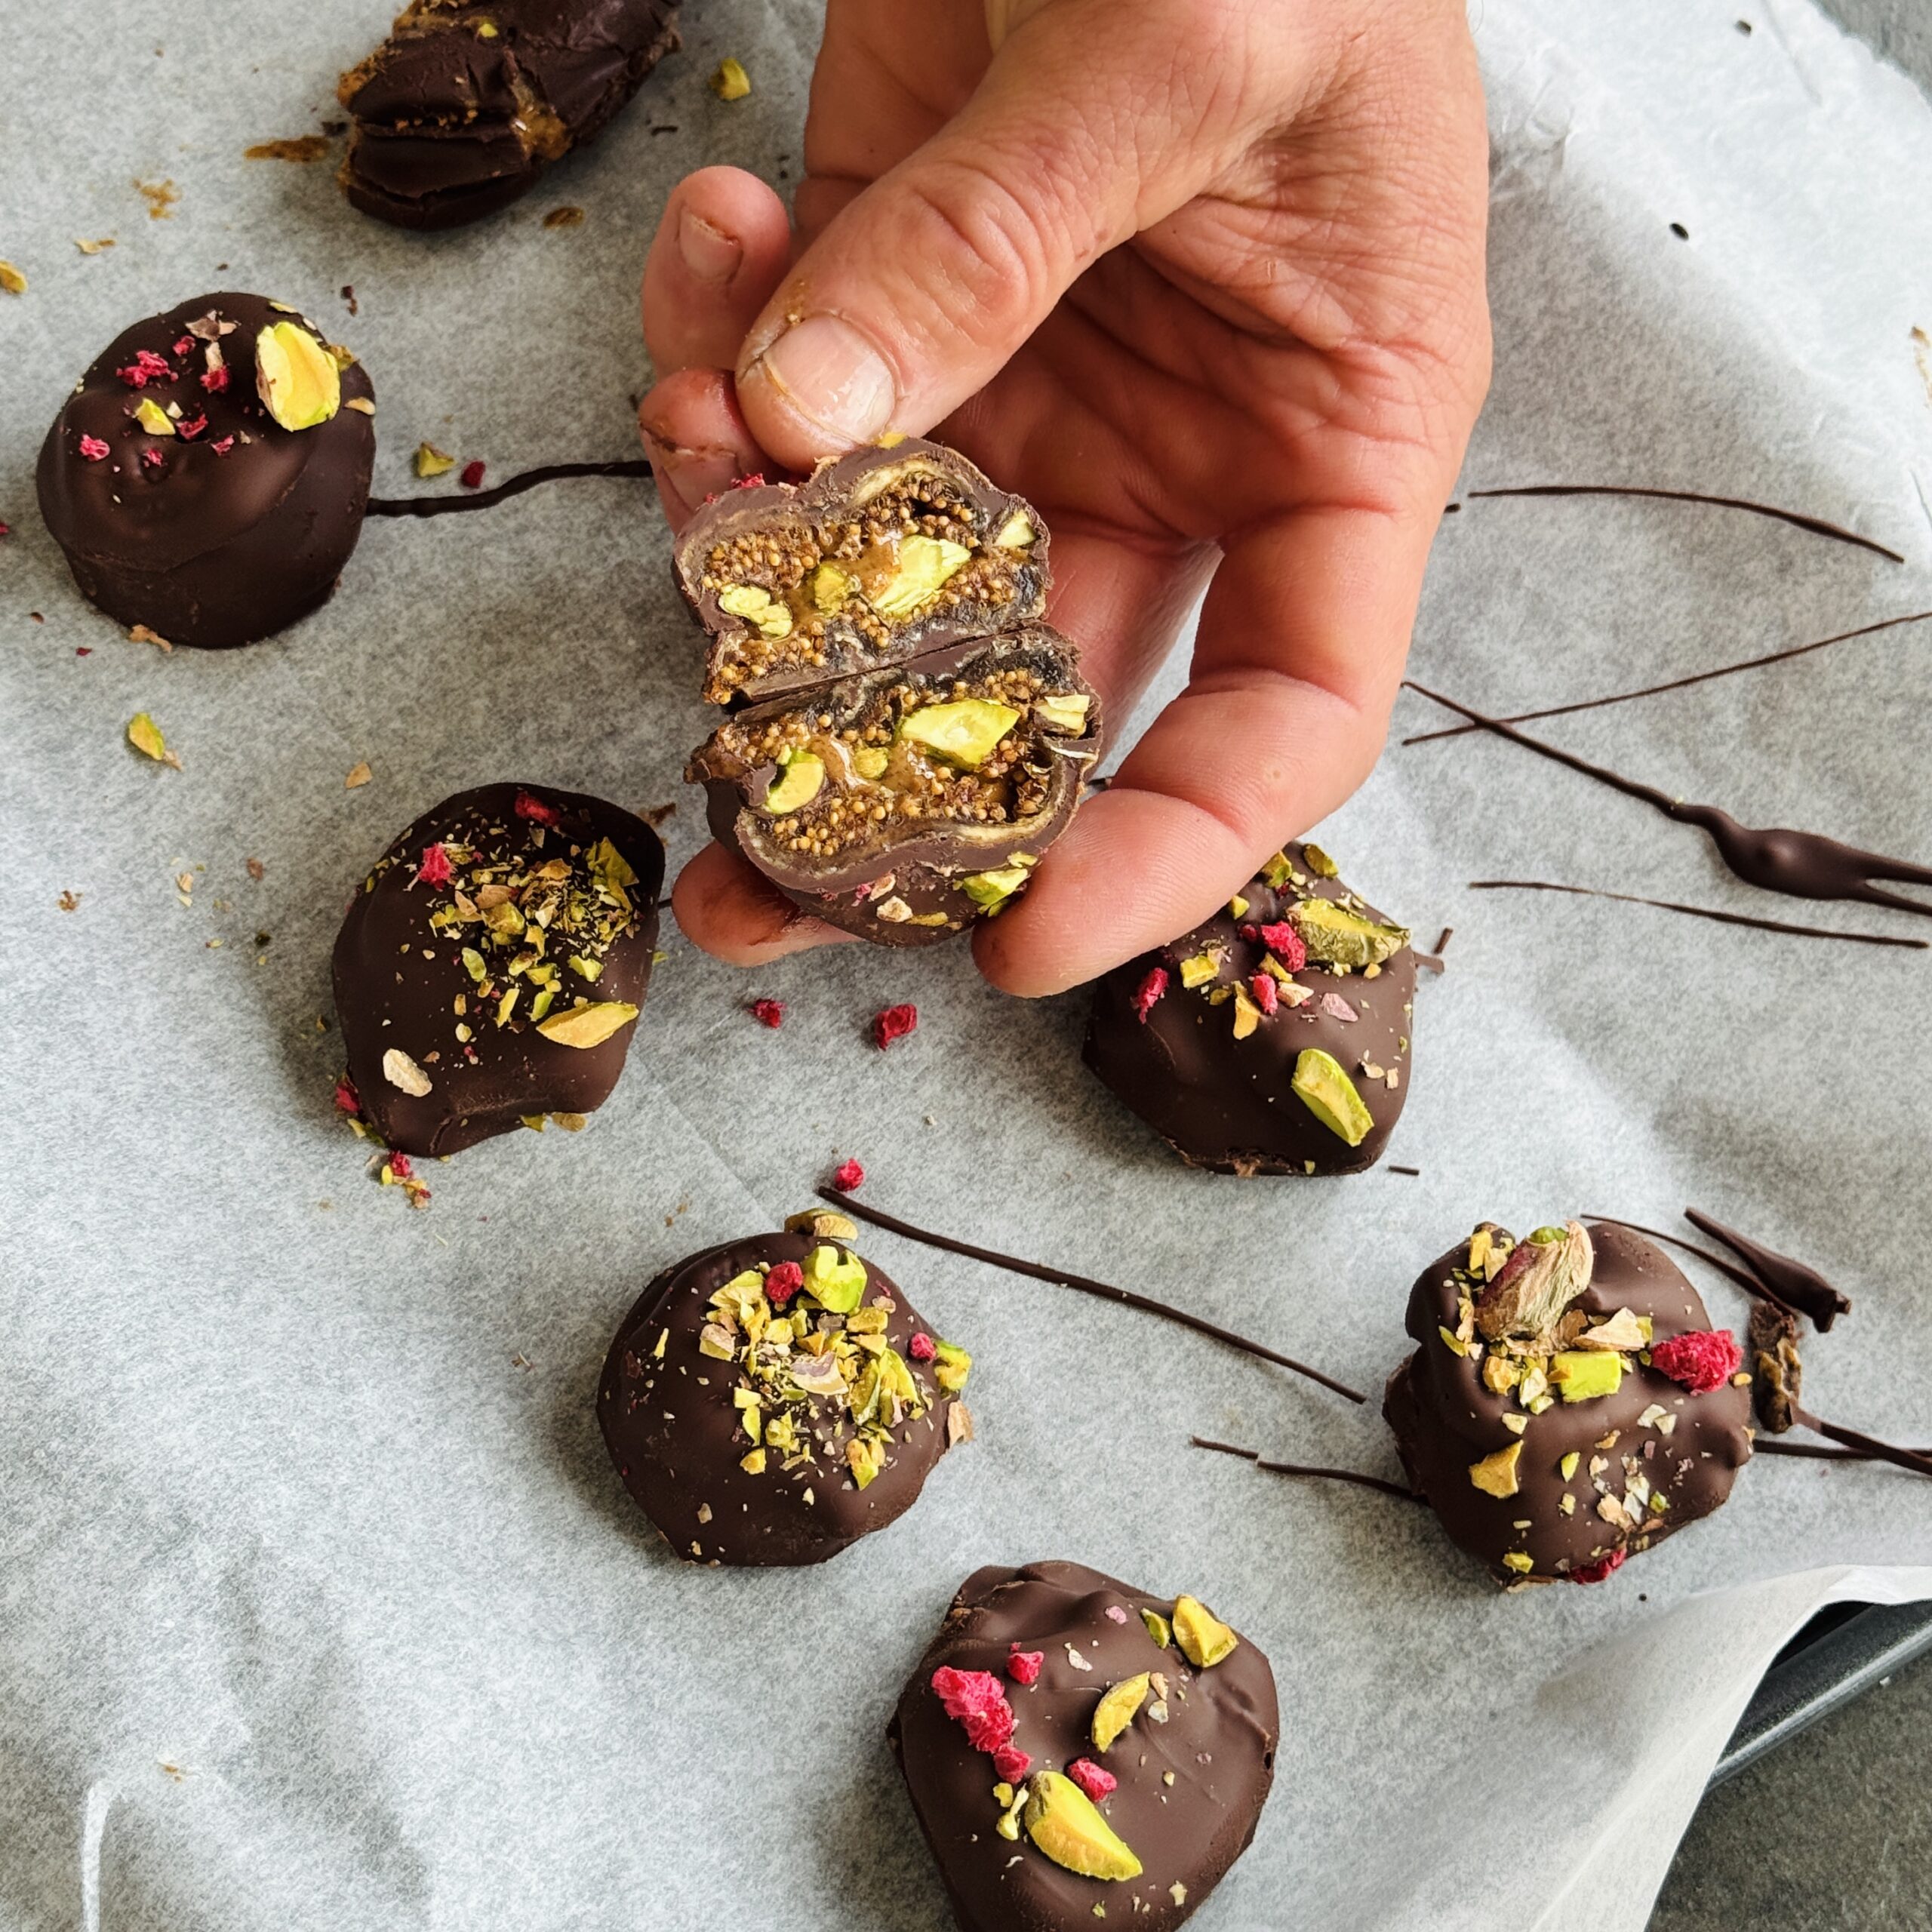
Chocolate Covered Figs with Pistachio
Takes 10 minutes
Serves 10
Ingredients
- 10 large plump dried figs
- 50 g almond or peanut butter
- 50 g shelled pistachios finely chopped
- 10 g freeze-dried raspberries lightly crushed
- 75 g dark chocolate 70% cocoa works best
Instructions
Prep the “Buns”
- Start by trimming the hard woody stem off the top of each fig. Slice them in half horizontally (across the “equator”) to create a top and a bottom “bun.”
Stuff the Burgers
- Lay the bottom halves open on a tray. Add a generous teaspoon of nut butter to each. Sprinkle with a layer of chopped pistachios and freeze-dried raspberries, then gently press the top half of the fig back on to close the “burger.”
Melt the Chocolate
- Break the dark chocolate into small pieces. Melt it slowly using a microwave (30-second bursts, stirring in between) or a bain-marie.
- Pro Tip: Pour the melted chocolate into a narrow, deep glass. This makes it much easier to submerge the figs fully without needing a huge amount of chocolate.
Dip and Coat
- Pierce a stuffed fig with a toothpick so it’s secure. Dunk it straight into the chocolate until fully coated. Lift it out, let the excess drip off, and place it onto a plate lined with parchment paper.
Set and Serve
- Repeat with the remaining figs. For a final touch, you can sprinkle a few leftover pistachio crumbs on top while the chocolate is still wet. Place the tray in the fridge for 15–20 minutes until the chocolate is snappy and set.
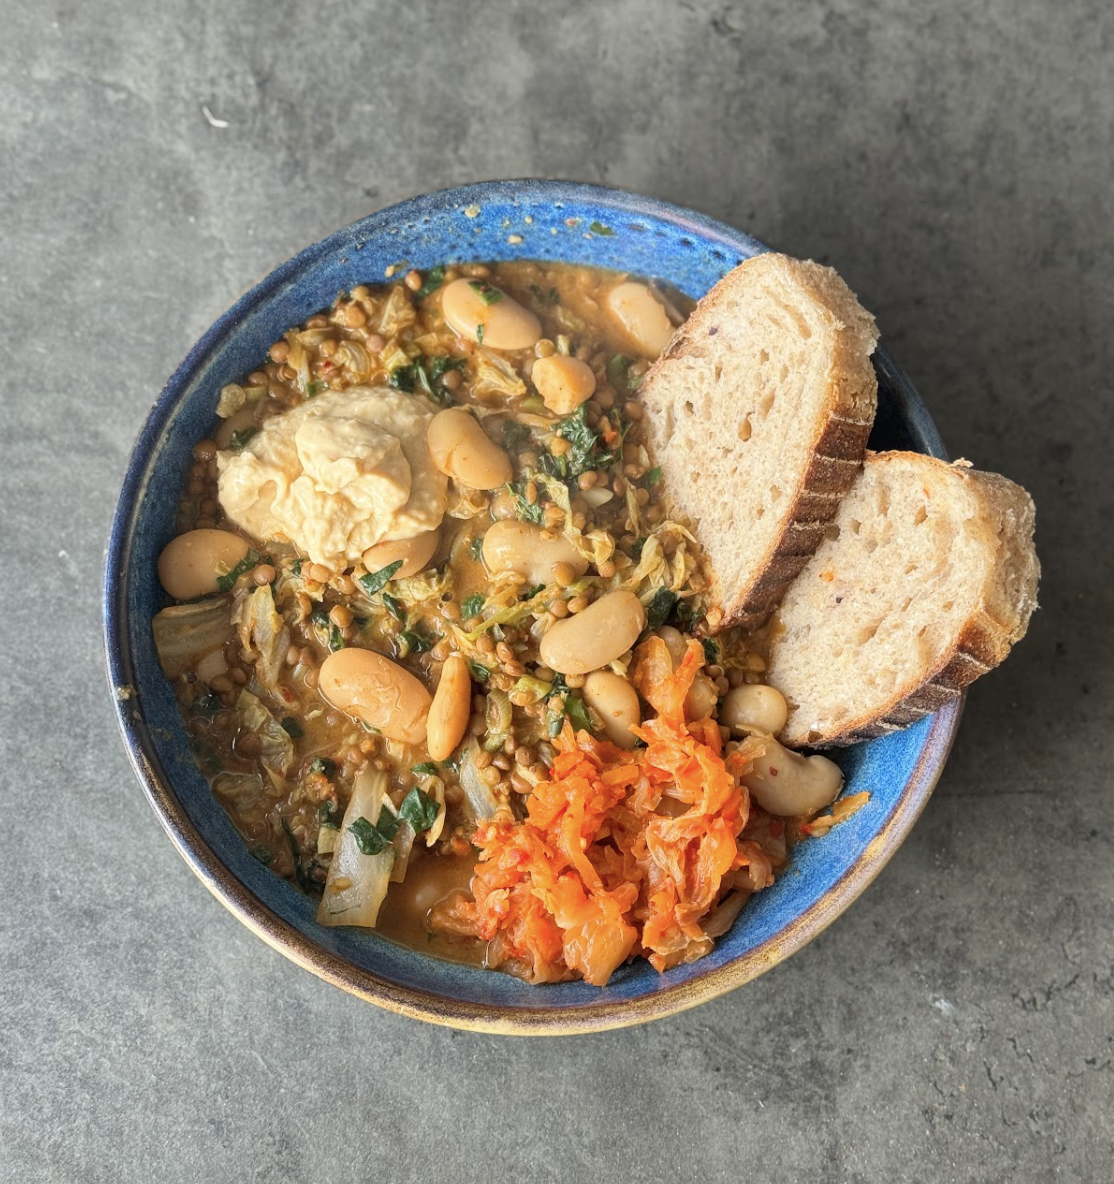
Speedy Superfood Bean Bowl
Takes 10 minutes
Serves 4
Ingredients
- 1 x 400g tin cooked lentils about 1½ cups drained
- 1 x 400g tin cooked chickpeas about 1½ cups drained
- 2 scallions green onions, finely sliced
- 15 g fresh ginger 1 tbsp finely chopped
- 1 clove garlic finely chopped
- 300 ml vegetable stock 1¼ cups
- 16 g peanut butter 1 tbsp
- 18 g miso paste 1 tbsp
- 2 g chilli powder 1 tsp
- 5 ml olive oil 1 tsp, optional
- 40 g kale stalks removed (1 large handful / about 1½ cups chopped)
- Optional: 80g chopped vegetables such as cabbage or courgette ½ cup
Instructions
Prepare the base flavours
- Finely slice the scallions. Peel and finely chop the ginger and garlic.
Sauté the aromatics
- Heat the olive oil (if using) in a large pan over medium heat. Add the scallions, ginger, and garlic. Cook for 1–2 minutes, stirring, until fragrant.
Add the beans and spices
- Drain and rinse the lentils and chickpeas. Add them to the pan along with the chilli powder. Stir well to coat in the spices.
Create the creamy broth
- Pour in the vegetable stock. Stir in the peanut butter until fully dissolved. Simmer for 2–3 minutes.
Add greens and finish
- Spoon a little hot broth into a small bowl and mix with the miso paste to loosen, then stir it back into the pan. Add the chopped kale and any optional vegetables. Cook for 1–2 minutes more, until the greens are wilted.
Taste and serve
- Taste and adjust seasoning if needed. Serve warm as is, or with wholegrain toast, brown rice, or quinoa.
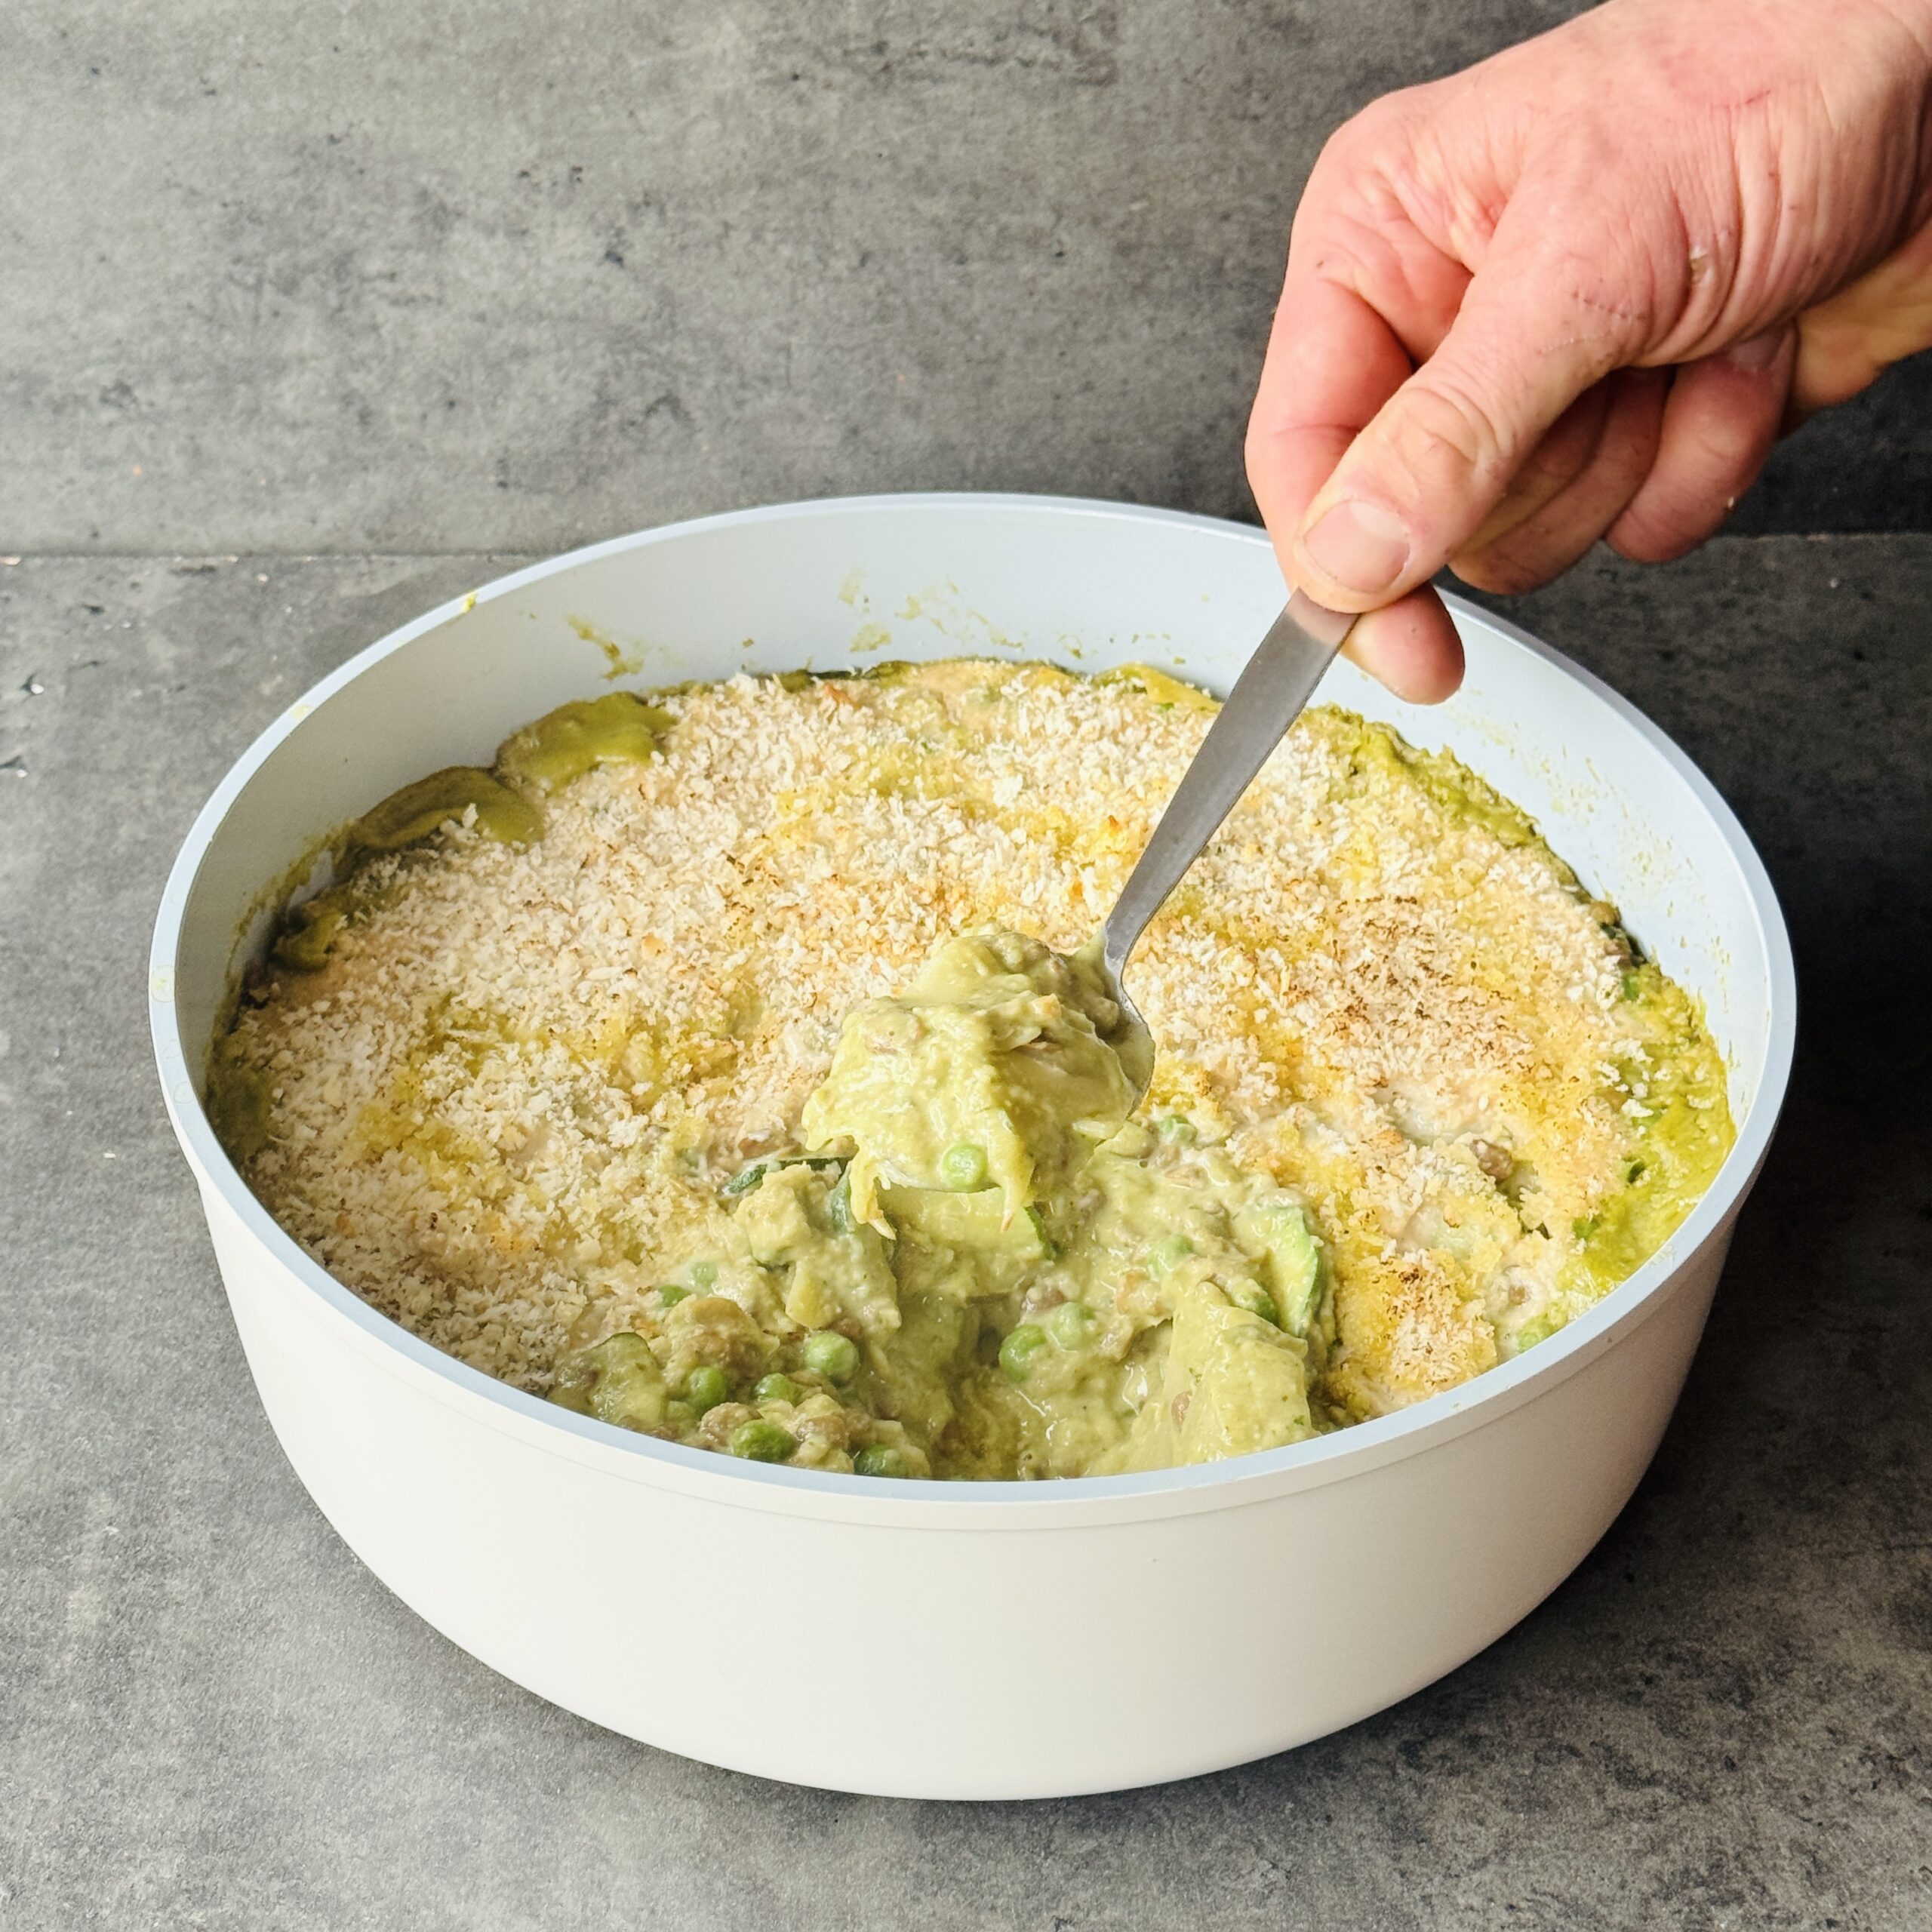
Creamy Spring Greens Lasagne
Takes 20 minutes
Serves 4
Ingredients
Base
- 15 ml olive oil 1 tbsp
- 1 medium onion finely chopped
- 1 medium courgette finely sliced
- 400 g cooked butterbeans drained (1 tin, about 2¼ cups)
- 200 g frozen peas 1½ cups
- 150 g lasagne sheets broken into pieces (about 8 sheets / 5 cups pieces)
- 400 ml vegetable stock 1¾ cups
Spring Green Sauce
- 2 cloves garlic or 50g wild garlic ½ cup chopped
- 100 g kale stems removed (4 cups chopped)
- 100 g cashew nuts 1 cup
- 75 ml olive oil ⅓ cup
- 75 ml water ⅓ cup
- Juice of ½ lemon 1½ tbsp
- ¾ tsp salt
Cashew Cream
- 100 g raw cashews ¾ cup
- 200 ml oat milk ¾ cup + 2 tbsp
- 30 ml olive oil 2 tbsp
- Juice of ¼ lime 1 tsp
- 2 g sea salt generous pinch
- Black pepper to taste
To Serve
- 50 g breadcrumbs ½ cup
- Olive oil for drizzling
- Fresh basil or parsley optional
Instructions
Prepare the vegetables
- Peel and finely chop the onion and garlic (if using cloves). Slice the courgette. Drain and rinse the butterbeans.
Blanch the kale
- Bring a saucepan of salted water to the boil (about 1 tbsp salt). Add the kale and simmer gently for 4 minutes. Drain and rinse with cold water.
Make the green sauce
- Blend the cooked kale, garlic or wild garlic, cashews, olive oil, lemon juice, salt, and water until smooth and creamy. Taste and adjust seasoning if needed.
Sauté the vegetables
- Heat the olive oil in a large, deep pan over high heat. Add the onion and cook for 3 minutes, stirring regularly. Add the courgette and cook for 4–5 minutes until softened.
Add pasta and cook
- Stir in the butterbeans, peas, and green sauce. Break the lasagne sheets into bite-sized pieces and mix through, ensuring they don’t stick together. Add the vegetable stock, cover, and simmer over medium heat for about 7 minutes, stirring occasionally, until the pasta is tender and the sauce has thickened.
Make the cashew cream
- Blend the cashews, oat milk, olive oil, lime juice, salt, and black pepper until silky smooth. Add a splash more oat milk if needed to loosen.
Finish and crisp
- Drizzle the cashew cream over the cooked lasagne. Sprinkle with breadcrumbs and drizzle lightly with olive oil. Char lightly with a blowtorch or place under a hot grill for 3–5 minutes until golden and bubbling.
Serve
- Scatter with fresh basil or parsley and serve hot, straight from the pan.